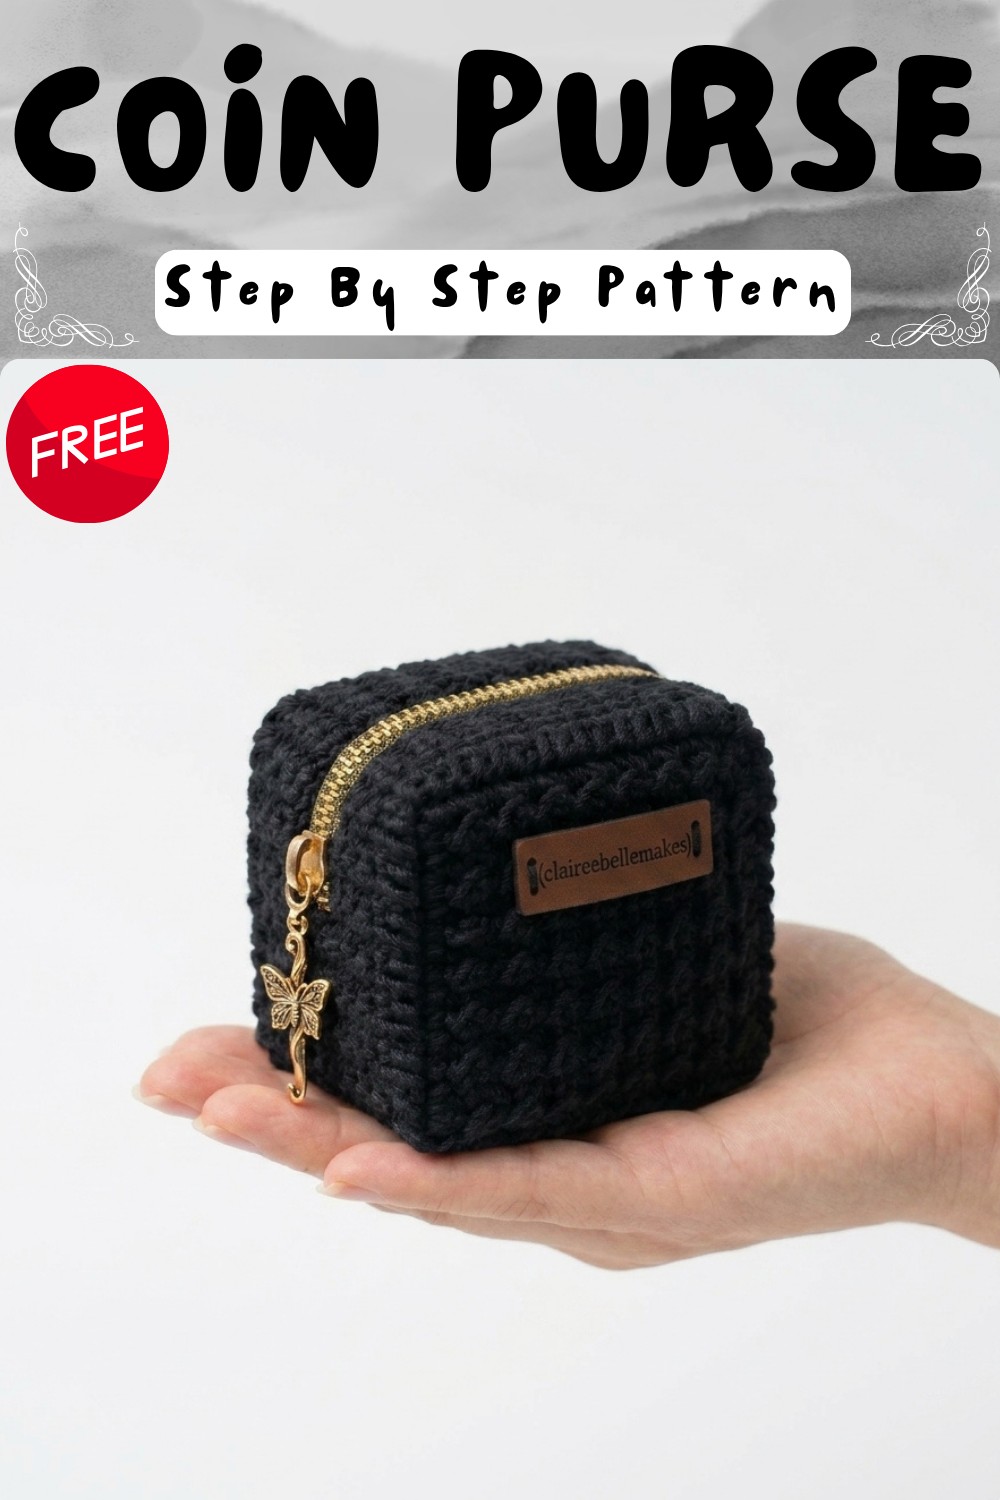
Easy Crochet Coin Purse Free Pattern For Beginners
I love making small and useful things with yarn, and one of my favorite projects is a cute little purse to hold coins and tiny treasures. This simple item can be made quickly and is perfect for keeping change or small keepsakes safe. With just a few small changes, you can also turn this basic design into a card holder or a small pouch for lip balm or headphones. The free crochet coin purse pattern is a helpful guide to create a charming and handy accessory.
Free Crochet Coin Purse PatternWith easy and Simple Steps
This coin purse is both pretty and practical. It usually has a neat, rounded shape or a simple square design, making it easy to carry in your pocket or bag. The texture is soft but firm enough to protect what’s inside. These purses can come in many colorful yarns, giving them a bright and cheerful look. Some even have buttons or zipper closures that add style and keep coins secure. The standout feature is its small size paired with strong stitches that hold their shape well, making sure your coins don’t fall out.
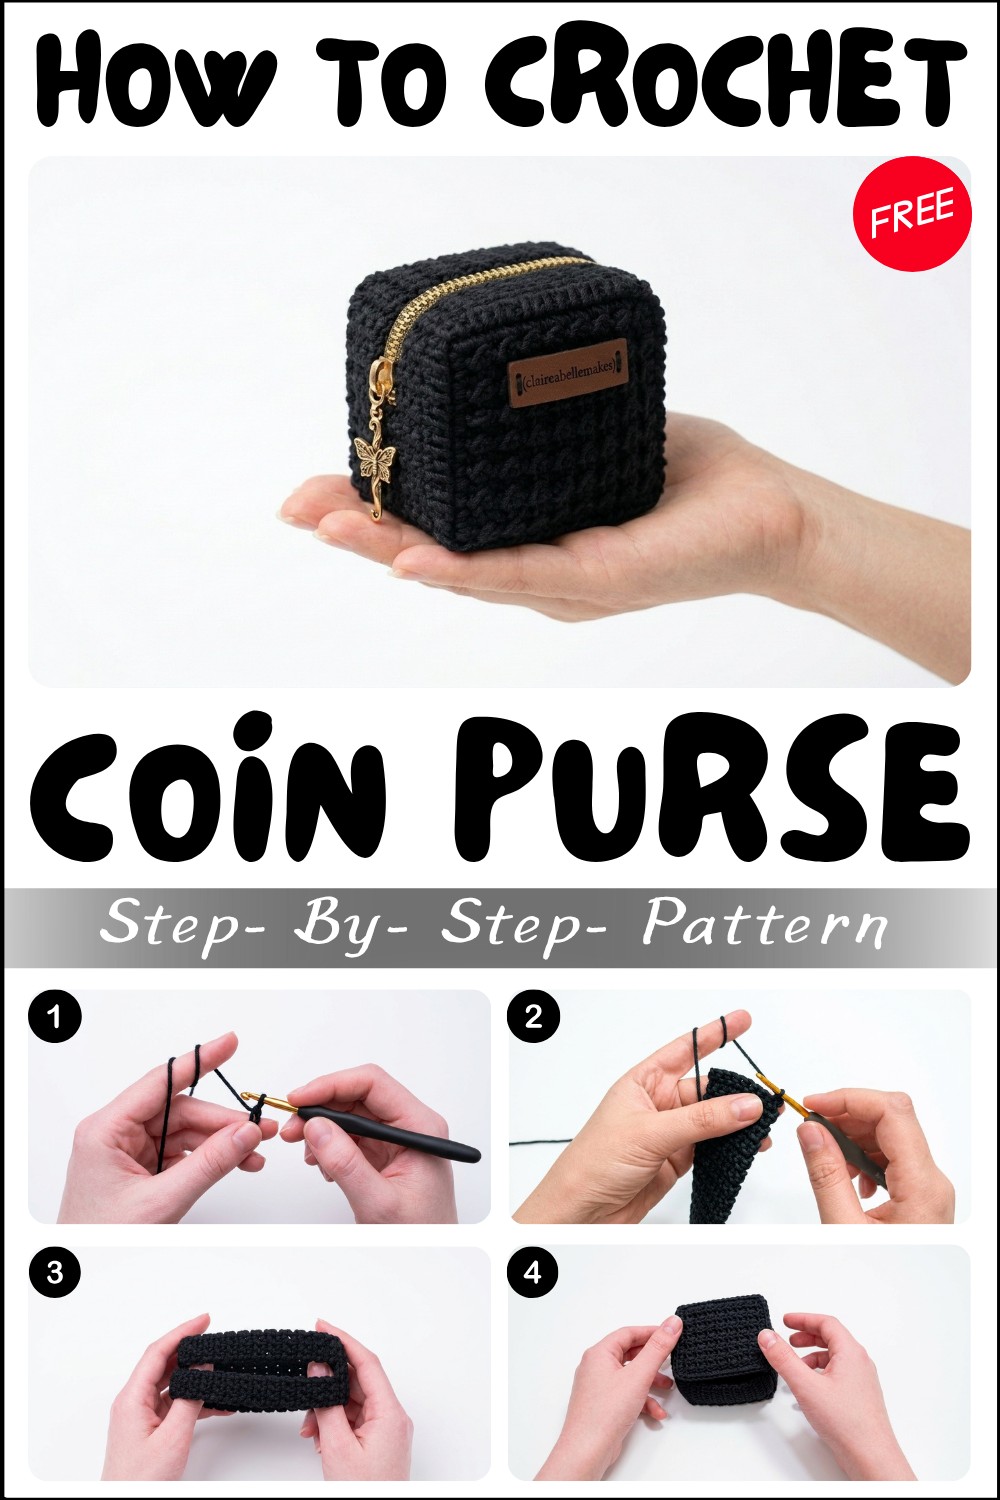
This project is great for beginners, using mostly the single crochet stitch, which creates a tight weave that works well for holding small items. You’ll get practice with basic crochet stitches and a chance to learn finishing touches like adding a button or zipper. The steps are simple enough to follow and don’t take much time, making it fun and satisfying.
A handmade coin purse is a lovely gift idea for friends and family who appreciate small, thoughtful accessories. It’s a nice mix of decorative and useful, perfect for everyday carry or as a cute collectible. If you want to try a quick and easy crochet project that’s both pretty and practical, this free crochet coin purse pattern is a fantastic fit for your skills and creativity.
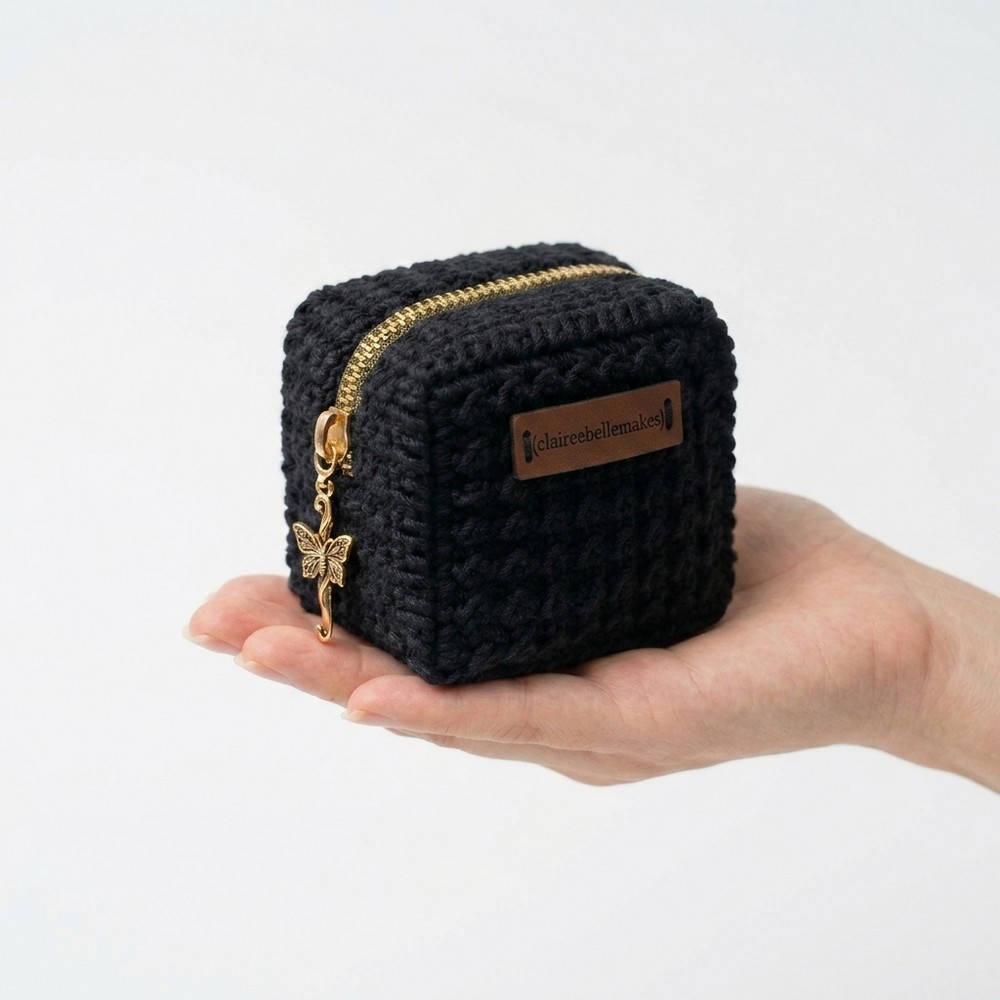
Macramé Cotton Square Purse
In this project, we will make a small, sturdy, and stylish square purse using thin macramé cotton. This purse features a tactile surface from easy alternating stitches and includes a secure zippered opening. The pattern is perfectly suited for confident beginners or anyone wanting to create a unique accessory with neat, defined edges.
Skill Level & Terminology
- Skill Level: Beginner to Easy Intermediate
- Terminology: US Crochet Terms
Materials & Tools
- Yarn: Thin macramé cotton, smooth and firm, in your choice of color
- Hook: 3 mm crochet hook
- Notions: Yarn needle, scissors, stitch markers, transparent plastic thread (for sewing), zipper (optional, for closure), measuring tape
- Optional: Lining fabric for inside the purse
Gauge
8 rows × 16 stitches (alternating sl st and hdc) = 3” × 3” (7.5 × 7.5 cm)
Tip: Gauge is not critical but ensure your fabric feels dense and structured, not loose or floppy.
Abbreviations List
| Abbr | Stitch |
|---|---|
| ch | chain |
| sl st | slip stitch |
| hdc | half double crochet |
| sc | single crochet |
| st(s) | stitch(es) |
| rep | repeat |
Special Stitch Instructions
Slip Stitch (sl st): Insert hook in next st, yarn over, pull through st and through loop on hook (very short stitch—do not work tightly).
Half Double Crochet (hdc): Yarn over, insert hook in next st, yarn over and pull up loop (3 loops on hook), yarn over and pull through all 3 loops.
Single Crochet (sc): Insert hook in st, yarn over, pull up loop, yarn over and pull through both loops.
Alternating Slip Stitch and HDC: For a woven look, always alternate between sl st and hdc across the row.
Finished Size
- Main panels: approx. 16 stitches wide × 13 rows tall (~10 × 8 cm each, adjust as needed)
- Base: 8 stitches wide × 34 rows (~5 × 22 cm)
- Side Panels: 3 sc wide × 30 rows tall (~2 × 20 cm)
How to start and what stitches are used:
You’ll begin with a foundation chain and work rows of slip stitches (sl st) and half double crochets (hdc), alternating each stitch for a woven effect. Sturdy single crochet (sc) edgings and easy seaming ensure a polished finish.
The Pattern
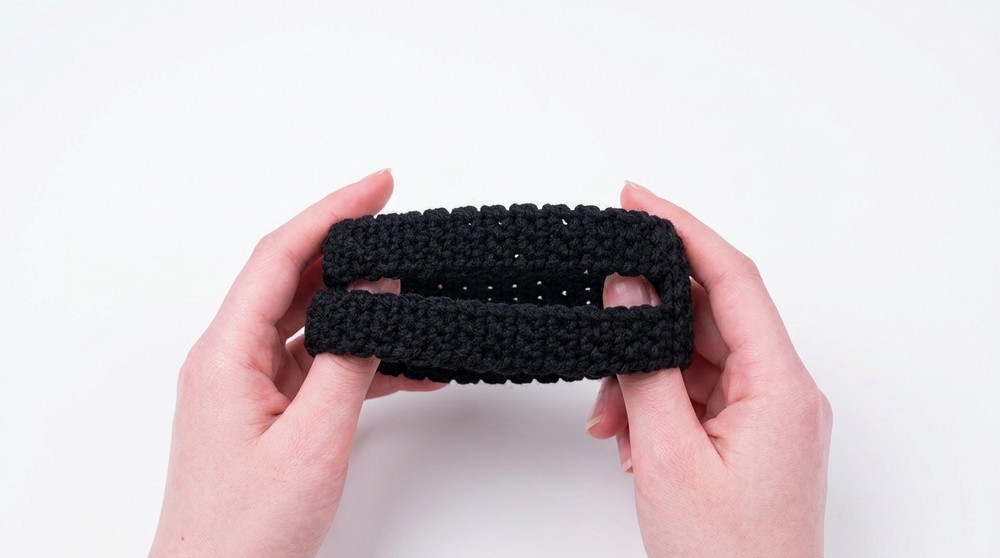
Main Panels (Make 2)
- Foundation:
- Ch 16.
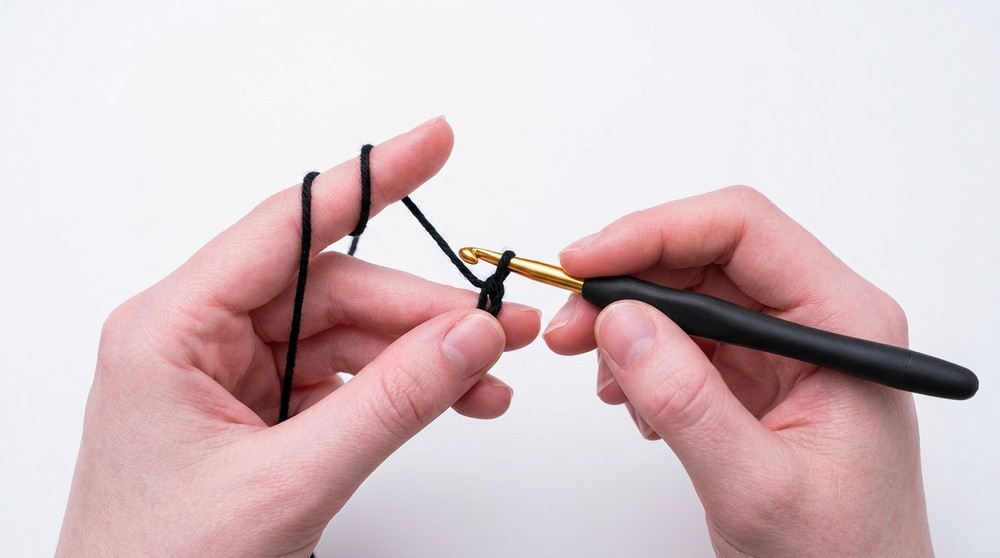
- Ch 16.
- Row 1:
- In the first st from hook, sl st. In next, hdc.
- Alternate sl st and hdc to end (should finish with sl st).
- (16 sts)
- Row 2:
- Ch 1, turn.
- sl st in first st. hdc in next. Continue alternating (sl st, hdc) across.
- Repeat Row 2 until you have 13 rows.
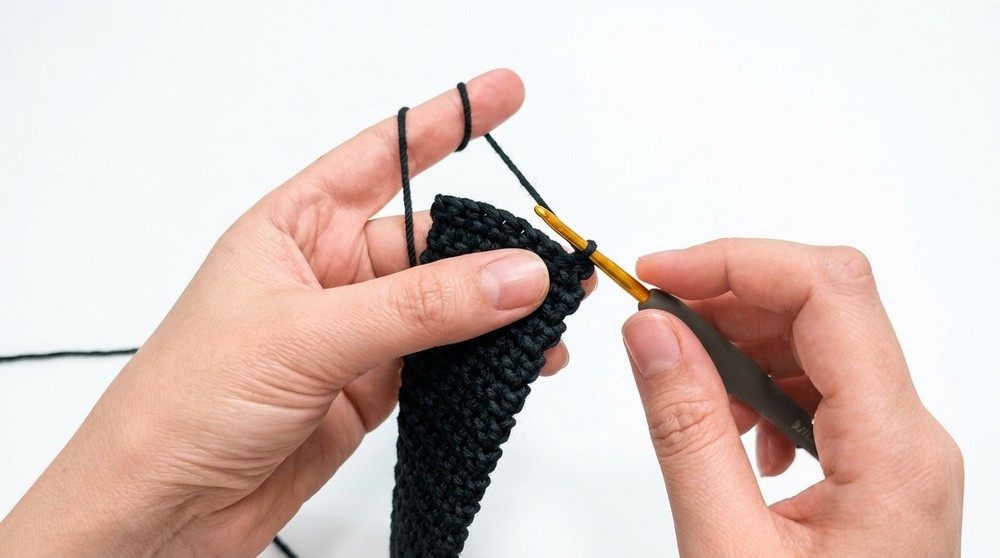
This panel alternates slip stitches and half double crochets for a firm, textured fabric. Make two of these for front and back of the purse.
If not a pattern reader:
Chain 16 to start. In each row, work one slip stitch into a stitch, one half double crochet into the next, and repeat to create a basket-weave effect. Finish when you have 13 rows, then make a second identical piece.
Side Panels (Make 2)
- Foundation:
- Ch 15.
- Row 1:
- sc in each st across (15 sc).
- Repeat Row 1 to make 30 rows.
The side panels are sturdy stripes of single crochet for strength and neat edges.
Base Panel
- Foundation:
- Ch 8.
- Row 1:
- sc in each st across (8 sc).
- Repeat Row 1 for 34 rows.
The base gives the purse its width. It should be as long as the bottom of the main panels.
Zipper & Top Strip
Create a strip for the zipper and easy closure:
- Foundation:
- Ch 15.
- Row 1:
- sc in each st across (15 sc).
- Repeat Row 1 for 3 rows.
This strip will be sewn under the zipper for reinforcement and easy usage.
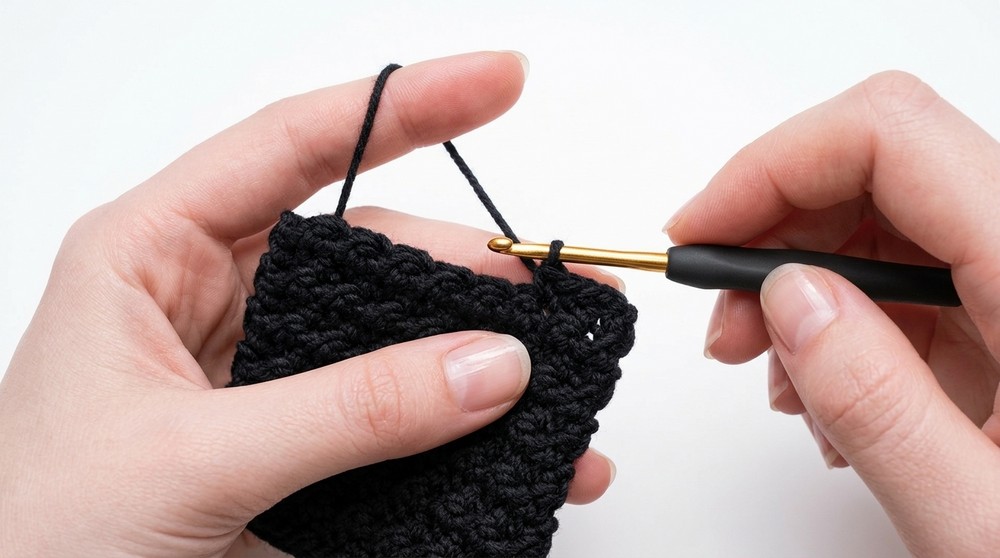
Edging & Preparation
- Work a round of sc around the perimeter of each panel, making 2 sc in each corner for a smooth edge.
- Mark placement:
- Mark where you want your zipper at the top of main panels.
- Mark where base and side panels attach.
This will make seaming clear and tidy.
Assembly & Finishing
Assembly
- Attach the Base:
- Align long edge of base panel to bottom edge of a main panel.
- Whipstitch or sc through both layers using transparant thread or matching yarn.
- Attach Sides:
- Align side panel’s short edge with the base/end seam.
- Continue seaming up each side, connecting both front and back panels with sides and base.
- Repeat for other side.
- Zipper:
- Place top strip under zipper edge on inside of main panels (for reinforcement).
- Pin zipper neatly along top, ensuring evenness.
- Sew zipper with transparent thread or thin strong matching cotton, using backstitch or overcast stitch.
Don’t rush this step: zipper placement keeps the purse looking crisp and professional.
Lining (Optional)
Cut a fabric rectangle matching purse size.
Whipstitch lining inside before single crocheting top edge shut, or after zipper is sewn.
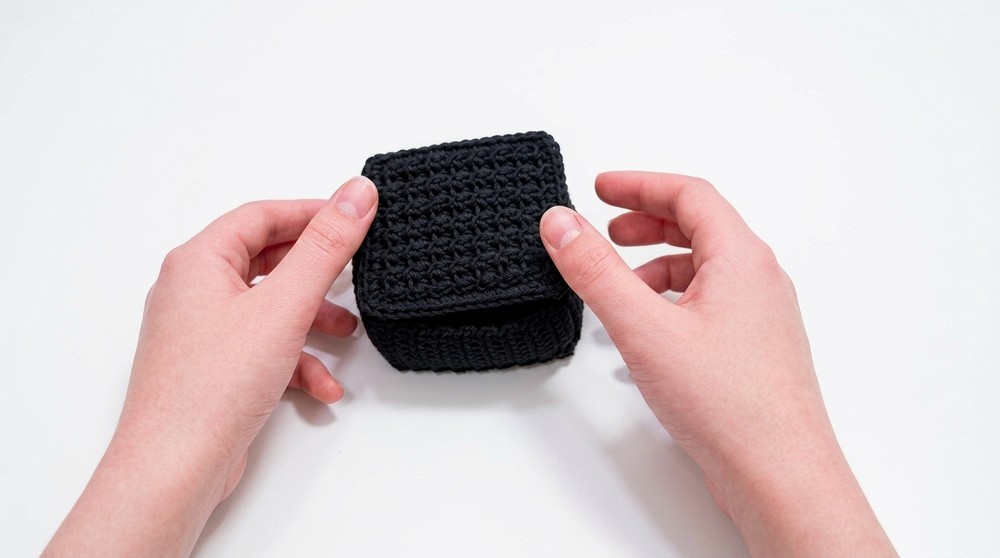
Last Steps
- Weave in all yarn ends with a darning needle to the inside of your purse.
- Block lightly if needed for sharp corners and flatness.
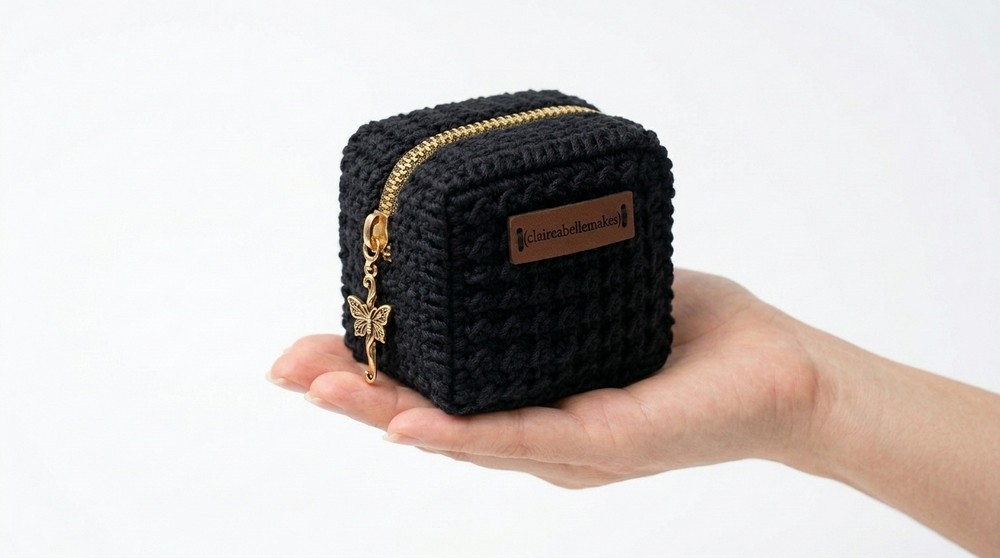
- Zip up and enjoy your new square macramé purse!
For Non-Pattern Readers
Make two rectangles with alternating slip stitch and half double crochet, then make two narrow side strips and a longer bottom rectangle (all in single crochet). Join with sewing or crochet around the sides and base. Attach the zipper with a reinforcing strip for neat looks and durability.
Finished Size
Final purse finished size should be about 16 cm (W) by 13 cm (H) for main face, with a 5 cm deep base, but you can adjust panels as desired for your custom bag.
Conclusion
Congratulations on finishing your small square macramé purse! You learned how to create structure with alternating stitches, make bold, tidy edges, and install a zipper for security. This simple but elegant purse pattern can be customized in size, color, or even with embroidery or a tassel. Don’t forget to show your beautiful creation to the world.