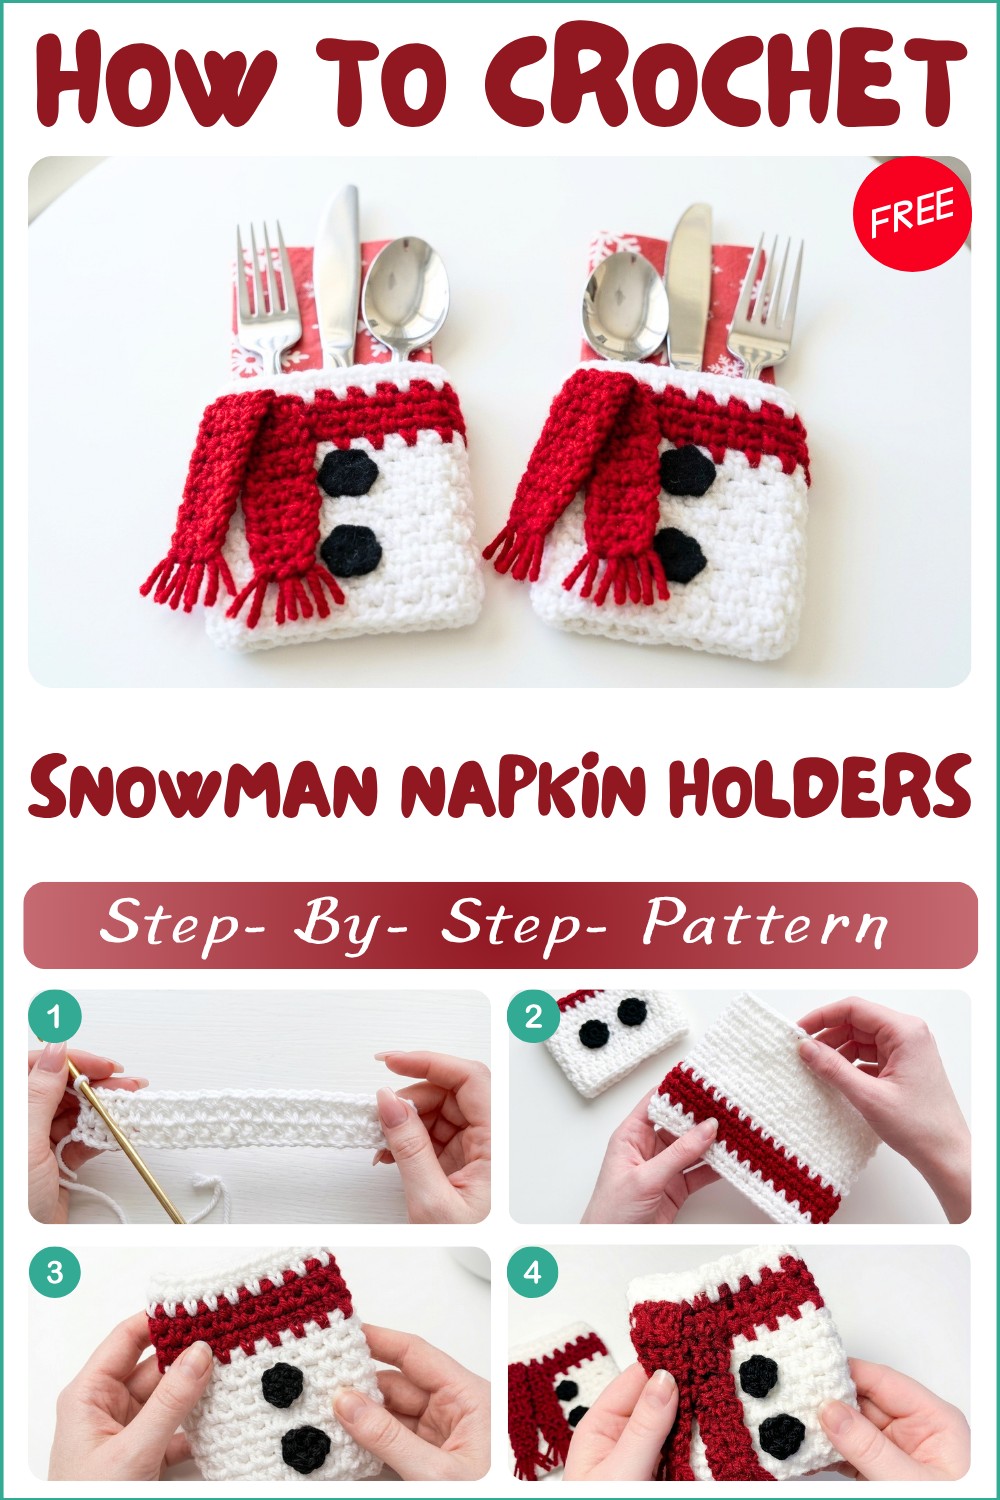
Free Crochet Snowman Napkin Holders Pattern For Holiday Decoration

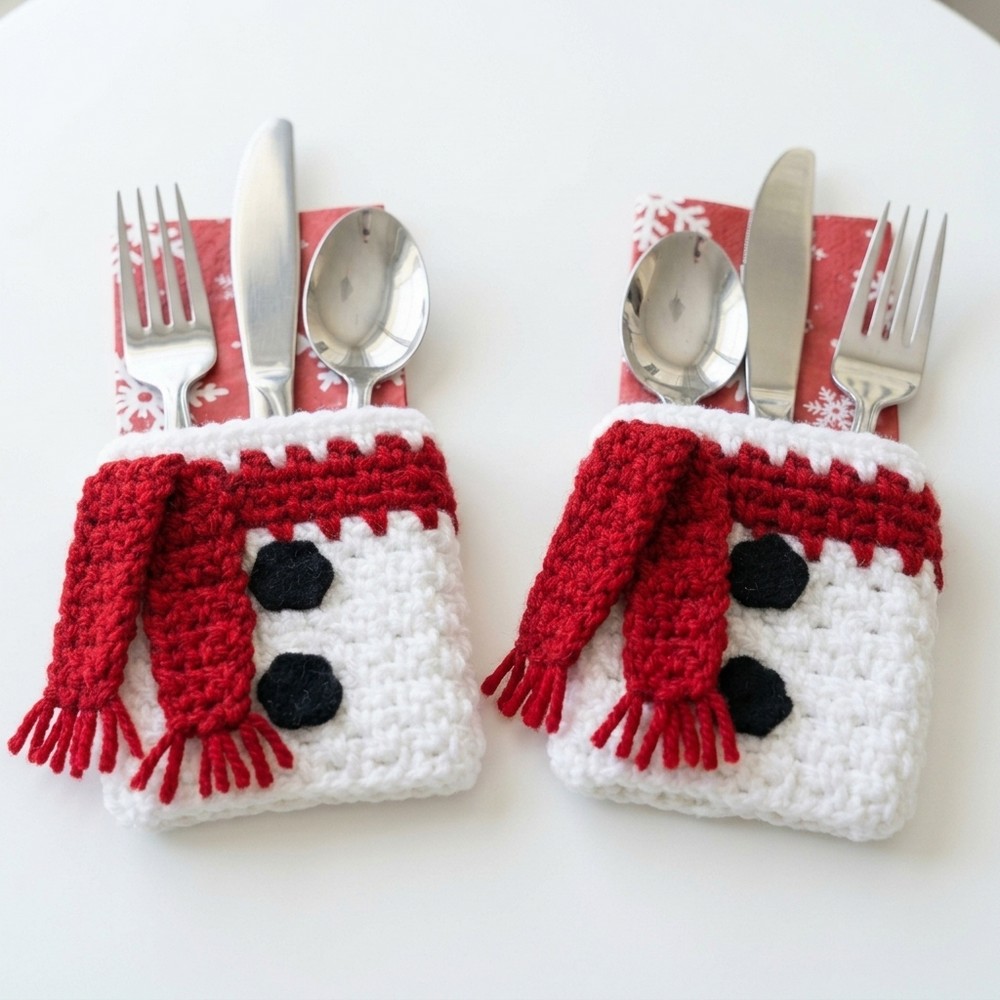
If you like cute and useful crochet projects, this one is perfect for you. The Free Crochet Snowman Napkin Holder Pattern lets you make a fun, winter-themed snowman that can hold your napkins neatly on the table. It’s a small and charming item that brings a cozy feeling to your home, especially during the holiday season. By changing some colors or small details, you can also make this pattern into a toy snowman, a holiday decoration, or even a table centerpiece.
Cute Crochet Snowman Napkin Holders Free Pattern
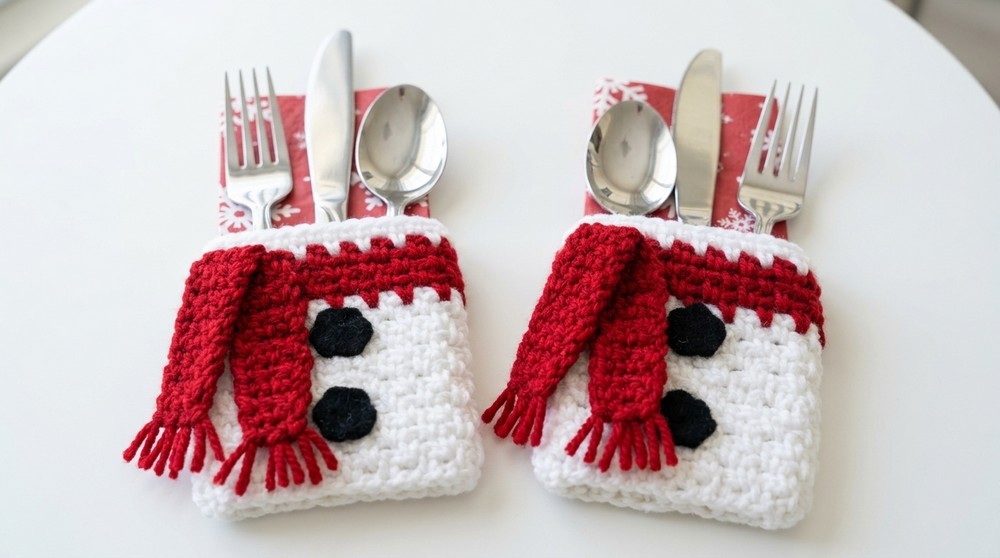
This snowman napkin holder looks very cheerful with its white body, bright orange nose, and a cute little hat you can make in any color you like. You can make the snowman bigger or smaller depending on how big your napkins are. The soft texture from the yarn makes it safe to handle, and the round shape looks very friendly. It’s a lovely way to add some festive spirit to your dining table and keep everything tidy at the same time.
The pattern uses mostly the single crochet stitch, which is easy and great for beginners to learn. This stitch helps create a strong fabric so the napkin holder keeps its shape well. Making little parts like the arms, hat, and nose is fun and allows you to practice simple shaping techniques.
This project is not only helpful but also makes a wonderful gift for friends and family. It’s perfect for decorating your home or for kids to make as a cozy craft. Whether you want to add some winter magic to your table or try a new crochet challenge, this snowman napkin holder is a warm and happy project to try.
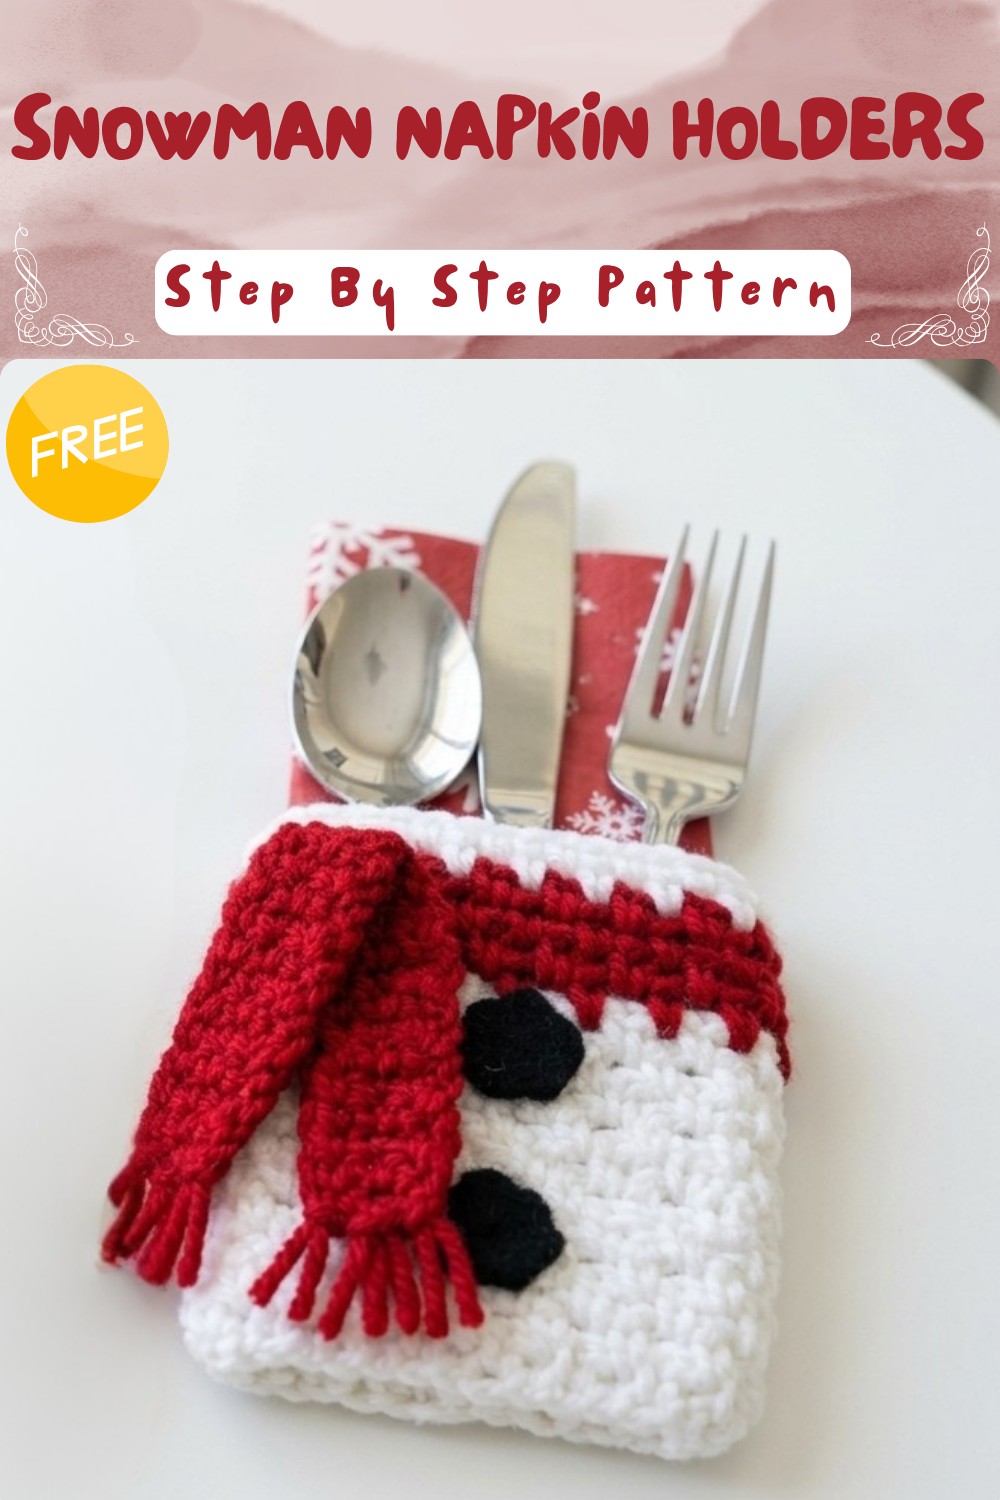
Snowman Napkin Holder Crochet Pattern
Before You Start
- Read through the entire pattern before beginning.
- This project works up quickly, so it’s great for gifts, party favors, or market prep.
- Choose any yarn color for the scarves and napkin holder body for fun personalization.
- Familiarize yourself with the Moss Stitch (alternating single crochet and chain-1 spaces).
Pattern Notes
- The napkin holder is worked flat as a rectangle then sewn into a ring.
- Color changes occur on the last pull-through of the last single crochet of the row.
- The scarf and buttons are crocheted and hand sewn to the body for secure attachment.
- All ends are woven in neatly for durability.
- Gauge is not crucial, but even tension gives the best finish.
How I Made the Crochet Pattern
- Crocheted a Moss Stitch rectangle as the snowman “body.”
- Added color blocks for accent using simple color changes.
- Made two separate scarf strips in single crochet for realistic detail.
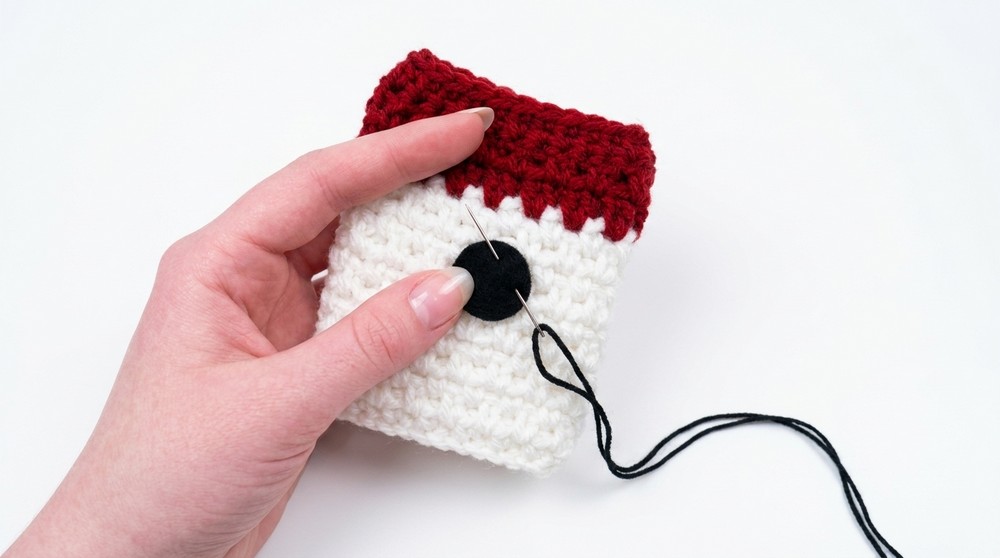
- Created small buttons (magic ring + single crochet) and sewed them on.
- Added optional fringe on scarf ends for extra cuteness.
Skill Level
Beginner to Advanced Beginner
Basic knowledge of chain, single crochet, Moss Stitch, increasing, and color changes.
Finished Size
- Height: 5 in (13 cm)
- Width (flattened): 2.5 in (6.5 cm)
- Circumference: 5 in (13 cm)
- Fits a standard napkin with room for utensils.
Materials
- Worsted weight #4 yarn (any brand):
- Color A: White (body)
- Color B: red (scarf & color block)
- Color C: Black (buttons)
- 5 mm (US H-8) crochet hook
- Scissors
- Yarn/darning needle
- Stitch marker (optional)
Measurements / Sizing
- Finished band: Approx. 5″ (13 cm) circumference × 2.5″ (6.5 cm) tall
- Scarf: Approx. 3.5″ (9 cm) long × .7″ (1.7 cm) wide
Gauge (and Stitch Pattern)
- 9 Moss Stitch (sc, ch 1) = 2” (5 cm) across
- 10 rows = 2” (5 cm) tall
- Moss Stitch: (sc in next ch-1 sp, ch 1) across, always sc in the last stitch
Stitch Abbreviations
| Abbreviation | Meaning |
|---|---|
| ch | chain |
| sc | single crochet |
| sl st | slip stitch |
| st(s) | stitch(es) |
| MR | magic ring |
Special Stitches
Moss Stitch:
- Row 1: (sc, ch 1, skip next st) repeat across, sc in last st.
- Rows 2+: (sc in next ch-1 sp, ch 1) repeat across, sc in last st.
The Pattern
Napkin Holder Body
- With white (Color A), ch 30.
- Row 1: Sc in 2nd ch from hook, ch 1, skip next ch, sc in next ch, repeat from * to * across. End with sc in last ch. (15 sc, 14 ch-1 sps)
- Row 2-10 (Moss Stitch repeats):
- Ch 1, turn. Sc in ch-1 space, ch 1, repeat across, sc in last st.
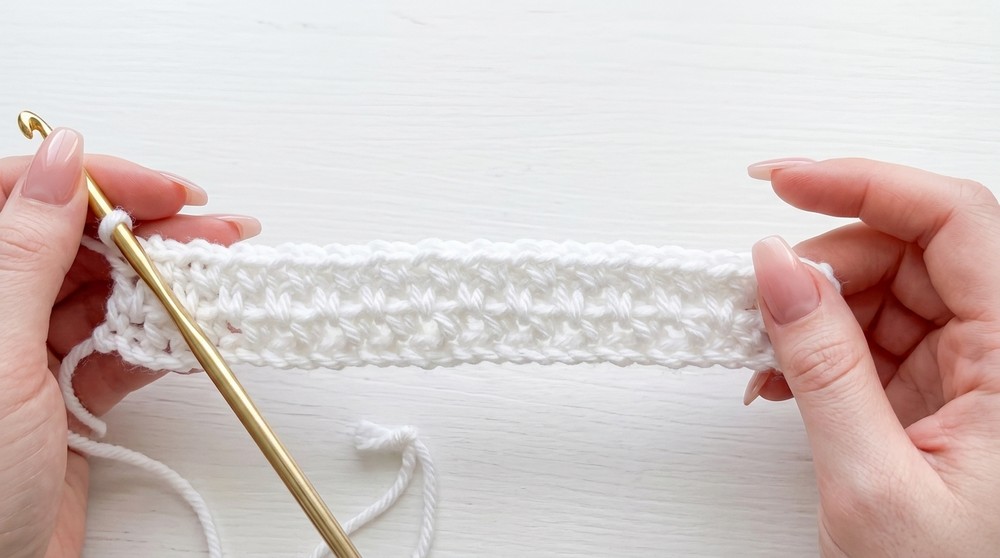
- Ch 1, turn. Sc in ch-1 space, ch 1, repeat across, sc in last st.
After 10 rows, you have the rectangular snowman body in textured Moss Stitch. If you’re not used to this pattern notation: alternate single crochets and chain-1s, so you’re creating small square “holes” in a checkerboard style. Repeat for 10 rows for texture.
Color Block Accent
- At the end of Row 10, change to Color B on last sc (pull through new color on final pull-through).
- Row 11-14: Repeat Moss Stitch rows, continuing with Color B as established for 4 rows.
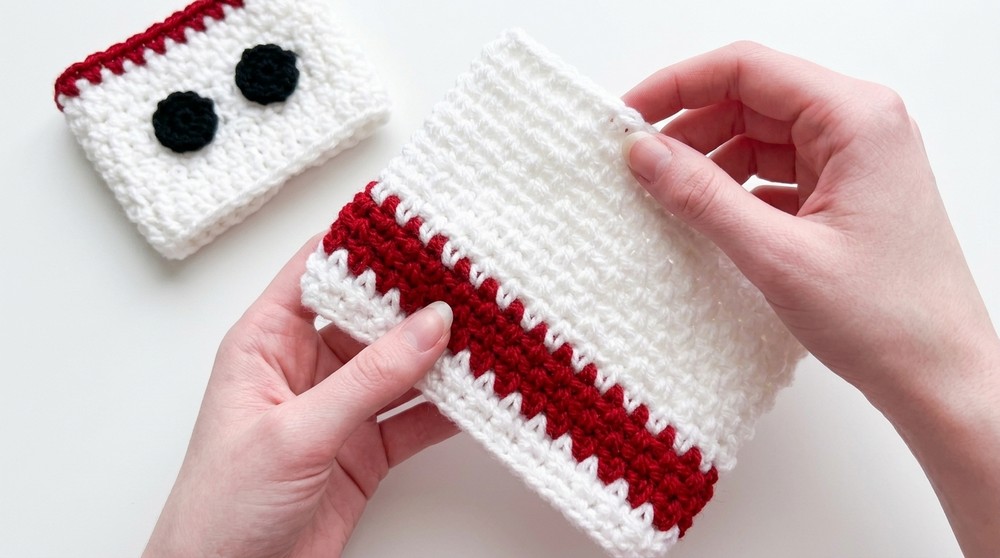
This section adds a bright scarf or body accent to your snowman. Carry the white up the edge if you wish; just keep it tight and neat.
Top Finish
- At the end of Row 14, change to white again (Color A) on the last sc.
- Row 15-16: Moss Stitch for 2 more rows in white.
This gives you a white top section to finish the body cleanly. When complete, fasten off and neatly weave in all ends.
Scarf (Make 2)
- With Color B, ch 4.
- Row 1: Sc in 2nd ch from hook and across (3 sc).
- Row 2-11: Ch 1, turn, sc in each st (3 sc).
- Fasten off, leaving long yarn tail for sewing.
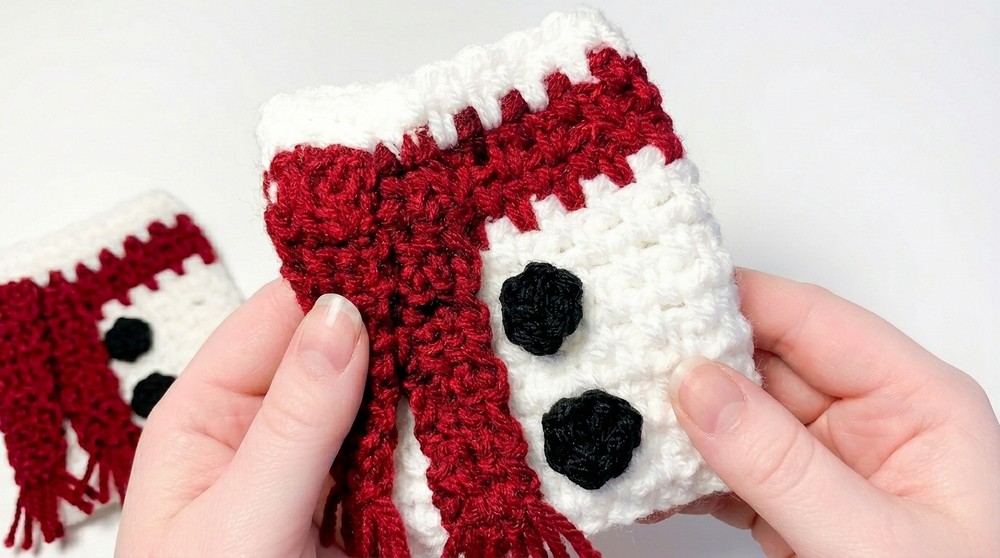
Make two scarves. The scarf strips are simple—just three stitches wide, so perfect for beginners who want to practice stitch consistency.
Buttons (Make 2)
- Using black yarn (Color C), create MR.
- Work 6 sc into ring, pull tight
- Sl st to first sc to close.
Fasten off, leave tail for sewing.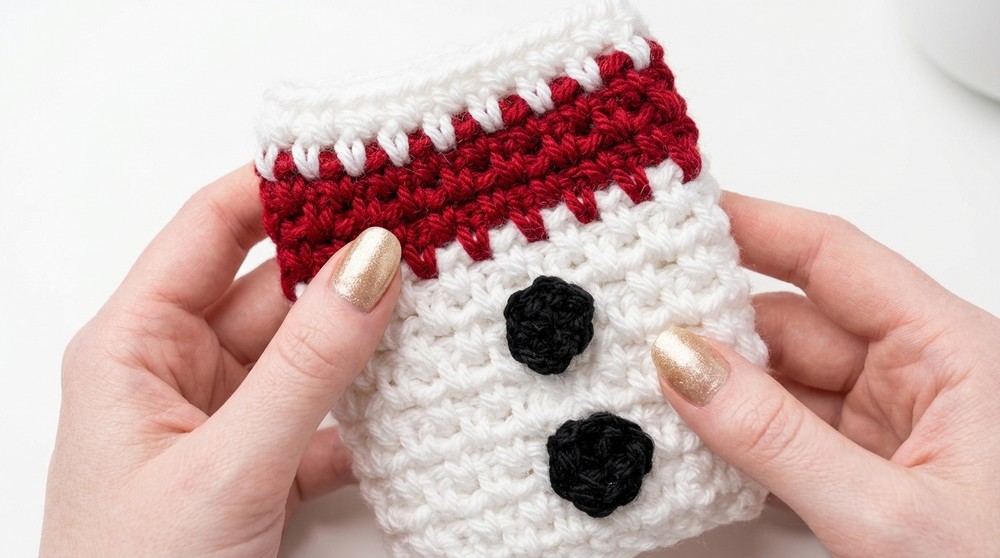
These little buttons are super quick! If you’re new: magic ring, 6 single crochet in the loop, then slip stitch and pull closed tightly—a classic method for buttons or amigurumi eyes.
Assembly & Finishing
- Sew on Scarf: Using yarn tail, sew first scarf piece to the fold of the Moss Stitch rectangle (angled, overlapping as shown). Attach second piece below, setting at an angle.
- Sew on Buttons: Place buttons evenly spaced (suggested: under 2nd and 4th Moss Stitch rows of colored section). Hand sew with yarn tails.
- Sew White Rectangle into a Tube: Fold body in half (short ends together), sew up side with whipstitch or mattress stitch, then turn right side out. Seam can be left on inside for a neat finish.
- Add Fringe (optional): Cut several pieces of scarf color yarn, fold in half, pull through scarf end with hook for fringe. Repeat across both scarf tips; trim even.
Solution of Common Problems
- Gap at seam: Use whip stitch, sewing closely; turn seam to inside for a neat cylinder.
- Buttons falling off: Tie securely and weave ends well, sewing through button several times.
- Fringe unraveling: Secure fringe with double knots if using slippery yarn.
What you can make with these stitches
- Table napkin holders for holidays or everyday
- Miniature doll scarves, belts, or accessories
- Rings for organizing cords, cutlery, or markers
- Blanket edging and textured baby items (using Moss Stitch)
Conclusion
With this fun and quick project, you’ve learned the Moss Stitch, easy color changes, and a bit about assembling crocheted fabric into decorative and useful items. The snowman theme is just the beginning—explore any combination of scarf colors, add features, or make playful animals for every season. Display on your table for a festive look, surprise guests, or sell at your next craft fair.