Easy & Free Crochet Mini Shovel with This Pattern

Design a unique crochet mini shovel using easy-to-follow instructions perfect for adding a creative touch to your handmade projects and decorations.
Holding a tiny garden tool made entirely of yarn and hook adds a delightful twist to handmade projects. A free crochet mini shovel pattern offers just that, a miniature replica full of character and charm. Falling into the category of amigurumi-style accessories, this piece features a slender handle and a gently curved blade, shaped through tight, precise stitches to maintain a sturdy form.
Cute Crochet Mini Shovel Free Pattern With Detail
Smooth texture combined with firmness defines the mini shovel, while its realistic proportions packed into a small size create a striking appeal. Ideal for keychains, ornaments, or dollhouse decorations, customization options abound by adjusting yarn weight or hook size. Variations allow creation of delicate tokens or bolder statement pieces, catering to individual preference and purpose.
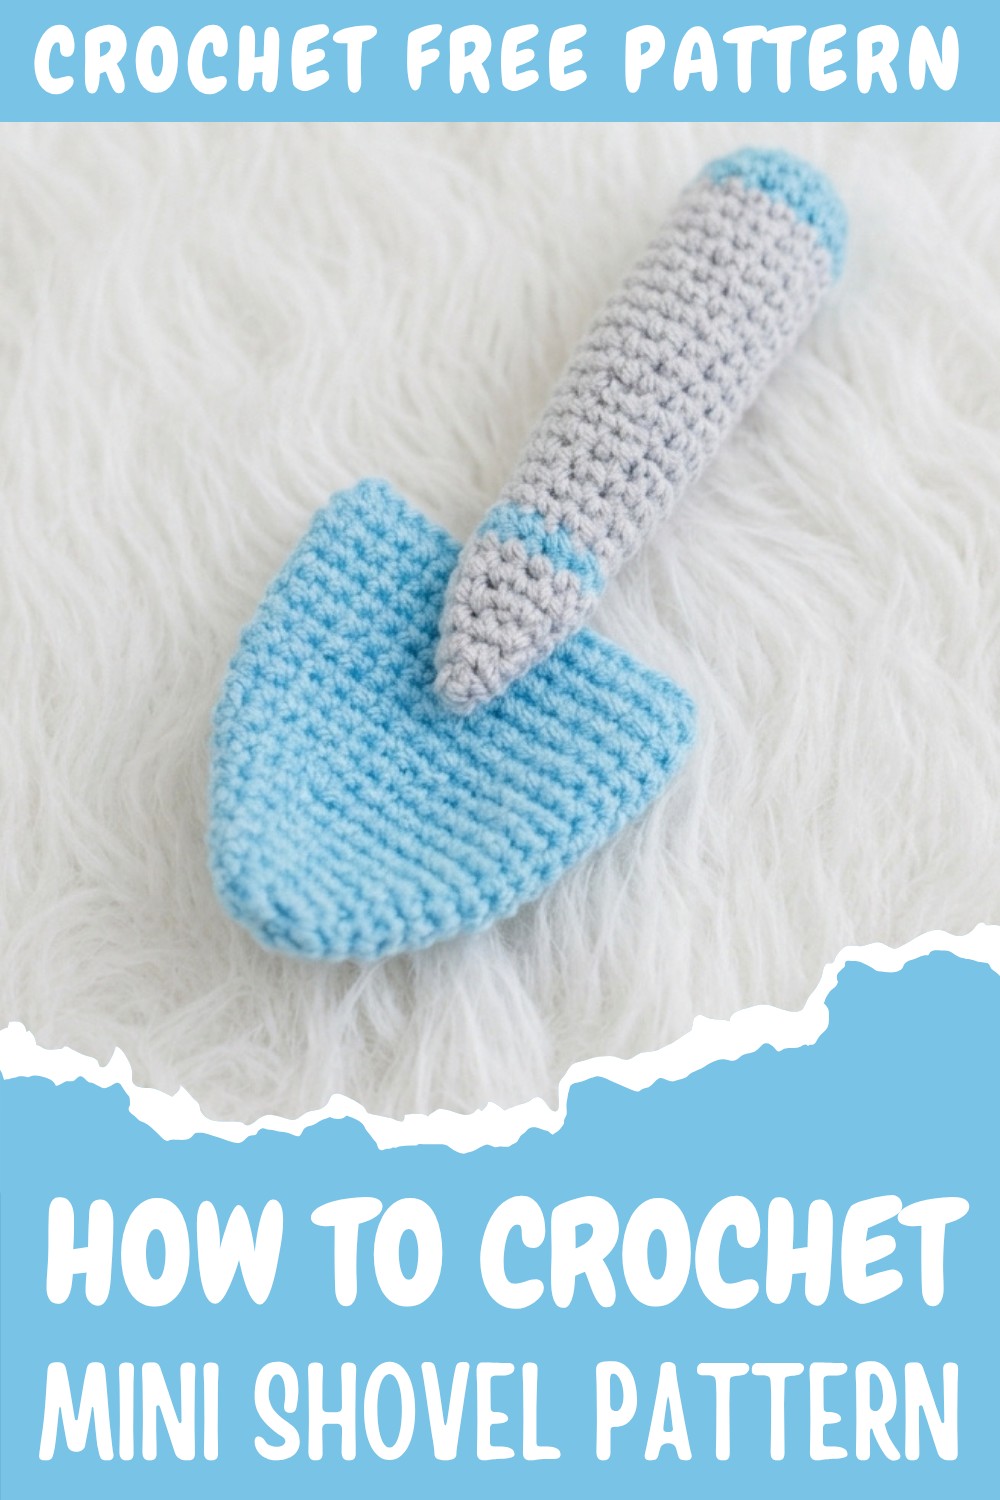
Constructed primarily with single crochet rounds complemented by slip stitches to refine edges, attention to tension ensures clean results. Opting for cotton or cotton-blend yarn provides the structure needed to preserve shape over time, while lending a soft sheen that highlights the stitch detail. Inspiration for this design springs from everyday gardening tools, reimagined as playful, compact creations for those who appreciate the whimsical.
Suitable as gifts for gardening lovers or hobbyists, miniature shovels bring charm to birthdays, holidays, or casual celebrations. Creative additions—color changes, attachments to bags, or groupings with other miniatures—encourage personal touches. This free crochet mini shovel pattern invites an enjoyable and inventive project that brightens both workspace and heart.

Classic Crochet Mini Garden Shovel Pattern
This pattern guides the creation of an intricately crocheted mini garden shovel, showcasing fine craftsmanship using milk cotton yarn and a small 2.0 mm hook. The project consists of two main parts: the elongated handle and the shovel blade. The resulting piece serves beautifully as a delicate decorative item or a keepsake within a gardening-themed project collection.
Skill Level
Intermediate
This pattern requires familiarity with crochet in rounds, stitch increases and decreases, yarn color changes, and precise stitch counting. Basic sewing and shaping skills are necessary for finishing and assembly.
Materials
- Four strands of milk cotton yarn (multiple colors: natural, gray, and blue)
- Crochet hook size 2.0 mm
- Sewing needle for assembly
- Marker for stitch alignment
- Scissors
Special Stitches Used
- Chain stitch (ch)
- Single crochet (sc)
- Single crochet increase (inc) — 2 single crochet stitches worked into one stitch
- Single crochet decrease (dec) — combining two stitches into one
- Slip stitch (sl st)
Stitch Abbreviations
| Abbreviation | Full Stitch Name |
|---|---|
| ch | chain |
| sc | single crochet |
| inc | single crochet increase |
| dec | single crochet decrease |
| sl st | slip stitch |
Useful Tips
Follow these tips to maintain your crochet pattern and don’t get any mistake.
- Maintain consistent tension to create a smooth fabric for both the handle and shovel portion.
- When changing yarn colors, secure ends neatly to avoid unraveling.
- Use a stitch marker to not lose track of rounds and ensure correct stitch counts.
- Pull loops larger before fastening off to ease finishing assembly steps.
- For sewing parts together, gently align edges and seams for a clean, professional look.
- Filling yarn loosely into the formed shovel section will give it shape before sewing closed.
Detailed Pattern Instructions
Part 1: Handle Construction
- Use 4 strands milk cotton yarn with 2.0 mm crochet hook.
Round 1:
- Make slip knot, ch 1, work 6 sc stitches in a ring.
- Tighten loop, join with sl st to first stitch.
Round 2:
- Ch 1, work 6 sc stitches.
- Increase remaining stitches evenly to have 12 sc total.
- Join with sl st.
Round 3:
- Ch 1.
- Pattern: 1 sc, 1 inc repeated 6 times. (18 stitches)
- Join with sl st.
Rounds 4 to 6:
- Work 18 sc each round without increase or decrease.
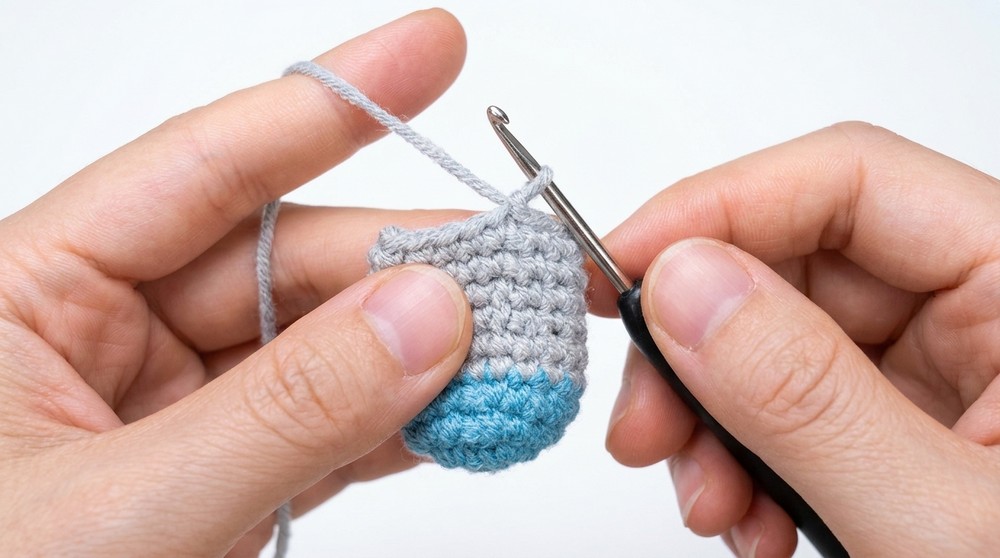
- At round 5, change yarn color to gray.
- Join each round with sl st.
Round 7:
- Ch 1, work 7 sc, 1 dec twice. (16 stitches)
- Join with sl st.
Rounds 8 to 10:
- Work 16 sc per round.
- Join rounds with sl st.
Round 11:
- Ch 1, work 6 sc, 1 dec 1-2 times as needed (14-13 stitches approx.).
- Join with sl st.
Rounds 12 to 14:
- Work 14 sc per round.
- Join with sl st.
Round 15:
- Ch 1, 5 sc, 1 dec repeated 1-2 times.
- Join with sl st.
Rounds 16 to 18:
- Work 12 sc each round.
- Join rounds.
Round 19:
- Ch 1, 4 sc, 1 dec repeated 1-2 times.
- Join with sl st.
Ro4unds 20 to 22:
- Work 10 sc each round.
- At round 21, switch yarn color to blue.
- Join rounds.
Round 23:
- Ch 1, 3 sc, 1 dec repeated 1-2 times.
- Join with sl st.
Round 24:
- Ch 1, work 8 sc.
- Join with sl st.
Round 25:
- Ch 1, 2 sc, 1 dec repeated 1-2 times.
- Join with sl st.
Round 26:
- Ch 1, 1 sc, 1 dec repeated 1-2 times.
- Join with sl st.
- Pull loop larger, leave yarn tail for sewing.
- Sew closed the opening at the end of handle piece; do not cut yarn before sewing.
Part 2: Shovel Blade Construction
Round 1:
- Make slip knot, ch 1, work 6 sc in a ring.
- Tighten loop, join with sl st.
Round 2:
- Ch 1, work 6 increases evenly to make 12 sc.
- Join with sl st.
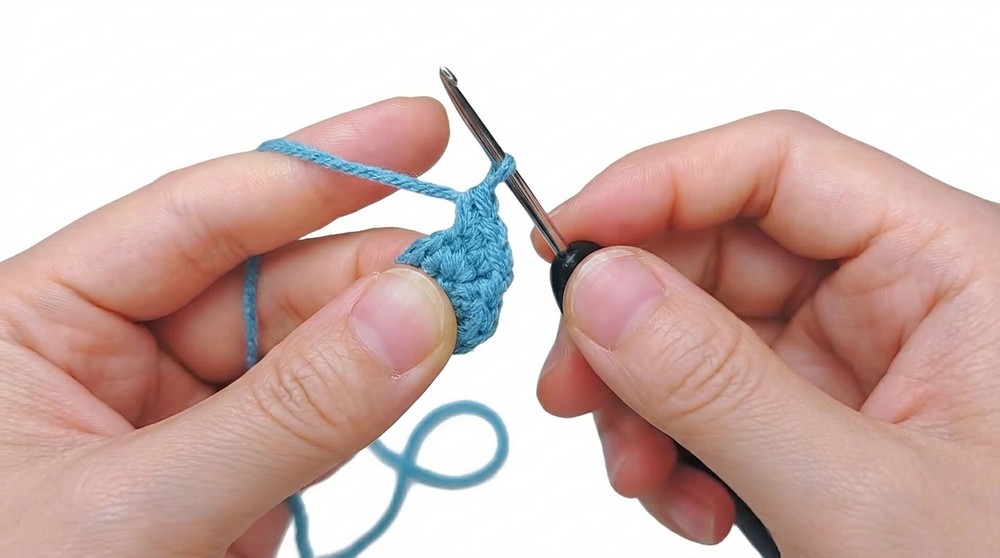
Round 3:
- Ch 1, work 12 increases evenly resulting in 24 sc.
- Join with sl st.
Round 4:
- Ch 1, 1 sc, 1 inc repeated 6 times (18 sc).
- Join with sl st.
Round 5:
- Ch 1, 1 inc, 2 sc repeated 6 times.
- Join with sl st.
Round 6:
- Ch 1, work 24 sc evenly.
- Join with sl st.
Round 7:
- Ch 1, work 24 sc evenly.
- Join with sl st.
Round 8:
- Ch 1, 3 sc, 1 inc repeated 6 times.
- Join with sl st.
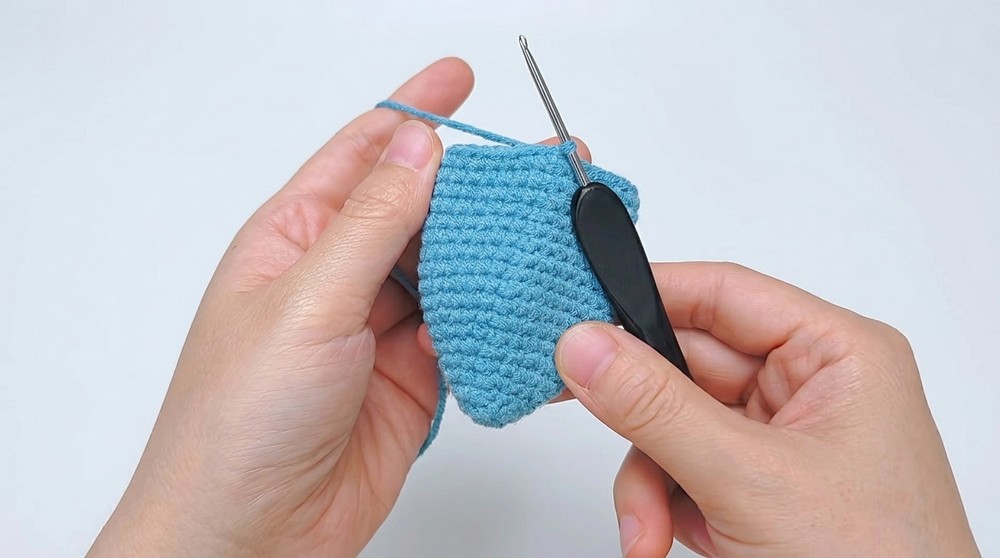
Rounds 9 to 18:
- Work 30 sc evenly for each round.
- Join each round.
- Pull loop larger and cut yarn leaving enough tail for sewing.
- Align edges and sew the blade closed along the seam carefully.
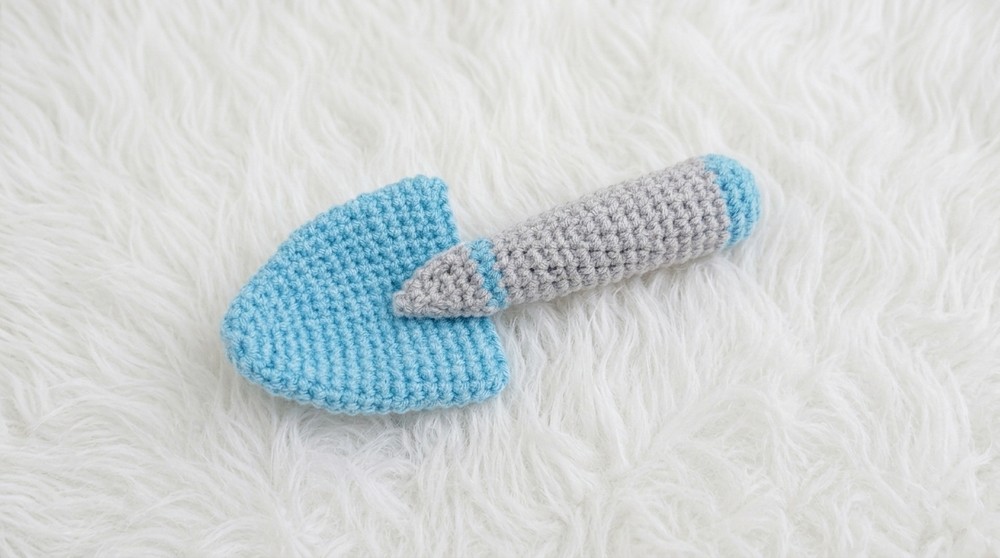
Assembly
- Use a marker to align handle and shovel blade precisely.
- With yarn and needle, sew the handle portion securely onto the narrow end of the shovel blade.
- Adjust stitches and seam alignment for a smooth transition and neat finish.
- Weave in all ends and trim excess yarn.
Conclusion
This mini crochet garden shovel combines delicate stitch work with dimension and shaping, creating an elegant miniature decorative gardening tool. Its compact size and refined detailing make it a lovely addition to themed collections or as a charming handcrafted gift element. The process reinforces stitch precision and assembly techniques ideal for intermediate crocheters expanding their skill repertoire.