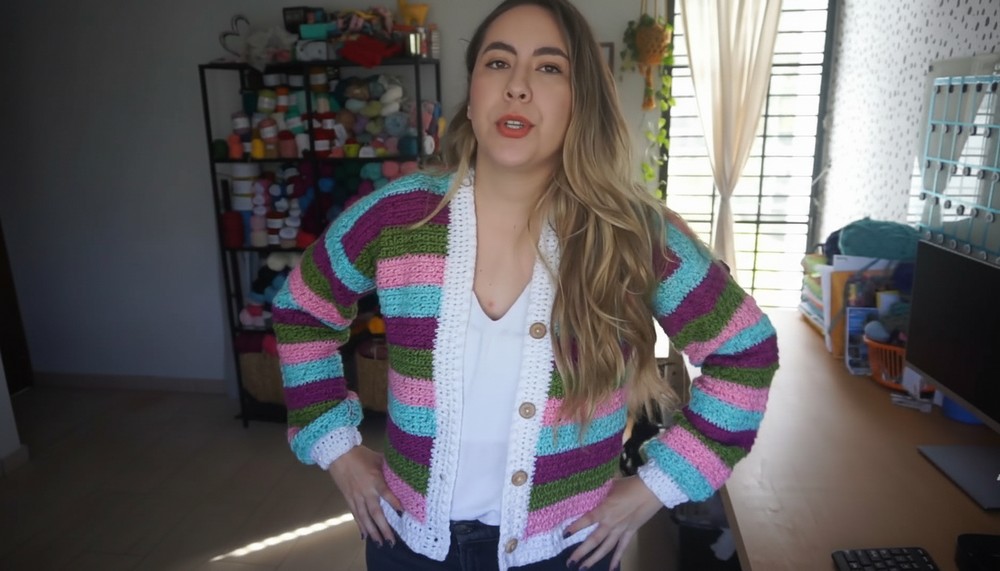
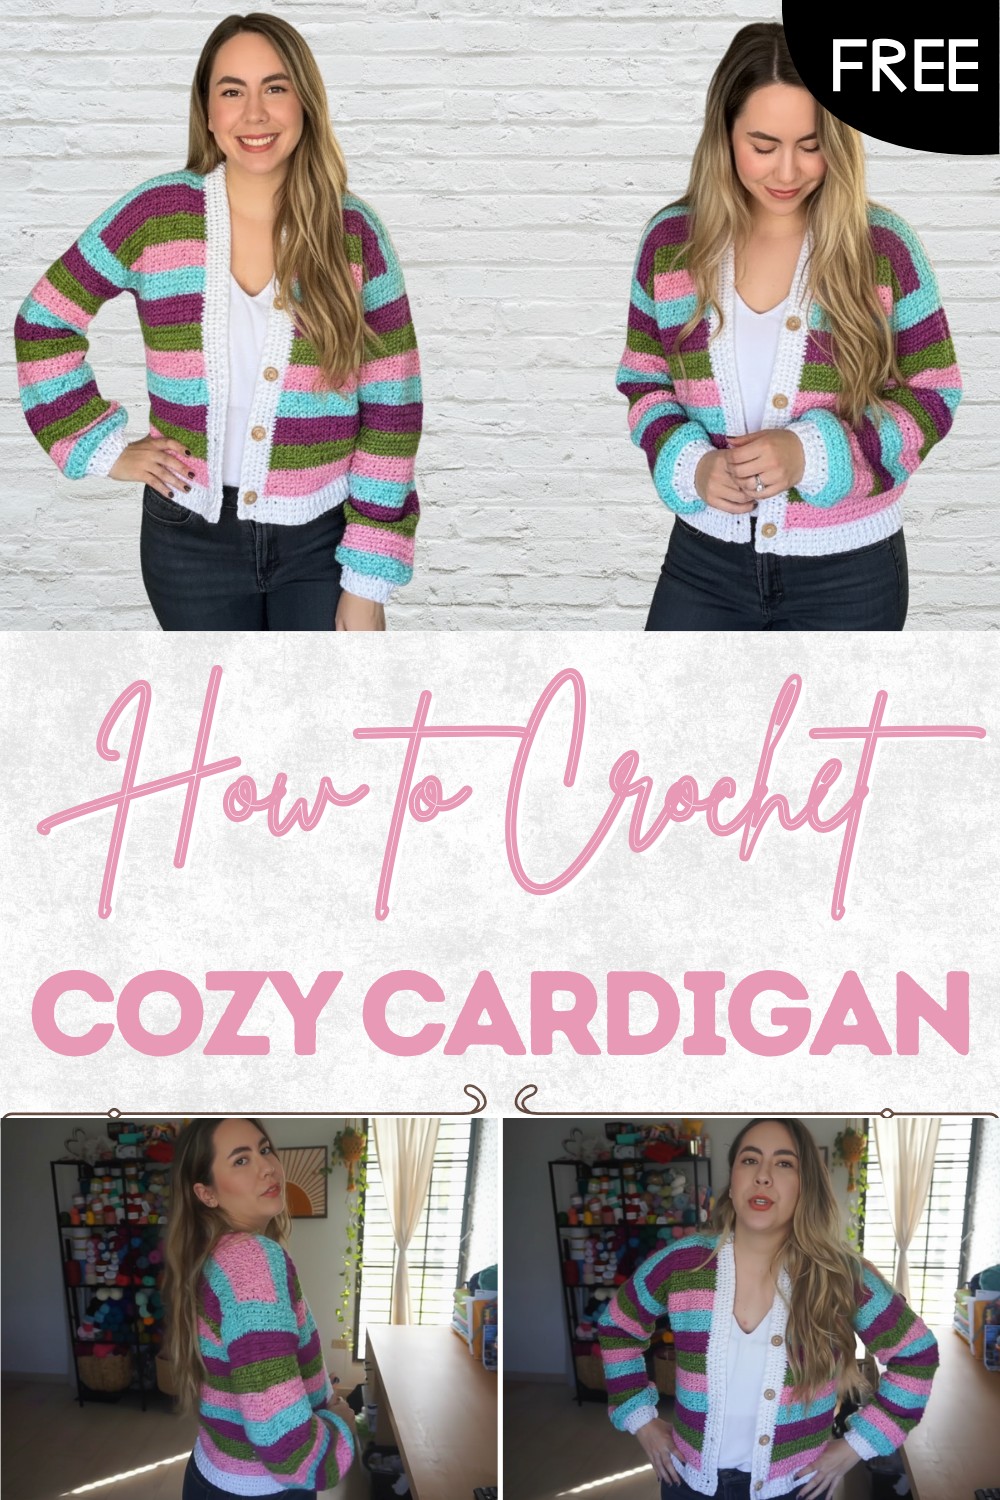
Free Crochet Cardigan Pattern for Effortless Fashion
Feel cozy and confident with this free crochet cardigan pattern that offers warmth adds classic charm and suits everyday wear in any season.
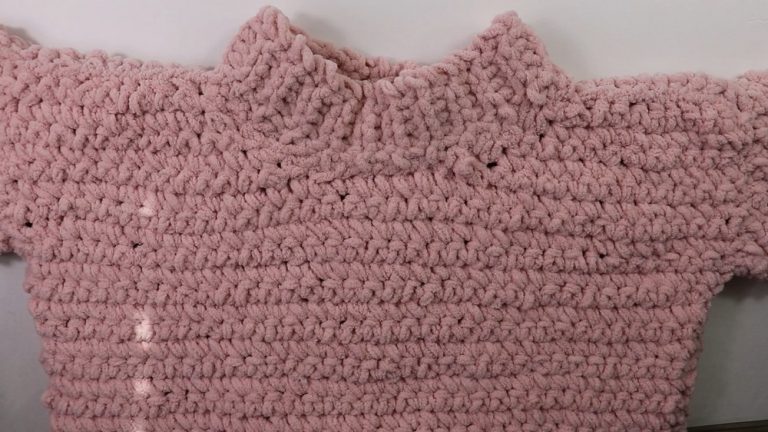
Warm yarn slowly grows into something that feels like comfort you can wear. The Crochet Cardigan pattern brings a soft and flowing design that wraps the body in a gentle layer of beauty and ease. It looks simple yet elegant with its handmade texture that adds charm to any outfit without trying too hard. You can wear it over casual clothes or light dresses and it instantly makes the look more cozy and complete.
Cozy Cardigan Using This Free Step by Step Guide
The fabric feels soft on the skin and gives a light warmth that is perfect for daily use at home outside or during travel. One special thing about it is its beginner friendly steps which help new makers enjoy the process without feeling confused. It also keeps its shape well so it stays beautiful for a long time. Color choices can be soft calm tones or bright happy shades depending on personal taste. Crochet Cardigan pattern turns ordinary yarn into a wearable piece full of comfort beauty and care making everyday dressing feel more special and relaxed in a very natural way.
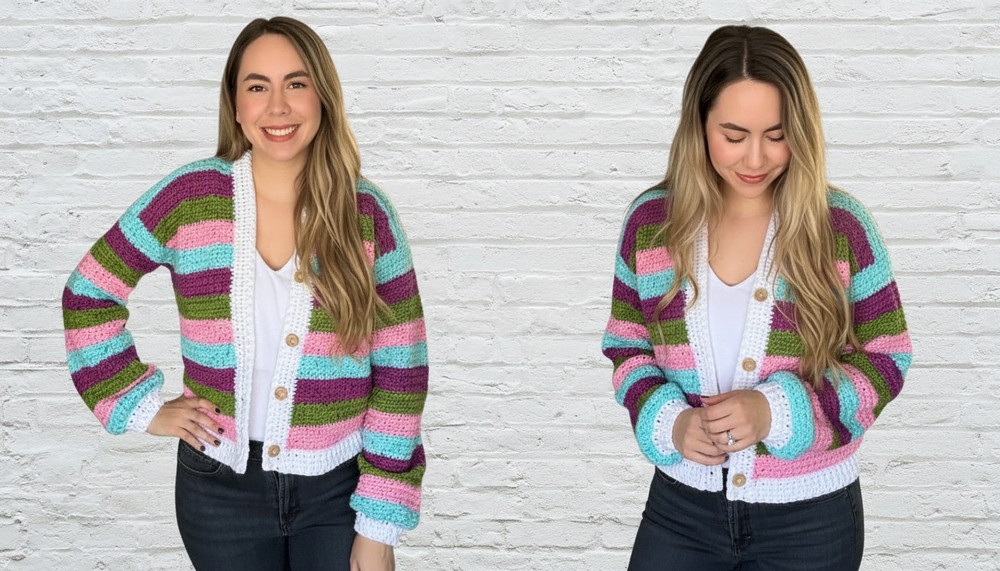
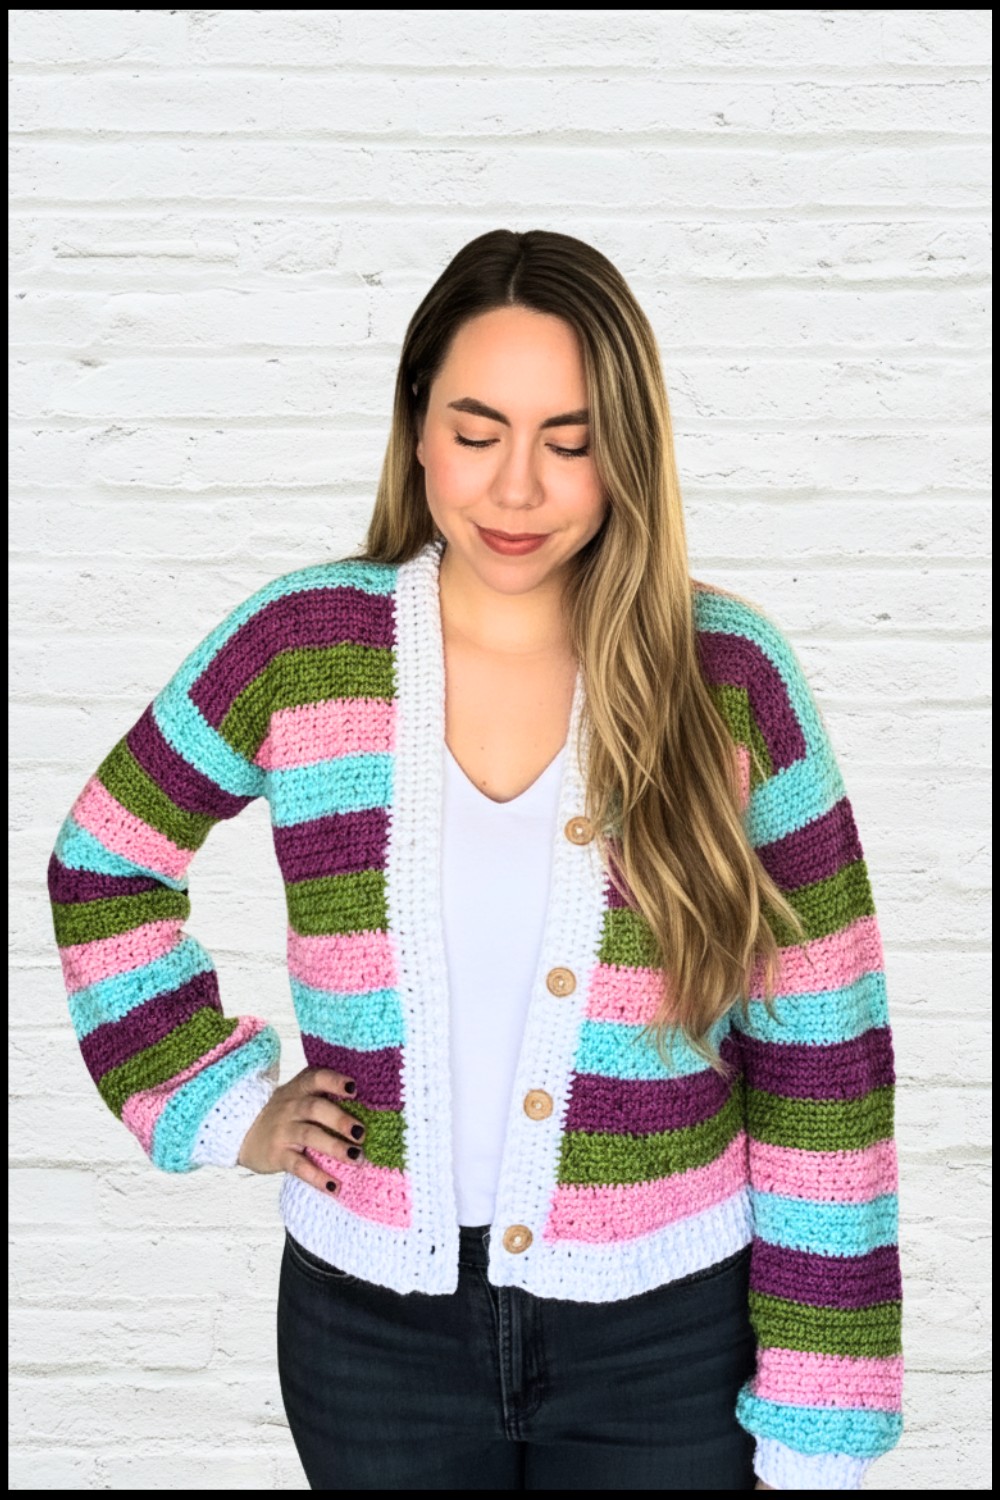
Crochet Textured Cardigan Pattern
Materials
- Yarn: Tweed Dreams by Hobbii (Lightweight acrylic; choose desired colors)
- Hook: 4.5 mm (US G/7)
- Scissors
- Yarn Needle for weaving ends
- Stitch Markers (optional, for marking panels and button placement)
- Buttons: 4 (or preferred number for closure)
- Foam Boards (optional, for blocking sleeves)
- Steamer or access to warm water for blocking (optional)
Key Abbreviations (US Terminology)
- ch: Chain
- sc: Single Crochet
- hdc: Half Double Crochet
- dc: Double Crochet
- fpdc: Front Post Double Crochet
- bpdc: Back Post Double Crochet
- sl st: Slip Stitch
- st: Stitch
Special Notes
- The pattern is written for size Medium. Adjust starting chain numbers for other sizes (see “Sizing” section).
- You may easily customize length and width.
- Cardigan is made in panels (back, two sides, two sleeves) then seamed.
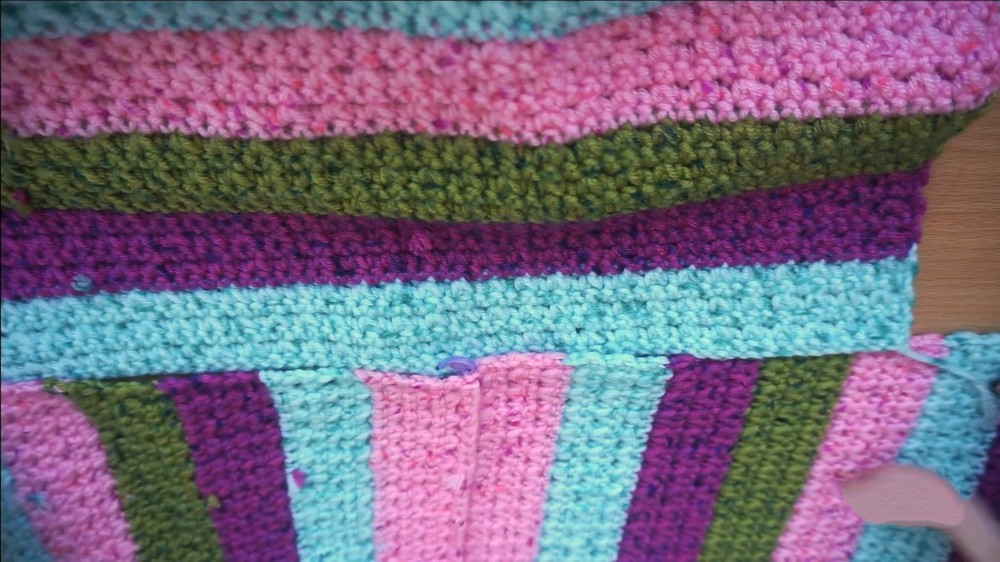
- Textured stitch is worked by alternating single crochet and a cluster of single crochet and half double crochet together.
- Stripe/color changes are optional.
Sizing
- Back Panel: 80 chains + 1 (for Medium)
- Side Panels: 36 chains + 1 (make two)
- Sleeves: 60 chains + 1 (make two)
- Adjust chains for larger or smaller sizes as needed.
Pattern
1. Back Panel
- With chosen color, ch 80 (for Medium) plus 1.
- Row 1:
– Working in second ch from hook, sc across. (80 sts)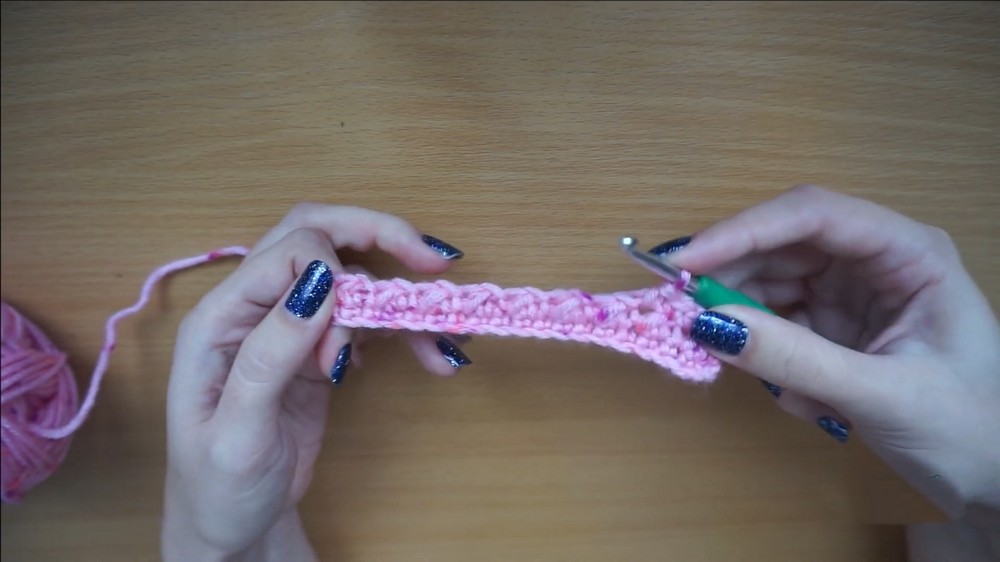
- Row 2:
– Ch 2 (counts as hdc), turn.
– Cluster Stitch:
– Insert hook in 2nd st, pull up a loop (do not complete sc);
– Yarn over, insert hook in next st, pull up a loop;
– Yarn over and pull through all loops on hook (sc + hdc together);
– Ch 1.
– Repeat ‘Cluster Stitch’ across row; end with hdc in last st. - Row 3:
– Ch 1, turn.
– Work sc in each st and each ch-1 space across row. - Repeat Rows 2-3 for desired length, changing colors as desired (for stripes).
– Typical to repeat the textured row three times before changing color.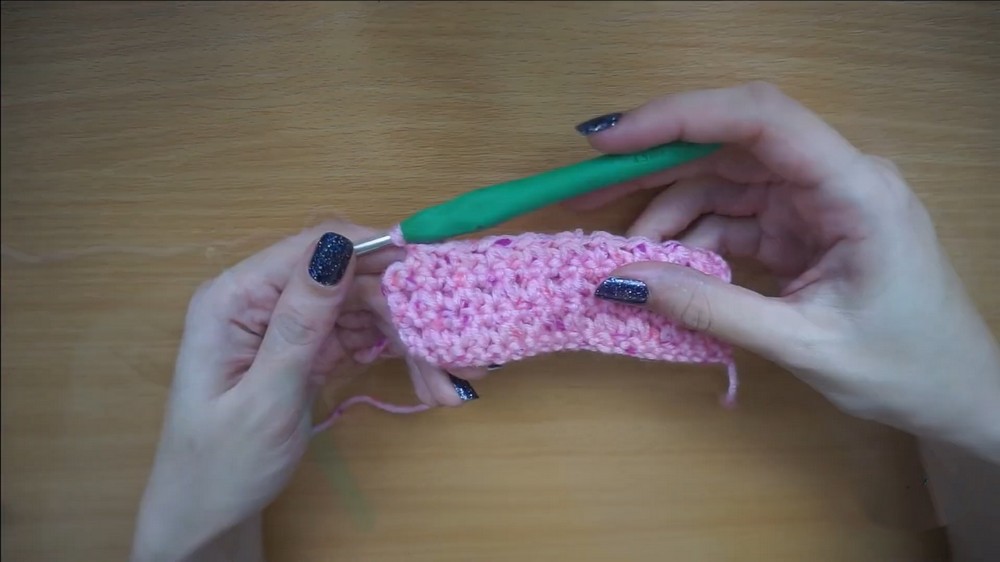
- Change Color:
– When finishing last st of row, bring in new color before completing final yarn over. Tie a simple knot to secure.
2. Side Panels (Make 2)
- Ch 36 + 1.
- Repeat steps for back panel:
– Row 1: sc across.
– Row 2: Cluster Stitch (hdc + sc together, as described above), ch 1 between.
– Row 3: sc in each st and ch-1 space.
– Repeat Rows 2-3 for desired length, matching back panel.
– Change colors as desired.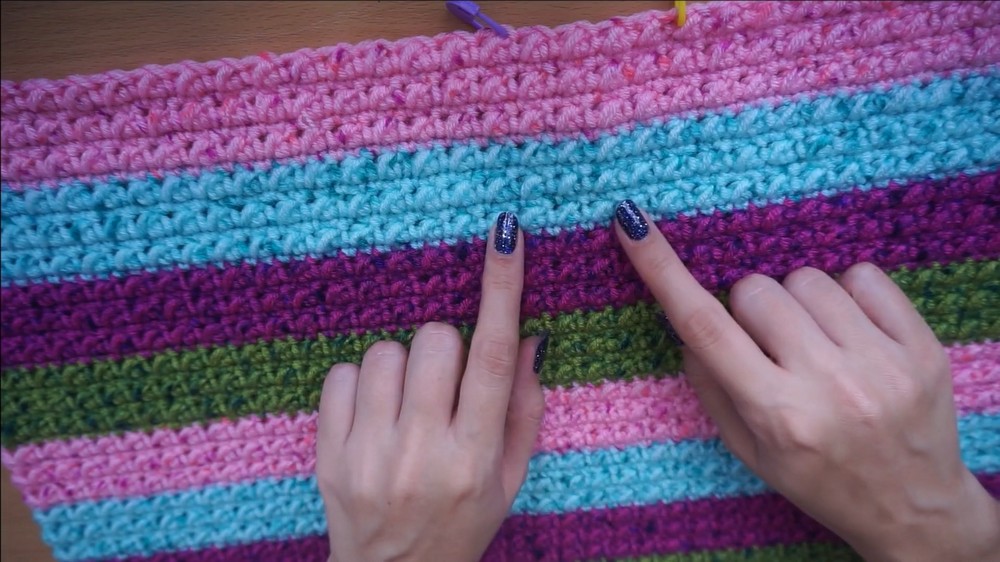
3. Sleeves (Make 2)
- Ch 60 + 1 (for Medium; adjust as necessary).
- Repeat panel stitch pattern for desired width and length.
- Cuff Shaping:
– When you reach wrist width, reduce panel width by half:
– Ch 1 and turn.
– Decrease: Insert hook in next st, pull up loop; insert hook in next st, pull up loop, yarn over and pull through all loops (sc2tog) until end.
– Next row: Ch 2, turn. Work dc across the reduced edge.
– Next 4 rows: Ch 2, turn.
– Alternate fpdc and bpdc across row for ribbing.
– Adjust ribbing thickness to fit wrist.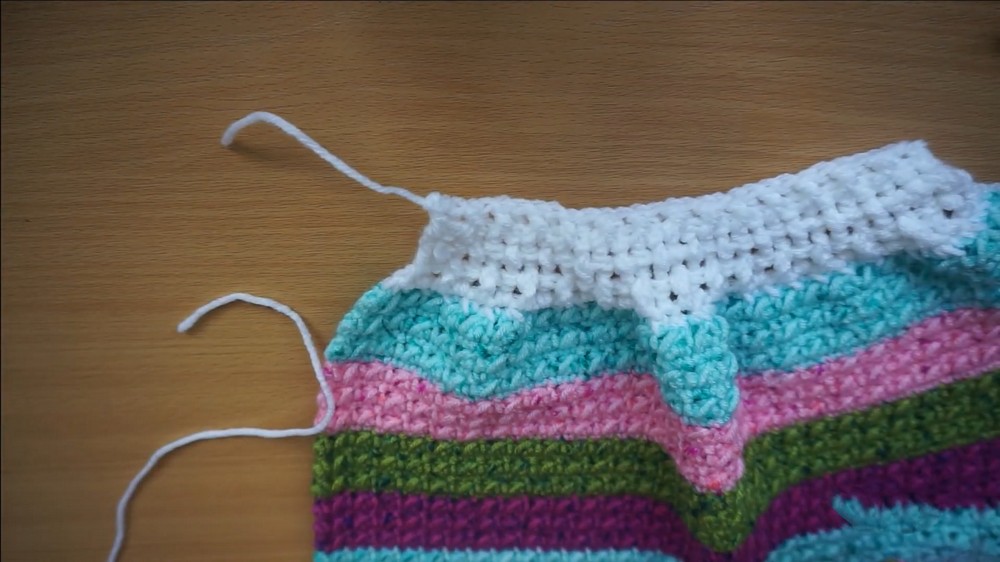
4. Seaming Panels
- Lay back and side panels flat, right side (texture) facing up.
- Use preferred method (sc, slip stitch, or hand sewing) to seam panels together along edges, hiding yarn tails as you go.
- Fold sleeves in half, find center, and attach to seams of cardigan body, right sides together. Use sc or slip stitch for seaming.
- Fold cardigan in half, seam side edges under arms.
5. Bottom Ribbing
- Attach yarn to one corner of the lower edge.
- Row 1: sc evenly along the entire bottom edge.
- Row 2: Ch 2, turn, dc) across.
- Rows 3-6: Ch 2, turn, alternate fpdc and bpdc for ribbed texture (match wrist ribbing).
– Increase/decrease number of rows as preferred.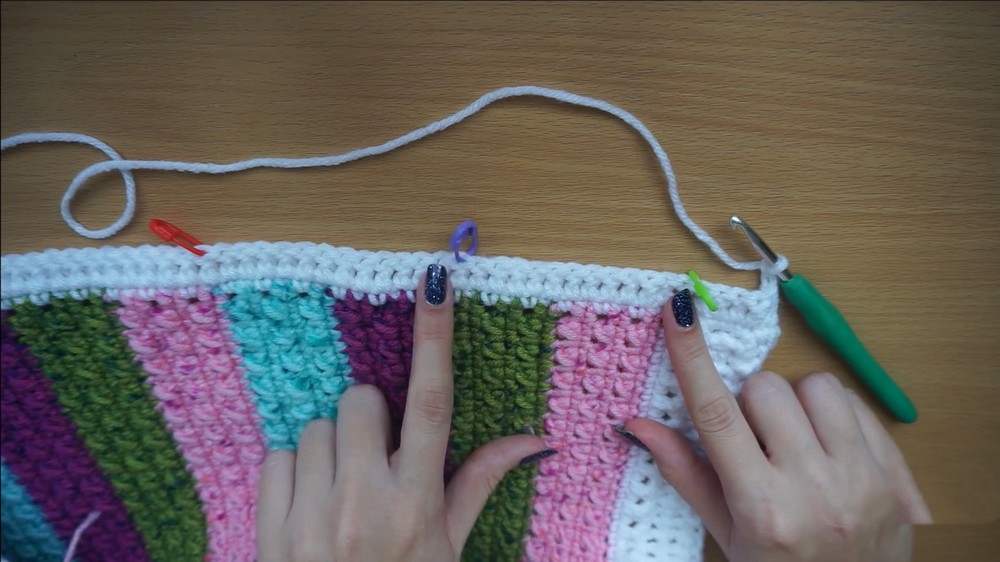
6. Front Side Ribbing
- Attach yarn at lower front edge.
- Row 1: sc evenly along each front side edge.
- Row 2: Ch 2, turn, dc across.
- Rows 3-6: Ch 2, turn, alternate fpdc and bpdc for ribbed appearance.
7. Buttonholes (Right Side)
- Place stitch markers where buttonholes will go (~1 inch from bottom; spaced about 4 rows apart).
- On ribbing row, when reaching a marker:
– Ch 1, skip next dc (usually a bpdc), continue with fpdc/bpdc stitches. - Repeat for number of desired buttonholes.
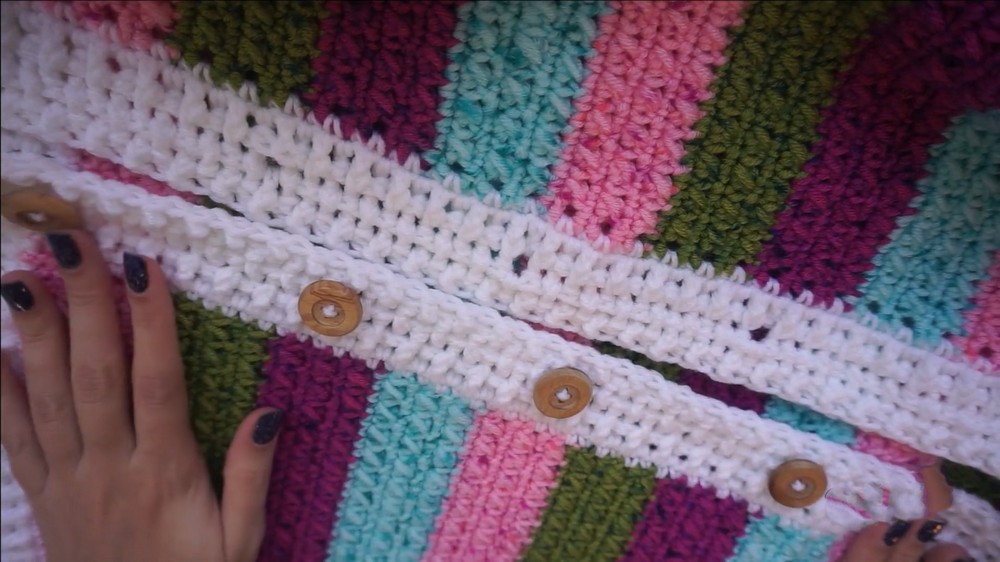
8. Button Placement (Left Side)
- Use stitch markers to mark button positions, aligning with corresponding holes.
- Sew buttons securely using yarn needle and matching yarn.
- Hide tails with yarn needle for a clean finish.
9. Blocking (Optional)
- Place sleeves or entire cardigan on foam boards.
- Use warm water or steamer to block, stretching gently to achieve preferred fit and shape.
Conclusion
This textured cardigan combines warmth, style, and easy construction. By working simple stitches and creating panels, you’ll achieve a cozy garment with beautiful detail. All panels can be customized for size and color preferences, with a ribbed finish for cuffs and borders. Once complete, enjoy the comfort and charm of your handmade cardigan.
Pattern Corrections & Tips
- Ensure you do not miss ch-1 spaces when working sc rows.
- For color changes, bring new yarn in at final yarn over, secure, and hide tails as you go.
- If seams aren’t matching or gaps occur, count stitches and use markers to align pieces evenly.
- When seaming colored stripes, you can match colors on the back, but on sides it’s acceptable to use any color.
- Take time to block your sleeves for better fit and shape.
- Ribbing can be adjusted for thickness depending on preference.
- For buttonholes, consistently space markers and use ch-1 skip method for clean holes.
- Buttons can be sewn with any secure method, double knotting and weaving ends for strength.