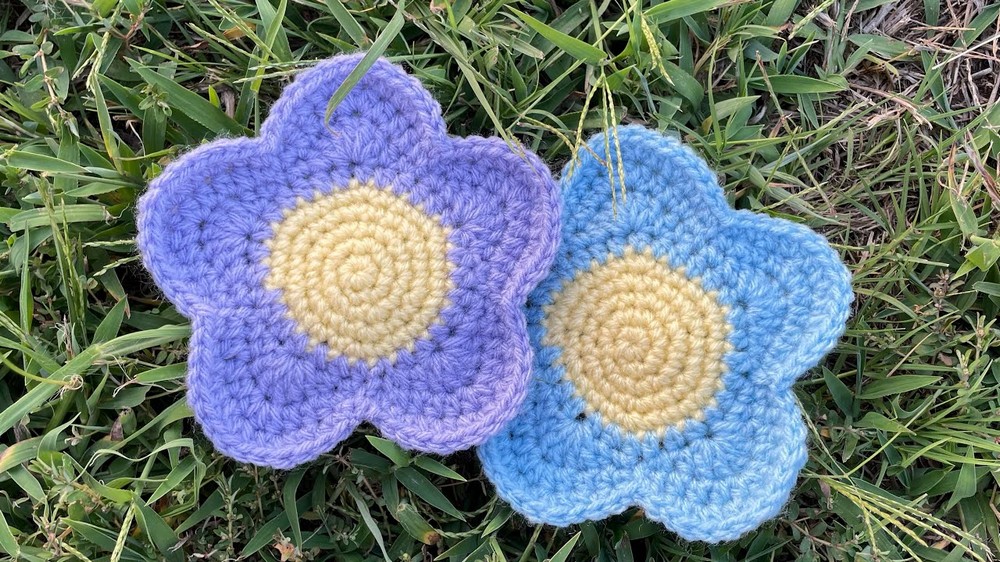
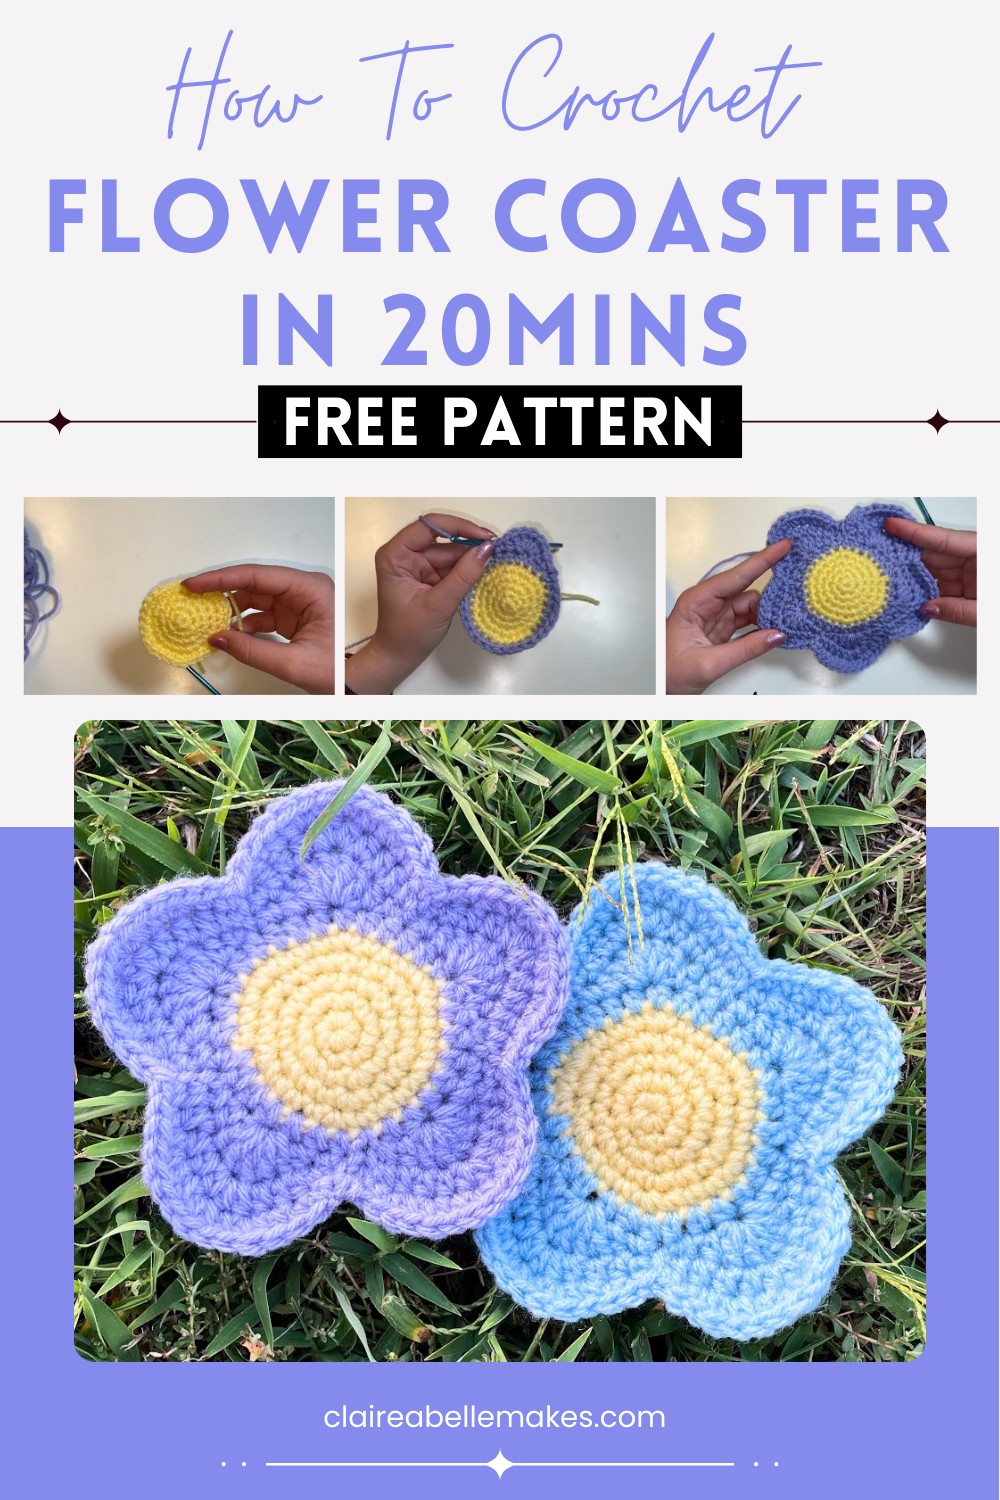
Elegant Crochet Flower Coaster Pattern for Tea-Time Charm
Decorate any table with this crochet flower coaster pattern that combines beauty and simplicity for welcoming touch everyone can appreciate.
Bright colors and cheerful shapes can instantly light up your table and make every meal feel special. This lovely coaster is made to look just like a real flower and feels soft to the touch, thanks to simple yarn. The crochet flower coaster pattern guides you to create each petal and center, letting you pick your favorite shades or match the seasons.
Boho Crochet Flower Coaster Pattern for a Free-Spirited Look
You can use this coaster under a mug or glass to keep your table safe, or place it around your home as a pretty decoration. It looks perfect in the kitchen, living room, or even as a thoughtful gift for a friend. Children enjoy its playful shape, and anyone can admire the beauty it brings to daily life. Making this coaster is easy and relaxing, helping anyone turn yarn into something useful and attractive, adding a touch of handmade warmth to every gathering.

Materials
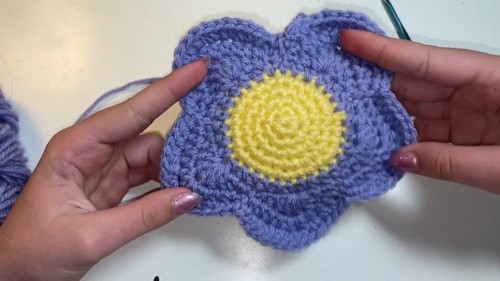
- Yarn: Worsted weight (category #4), e.g., acrylic or cotton
- Color A (flower center): Yellow
- Color B (petals): Any color you wish (e.g., purple, blue, pink)
- Hook: 4.0 mm (G-6) crochet hook
- Stitch Marker: Optional—can use scrap yarn or plastic marker
- Yarn Needle: For weaving in ends
Key Abbreviations (US Terms)
- ch: chain
- sc: single crochet
- hdc: half double crochet
- dc: double crochet
- sl st: slip stitch
- st(s): stitch(es)
- inc: increase (two stitches worked into same stitch)
- yo: yarn over
Special Notes
- Pattern is worked in rounds.
- Use a stitch marker or scrap yarn to mark the beginning of each round.
- The coaster’s center forms the base for five petals in the second color.
- If you are unfamiliar with the magic ring, refer to detailed tutorials or use ch 4 and join into a ring.
Pattern
Center of Flower (Color A)
Round 1:
Make a magic ring.
Work 6 sc into the ring.
Pull the tail to tighten.
Place a stitch marker at the beginning of the round.
Round 2:
Work 2 sc in each st around.
(12 sts at end of round)
Round 3:
[2 sc in next st, 1 sc in next st] repeat around.
(18 sts)
Round 4:
[2 sc in next st, 1 sc in next st, 1 sc in next st] repeat around.
(24 sts)
Round 5:
[2 sc in next st, 1 sc in next 3 sts] repeat around.
(30 sts)
At end of Round 5:
Remove stitch marker.
Slip stitch in next st.
Fasten off Color A.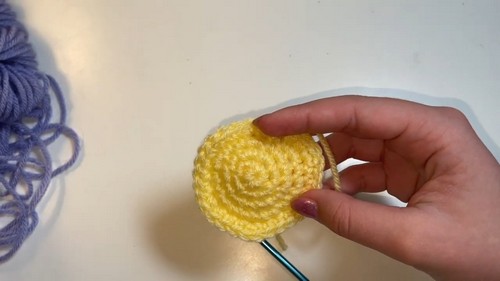
Petal Rounds (Color B)
Attach Color B to any stitch in last round of flower center; tie a knot to secure. Insert hook in same st, yo and pull up loop, ch 1.
Round 1 (Petal Base)::
Work 1 hdc in each st around.
Join with a sl st to the first ch 1.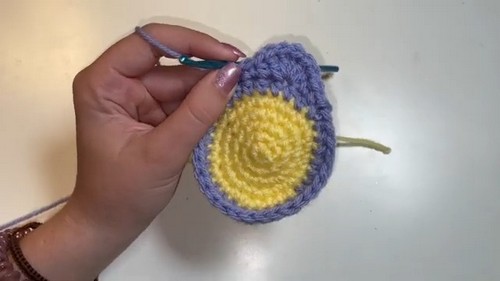
Petal Formation (Repeat for Each Petal, 5 Total)
Each petal spans 7 stitches.
Work the following sequence:
- Ch 1, sl st in same st.
- Next st: 1 sc
- Next st: 1 hdc
- Next st: 5 dc in same st
- Next st: 1 hdc
- Next st: 1 sc
- Next st: sl st
Repeat sequence for a total of 5 petals.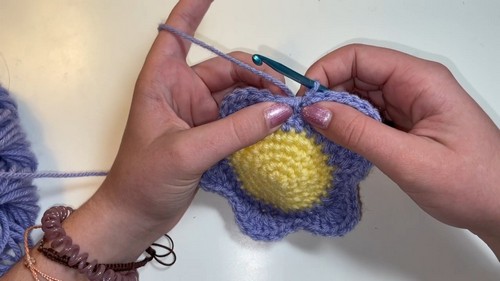
Petal Expansion
Next round: Work on petal tops to make them rounder and fuller.
Each petal will follow this sequence:
- Ch 1, sl st in same st.
- Next st: 1 sc
- Next 3 sts: 1 hdc in each st
- Next st: 3 hdc in same st
- Next 3 sts: 1 hdc in each st
- Next st: 1 sc
- Next st: sl st
Repeat pattern for all 5 petals.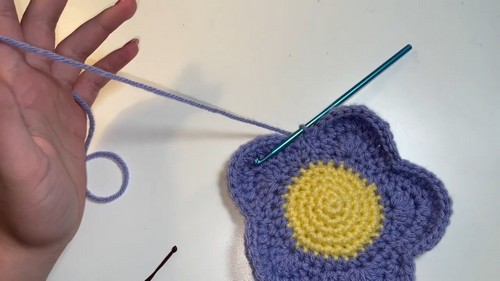
Final Petal Round
Each petal follows:
- Ch 1, sl st in same st.
- Next 2 sts: 1 sc in each
- Next st: 1 hdc
- Next st: 2 hdc in same st
- Next st: 1 hdc
- Next st: 2 hdc in same st
- Next st: 1 hdc
- Next st: 2 hdc in same st
- Next st: 1 hdc
- Next 2 st: 1 sc in each
- Next st: sl st
Repeat pattern around for all petals.
Finishing
- Fasten off Color B.
- Weave in all ends with a yarn needle.
- Shape petals gently.
Pattern Correction & Tips
- Correction: There are some unclear moments about stitch counts, especially at petal rounds. Make sure your stitches are distributed evenly over the petal spans (count carefully).
- Tip: Use a stitch marker or piece of scrap yarn to help keep track of round starts, especially in continuous rounds.
- For best results, block your coaster slightly to flatten and shape the petals.
- If you prefer more petals, you may increase the initial stitch count (e.g., make 36, then divide by 6 for 6 petals).
Conclusion
Your flower coaster is now finished! These make adorable and functional table decor, and you can customize the colors for a seasonal or rainbow look.