Easy Free Crochet Ribbed Hat Pattern for Beginners
Warmth meets style with this free crochet ribbed hat pattern that’s super easy to follow and perfect for your next cozy accessory project.
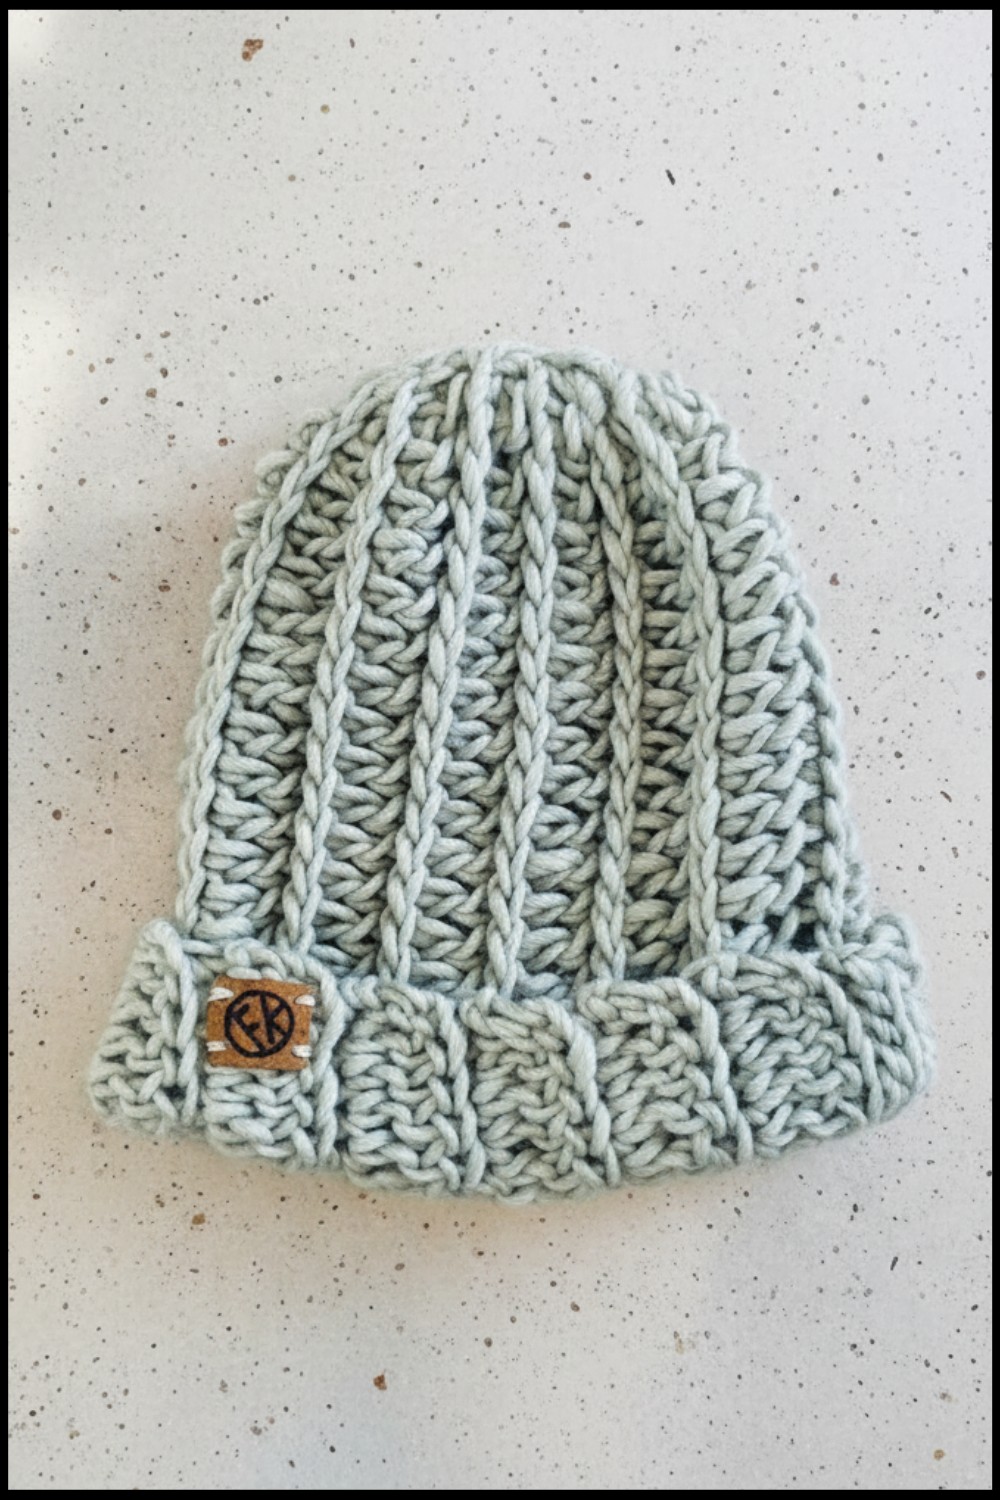
Imagine a soft hug for your head that keeps you warm and comfortable every time you slip it on. The gentle ridges running around this special hat make it stretch easily and stay in place so anyone can wear it with ease and feel good all day. With neat lines and a stylish fit the cozy layer adds charm to your look as it protects your ears from cold winds or offers a fashionable touch during a simple outing.
Cozy Free Ribbed Hat Crochet Pattern for Chilly Days
Following a crochet ribbed hat pattern brings you a fresh way to create a hat that looks beautiful and works well for any season. The ribbed texture makes it strong and helps the hat keep its shape so you can use it again and again. Choose bright yarns or calm colors for your hat and enjoy wearing a handmade piece that is as warm as it is pretty. Making and wearing this crochet ribbed hat pattern gives you both comfort and joy in every moment.
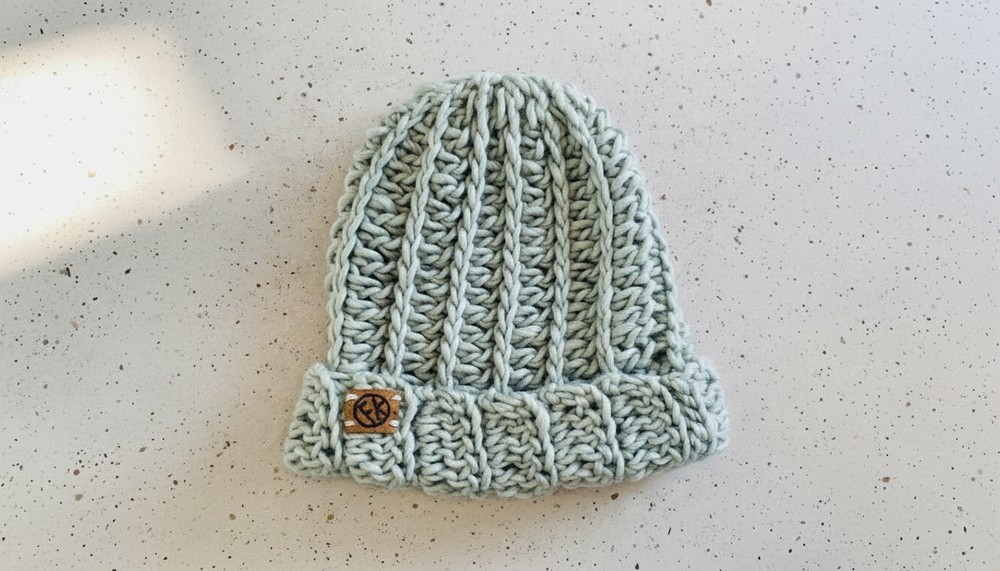
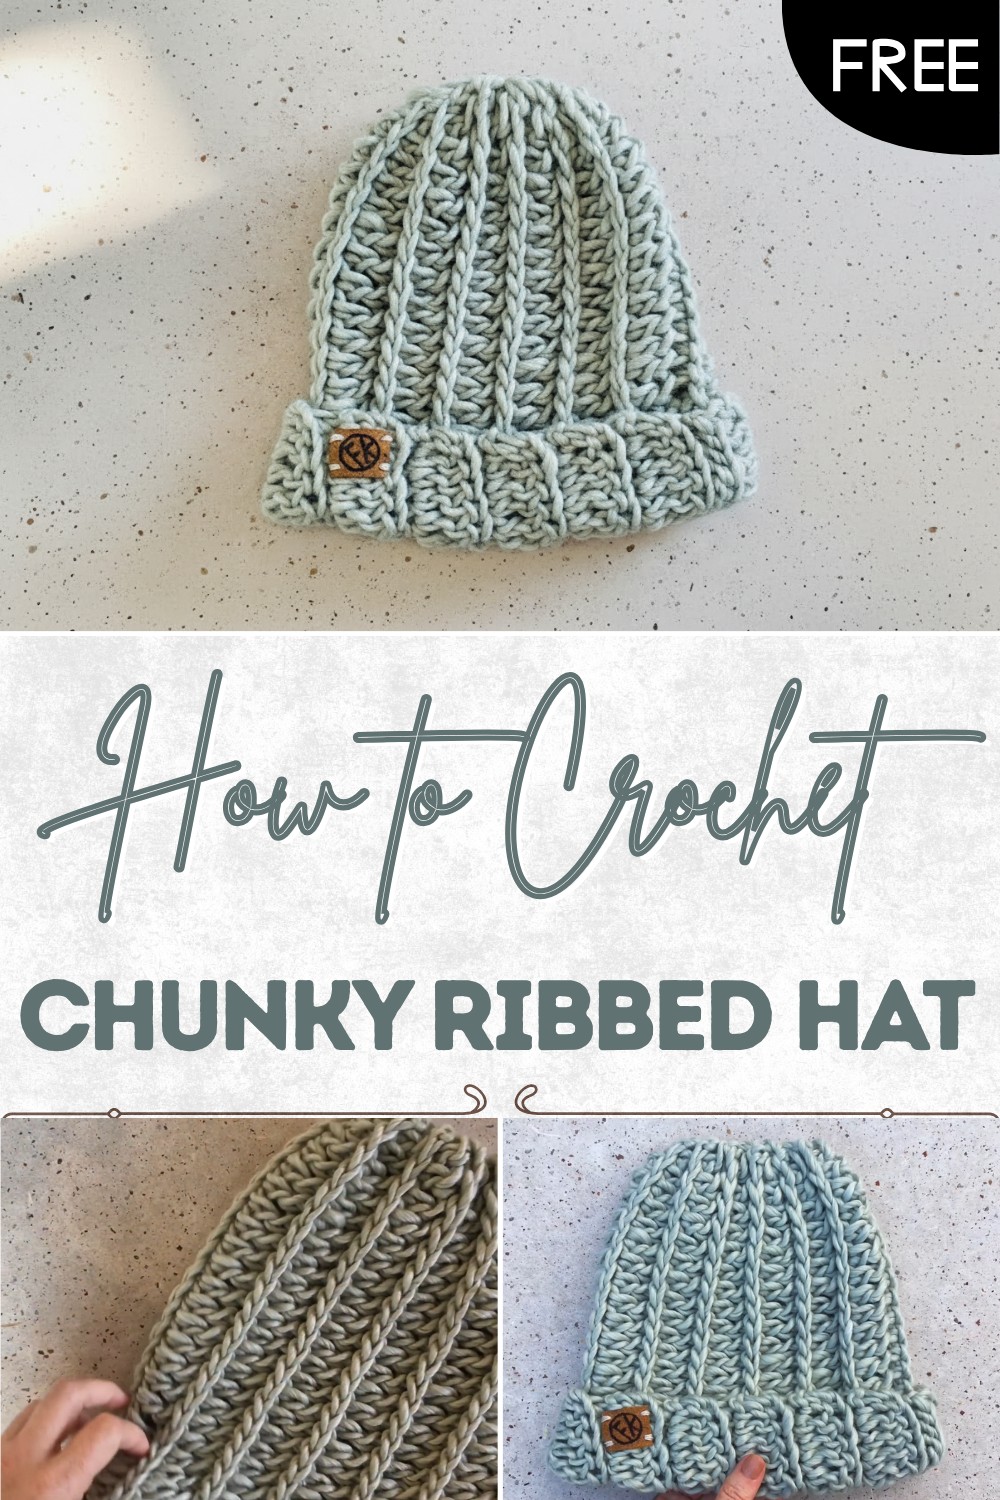
Textured Chunky Ribbed Hat
Materials
- Yarn: Bulky (Size 5) yarn, 1 ball (sample uses “Sage Green” from Michael’s)
- Hook: Size N (10 mm) crochet hook
- Notions:
- Large-eye yarn needle
- Scissors
- Tape measure
- Optional: Small scrap of leather/faux leather, permanent or furniture marker, hammer, large nail, size 10 crochet cotton for tag
Key Abbreviations (US Terms)
| Abbreviation | Meaning |
|---|---|
| ch | chain |
| sc | single crochet |
| dc | double crochet |
| sl st | slip stitch |
| st(s) | stitch(es) |
| BLO | back loop only |
| rep | repeat |
Special Stitches & Construction Notes
- Chainless Double Crochet:
For the first dc of a row: sc in first st, turn work to side, sc into 2 side bars/loops—this counts as your first dc and creates a sturdy edge. - Slip Stitch in the Back Loop Only (BLO):
Insert hook into the loop farthest from you at the top of each st. - Hat Construction:
Worked sideways in rows, joined into a tube, then seamed and cinched at the top.
Pattern
1. Crown Ring and Foundation
- With N/10 mm hook, ch 9.
- Join to first ch with a sl st to form a small ring (this is the hat crown).
- Ch 24—this creates the height of the hat (adjust for desired brim length).
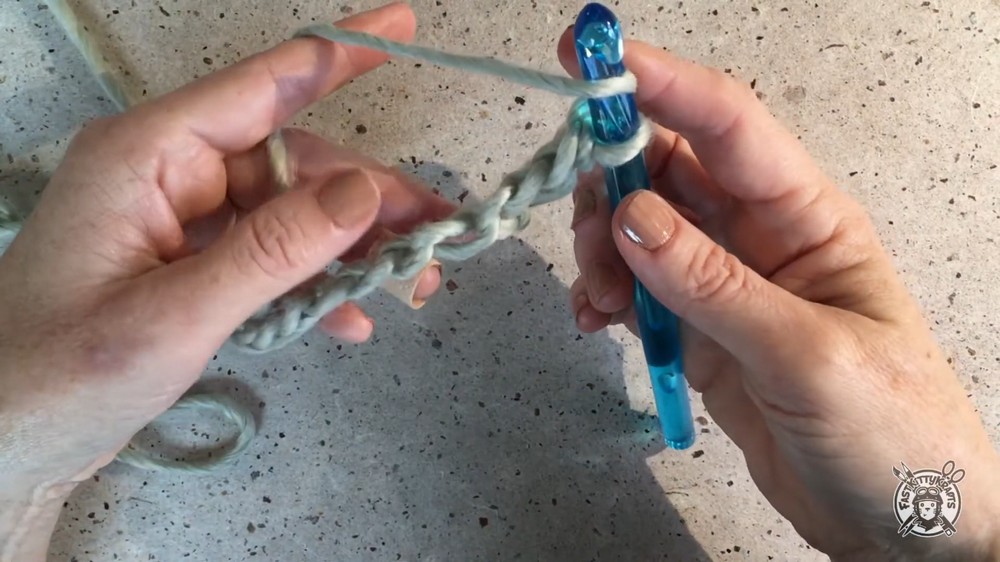
2. Row 1: Establish Rib
- Starting in 2nd ch from hook, work a chainless double crochet (see Special Stitches above).
- Dc in each ch across to ring (total: 23 dc).
- Join with a sl st into the center of the crown ring.
3. Row 2: Slip Stitch Ridge
- Ch 1, turn.
- Skip the turning ch and sl st.
- Sl st BLO into the first dc and each dc across to end (keep stitches loose).
- Your last sl st goes into the chainless double crochet of the previous row.
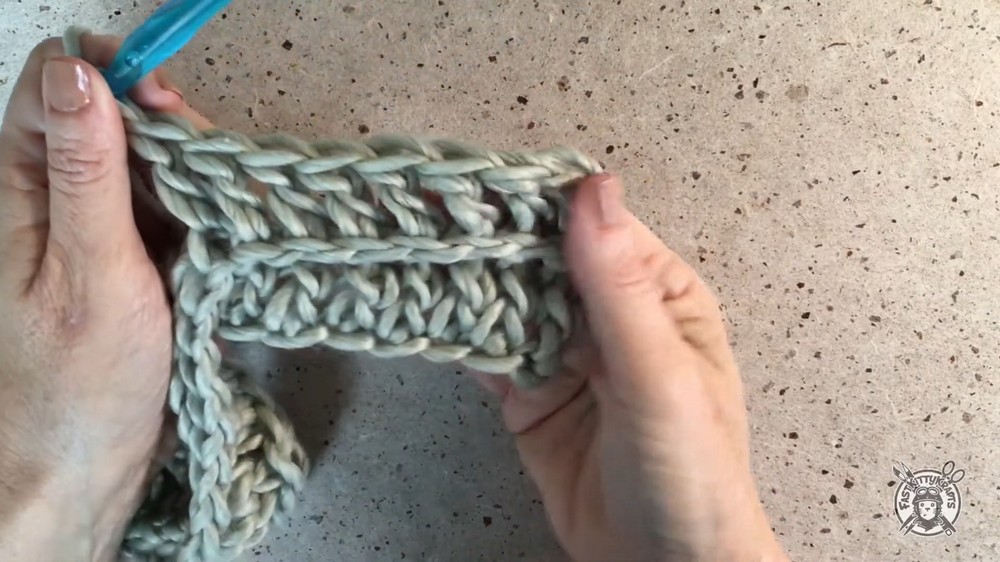
4. Row 3: Double Crochet Rib
- Ch 1, turn.
- Start with a chainless double crochet into the first slip stitch.
- Dc BLO in each st across to ring.
- Sl st into the crown ring.
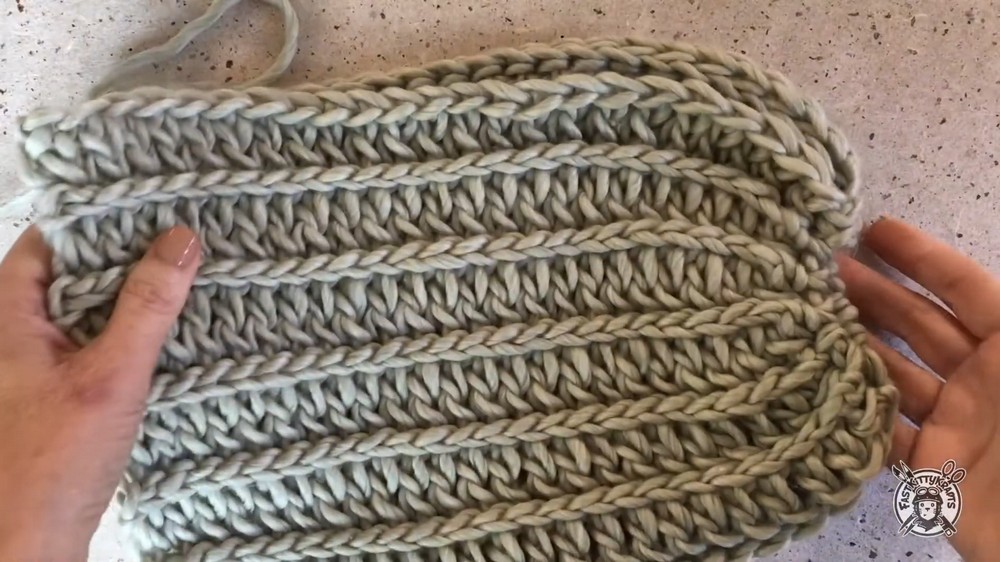
5. Repeat
- Continue alternating Row 2 (sl st BLO) and Row 3 (dc BLO) until your piece is approximately 18” wide, or fits snugly around your head (end with a slip stitch row).
6. Seam Sides
- Fold your fabric right side in (so the seam will be on the inside).
- With working yarn, ch 1, and sl st through the BLO of stitches from both edges, joining the hat into a tube.
- Finish off with a long tail for sewing the top closed.
7. Close Top
- With a yarn needle and your long tail, weave through the stitches at the crown edge in a zigzag manner.
- Pull tight to draw the crown closed.
- Secure and weave in your ends.
8. Optional: DIY Faux Leather Tag
- Cut a small piece of leather/faux leather to desired shape.
- Use a permanent marker to draw a design/brand.
- Use a large nail and hammer to make two sew-on holes.
- Attach the tag with cotton thread using a yarn needle near the brim.
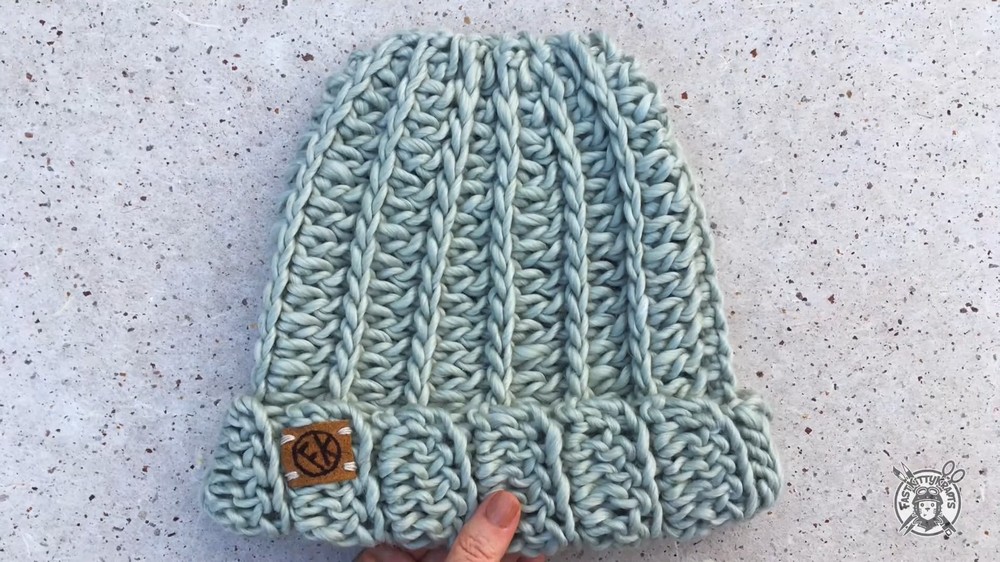
Conclusion
Your beautifully textured chunky ribbed hat is complete! The rib pattern creates stretch and warmth, while the optional custom tag gives a store-bought finish. This pattern is perfect for gifting or personal use.
Pattern Corrections & Tips
- Correction: Ensure you keep an accurate stitch count—each dc and slip stitch row should have 23 sts.
- Tips:
- Work slip stitches loosely to avoid a tight, inflexible fabric.
- The wider your starting chain after the ring, the taller the hat and wider the brim.
- Give the hat a good stretch before seaming and after completion for best fit.
- Substitute faux leather or felt for the tag if desired.