Cute & Fun Free Crochet Kirby Pattern With Easy Tutorial

Add a pop of color to your collection by crocheting a charming Kirby amigurumi with this free pattern that’s playful and simple to follow.
Create a charming, game-inspired keepsake with the Free crochet Kirby Amigurumi Pattern, a detailed tutorial that guides you through making a small plush figure. This amigurumi project is ideal as a thoughtful gift for Kirby fans, a fun decorative item for desks or shelves, or a playful accessory such as a keychain or bag charm. Thanks to the clear video instructions from piligurumis creaciones on YouTube, it becomes approachable even for those still building their skills.
Crochet Kirby Amigurumi – Perfect for All Skill Levels
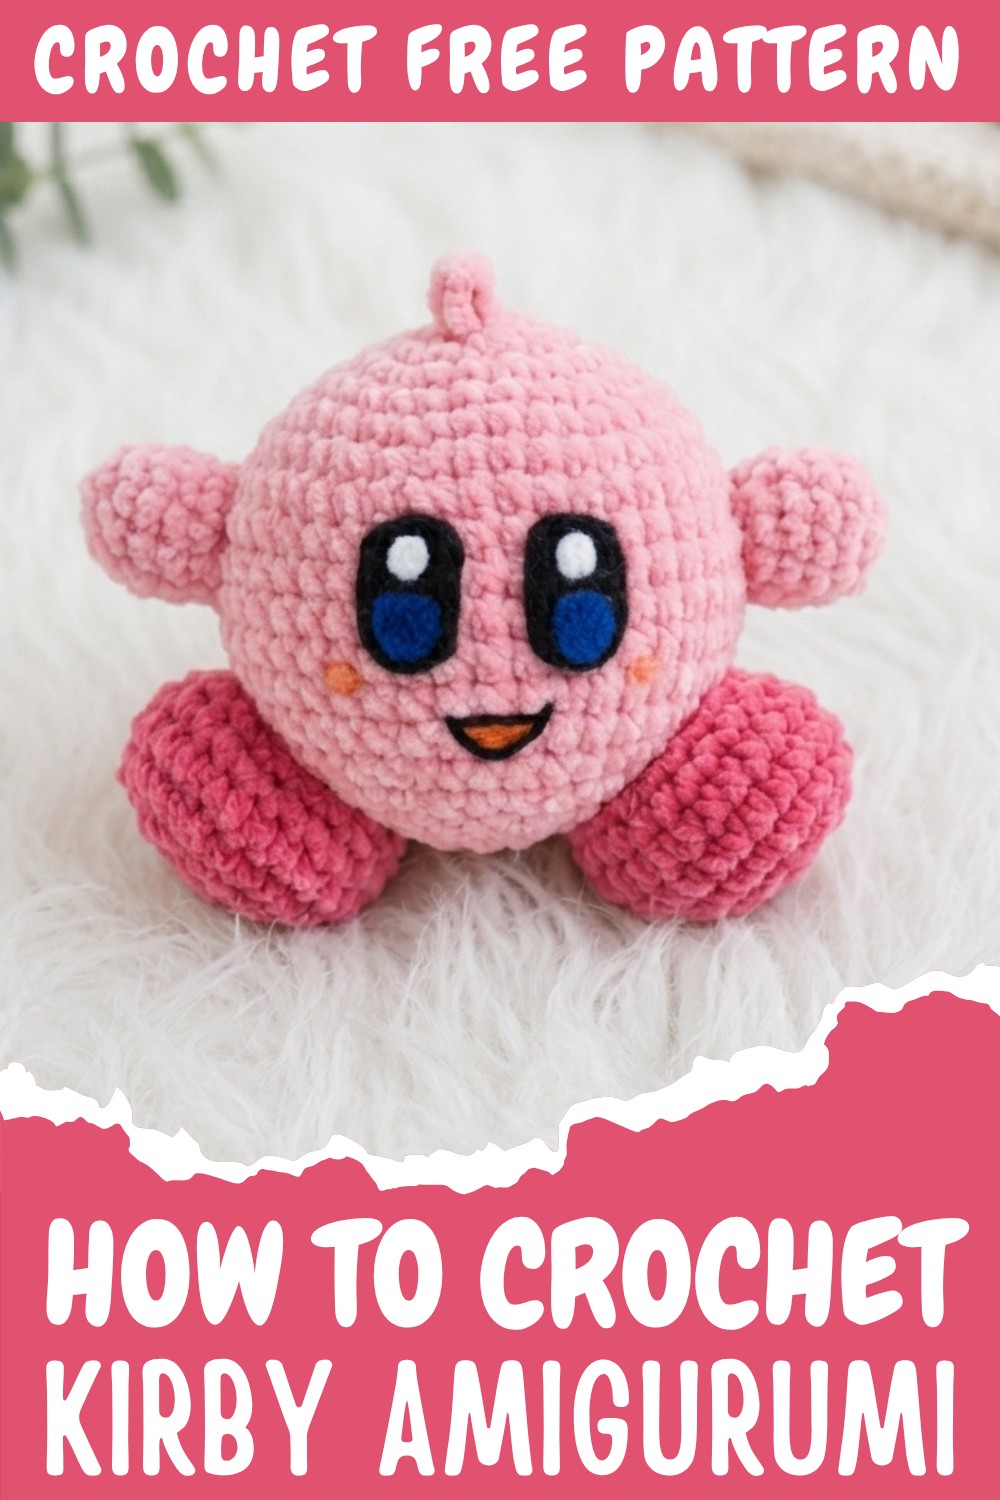
The design features Kirby’s iconic round shape, soft and squishy body, and bright pink color that instantly stands out. His expressive felt eyes, gentle smile, and rosy cheeks capture the character’s cheerful personality. Short little arms and sturdy red feet give the figure balance and structure, while maintaining a cute and friendly look.
This project offers plenty of practical benefits. The finished Kirby is small and lightweight, making it easy to display, carry, or gift. It can decorate a child’s room, sit on a gaming setup, or become part of a themed collection. With the option to adjust shades of pink, eye details, or accessories, you can personalize each piece. The combination of soft yarn, felt accents, and smooth shaping creates a polished, professional appearance that still feels warm and playful.
Crochet Pattern: Kirby Amigurumi
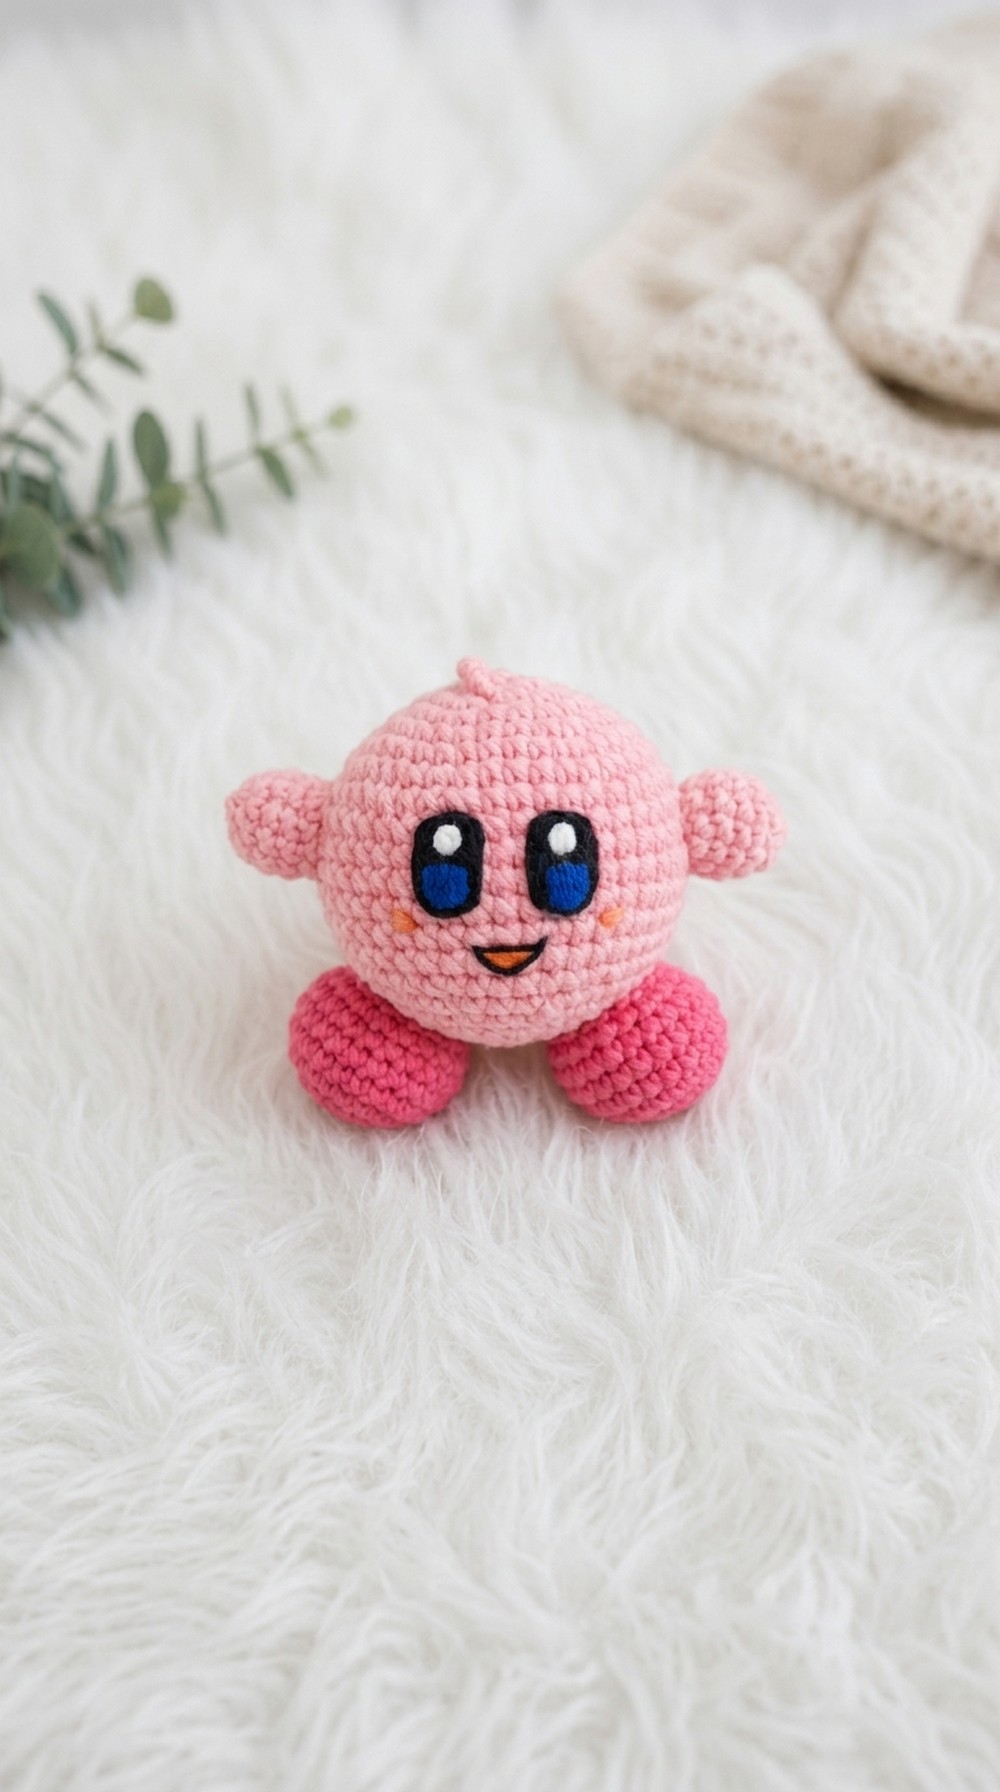
Create your very own adorable Kirby amigurumi, perfect as a keychain or decor piece. This project features charming elements such as Kirby’s iconic rounded body, his tiny arms, shoes, and cute facial details. Measuring 6 cm x 9 cm, this pattern provides precise instructions for crafting each part of the amigurumi.
Skill Level
This pattern is designed for intermediate crocheters. While the basic stitches are beginner-friendly, techniques like shaping, color changes, and assembling multiple components require prior experience with amigurumi patterns.
Materials
To complete this pattern, you will need:
- Crochet Hook: 2.5 mm
- Yarn: Cotton yarn, 2 mm in thickness, in the following colors:
- Light Pink (Body and Arms)
- Dark Pink (Shoes)
- Felt (Paño Lency): Black and Blue, for the eyes
- Fabric Paint: White, for details on the eyes
- Stuffing: Synthetic fiberfill to shape and stuff the body, arms, and shoes
- Glue: Cold silicone glue for attaching the felt parts
- Keychain Ring: Optional, for converting Kirby into a keychain
- Other Supplies: Scissors, tapestry needle, and stitch marker
Special Stitches
- Magic Ring: A technique for starting crochet projects in the round with a tightly adjustable loop. This prevents any gaps in the center of the circle.
- Chain (Ch): A basic crochet stitch used as a foundation or to work across, especially in flat pieces.
- Decrease (Dec): Combine two consecutive stitches into a single stitch, reducing the stitch count and creating shaping.
Stitch Abbreviations
- ch: Chain
- sc: Single Crochet
- st: Stitch
- inc: Increase (work 2 sc in the same stitch)
- dec: Decrease (crochet 2 stitches together)
Useful Tips
- Consistent Tension: Use even tension to avoid uneven shapes. Tight tension is preferred for amigurumi projects to avoid gaps in the stitches.
- Use a Stitch Marker: Mark the first stitch of each round to help track progress, as this project requires working in continuous rounds.
- Stuff Firmly: Gradually add stuffing as you complete each section for smoother results. Avoid overstuffing, especially for small parts like the arms and shoes.
- Prepare Felt Details: Cut out the felt pieces for the eyes as instructed so they’re ready for attachment during assembly.
Pattern Instructions
Body (Light Pink Yarn)
The body is worked in continuous rounds. Use a stitch marker to indicate the beginning of each round. Stuff as you go to maintain the shape.
- R1: Create a magic ring and crochet 6 sc into it (6 sc).
- R2: Work 1 inc in each st (12 sc).
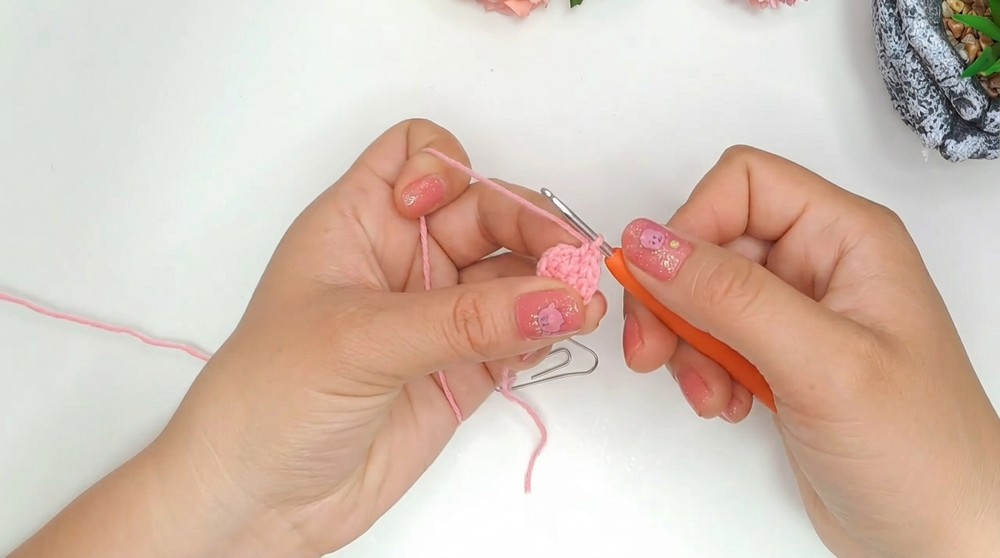
- R3: [1 sc, inc]; repeat 6 times (18 sc).
- R4: [2 sc, inc]; repeat 6 times (24 sc).
- R5: [3 sc, inc]; repeat 6 times (30 sc).
- R6: [2 sc, inc, 4 sc, inc]; repeat 5 times, end with 2 sc (36 sc).
- R7: [5 sc, inc]; repeat 6 times (42 sc).
- R8–R14: Work 1 sc in each st (42 sc per round).
- R15: [5 sc, dec]; repeat 6 times (36 sc).
- R16: [2 sc, dec, 4 sc, dec]; repeat 5 times, end with 2 sc (30 sc).
- R17: [3 sc, dec]; repeat 6 times (24 sc).
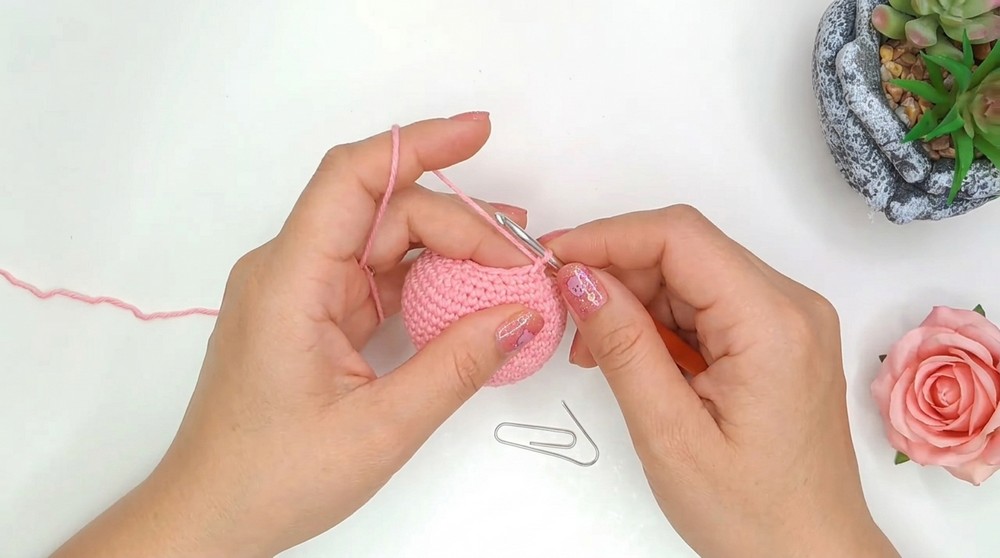
- R18: [2 sc, dec]; repeat 6 times (18 sc).
- R19: [1 sc, dec]; repeat 6 times (12 sc).
- R20: [1 sc, dec]; repeat 4 times (8 sc).
Using your remaining thread, sew the opening on the body closed.
Arms
Make 2 arms using light pink yarn.
- R1: Create a magic ring and crochet 8 sc into it (8 sc).
- R2: [3 sc, inc]; repeat 2 times (10 sc).
- R3–R5: Work 1 sc in each st (10 sc per round).
Finish off and leave a long tail for sewing during assembly.
Shoes
Make 2 shoes using dark pink yarn.
- R1: Chain 6 ch. Starting in the 3rd chain from the hook, work:
- 2 sc in the same st, 3 sc (1 in each ch), 2 sc in the last chain,
- Turn and work along the opposite side of the foundation chain: 2 sc, 3 sc, and 1 inc (14 sc).
- R2: Work [1 sc, 1 inc]; repeat 7 times (21 sc).
- R3–R4: Work 1 sc in each st (21 sc per round).
- R5: Work [5 sc, 1 dec]; repeat 3 times (18 sc).
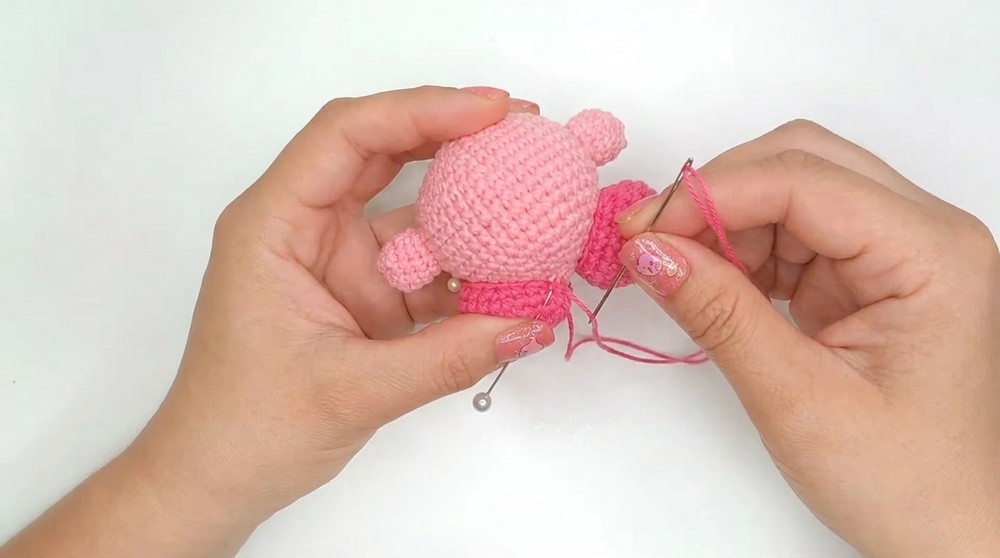
Stuff the shoes lightly and leave a long tail for sewing during assembly.
Assembly and Sizing
Once all parts are crocheted and stuffed, it’s time to assemble Kirby. Follow these steps carefully to achieve the correct positioning and final look:
Arms
- Position the arms directly below Row 8 of the body, leaving a gap of 20-21 stitches between each arm. Use pins to secure them temporarily if necessary.
- Use the yarn tail from the arms to sew them to the body using a tapestry needle. Ensure they are firmly attached, and tie off the yarn by weaving it under the seam to secure.
Shoes
- Place the shoes two rows below the arms. The curved ends of the shoes should face upward.
- Sew the shoes to the body using the yarn tail, stuffing the shoes lightly as you sew to maintain their shape.
Face Detail
- Cut oval shapes from black felt for Kirby’s eyes, and smaller blue shapes for the inner eye details. Attach the felt eyes directly under Row 8, keeping them spaced 2 stitches apart for placement.
- Use cold silicone glue to attach the felt to the body firmly. Allow the glue to dry completely.
- Use fabric paint to add a small white highlight to each eye for a lifelike appearance.
- Embroider Kirby’s mouth and cheeks using embroidery thread or yarn. Place the mouth between the eyes, slightly curved, and the cheeks just at the sides of the mouth for added cuteness.
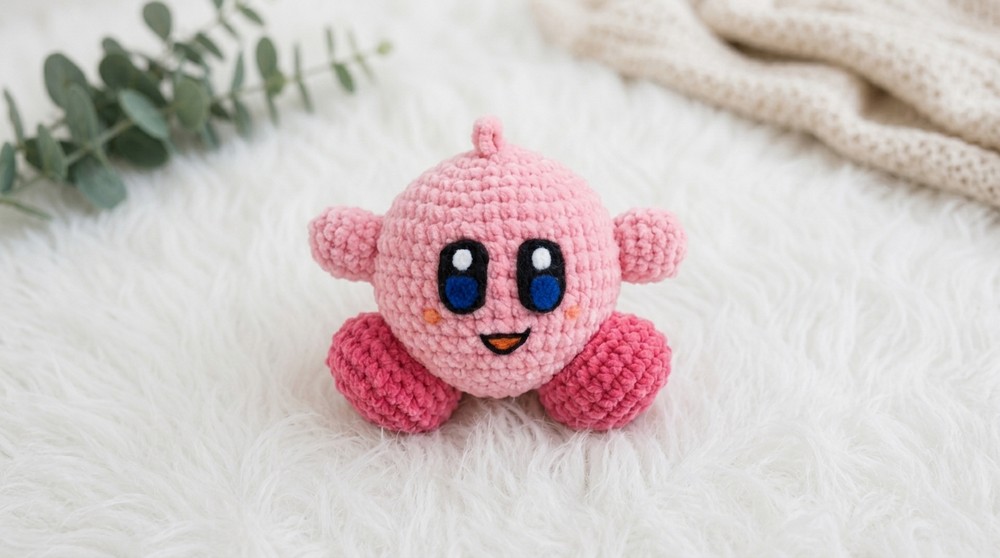
Final Size
- Dimensions: The finished Kirby amigurumi should measure approximately 6 cm tall and 9 cm wide, making it perfect as a keychain, decoration, or collectible.
Conclusion
This Kirby amigurumi pattern features beginner-friendly designs with intermediate-level assembly for creating Kirby’s signature rounded body and playful accessories. The added felt details and small embroidered touches bring Kirby to life, making it a delightful project for fans or a thoughtful handmade gift.
https://youtu.be/1YUhFG3zd1Y