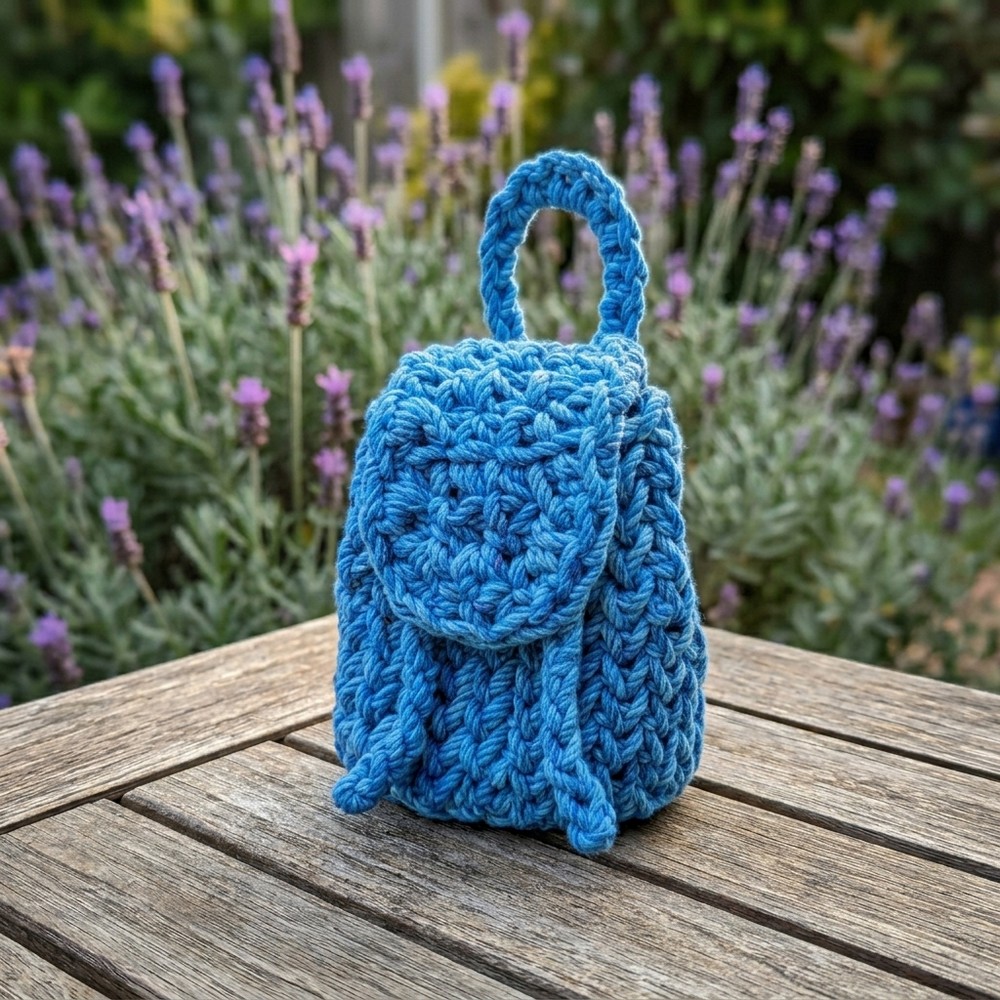
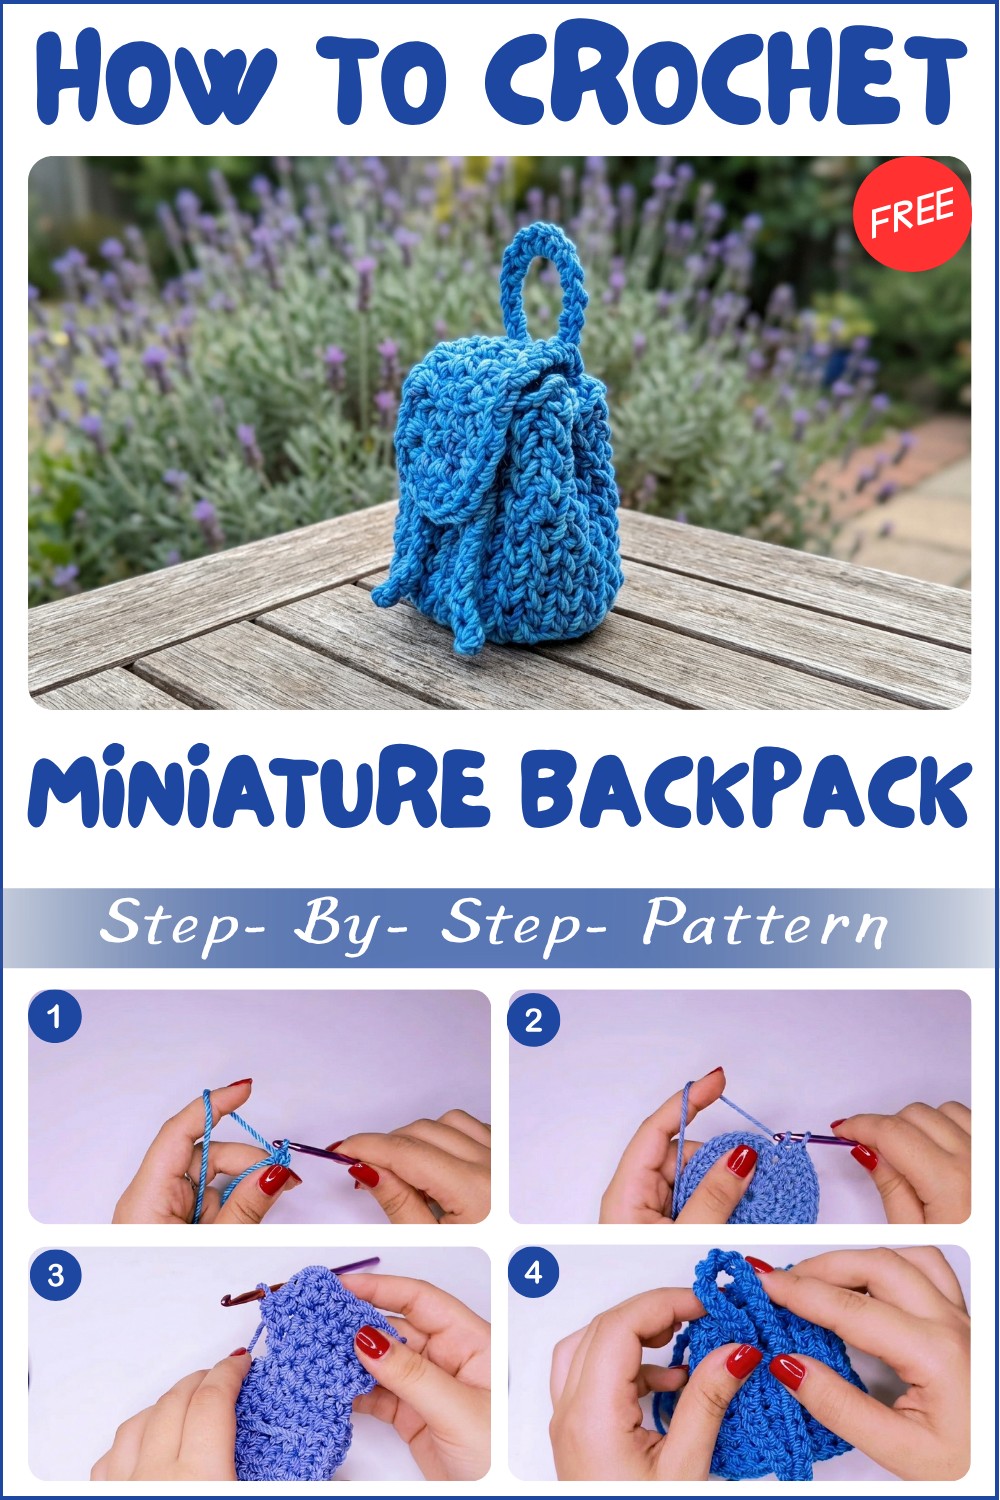
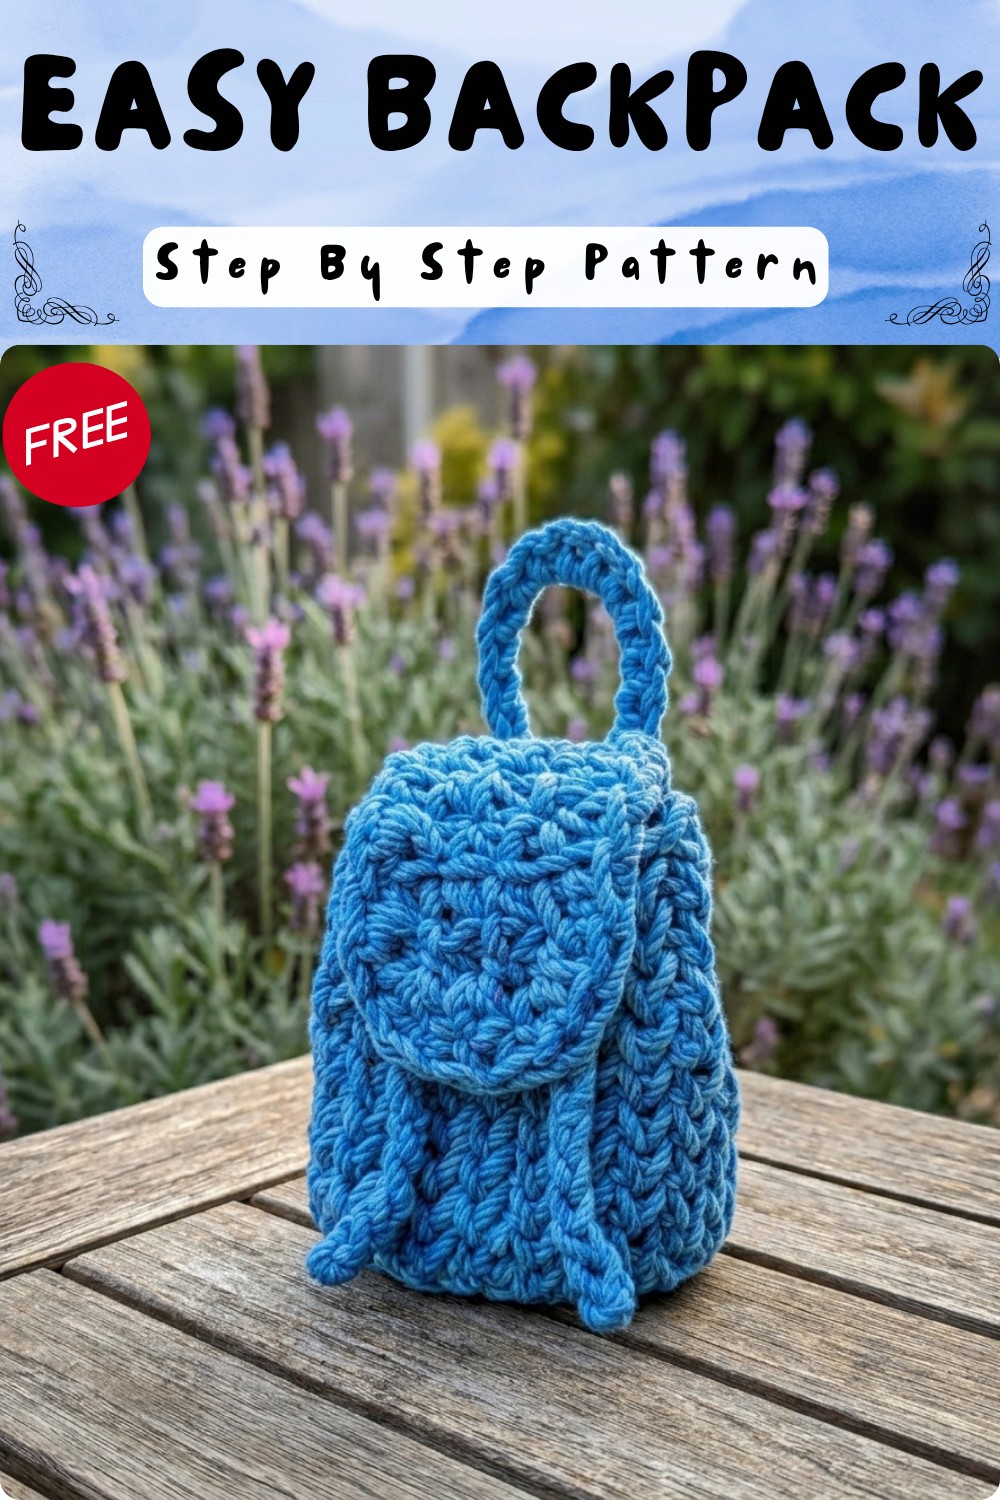
Free Crochet Miniature Backpack Pattern With Neat Flap
Making tiny things with yarn is really fun, and one cool project is a small backpack you can carry or decorate with. The free crochet miniature backpack pattern helps you make a tiny bag that looks just like a real one, but in a small size. You can use this pattern to create not only a backpack but also little purses or pouches by changing some parts. It’s a simple project that anyone, even kids, can enjoy making.
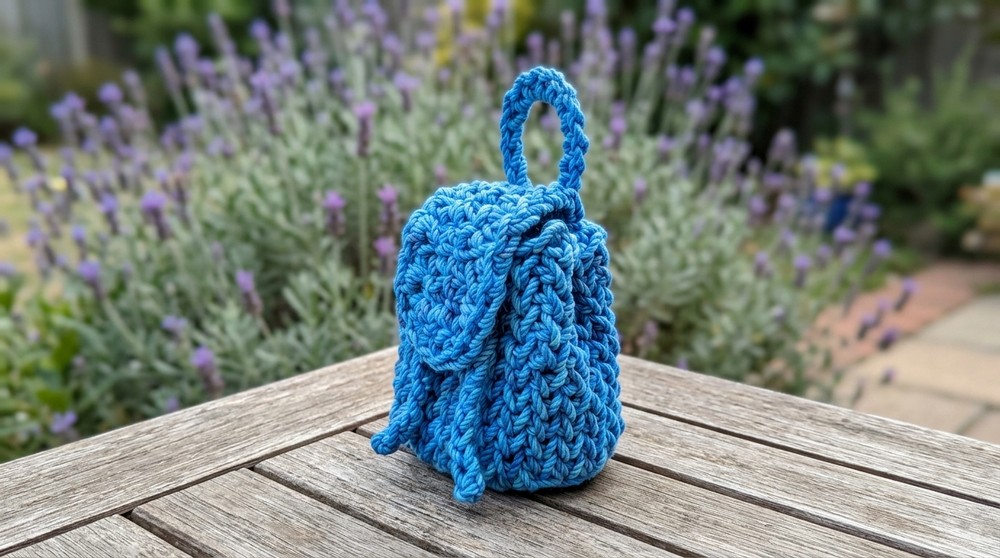
This miniature backpack is very cute and has a neat shape just like a real backpack. You can use different colors like bright red, soft pink, or cool blue to make it your own special style. You can make it small enough to fit on a shelf as decoration, or bigger if you want to carry small things like keys, coins, or lip balm. The texture feels soft but strong so it holds its shape well. The tiny straps and zipper details make it look very real and fun. This little backpack looks great anywhere you keep it.
Cute Crochet Miniature Backpack Free Pattern
The most important stitch in this pattern is the single crochet stitch. This stitch is easy to learn and makes a firm fabric that keeps everything inside safe. You will also learn how to make small straps and pockets, which is fun and helps you practice new skills. This project is great for beginners or anyone who likes to try new crochet ideas.
This miniature backpack is a lovely gift for friends or a nice toy for children. It can also be used as a cute decoration on your desk or in your room. If you want to make something small and useful that looks cool and is easy to make, this free crochet miniature backpack pattern is perfect for you. Give it a try and enjoy making your own little backpack today.
Mini Crochet Backpack Pattern
Welcome to this step-by-step tutorial to create a charming mini crochet backpack! This project is beginner-friendly and practical, making it a wonderful gift, accessory, or small storage pouch. You’ll use basic stitches and straightforward increases to form a durable bag, finished off with a sturdy cord closure, backpack straps, and a neat flap. Follow this pattern to create a stylish and useful mini backpack—perfect for keys, small trinkets, or even as a doll accessory.
How you start & what stitches are used:
You’ll start with a short chain, working oval-shaped rounds in single crochet (sc), using increases for shaping. The body is worked in continuous spirals, while the cord and straps are simple chains. All main construction relies on the single crochet stitch—easy and tidy!
Skill Level & Terminology
- Skill Level: Beginner
- Terminology: US Crochet Terms
Materials & Tools
- Worsted or Aran weight cotton or acrylic yarn (approx. 50g)
- 5.0 mm crochet hook
- Yarn needle
- Scissors
- Measuring tape or ruler
- Stitch markers (optional for rounds)
Gauge
Gauge is not critical for this pattern, but for reference:
- 10 sc × 10 rows ≈ 2″ × 2″ (5 × 5 cm) with 5 mm hook
Aim for a firm, dense fabric so your backpack holds its shape.
Abbreviations List
| Abbreviation | Stitch |
|---|---|
| ch | chain |
| sc | single crochet |
| inc | increase (2 sc in st) |
| st(s) | stitch(es) |
| sl st | slip stitch |
| BL | back loop |
Special Stitch Instructions
- Single Crochet in Back Loop (sc in BL): Insert your hook into the back loop only (the loop farthest from you) and make a single crochet as usual.
- Increase (inc): Work 2 single crochet stitches in the same stitch to expand the row or round.
Finished Size
- Height: 10 cm (4”)
- Width: 7 cm (2 ¾”)
- Strap Length: 35 cm (14”) each (customizable)
The Pattern
BASE & BODY
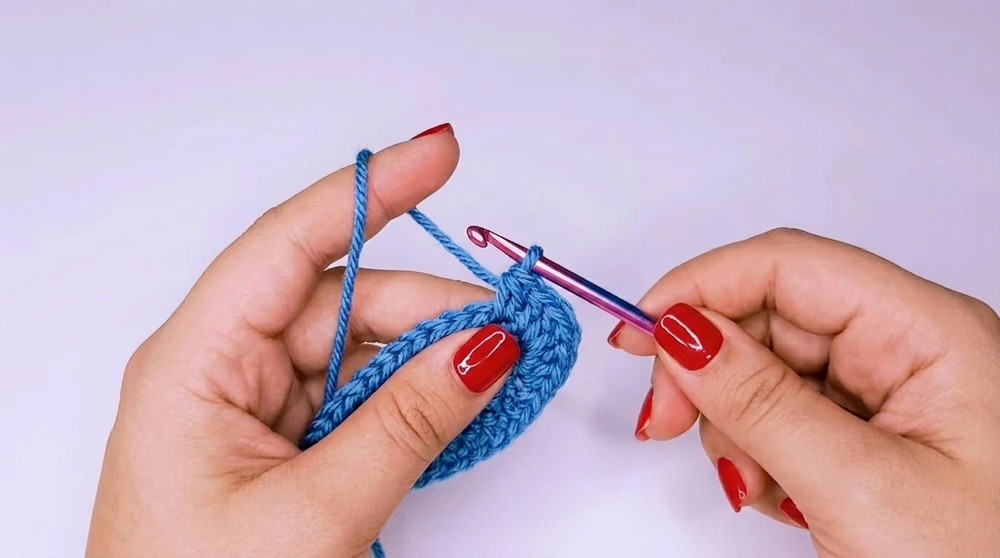
Round 1:
- Make a slip knot (sl st) and ch 6.
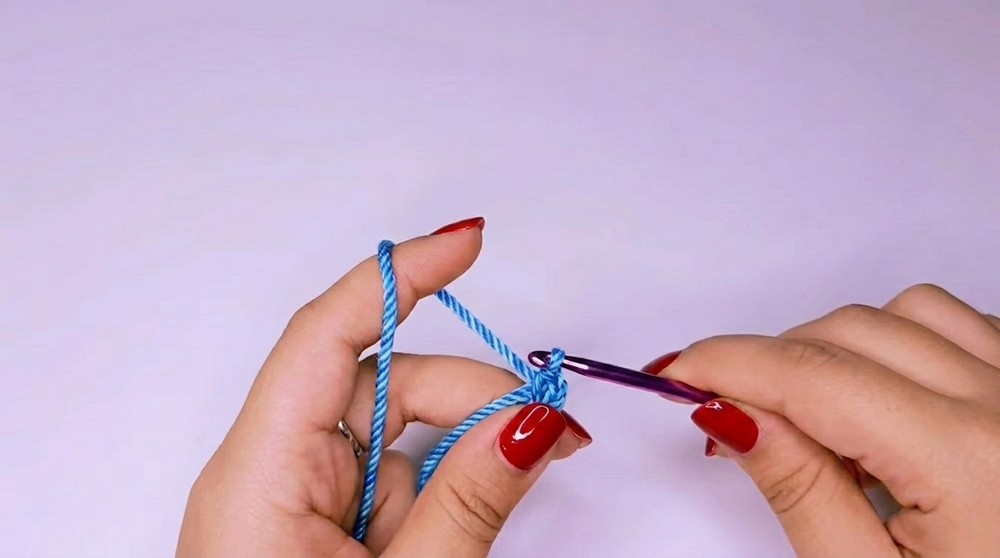
- Working into the chain:
- Sc in 2nd ch from hook and next 3 ch (4 sc).
- 3 sc in last ch (this will curve around the end).
- Rotate and continue working on opposite side:
- Sc in next 3 ch (along other side).
- 2 sc in first ch (now both ends rounded).
- Total: 12 sc
This forms an oval base. If you’re not a pattern reader, you start by working stitches along both sides of the initial chain for an oval.
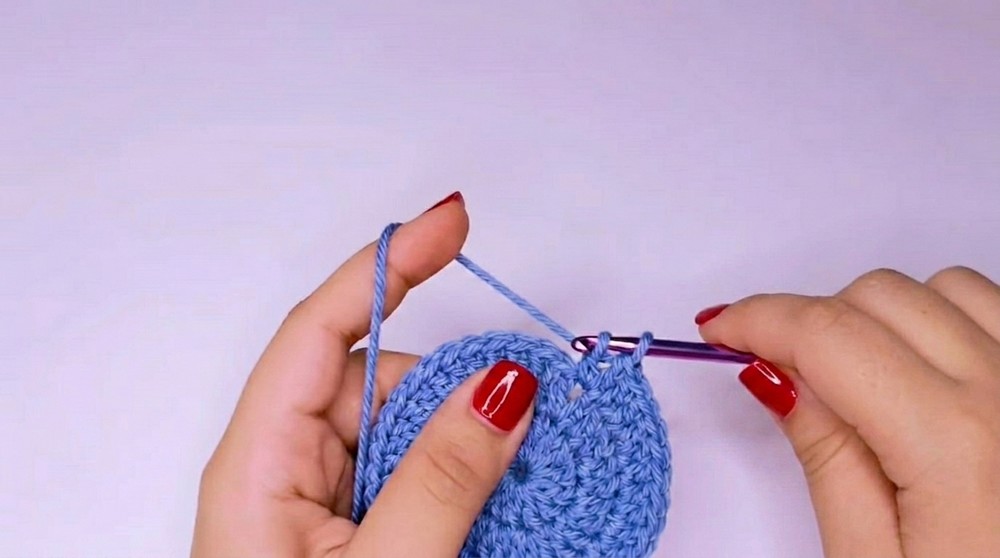
Round 2:
- Work in the space between both loops (for neat edge):
- 2 sc in first st (increase).
- Sc in next 3 sts.
- (2 sc in next st) x 3.
- Sc in next 3 sts.
- 2 sc in last 2 sts
- Total: 18 sc
Here you increase at both ends and along sides for a gently widening oval.
Round 3:
- 2 sc in first st, 1 sc in next st (repeat for end increases).
- 1 sc in next 3 sts
- (2 sc in st, 1 sc in next st) x 3
- 1 sc in next 3 sts
- (2 sc in st, 1 sc in next st) x 2 (finish round)
- Count: 24 sc
From here, your oval has expanded. Increase regularly at ends for a smooth base.
Round 4 (Optional for larger size):
- Continue working increases at rounded ends in same manner, or proceed to next step for stated size.
BODY
Next Round:
- Work in the Back Loop Only (BL):
- Sc in BL of every st around (no increases).
- Join with sl st to first st if needed, or continue in spiral for seamless body.
Working in the BL creates a crisp bottom edge.
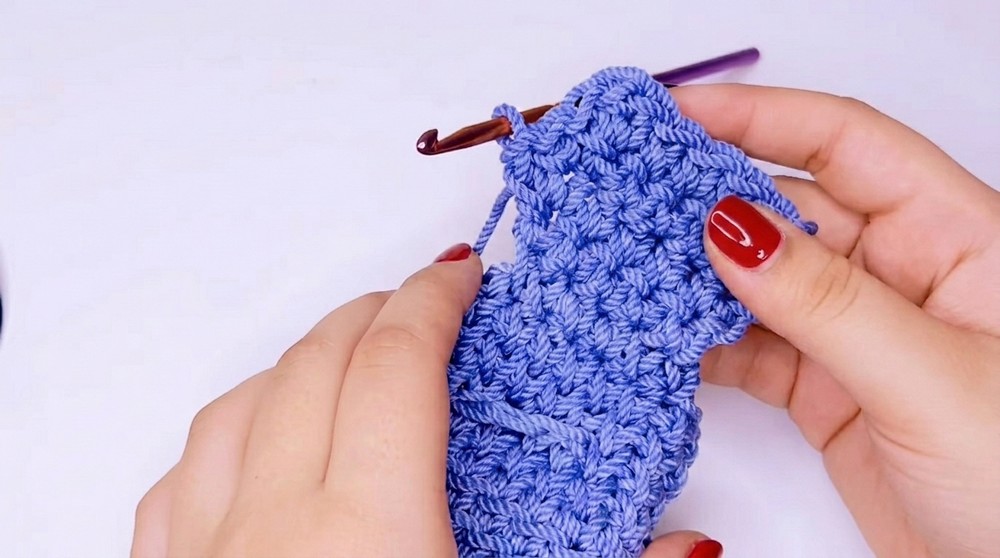
Body Rounds:
- Sc in each st around, working in the usual way (under both loops), until the body measures 10 cm (4”) in height from the base.
Continue without increases to grow the sides. Try to keep your seam straight for a neat finish.
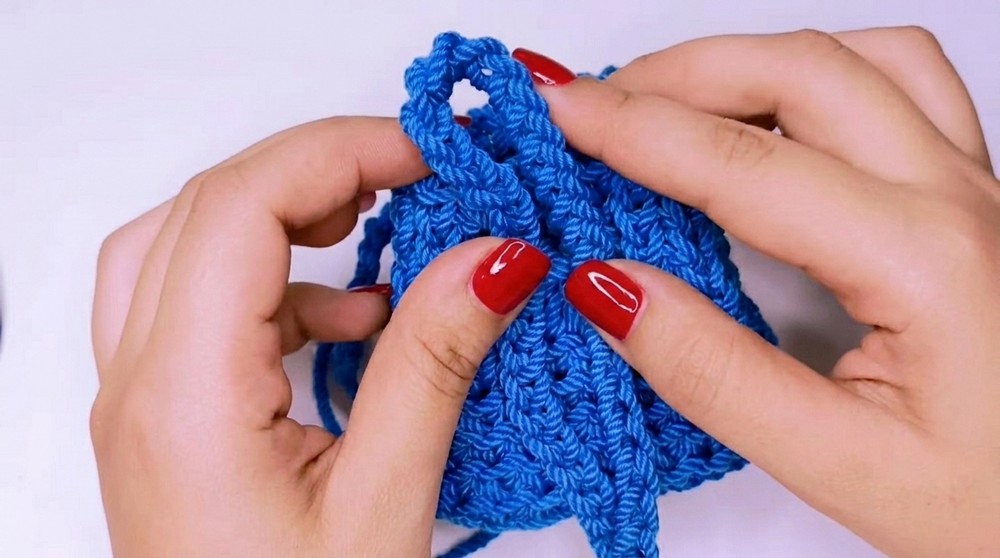
DRAWSTRING CORD
- Ch a length of about 35 cm (14”) (you can measure around your bag’s opening for accuracy).
- Fasten off and use a yarn needle to weave the cord in and out around the top row of stitches (skip every other stitch for a classic drawstring look).
- Pull tightly to close, then tie ends.
If you’re not a pattern reader: crochet a long chain and thread it through the top of your bag to act as a drawstring closure.
BACKPACK STRAPS
- Make 2 straps:
- Ch to 35 cm (14”) (or preferred strap length).
- Fasten off.
- Sew or knot each strap securely to the top and bottom corners of the bag’s back.
If you’re not a pattern reader: just chain two separate cords, attach one end to the top and the other end to the bottom to form backpack straps.
FLAP
- Attach yarn to the center back edge of the opening:
- Row 1: Sc evenly across back edge (width about half the bag’s opening, e.g., 6–7 sc).
- Row 2–(as needed): Ch 1, turn. Sc in each st across.
- Continue in rows until flap covers about ⅓ of the bag’s height or to preference (usually 3–4 cm).
- Fasten off.
- Edging: Sc around two sides of flap for a neat finish.
The flap closes over the opening for extra security. You can add a snap or button if you wish.
Assembly & Finishing
- Insert and weave drawstring cord through top edge; tie or knot ends.
- Sew/secure straps evenly at the back (top and bottom corners).
- Sew or crochet the flap to the back panel, then add edging as described.
- Weave in all yarn ends with a needle.
- Shape bag and straps gently; block if desired (optional).
Conclusion
Congratulations on finishing your adorable mini crochet backpack! This bag uses only simple stitches and methods but results in a functional, cute accessory. Adjust size, color, or decorations such as beads or patchwork for your own unique version. Share your work and enjoy the delight of handmade crochet creations.