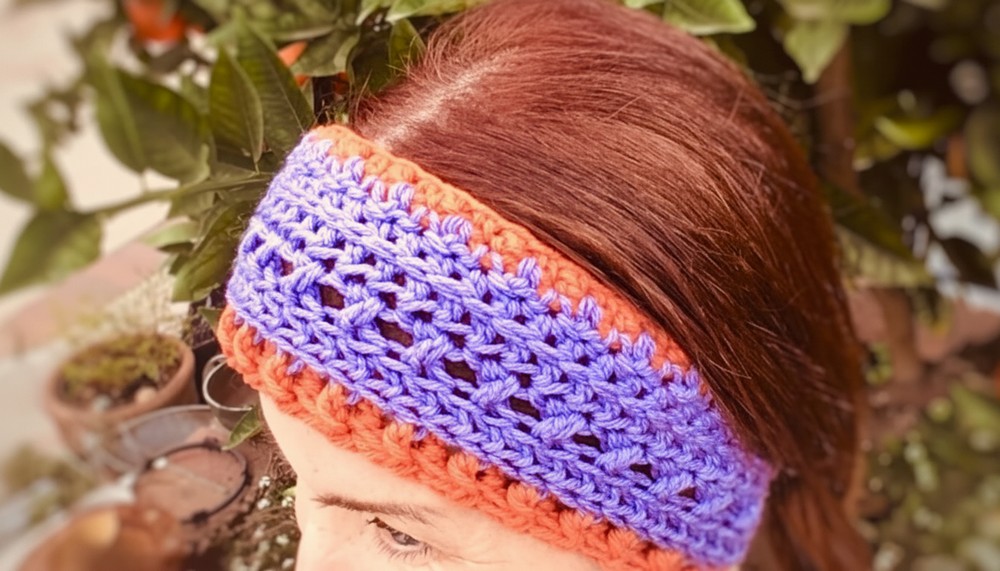
Textured Headband Crochet Pattern – Free & Stylish
Softness meets texture in free crochet textured headband pattern, inviting you to easily create a charming cozy accessory for everyday style.
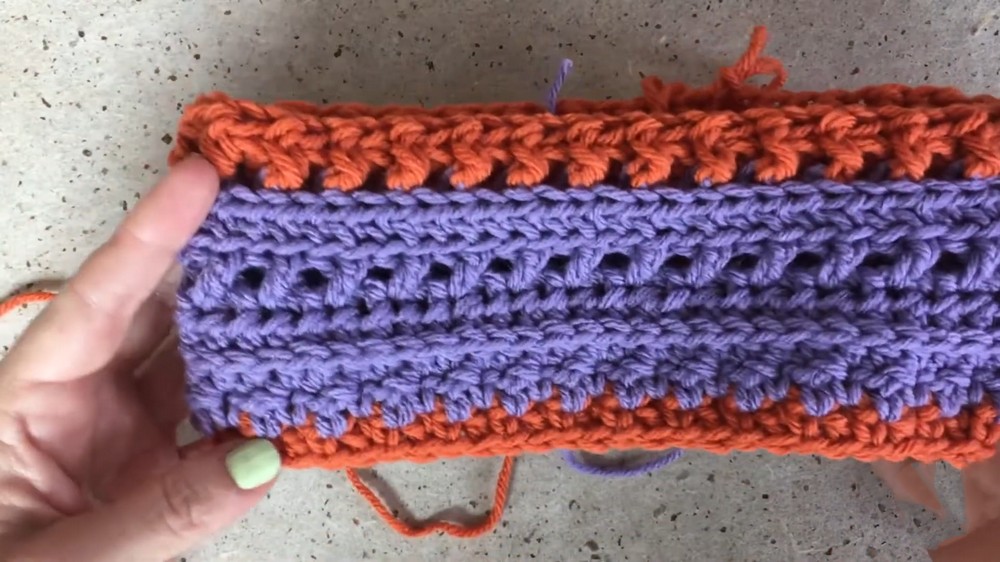
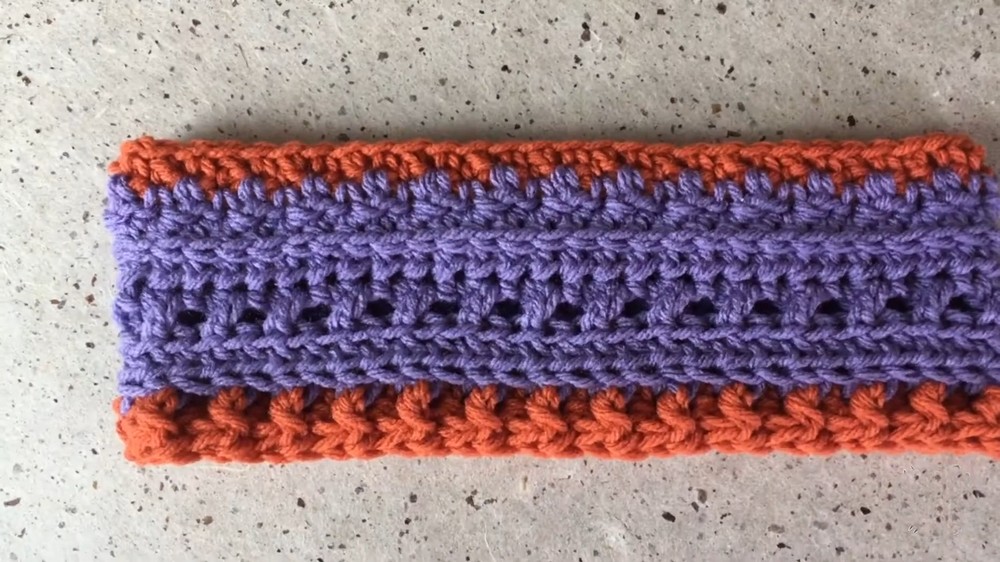
A hand reaches out for a soft band that shines with texture and charm. The crochet textured headband pattern brings comfort, warmth, and a gentle touch of style to any day. A raised stitch design creates a unique look, making this headband stand out and feel special for anyone who wears it. The headband keeps hair neat and ears protected during cool days, offering both beauty and useful support.
Stylish & Free Crochet Textured Headband Pattern
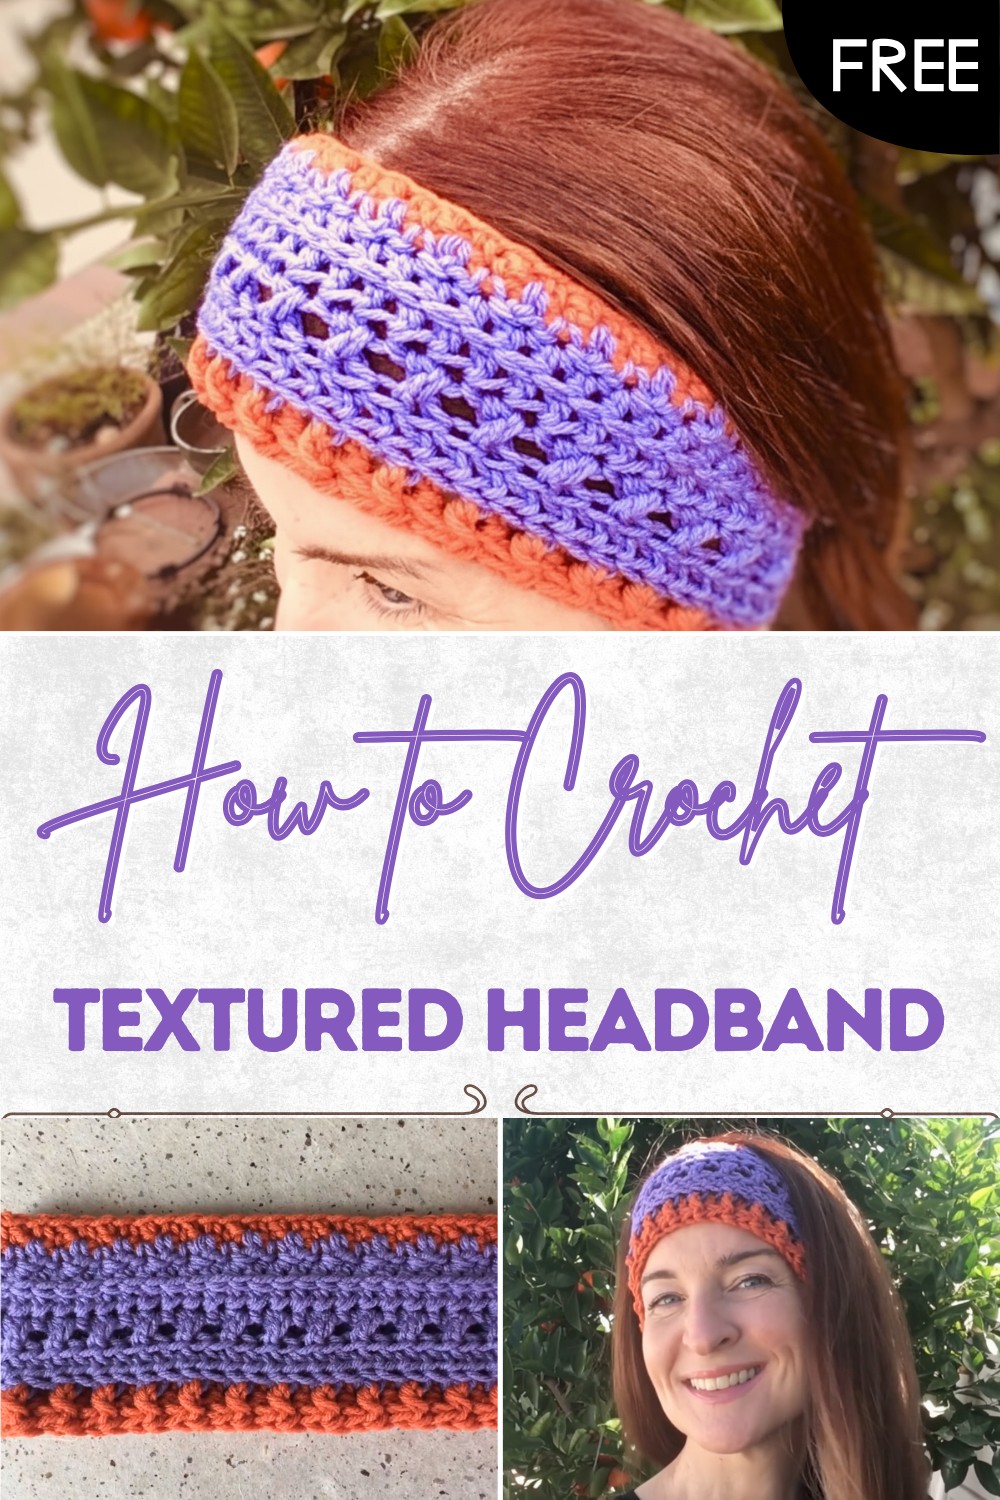
Bright color and bold patterns turn it into a small work of art, easy to pair with simple or festive clothes. Whether it’s made as a gift or for yourself, this pattern has a gentle stretch so it fits well and feels comfortable. With easy steps, making your own headband is simple, giving everyone a chance to pick a favorite color and enjoy a handmade treasure. Creating and wearing this band brings smiles and makes everyday moments warmer and more joyful.
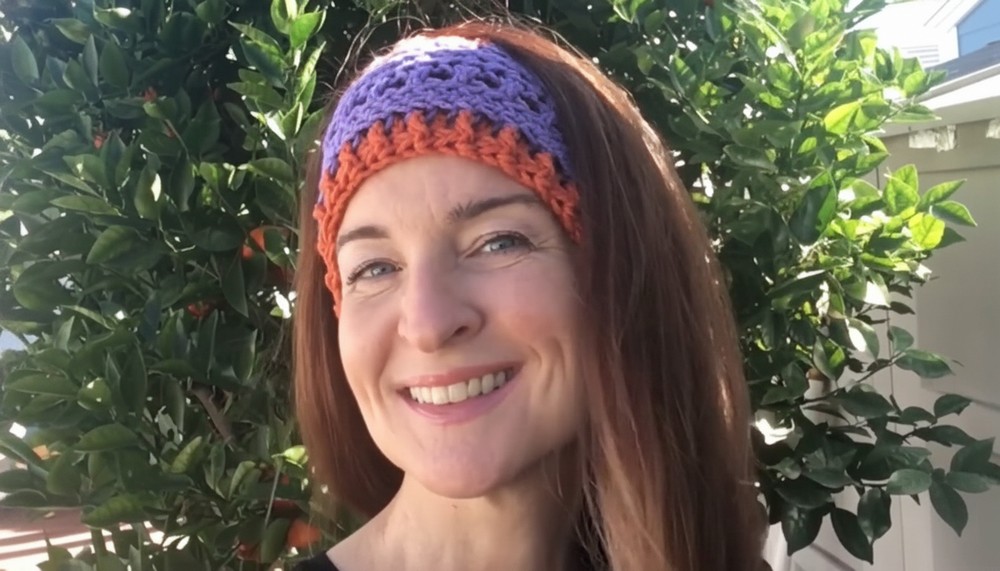
Star Crossed Headband
Materials
- Yarn: Size 4 (worsted weight) yarn, small amounts in 2 colors
- Hook: Size J (6 mm) crochet hook (or size needed for a snug fit)
- Notions: Yarn needle, scissors, measuring tape
Key Abbreviations (US Terms)
| Abbreviation | Meaning |
|---|---|
| ch | chain |
| sc | single crochet |
| dc | double crochet |
| hdc | half double crochet |
| sl st | slip stitch |
| FP hdc | front post half double crochet |
| BP hdc | back post half double crochet |
| BLO | back loop only |
| FLO | front loop only |
| rep | repeat |
| st(s) | stitch(es) |
Special Notes
- The headband is worked flat then joined in the round after Row 1.
- Choose a starting chain that fits snugly around your head, stretched slightly, with an odd number of chains.
- Alternate colors as described for contrast.
- Gaps at the joining/starting chain are sewn closed at the end.
Pattern
1. Foundation
- With Color A, ch a snug, odd number to fit around your head (e.g. 57).
- Turn, sc in 2nd ch from hook, dc in next ch.
- Sc in next ch, dc in next ch; rep from * to end. Last st should be dc in last ch.
2. Join & Change Color
- Bring ends together (no twist) and join with sl st to first st of row. Change to Color B when joining:
Insert hook into first st, pull up loop of new color and finish sl st.
3. Lemon Peel Stitch Row
- With Color B, ch 1, turn.
- Skip turning ch and joining st.
- Sc in next st, dc in next st; sc in next, dc in next to end.
- Last stitch is dc in same st as your join.
- Sl st to first st.
4. Hdc Row
- Ch 1, turn.
- Skip turning ch and joining st.
- Hdc in first st and each st around.
- Last hdc goes in same st as join.
- Sl st to first st.
5. Camel Stitch Row (Third Loop Hdc)
- Ch 1, turn.
- Skip turning ch and joining st.
- Work hdc in third/front loop (beneath top V on front side) of each stitch around for camel stitch effect.
- Last hdc in third/front loop of same st as join.
- Sl st to first st.
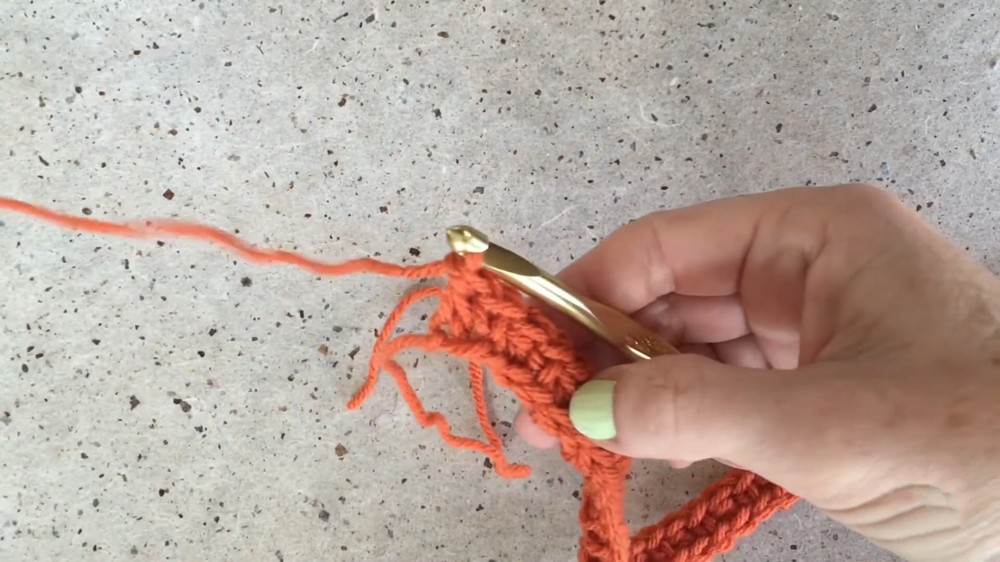
6. Crossed Double Crochet Row
- Ch 2, turn.
- Skip turning ch and joining st.
- Skip next st, dc in next st, yarn over, insert hook from the back around post of just-made dc into skipped st, yo, pull up loop, complete dc (crossed dc made).
- Rep from * around.
- For final cross: first leg (dc) goes in same st as join.
- Ignore ch-2, sl st to first dc.
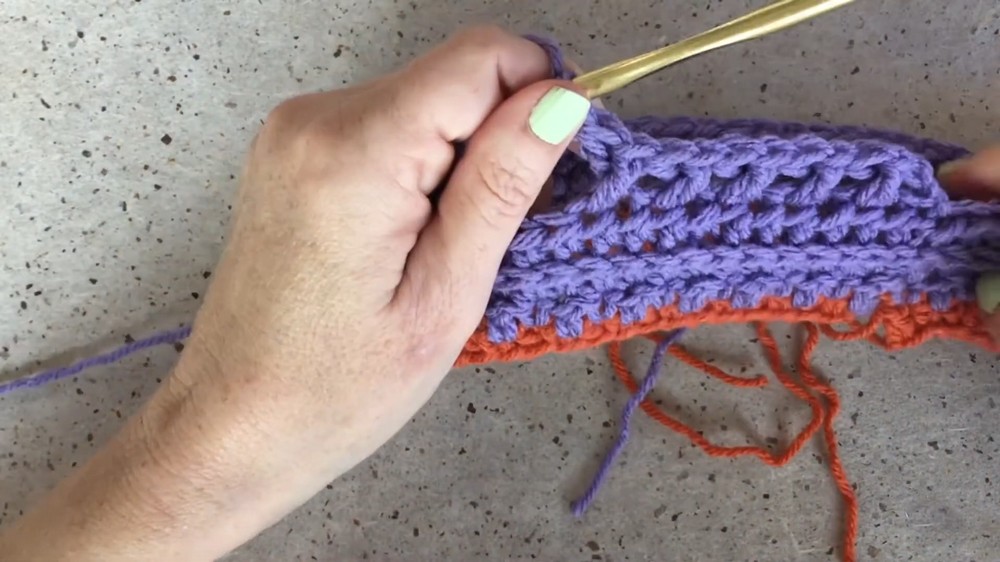
7. Hdc in Front Loop Only Row
- Ch 1, turn.
- Skip turning ch and joining st.
- Hdc in front loop only of each st around.
- Last hdc in FLO of same st as join.
- Change to Color B on last st.
- Sl st to first st.
8. Hdc in Back Loop Only Row (Color B)
- With Color B, ch 1, turn.
- Skip turning ch and joining st.
- Hdc in back loop only (BLO) of each st around.
- Last hdc in BLO of same st as join.
- Sl st to first st.
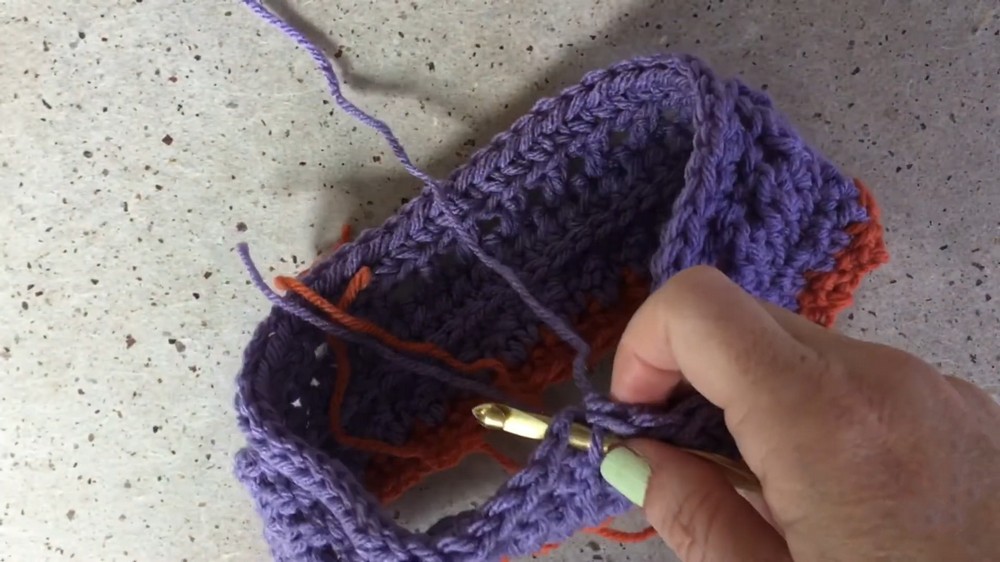
9. Ribbed Edging (FP/BP Hdc)
- Ch 1, turn.
- Skip turning ch and joining st.
- FP hdc around next st, BP hdc around next st; rep from * to end.
- End with BP hdc.
- Sl st to first st. Fasten off.
Finishing
- Sew closed the gap at the foundation chain with the tail.
- Weave in all ends with yarn needle.
Conclusion
You now have a beautifully textured, stretchy, and warm headband! This pattern uses only small amounts of yarn, works up quickly, and is a great showcase for post and cross stitches. Enjoy gifting or wearing your new accessory.
Pattern Correction & Tips
- Correction: If you end up with an even chain or off stitch count, simply skip or add one at joining to preserve the stitch pattern.
- Tips:
- For a fuller look, add another row of crossed double crochet or lemon peel before/after.
- Try a smaller hook for a tighter fit or if your yarn is especially stretchy.
- Alternate color order as desired for maximum effect.