Free Crochet Tote Bag Pattern for Shopping and Travel
Carry your essentials with this free crochet tote bag pattern that adds style and convenience to your day making every outing feel special.
A bag that feels light in your hand can make every trip easy and fun. With strong handles and a roomy inside you can carry everything you need from the market to the park or even the beach. Using a crochet tote bag pattern makes it simple to create a beautiful and useful bag with soft but sturdy stitches that last a long time. Bright or gentle colors turn each one into something special that shows off your style.
Free Crochet Tote Bag Pattern Perfect for Daily Essentials
The open shape helps you grab things quickly without any trouble so you never have to search around. Easy to fold and store when it is not needed the bag takes up little space. Its charming look gets friendly smiles from others and makes every outing more joyful. Whether you shop or visit friends this bag brings comfort and joy to your daily life and becomes a helpful friend you will always want nearby.
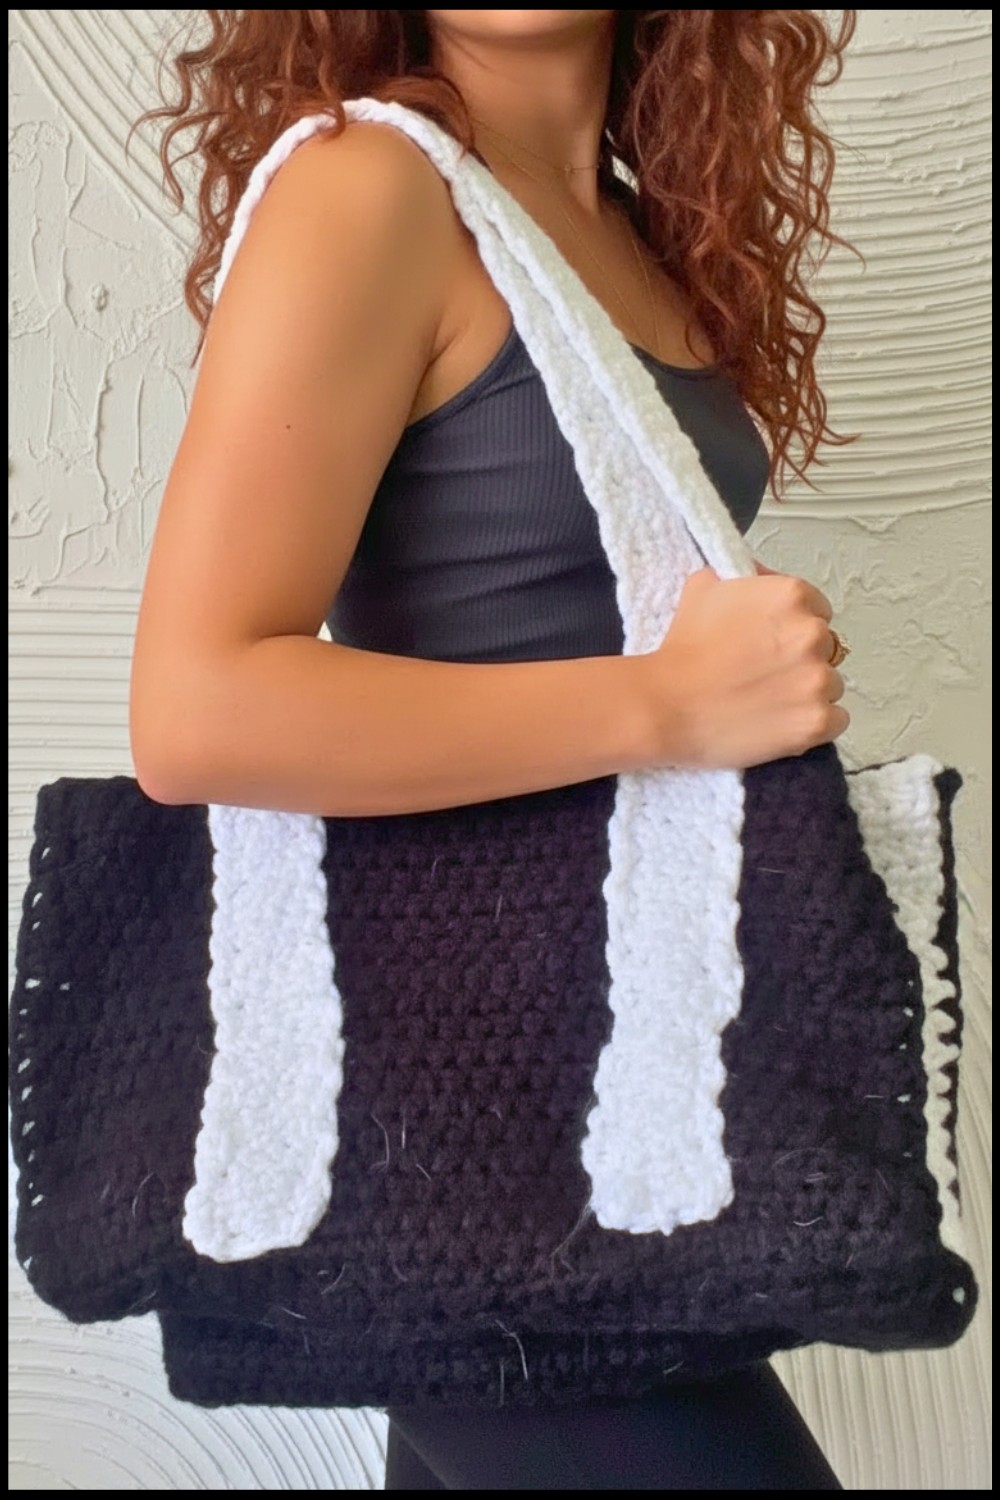
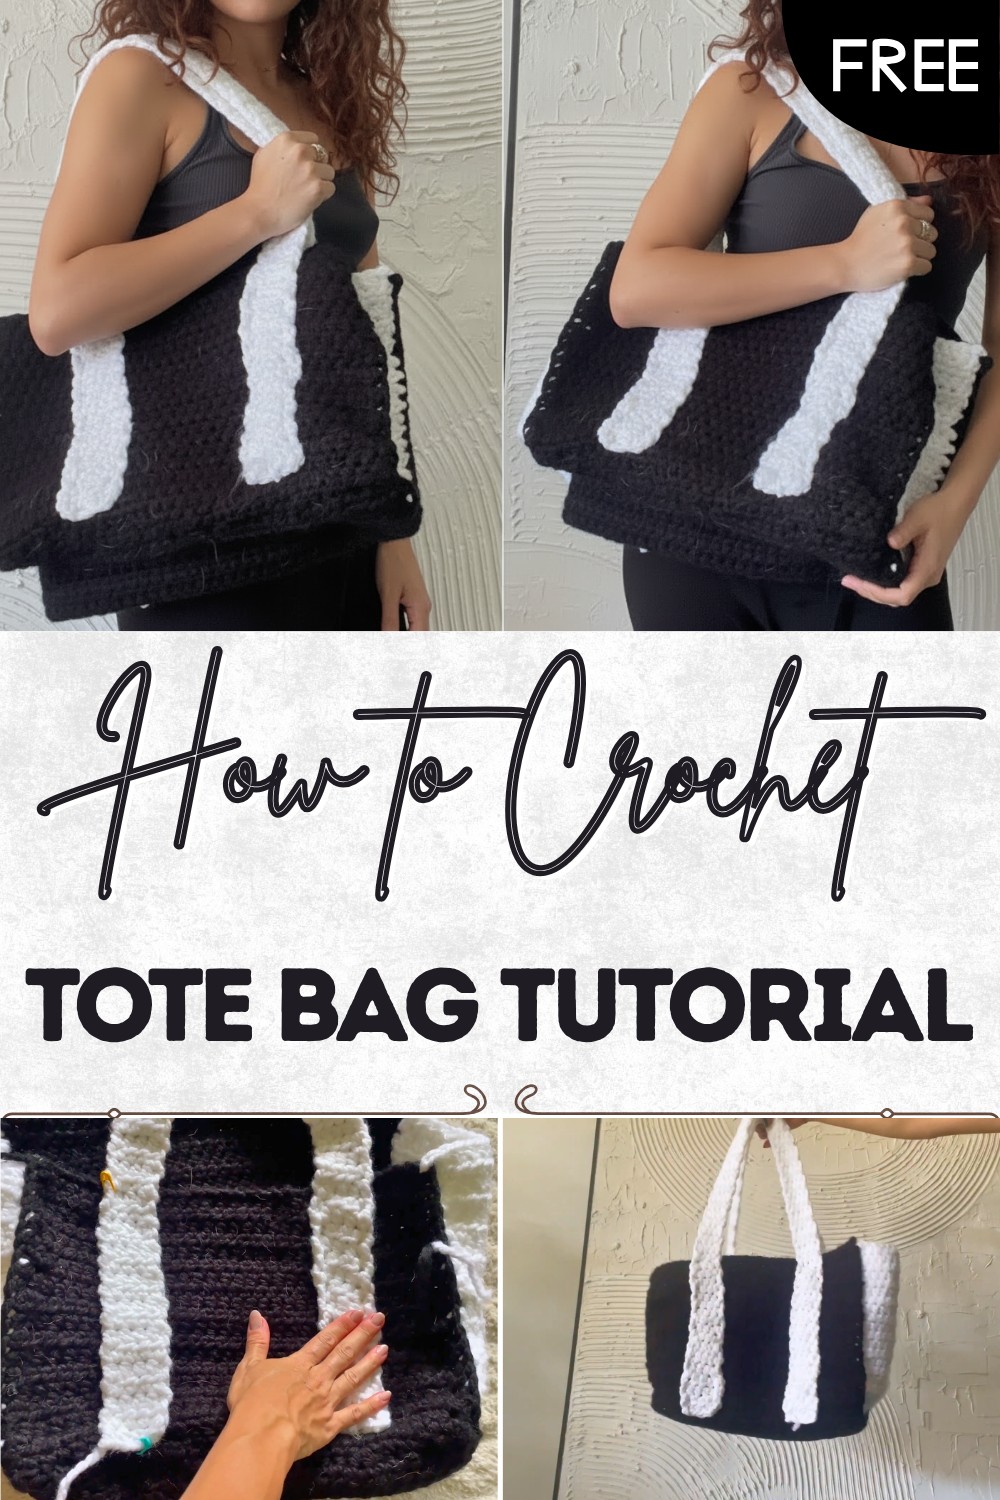
Crochet Monochrome Rectangle Tote Bag Pattern
Materials
- Yarn: Bulky weight yarn (category 5), preferably sturdy for bag structure.
- Emma used Spotlight “Abbey Road” (or any firm, chunky yarn).
- Main color: ~2 skeins for main body
- Contrast color: ~1 skein for the side and base panel
- Strap color: Can match body or contrast
- Hook: 7.0 mm crochet hook (or size needed for gauge & comfort)
- Notions:
- Stitch markers (recommended)
- Tape measure/Ruler
- Yarn needle (for sewing in ends)
- Scissors
Key Abbreviations (US Terms)
| Abbreviation | Stitch Name |
|---|---|
| ch | chain |
| st(s) | stitch(es) |
| hdc | half double crochet |
| sc | single crochet |
| sl st | slip stitch |
| rep | repeat |
| RS/WS | right/wrong side |
Special Notes
- All panels and straps are worked flat in rows of half double crochet (hdc).
- Bag size is fully customizable. Add or subtract stitches/rows for desired width/length.
- For extra strength, seam base and straps with slip stitch (as shown) instead of sewing.
- Seams are worked with visible slip stitches (can be contrast or matching yarn).
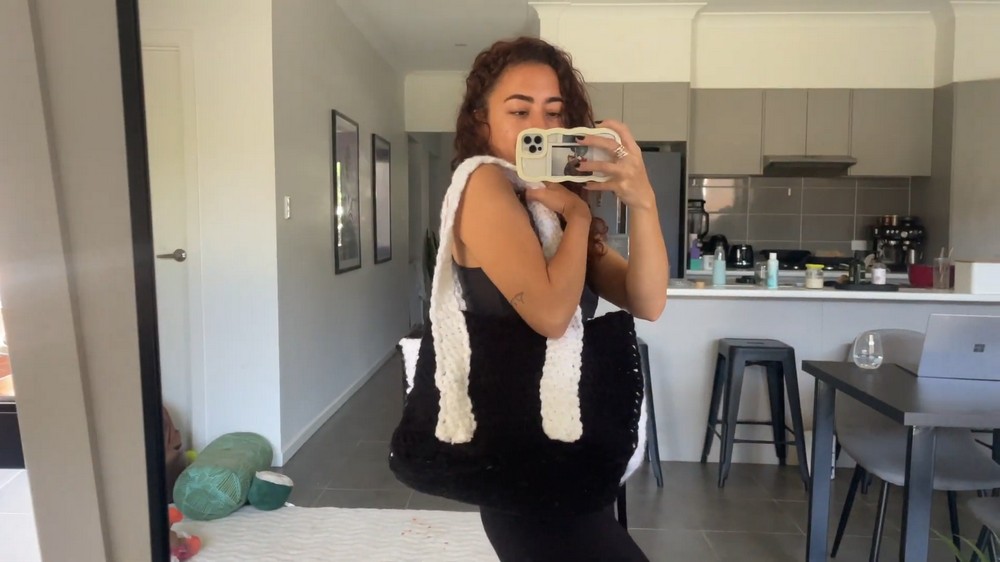
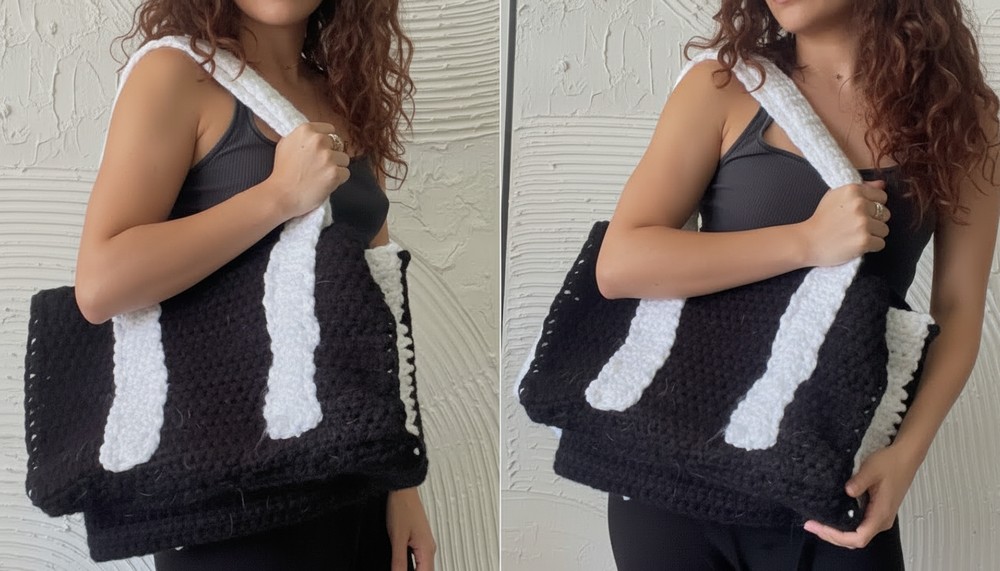
- Finished dimensions for Emma’s bag: Main panel: 39–40cm wide x 71cm long; Base panel: 15 x 85cm; Straps: 5 x 88cm.
Pattern Instructions
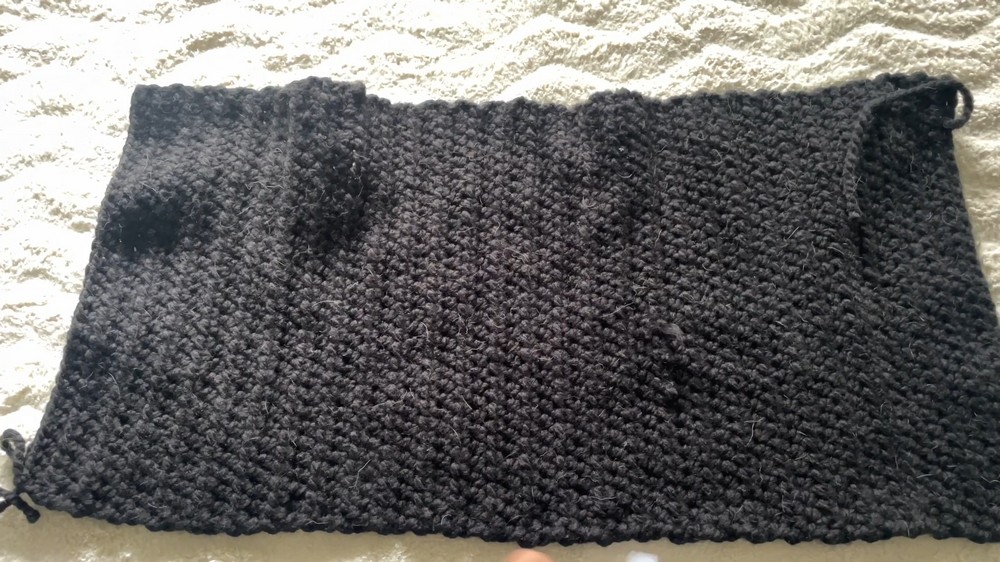
1. Main Rectangle Panel (make 1)
This forms the outer face (front, bottom, and back) in one piece.
- Ch 30 (or desired width; Emma’s = 39–40cm).
- Row 1: Hdc in 3rd ch from hook and in each ch across. (28 hdc)
- Row 2 (and all rows): Ch 2 (counts as first st), turn. Hdc in each st across.
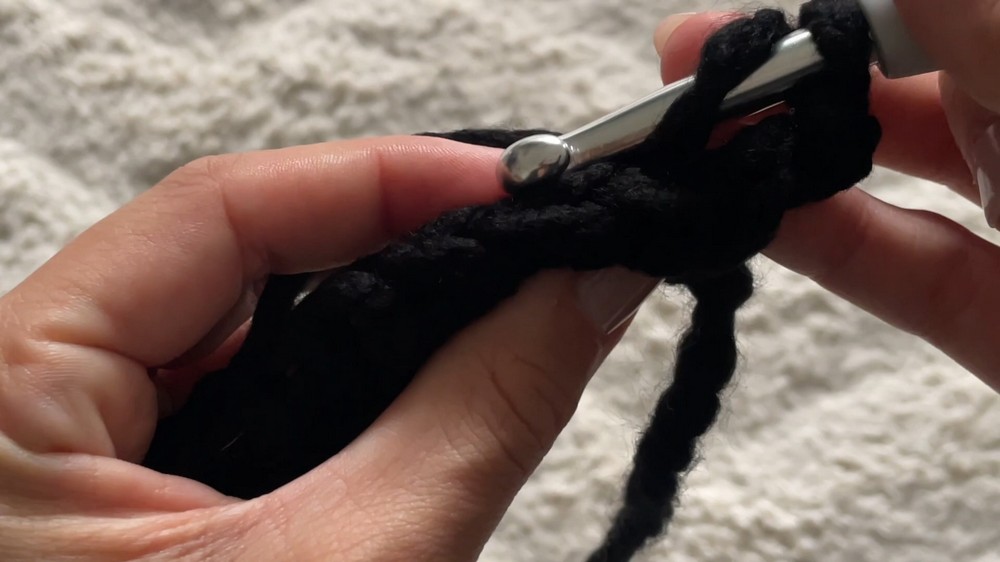
- Repeat Row 2 until panel measures approx 71cm in length (~29 rows for Emma).
- Fasten off and weave in ends.
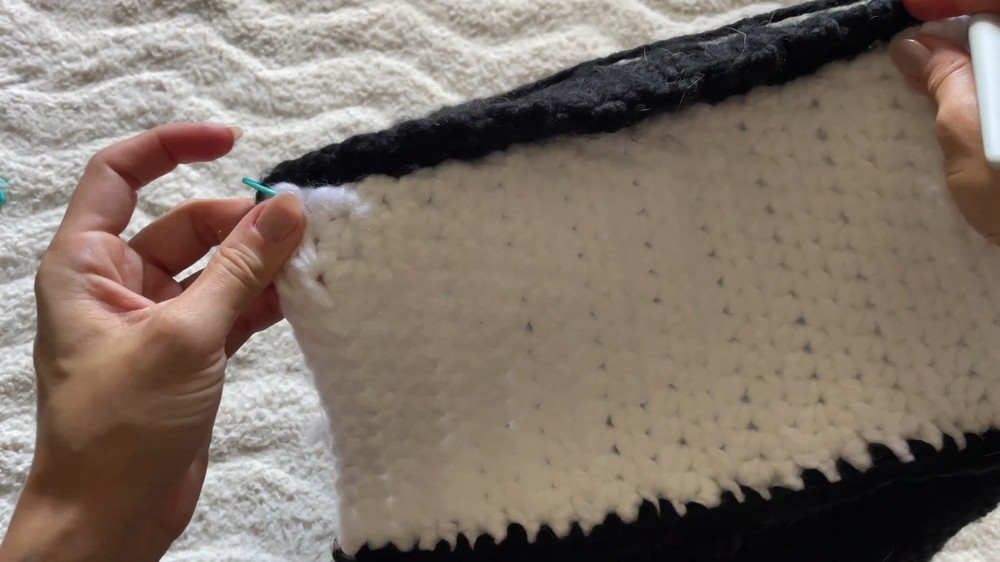
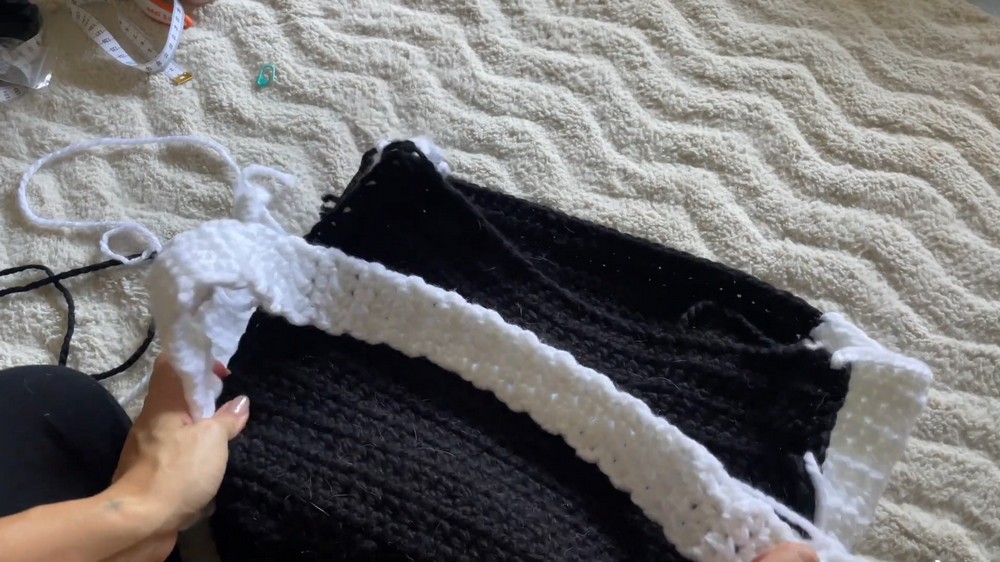
2. Base/Side (Contrast) Panel (make 1)
This wide strip forms the base and both narrow sides of your bag.
- Ch length: Make a foundation ch to match the width you want for the bag’s side/base. Emma: ch to approx. 16cm.
- Row 1: Hdc in 3rd ch from hook and in each ch across.
- Row 2: Ch 2, turn, hdc in each st across.
- Continue as for main panel until this panel is as long as the folded circumference (Emma: ~85cm, or to match the side edges of main rectangle).
- Fasten off and weave in ends.
3. Straps (make 2)
Can be customized for length and width.
- Ch 5 (for ~5cm wide strap; add more ch for wider).
- Row 1: Hdc in 3rd ch from hook and in each across.
- Row 2: Ch 2, turn, hdc in each st across.
- Repeat Row 2 until the strap measures your preferred length (Emma: 88cm).
- Fasten off.
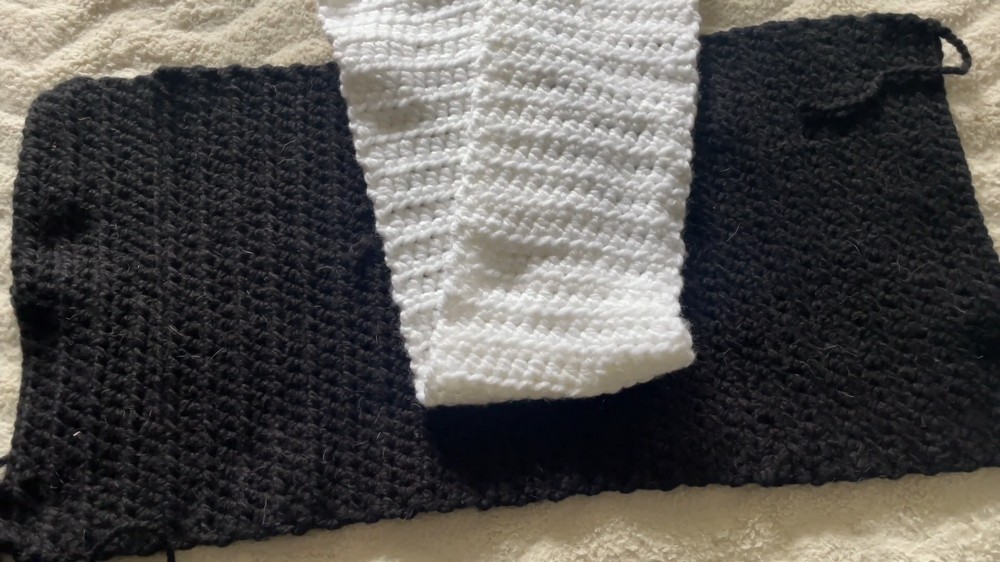
4. Assembly
a. Joining Side/Base Panel to Main Panel
- Fold main panel in half to find the midpoint (will help center the base panel).
- Lay the side/base strip along the bottom edge and sides of the main rectangle, aligning corners.
- Use stitch markers to pin corners (optional, but helps even seaming).
- With contrast or body color yarn, single crochet or slip stitch through BOTH thicknesses (base panel and main panel) all the way around sides and base, working three sides only (leave top open).
- At corners, ensure the seam is tight and panels line up.
- If preferred, the base panel’s bottom edge can be joined with slip stitching from the inside for a “boxed” look.
- Fasten off and weave in all ends.
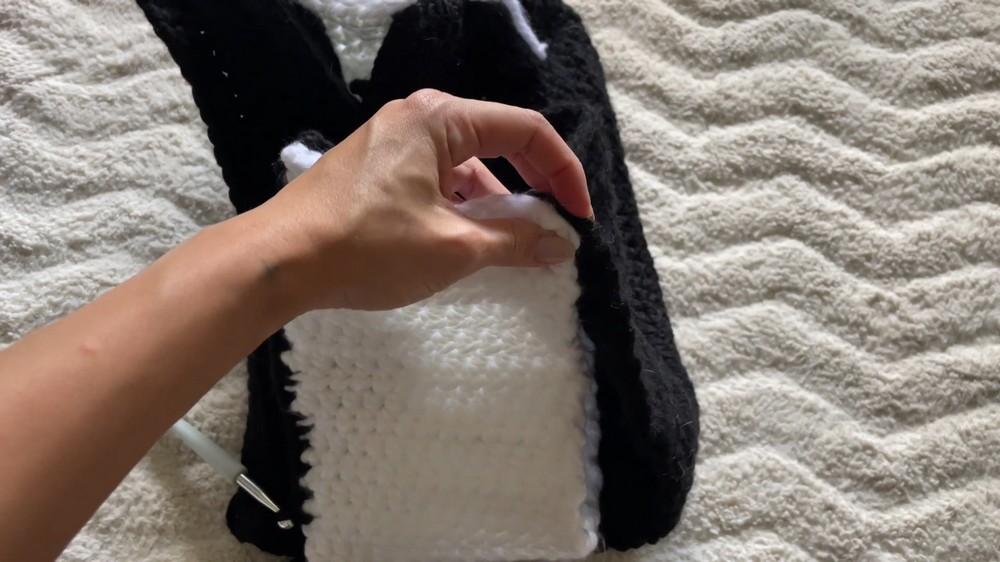
b. Optional: Secure Inside Base
- For a firmer, gap-free bottom, slip stitch or sc again around the inside edge (the “ditch” inside bag base).
c. Attach Straps
- Place the top (open) edges of the bag together.
- Decide your strap placement: Emma placed hers 7cm in from each side seam.
- Pin straps with stitch markers to line up both ends, making sure the strap isn’t twisted.
- Insert hook through all bag layers and strap end, and slip stitch securely across the strap’s entire width.
- Repeat for both straps, attaching front and back edges (ensure they match and aren’t twisted).
- Weave in all yarn ends.
5. Finishing
- Turn bag RS out. Shape corners if needed.
- Steam-block for a crisp finish, if desired.
- Load up your new tote!

Pattern Correction & Tips
- Bag size: Adjust panels/strap size to preference.
- Strength: Slip stitch seaming adds structure and durability.
- Contrast seaming: Use bright or contrasting color for an on-trend look.
- Ease: This pattern is excellent for beginners or TV crochet!
- If base panel sags: Add a plastic canvas or cardboard base insert.
Conclusion
You have completed a modern, sturdy, and customizable crochet tote! This project is beginner friendly, seam-focused, and built to last. Try color blocking, stripes, or playing with seaming for your own look. Sew in ends, show it off, and enjoy your handmade bag.