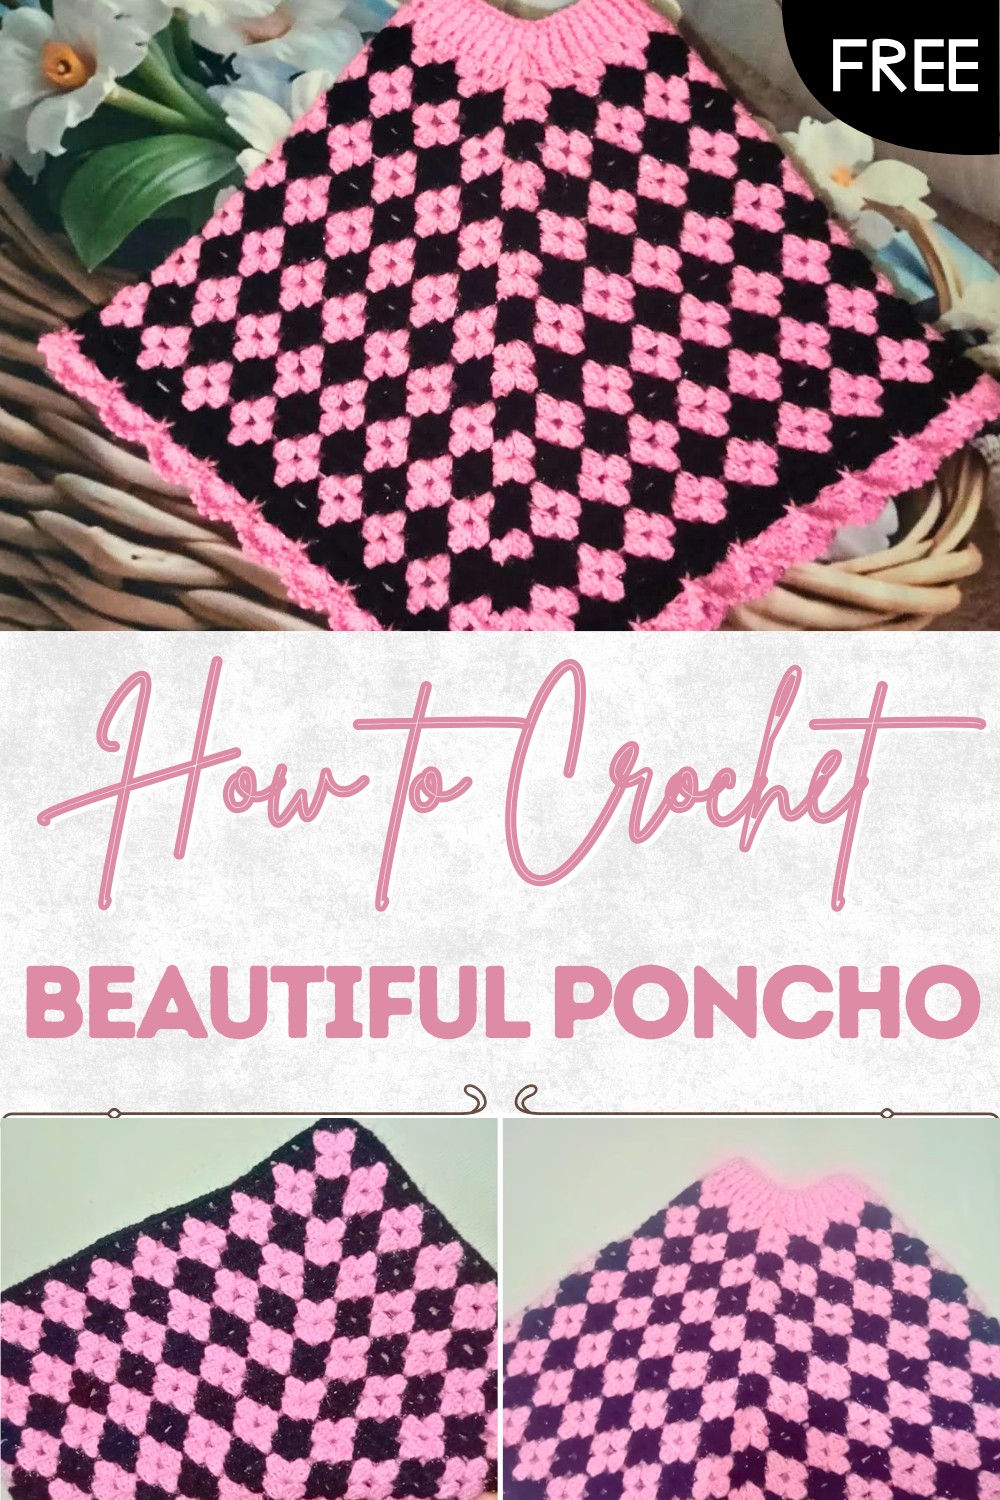
Free Crochet Poncho Pattern With Step by Step Guide
Refresh any look with this free crochet poncho pattern, for a stylish layer that adds elegance and a personal touch to your everyday outfits.
A colorful and stylish layer can brighten your day and bring a smile to your face. Using a crochet poncho pattern, anyone can make a beautiful piece that feels light but keeps you comfortable in any season. A poncho works well for anyone, fitting nicely over a dress, shirt, or even with jeans. Its unique shape and lovely pattern add a special touch, turning a simple outfit into something eye-catching.
Free Crochet Poncho Pattern For Stylish Outfits
This garment is easy to put on, making it perfect for days when you need something quick yet beautiful. Gentle on the skin, it allows air to flow, keeping you cool on sunny days and cozy when it gets chilly. The best part is it can be made in any color, from bright and playful to calm and classic. A crochet poncho pattern brings families together, helping each person feel proud and fashionable.
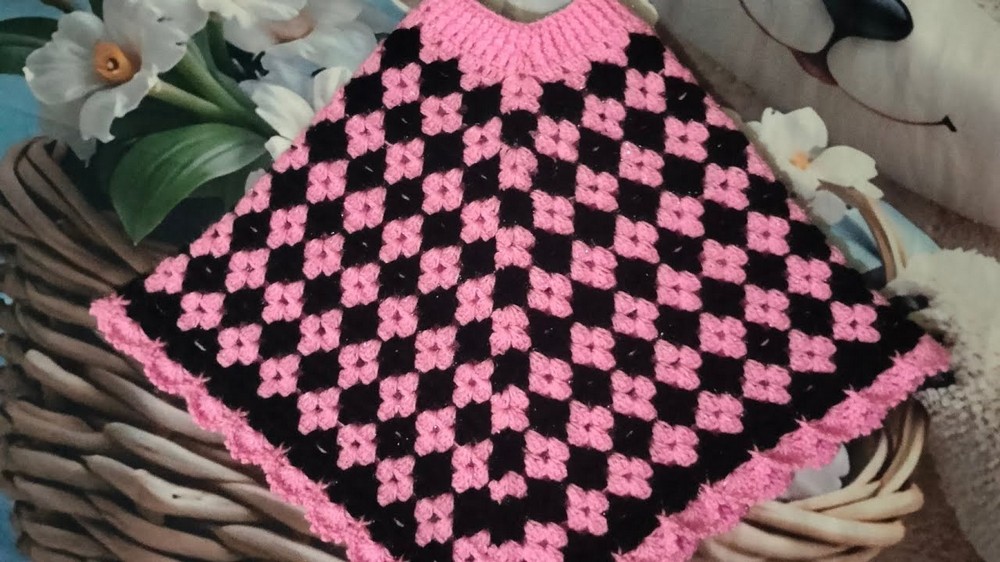
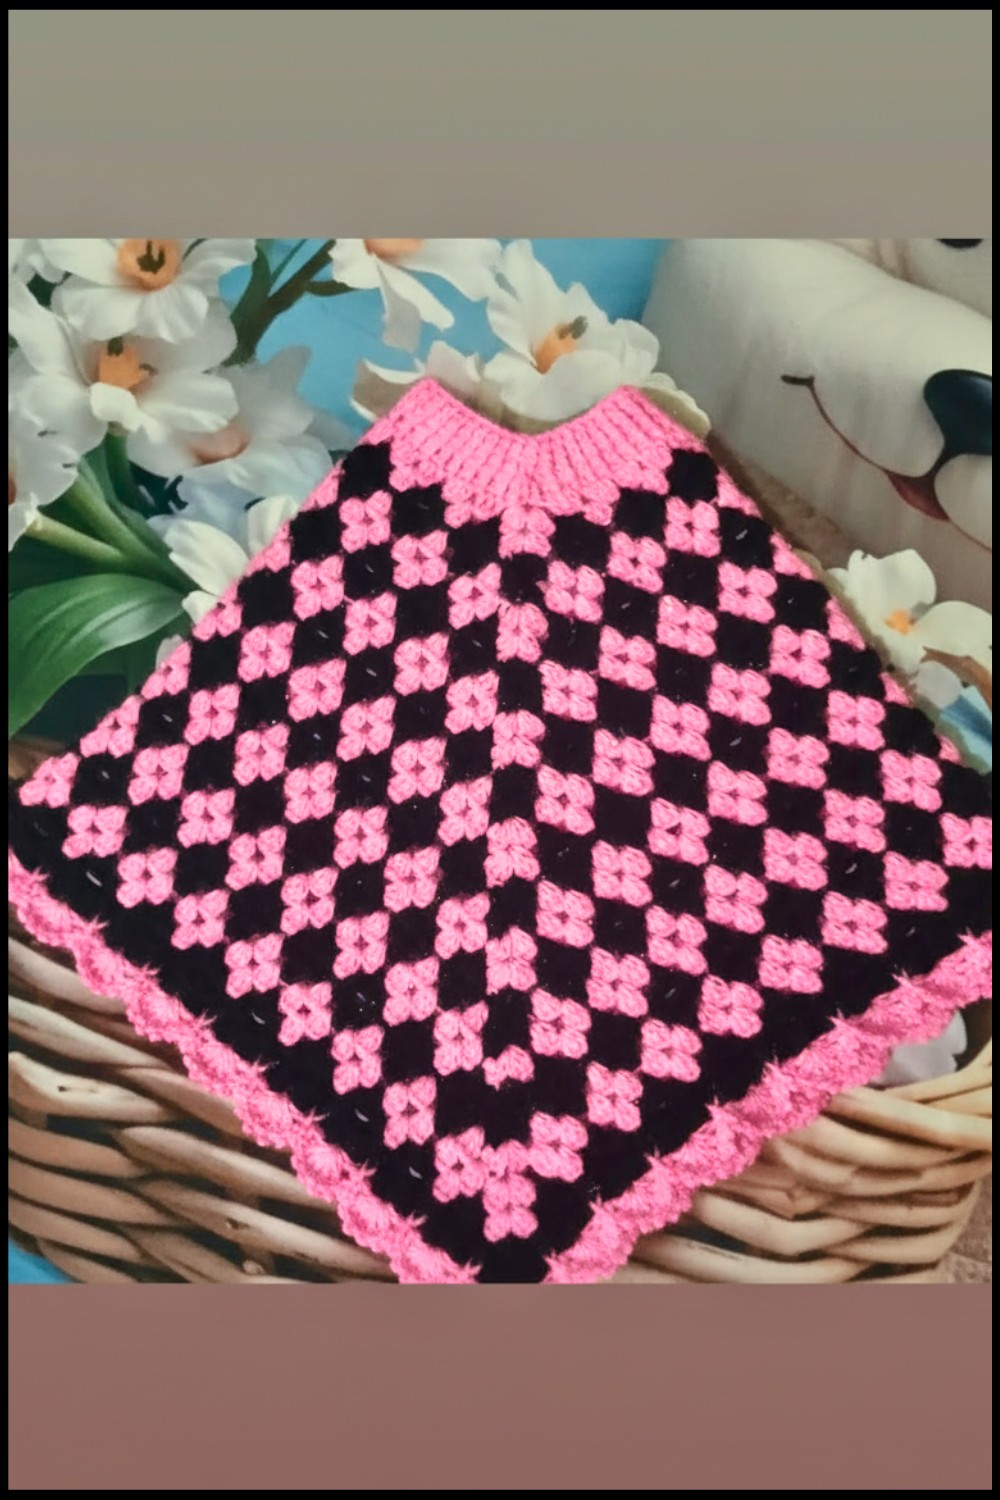
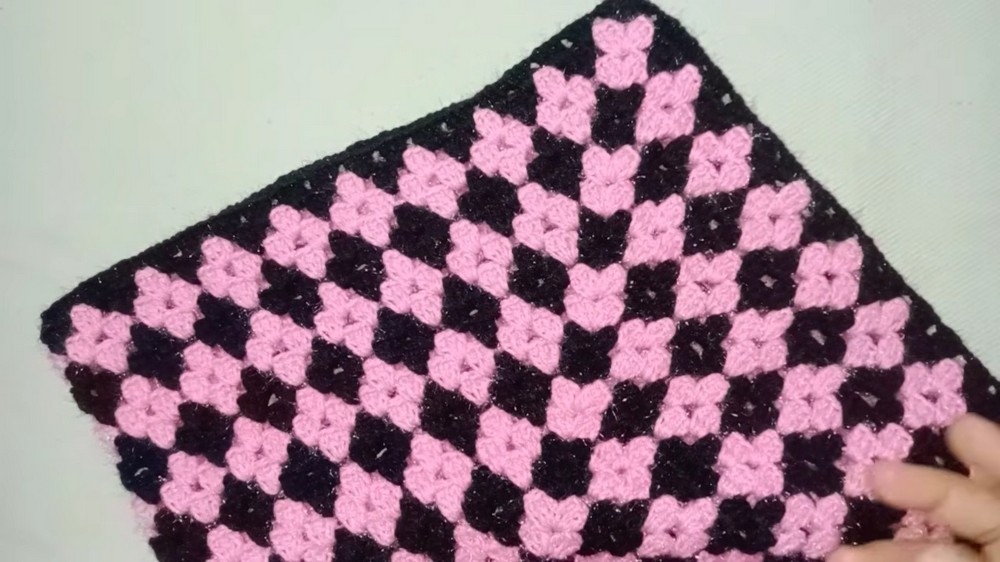
Little Girl’s Two-Color Crochet Poncho Pattern
Materials
- Yarn: Medium Weight (Worsted, #4) Acrylic Yarn
- Color A: Pink
- Color B: Black
- Crochet Hook: 4 mm (US G/6) for poncho body; 5.5 mm (US I/9) for neckline border
- Yarn Needle: For weaving in ends
- Scissors
- Measuring Tape (optional)
Abbreviations (US Terms)
| Abbreviation | Meaning |
|---|---|
| ch | chain |
| sl st | slip stitch |
| sc | single crochet |
| dc | double crochet |
| fpdc | front post double crochet |
| bpdc | back post double crochet |
| st(s) | stitch(es) |
| sk | skip |
| sp | space |
Special Notes
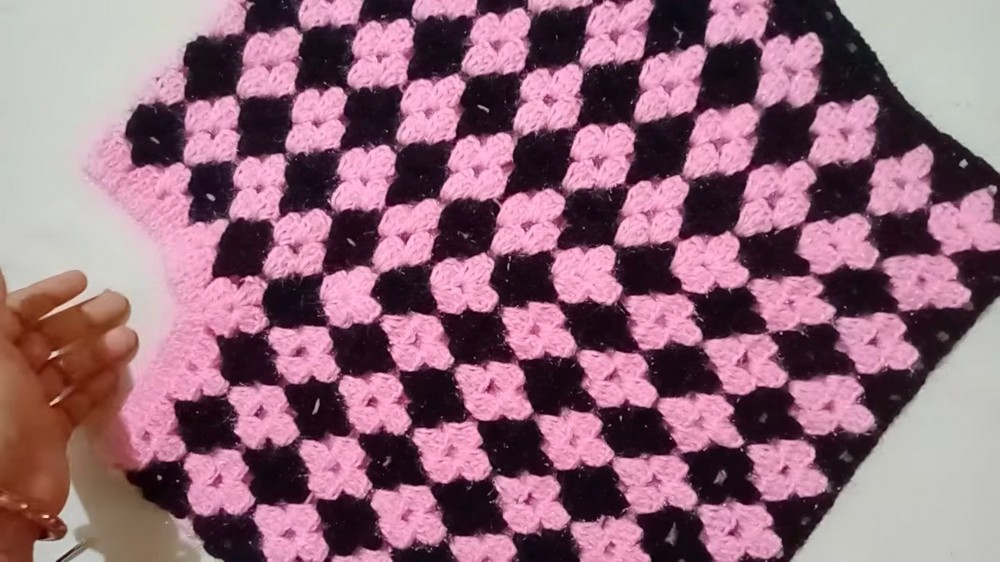
- Stitch count is crucial for shaping; always check your multiples if you wish to adjust size.
- The corners are formed with cluster groups (buds) for shaping.
- Work with a consistent tension so stitches are not too tight or too loose, especially the foundation chain.
- The poncho is worked in rounds, starting from the neckline.
- Alternate colors as per the instructions to achieve the two-tone effect.
Pattern
1. Foundation & First Round
- With Color A (Pink) and 4 mm hook, ch 84, making sure chain is not twisted.
- Join to the first ch with a sl st to form a ring.
- Ch 3 (counts as a dc), dc in each ch around — 84 dc total.
- Join with a sl st to the top of the starting ch-3.
2. Round 2: Setting up the Pattern
- Ch 3 (counts as dc),
- In the same st, dc, dc in next st (total 3 dc in same st),
- Ch 2, 3 dc in the same stitch (forms the 1st “bud” or corner),
- Ch 1, sk next st, 3 dc in next st (this forms a group),
- Repeat: Ch 1, sk next st, 3 dc in next st, continue this sequence.

- At the predefined corners (should be positioned at 1/4 and 3/4 positions in round), work: (3 dc, ch 2, 3 dc) in the same st.
- Continue until round is complete.
- At end, join with sl st to top of start ch-3.
3. Repeating Rounds & Color Changes
- For each subsequent round,
- Slip stitch to center of 1st corner.
- Ch 3, 2 dc in corner, ch 2, 3 dc in same corner,
- Ch 1, 3 dc in next ch-1 sp across to next corner,
- At corner: (3 dc, ch 2, 3 dc) in ch-2 sp,
- Continue around.
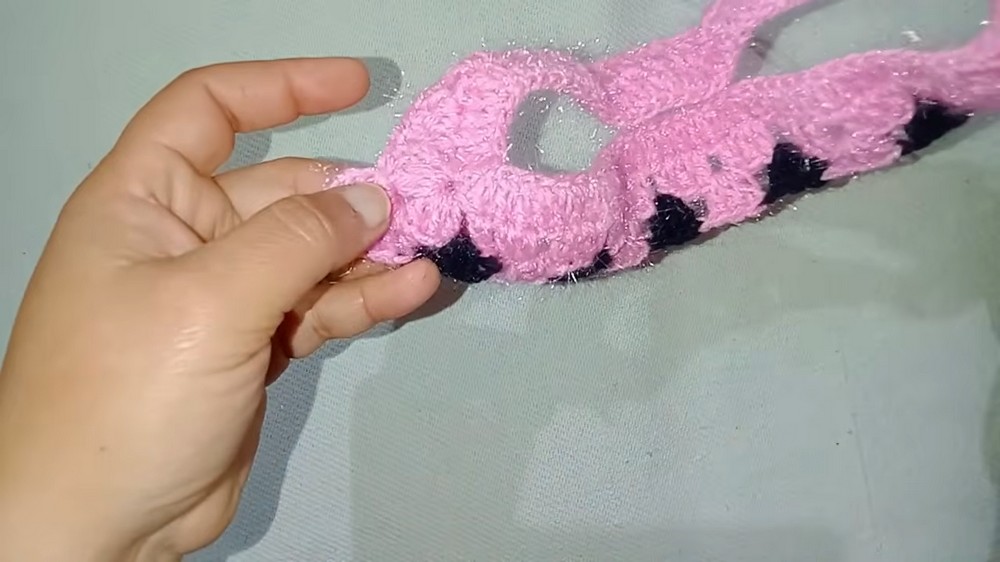
- For color changes, after the first few rounds in Pink,
- On last dc of round, pull through new color (Black) to finish st.
- Continue new round in Black, alternating every other round (Pink/Black).
4. Creating the Desired Length
- Repeat pattern (alternating colors) until you have 26 rounds total (as demonstrated — 13 pairs of Pink/Black).
- You may increase or decrease length as desired.

5. Final Decorative and Edging Rounds
Shell/Bud Edging:
- In each ch-2 corner sp: (3 dc, ch 2, 3 dc).
- In ch-1 sps between groups: 3 dc.
- Continue pattern, alternating colors for each round until desired effect.
Lace Edge:
- In ch-sps, work: (sc, ch 3, sc) in each space.
- In corner dc groups, work a fpdc (front post dc) over corner dc.
6. Closing the Poncho & Finishing
- After last round, use last st as slip stitch, finish off, and weave in all ends.
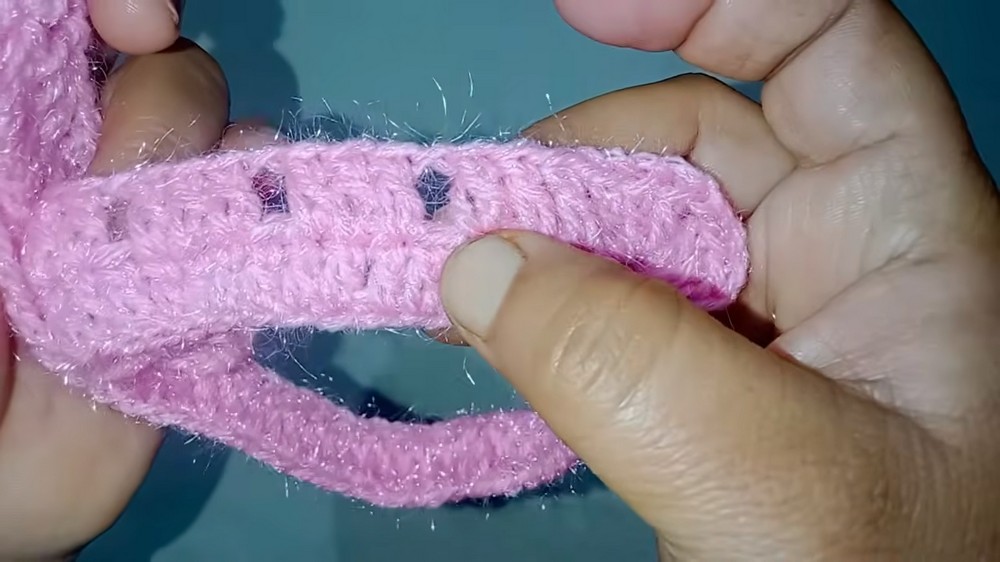
7. Neckline Border
- Use 5.5 mm hook & color of your choice (Pink or Black).
- Starting at any corner, attach yarn and:
- Work alternating fpdc and bpdc around to create rib effect.
- To decrease at corners, work three dcs together (dc3tog) at each corner for shaping.
- Continue for 2–3 rounds for a neat finish.
- Finish off and weave in ends neatly.
Pattern Corrections & Adjustments
- Correction: In the final black round of decorative stitches, it was suggested to switch to pink as the black was visually heavy; adjust as preferred for optimal appearance.
- Corners are critical for shaping; ensure every corner of every round gets (3 dc, ch 2, 3 dc).
- Adjust initial chain in multiples of pattern repeat if you wish to size up or down.
Tips
- Always count your stitches at the end of every round, especially at corners.
- Alternate colors by carrying yarn inside stitches when possible for seamless joins.
- For a neater neckline, block your work slightly or steam press at low temperature.
- If you want a looser drape, use a larger hook.
Conclusion
Congratulations on completing this adorable two-tone little girl’s crochet poncho! The alternating colors and bud stitch clusters create a lively, cute look perfect for any occasion. The design is adaptable—change yarn weight, color order, or size for countless variations. With a soft drape, it’s a comfortable, stylish layer for any child.