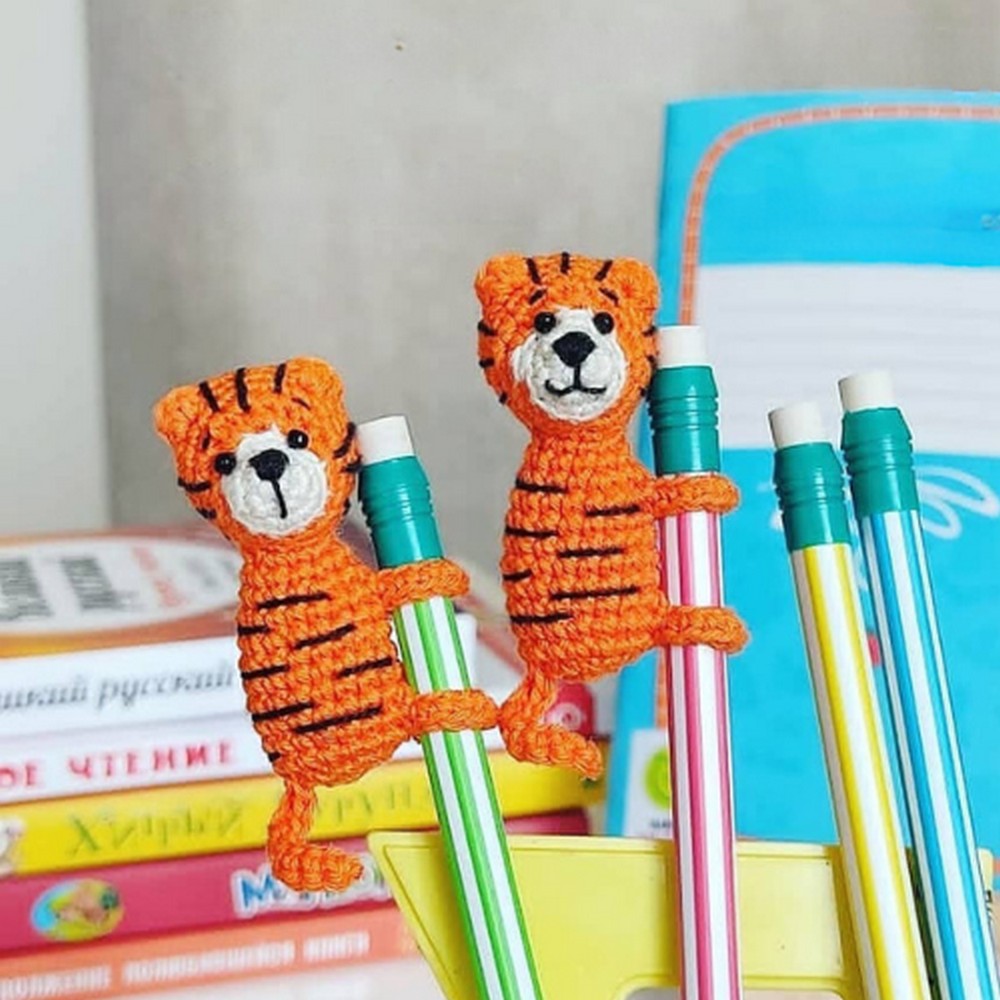
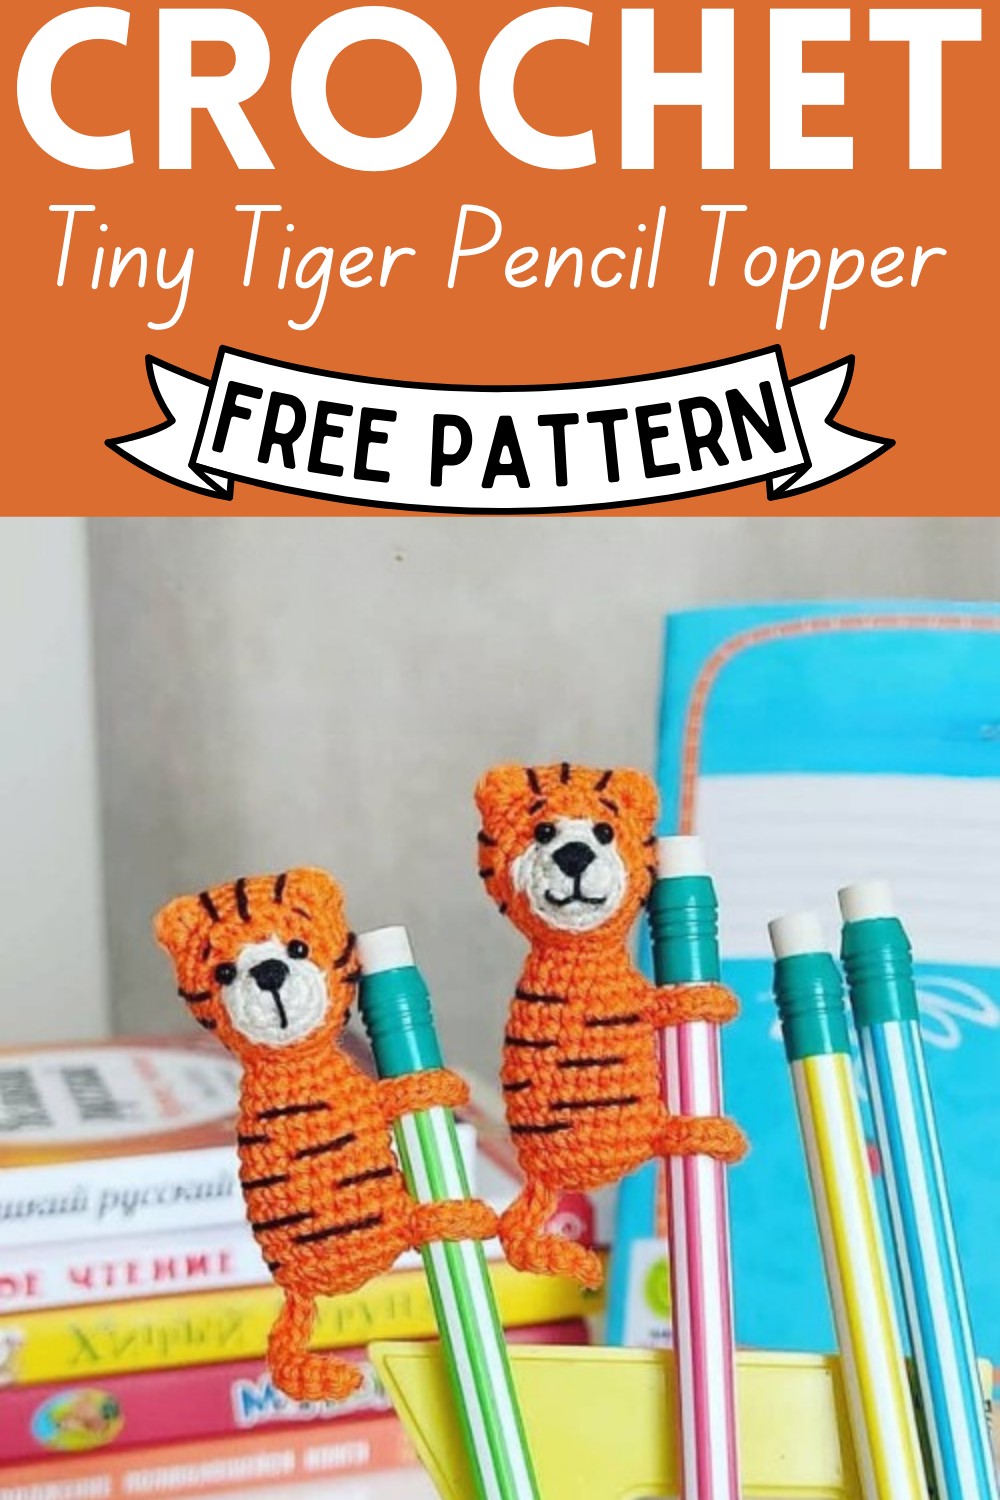
Crochet Tiny Tiger Pencil Topper Pattern For Wildlife Enthusiasts
We all know that tigers are masters at climbing and just like their wild counterparts, this little crochet tiger is designed to climb right onto your child’s pencil! Imagine a tiny version of a real tiger, complete with all the intricate details. This crochet tiny tiger pencil topper captures the essence of a real tiger’s appearance, but it’s been cleverly crafted on a much smaller scale. Its legs are specifically designed to snugly hold onto a pencil, making it a playful companion for your child’s writing and drawing adventures. With its adorable features and tiny crochet stature, this tiger is ready to bring a touch of wildlife fun to schoolwork and creative projects.


 Designer: Toysforfriends On Instagram
Making Your Crochet Tiny Tiger Pencil Topper
The required materials:
- Any desired cotton yarn 240-250m/50 g in milk/white and orange colours (for example coco vita cotton, xenia alpina)
- Thin black cotton yarn for design
- Sewing black thread for embroidering the muzzle
- Small eye beads
- 1.5 mm crochet hook
- Stuffing material
Abbreviations (US):
- MR – magic ring
- st-stitch
- sl.st. — slip stitch
- ch – chain
- t-ch turning chain
- SC- single crochet
- hdc – half double crochet
- inc – increase – two single crochet in one stitch
- inc hdc – increase hdc two half double in one stitch
- dec – decrease two single crochet together (invisible decrease or as usual)
- BLO/FLO – back/front loops only
Step by step Pattern
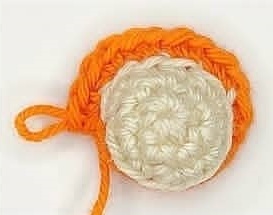
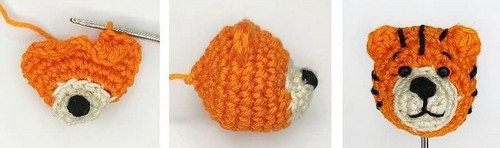
Head
- Begin crocheting the muzzle.
- White/milk colour yarn
- Rnd 1 – 6 sc into MR
- Rnd 2 – (inc, sc) x 3 times (9)
- Rnd 3 – (2 sc, inc) x 3 times (12)
- Change to orange colour yarn
- Rnd 4 – BLO 6 sc, 6 inc (18)
- Rnd 5 – 5 sc, (inc, 3 sc) x 3 times, inc (22)
- Rnd 6 -22 sc (22)
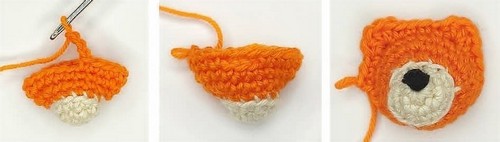
- Rnd 7-3 sc, chain 3, skip 3 sc, begin from the fourth sc – 7sc, FLO – 4 hdc in one stitch, 4 sc, FLO 4 hdc in one stitch, 3 sc
- Embroider the nose using a sewing thread.
- Rnd 8 – 3sc, 3 sc to the chain (FLO), 7sc, bend the ear inward, BLO – hdc inc, 4 sc, bend the ear inward, BLO hdc inc, 3 sc (24)
- Rnd 9 24 sc (24)
- Rnd 10 — (2 sc, dec) x 6 times (18)
- Rnd 11 — (sc, dec) x 6 times (12)
- Stuff with fiberfill.
- Rnd 12-6 dec, break yarn, leaving a long tail for sewing.
- Do not tighten the hole.
- Sew the eye beads, sculpting the eye sockets. Draw the thread tails to the hole on the backside of the head. Embroider the eyebrows. Embroider
- the stripes using black Iris yarn. Tighten the hole. Design the ready head later.
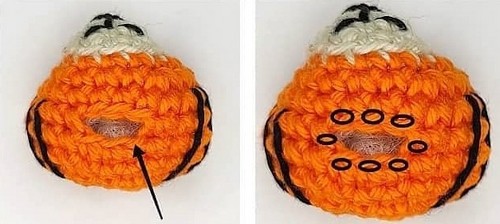
- Begin to crochet the body from the head through the FLO of the bottom of the head, as shown in the photo:
- Rnd 1- inc, sc, inc, sc between rounds, inc, sc, inc, sc between rounds (12)
- Rnd 2 – 12 sc (12)
- Rnd 3 (inc, 2 sc) x 4 times (16)
- Rnd 4— chain 10, in the first stitch of the round 16sc+ 10 sc to the chain
 Try on the paws on the pencil.
- Rnd 5 16 sc (16)
- Skip 10 sc (paws) and crochet the next round as usual from the first sc of the body.
- Rnd 6 (7 sc, inc) x 2 times (18)
- Rnds 7-9 (3 rounds) 18 sc
- Rnd 10 – chain 10, in the first stitch of the round- 18 sc+ 10 sc to the chain
- Rnd 11 10 sc, chain 10 – start working in the second chain from hook 9 sc, 8 sc (18)
- Stuff with fiberfill.
- Skip 10 sc (paws) and crochet the next round, as usual from the first sc of the body.
- Rnd 12 (sc, dec) x 6 times (12)
- Stuff with fiberfill.
- Rnd 13 6 dec, break yarn, leaving a long tail for sewing.
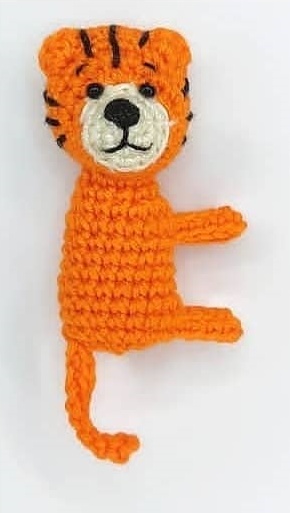
- Tighten the hole. Hide the yarn tail inside the body.
- Embroider the stripes on the body using black thread.
- The tiny tiger is ready!
Designer: Toysforfriends On Instagram