Crochet Snowflake Bag Charm Step-by-Step Free Pattern

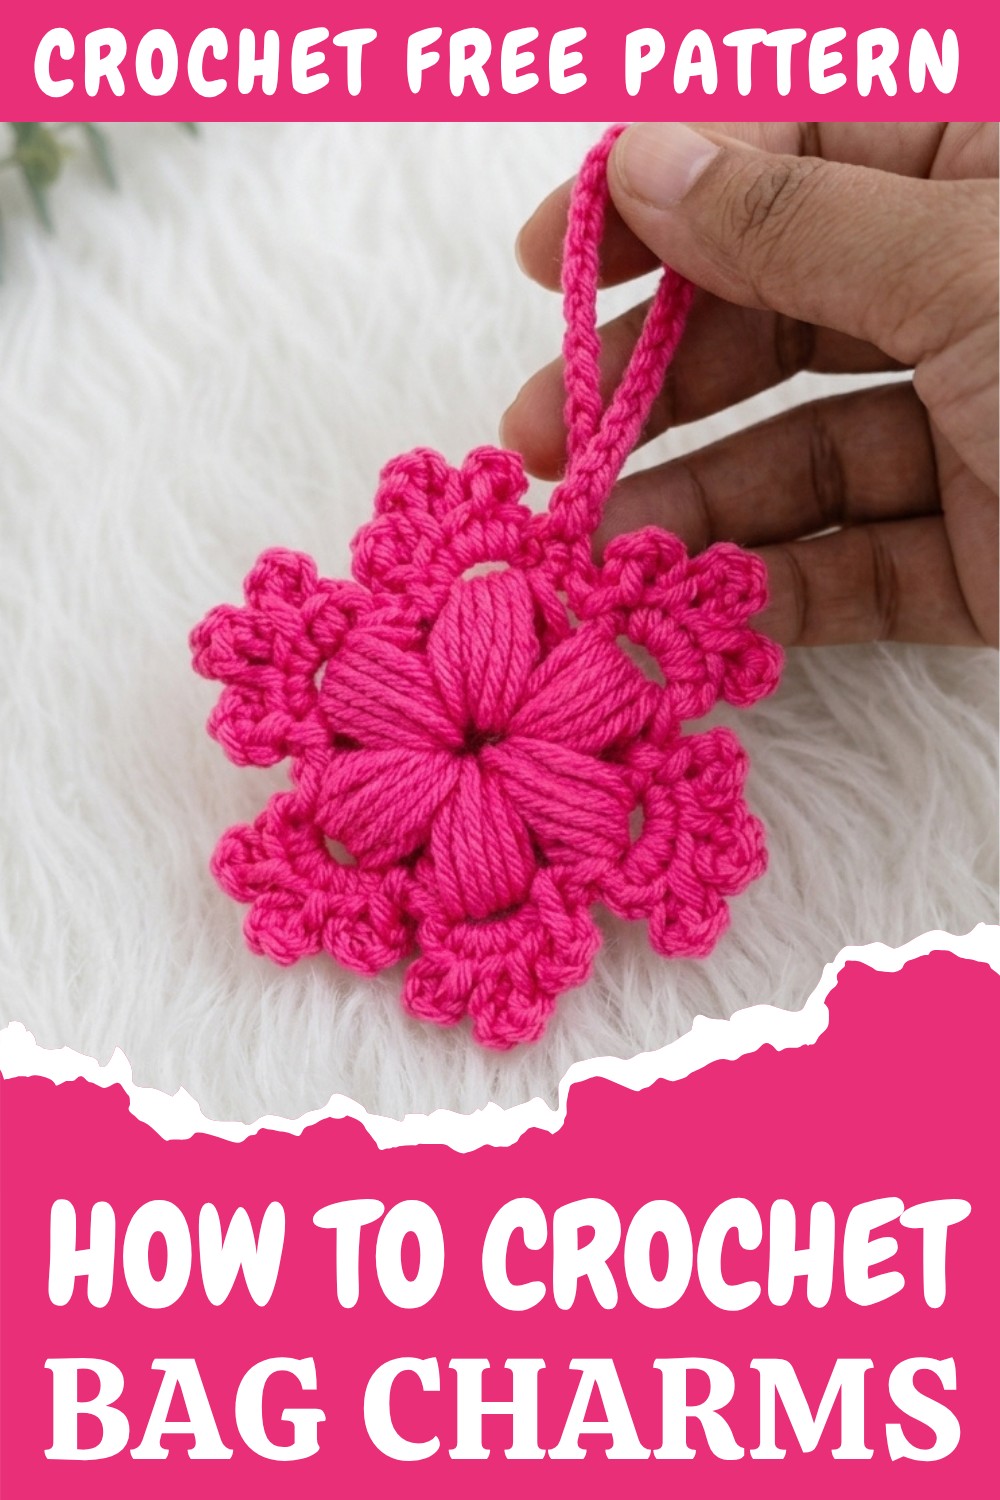
Crocheting a snowflake bag charm is a fun and simple project that’s great for both beginners and anyone looking for a quick, creative craft. You don’t need a lot of fancy tools or expensive yarn—just a small hook, some yarn in your favorite winter colors, and a keychain ring. Making these snowflake charms lets you practice your stitches while creating something you can show off on your backpack, purse, or even give to friends as a thoughtful, handmade gift. It’s also a perfect way to use up small bits of leftover yarn and learn new crochet techniques in a miniature form.
The snowflake charm is really pretty, with its delicate arms and lacy structure. Using classic white yarn makes it look just like real snow, but you can also pick light blues, silver, or even sparkly yarn for a magical effect. Most of the pattern relies on basic stitches, so it’s simple enough for anyone, even if you’re not a crochet expert. With just a few tweaks, you can use the same pattern to make Christmas ornaments, festive keyrings, a sweet garland for your room, or even mini coasters if you use thicker yarn.
Creative Crochet Snowflake Bag Charms Pattern for Unique Gifts
You might run into some common problems, like your snowflake turning out uneven (usually caused by missing a stitch in one arm—just unravel that round and redo it), or your charm feeling floppy (fix this by using cotton yarn with a small hook, or stiffen it with a little fabric starch after finishing). If making a magic ring is tricky, just use a small chain ring to start off instead.
The finished snowflake charm usually measures about 2.5 to 3 inches across, a great size for bag charms or decorations. If you want a bigger charm, just use thicker yarn and a larger hook. Lay your snowflake flat and gently press with a damp cloth if it curls, so it looks crisp and perfect. With this free pattern, you get a fast, creative project that’s easy to customize—and you’ll love seeing your own handmade snowflake brightening up your bag or gifts.
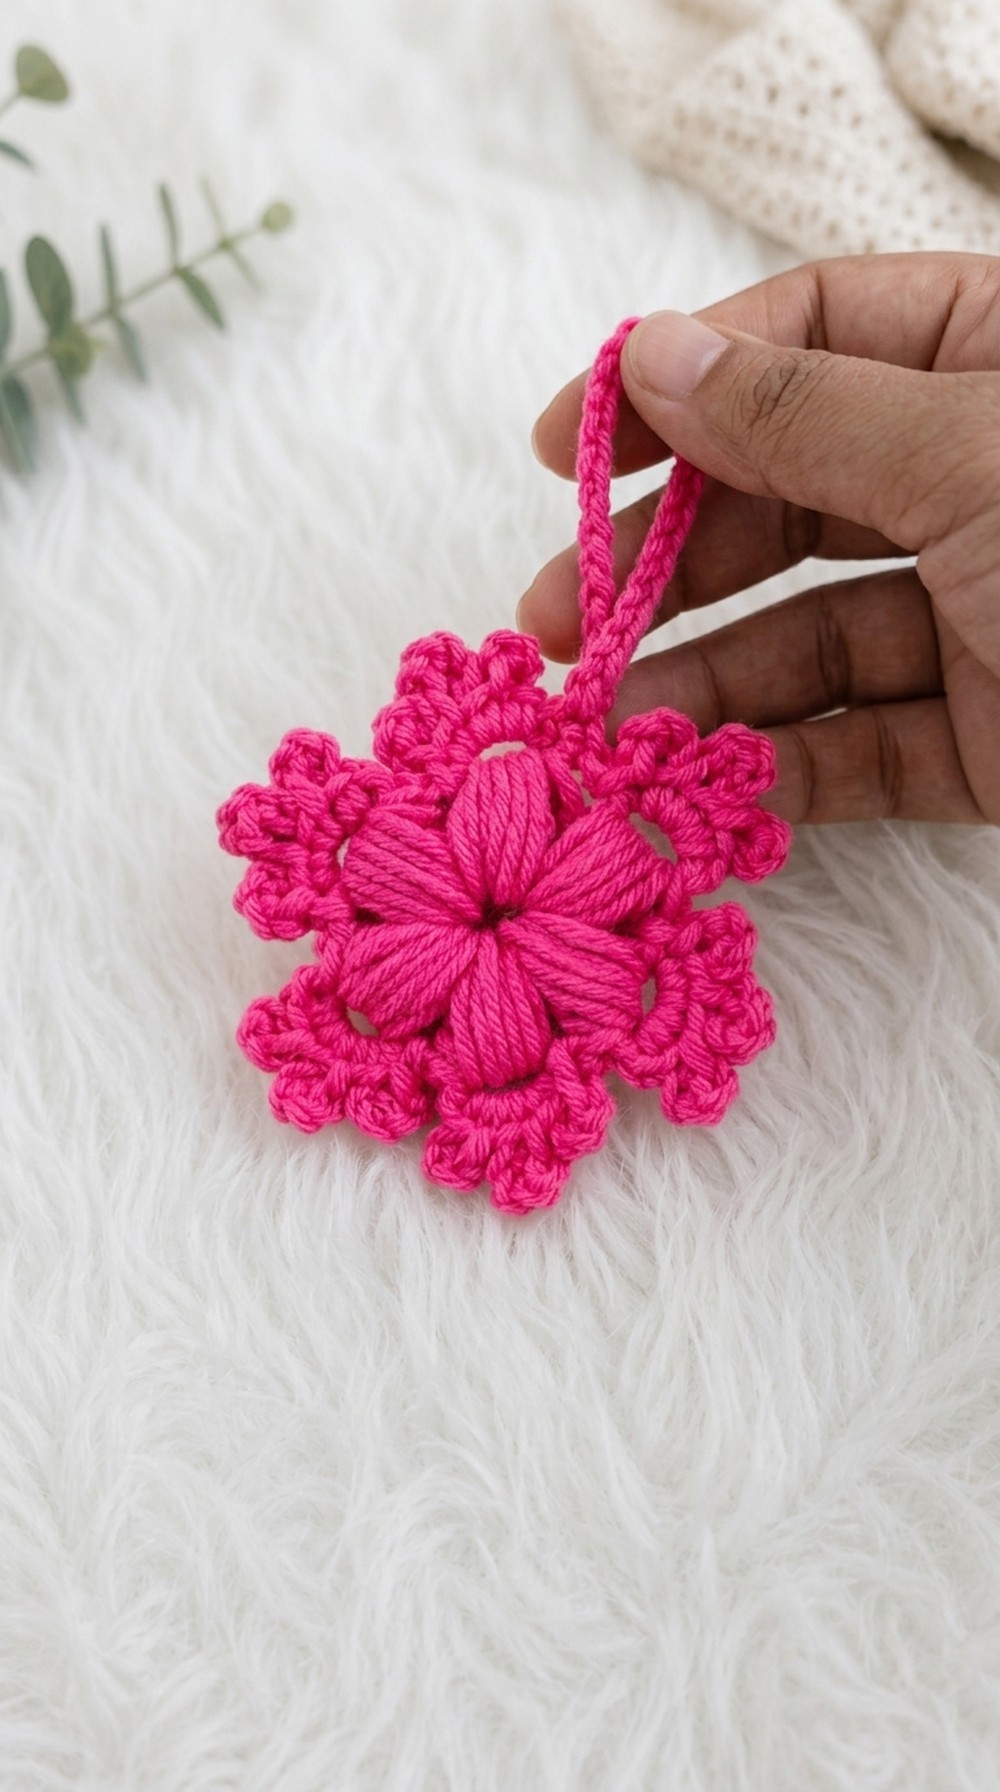
Here are a few key steps you shouldn’t forget:
- Start by making a magic ring for a tidy, round center.
- Always count each stitch in every round, so your snowflake arms come out even.
- Follow the pattern’s spacing carefully for the lacy snowflake look.
- Weave in your loose yarn ends tightly, so the charm doesn’t fall apart.
- Attach your keychain while the snowflake is freshly finished and flat.
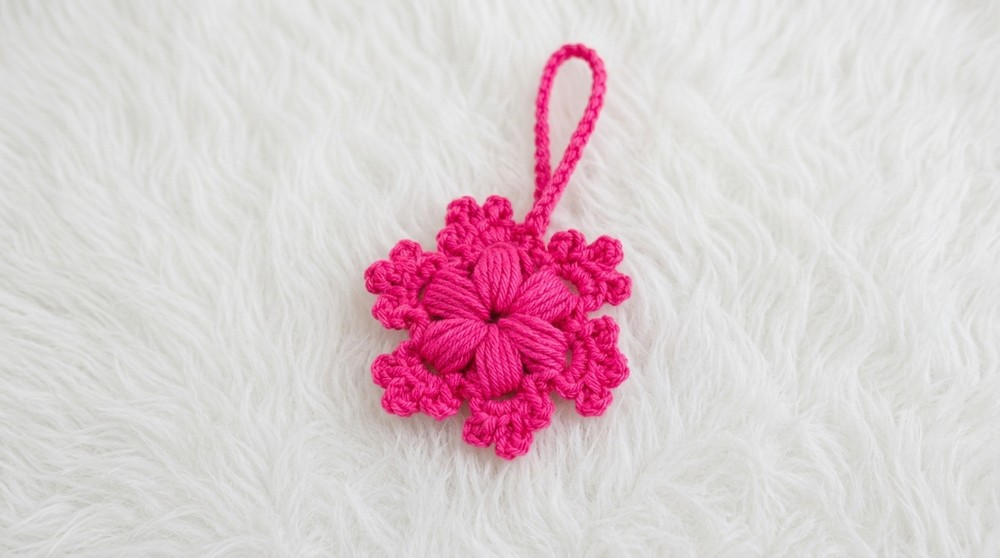
Fluffy Snowflake Keychain Crochet Pattern
Skill Level
Intermediate
Materials
- Milk cotton yarn, 5-ply (or similar thick, fluffy yarn)
- 3.5 mm crochet hook
- Scissors
- Yarn needle (for weaving in ends)
- Optional: Keychain or bag ring
Abbreviations (US terms)
- ch = chain
- sc = single crochet
- sl st = slip stitch
- yo = yarn over
- st(s) = stitch(es)
Special Notes
- Work loosely for fluffier effect.
- Repeat steps for each petal (6 total).
- Use stitch marker if you need help with rounds.
Pattern
Step 1: Foundation Ring
- Make a slip knot.
- Ch 8.
- Sl st to first ch to form a ring.
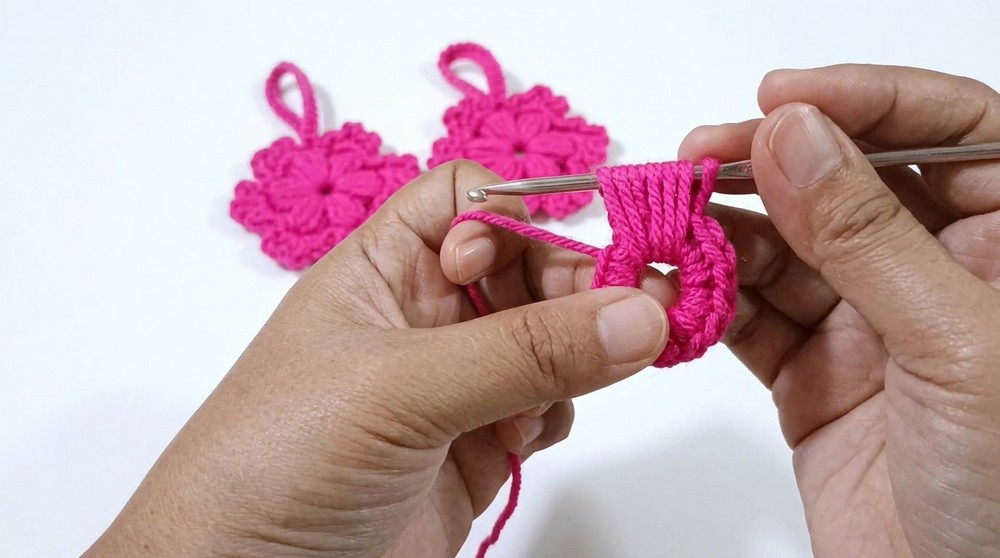
You are creating the center base for your snowflake. Eight chains make a nice-sized ring for fluffiness. Slip stitch brings the ends together so you can work in the round.
Step 2: Circle Base
- Ch 1.
- Work 12 sc into ring.
- Sl st to first sc to join.
This forms a solid circle from which the petals will grow. Make sure you work into the chain ring and count carefully to reach 12 stitches.
Step 3: Fluffy Petal (Repeat 6 times around)
For each petal:
- Ch 1.
- Insert hook into ring, yo, pull up a loop (keep loops loose for puffiness).
- Repeat: insert, yo, pull up a loop – do this a total of 6 times, so you have 6 loose loops on your hook.
- Yo, pull through all loops on hook.
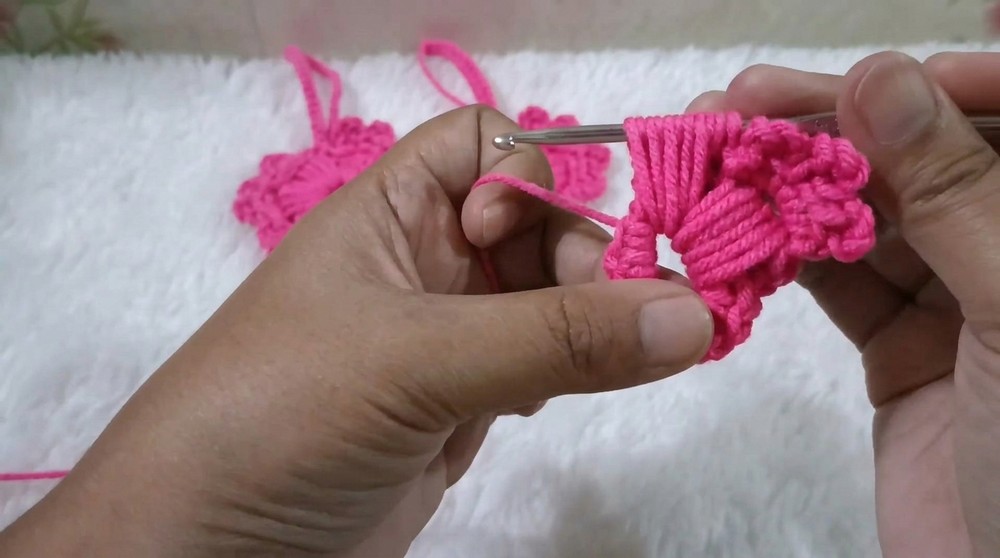
- Ch 3.
- Sl st in same space.
This method creates the puffy snowflake effect. The loose loops become a fluffy petal. Pulling through all loops gathers them into one point. The chain and slip stitch finish the petal.
Step 4: Small Spoke Next to Petal
- Ch 1.
- Sc in next st.
- Ch 3.
- Sl st in same sc.
- Sc in next st.
- Ch 4.
- Sl st in same sc.
- Sc in next st.
- Ch 3.
- Sl st in same sc.
- Sl st in next st.
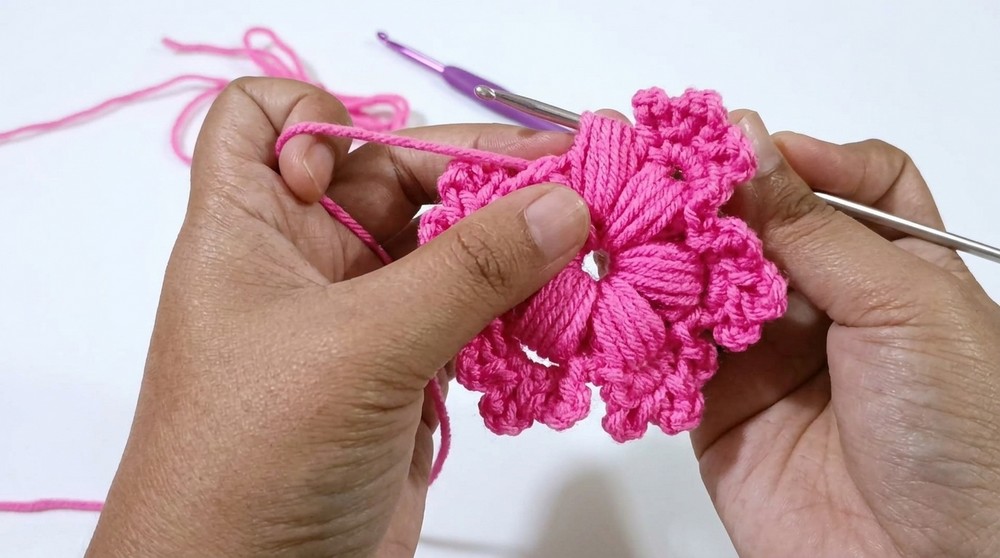
These extra chains and single crochets create smaller points between the petals, mimicking a snowflake shape.
Step 5: Repeat Around
- Repeat Steps 3 & 4 a total of 6 times, working around the circle.
Repeat each petal and its small spokes for all remaining sections. You will end up with 6 puffy petals and small chains between them.
Step 6: Hanging Loop (Optional)
- After the final round, Ch 1 and sl st to base to finish motif.
- For keychain/bag charm: Ch 40 (or desired length).
- Sl st to base of motif to form loop.
- Fasten off.
- Weave in all ends.
Add a chain for hanging, or attach your motif to a ring as you like. Make the chain longer for a bag charm, shorter for a keychain.
Pattern Correction & Tips
- If snowflake isn’t puffy enough, make loops looser or add more.
- If arms are uneven, count stitches and keep tension consistent.
- For a neat finish, attach motif directly to metal ring when creating hanging loop.
Conclusion
Your fluffy snowflake is now finished and ready to use as a keychain, bag charm, or decoration. The pattern is easy to repeat, and you can experiment with colors and yarn for different looks.