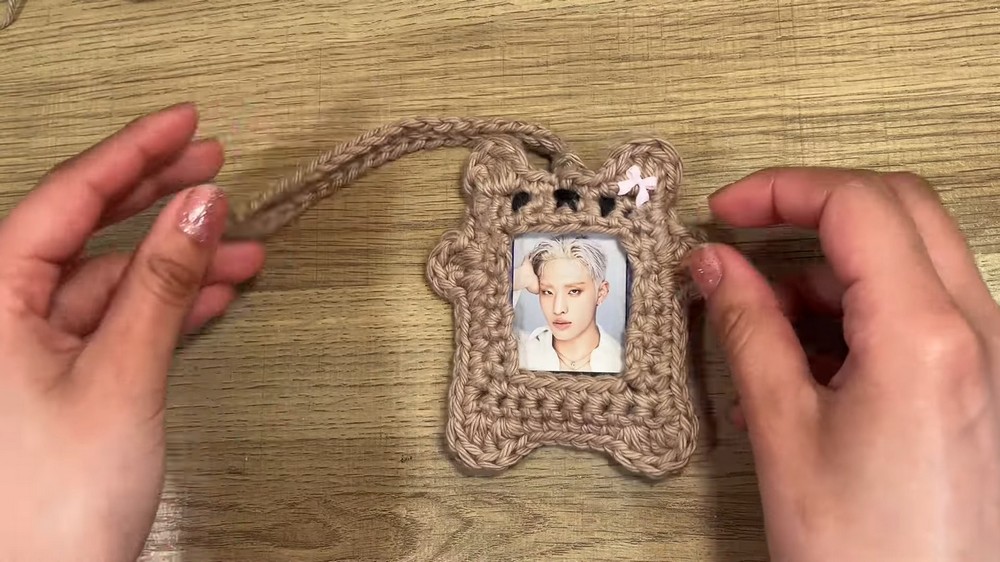
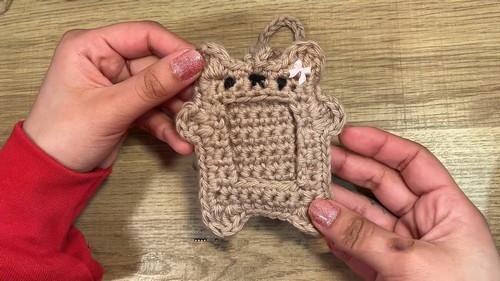
Charming Teddy Bear Photo Holder Pattern that Holds Memories
Display cherished memories with Crochet Teddy Bear Photo Holder Pattern that adds charm and decoration to desks shelves and living spaces.
No plain frame can ever make your favorite photos feel as warm and joyful as a handmade friend sitting beside them. With the crochet teddy bear photo holder pattern you can turn soft yarn into a cuddly bear who keeps your pictures safe and adds a touch of sweetness to any space. The little bear’s friendly face brings smiles every time you glance at it and you can choose colors that match your room or mood.
Trendy Teddy Bear Photo Holder Pattern that Everyone Will Notice
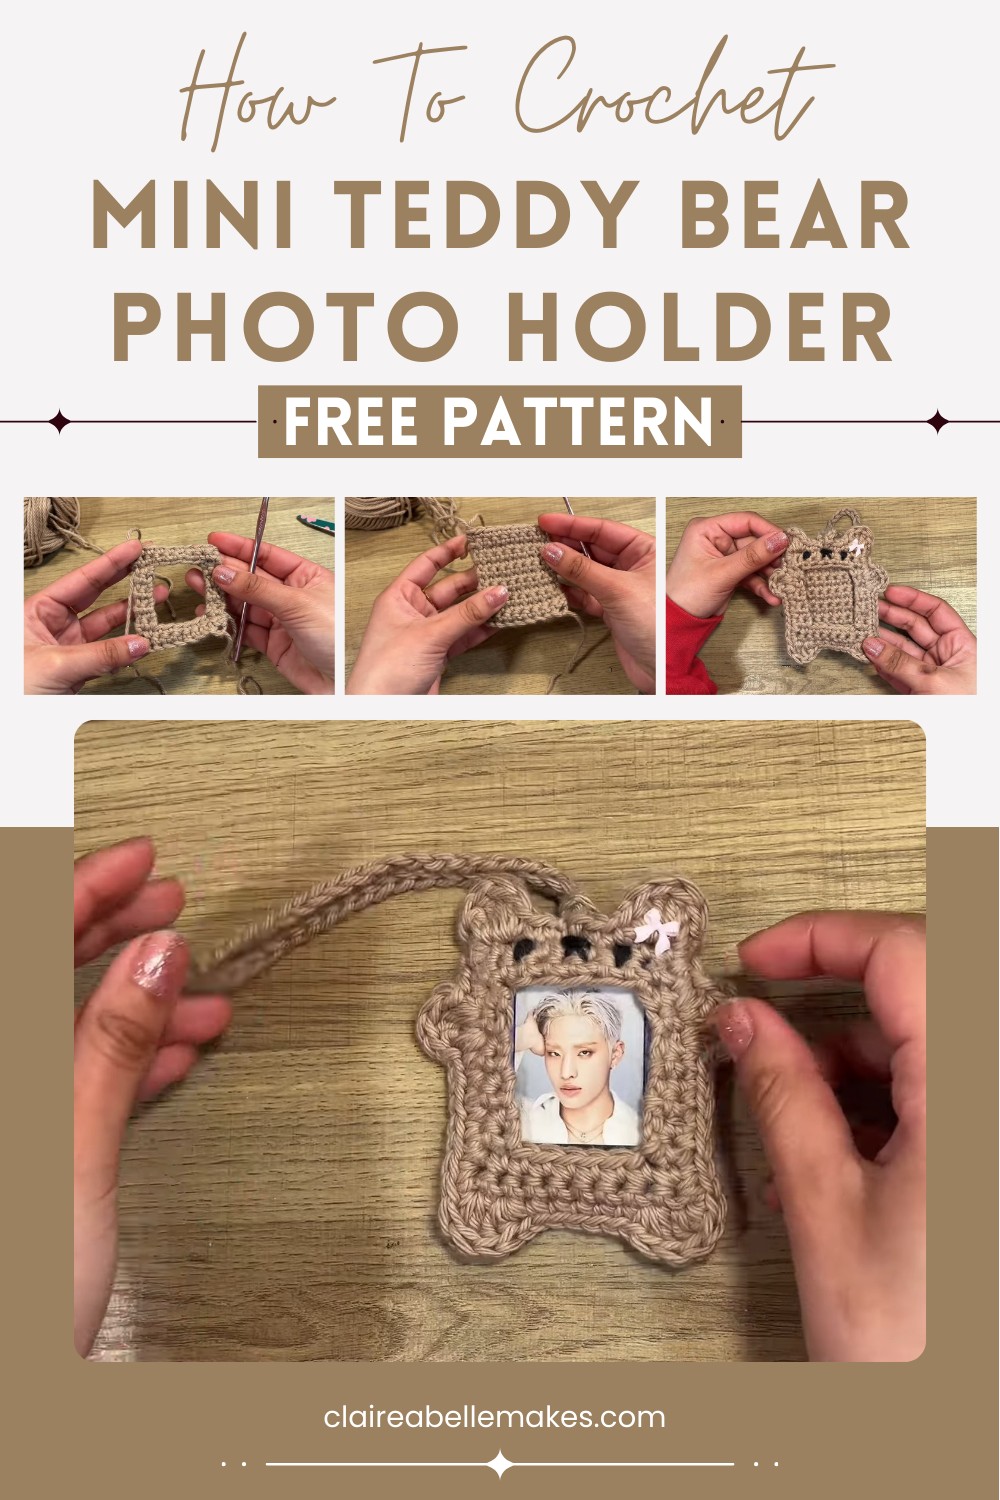
This cute holder fits nicely on tables shelves or any cozy corner so your memories stay close to your heart. It is not only for keeping photos but also makes a lovely gift that shows how much you care about someone. Even children can enjoy having it by their bedside holding pictures of family or friends. Making and using this bear brings both beauty and joy to everyday life with just a little yarn and your loving hands.
Materials
- Yarn: #2 Fine (weight 2), 100% cotton yarn in two colors (light brown for the body; black for facial details)
- Crochet Hook: 4 mm (US G-6)
- Notions:
- Scissors
- Yarn needle
- (Optional) Decorative charm or bow
- (Optional) Glue for attaching charm
Key Abbreviations (US Terms)
- ch – chain
- sc – single crochet
- dc – double crochet
- tr – treble (triple) crochet
- sl st – slip stitch
- st(s) – stitch(es)
Special Notes
- The photo holder consists of two panels (front & back) joined with continuous single crochet and “bear” shaping.
- Stitches are worked into the back bump of the foundation chain for a neater finish.
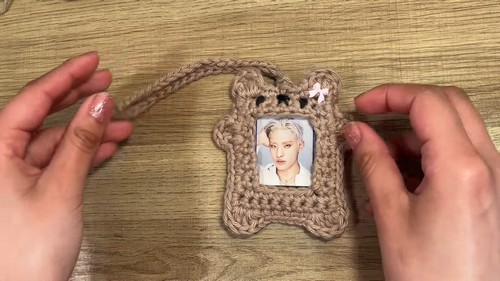
- The loop at the top is for holding the photo and the smaller loop at the back allows you to hang the holder on a bag or keychain.
Instructions
Front Panel (with bear arms, legs, head)
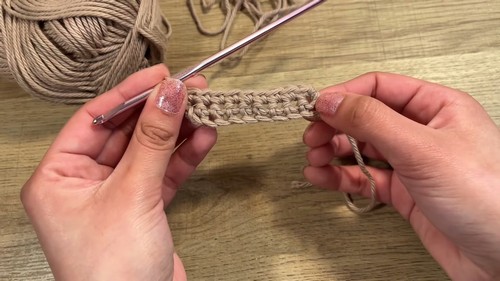
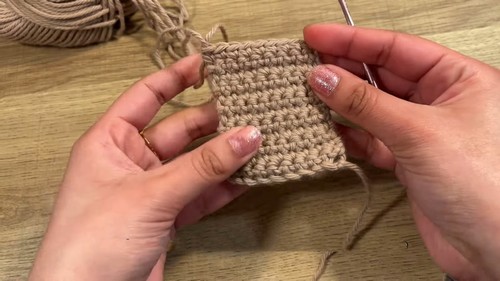
Bottom Strip
- With light brown yarn, make a slip knot.
- Ch 10.
- Working into the back bumps, sc in 2nd ch from hook and in each ch across. (9 sc)
- Turn. Without chaining, sc in each st across (9 sc).
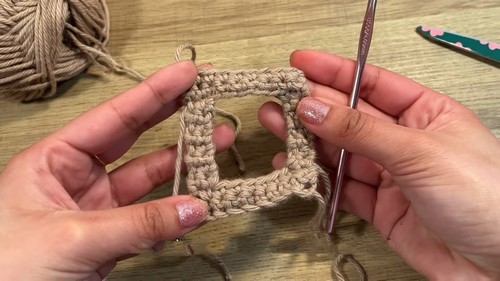
First Arm
- Turn, skip the turning ch, sc in each of the first 2 sts (2 sc).
- Turn, sc in 2 sts.
- Repeat row until you have a total of 7 rows for this small side. Fasten off.
Second Arm
- Attach yarn with slip knot to the 2nd st from the opposite edge of your starting strip (from the short side).
- Sl st to join, tighten slightly.
- Sc back into the joined st and sc in the next st (2 sc).
- Turn, sc in 2 sts; no turning ch.
- Work a total of 8 rows for this side. Fasten off.
Top of Head
- Starting from the last st of second arm, ch 5.
- Sc into each of the 2 sts on the opposite short side, working over any ends to the edge.
- Turn, sc in each st (2 base sts, 5 chs, and 2 base sts = 9 sc in row).
- Turn, sc across. Fasten off.
Back Panel
- Make a slip knot, ch 10.
- Sc in back bump of 2nd ch from hook and each ch across (9 sc).
- Turn, sc in each st across.
- Repeat until you have 12 rows total. Fasten off.
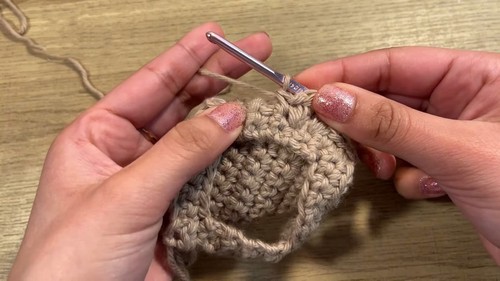
Joining the Two Panels
- Place front and back panels wrong sides together.
- Pull the live loop on your hook from the back piece; insert hook into the first corner stitch of the front, pull loop through and sl st to join.
- Side 1:
- For each row end, insert hook through matching sides of both pieces, sc together along the edge. (3 sc)
- In next st: (sc, dc, tr) all in same st (through both thicknesses).
- In next st: (tr, dc, sc) all in same st.
- Bottom edge:
- Sc in each st for next 7 sts (through both layers).
- In next st: (sc, dc, tr) all in same st.
- Next st: (tr, dc, sc) all in same st.
- Sc in each of next 5 sts.
- Side 2:
- In next st: (sc, dc, tr) all in same st.
- Next st: (tr, dc, sc) all in same st.
- Sc in each of next 7 sts.
- In next st: (sc, dc, tr) all in same st.
- Next st: (tr, dc, sc) all in same st.
- Sc in next st.
For the Head and Ears (Front piece only)
Continue around the top, but now work only through front panel :
- In first st: (sc, dc, tr) in same st (First ear).
- In next st: (tr, dc, sc) in same st.
- Sc in next 2 st, sl st in next st.
- Ch 45 (photo loop), sl st in same st, sc in next 2 st.
- In next st: (sc, dc, tr) in same st (Second ear).
- In next st: (tr, dc, sc) in same st.
- Sl st to join.
For the Back Loop (Back piece only)
- Turn to back.
- Sc in next 4 st, sl st in next st.
- Ch 4, sl st in same st (creates mini loop for hanging on a bag).
- Sc in next 4 st, sl st to join just before first ear.
- Fasten off, weave in all ends inside the back.
Face Embroidery
- With black yarn and a yarn needle, embroider 2 eyes and a nose/mouth as follows:
- For eyes: Make vertical stitches by threading needle from front just below ear, repeat 3 times for each eye.
- Space eyes about 2 stitches apart.
- For nose/mouth: Stitch a small “V” for nose in center between eyes (using about 3 stitches).
- When done, knot and weave in ends on inside.
Finishing & Assembly
- Optional: Glue or sew on a small bow, charm, or bead as desired.
- Slip your photo (~2 x 2.5″) through the top “photo loop.”
- To hang, thread the large chain through the small chain at the back.
Conclusion
Your Mini Teddy Bear Photo Holder is ready for use! This adorable and practical project is quick to make, beginner-friendly, and easily customizable with color or accessories.
Pattern Correction & Tips
- Correction: Always count stitches at the end of each row to ensure symmetry on both panels.
- Tip: For a neater finish, crochet over yarn ends as you join panels, saving time on weaving in ends later.
- Tip: Stitches in parentheses indicate all stitches are worked in the same base stitch (e.g., (sc, dc, tr) in same st).