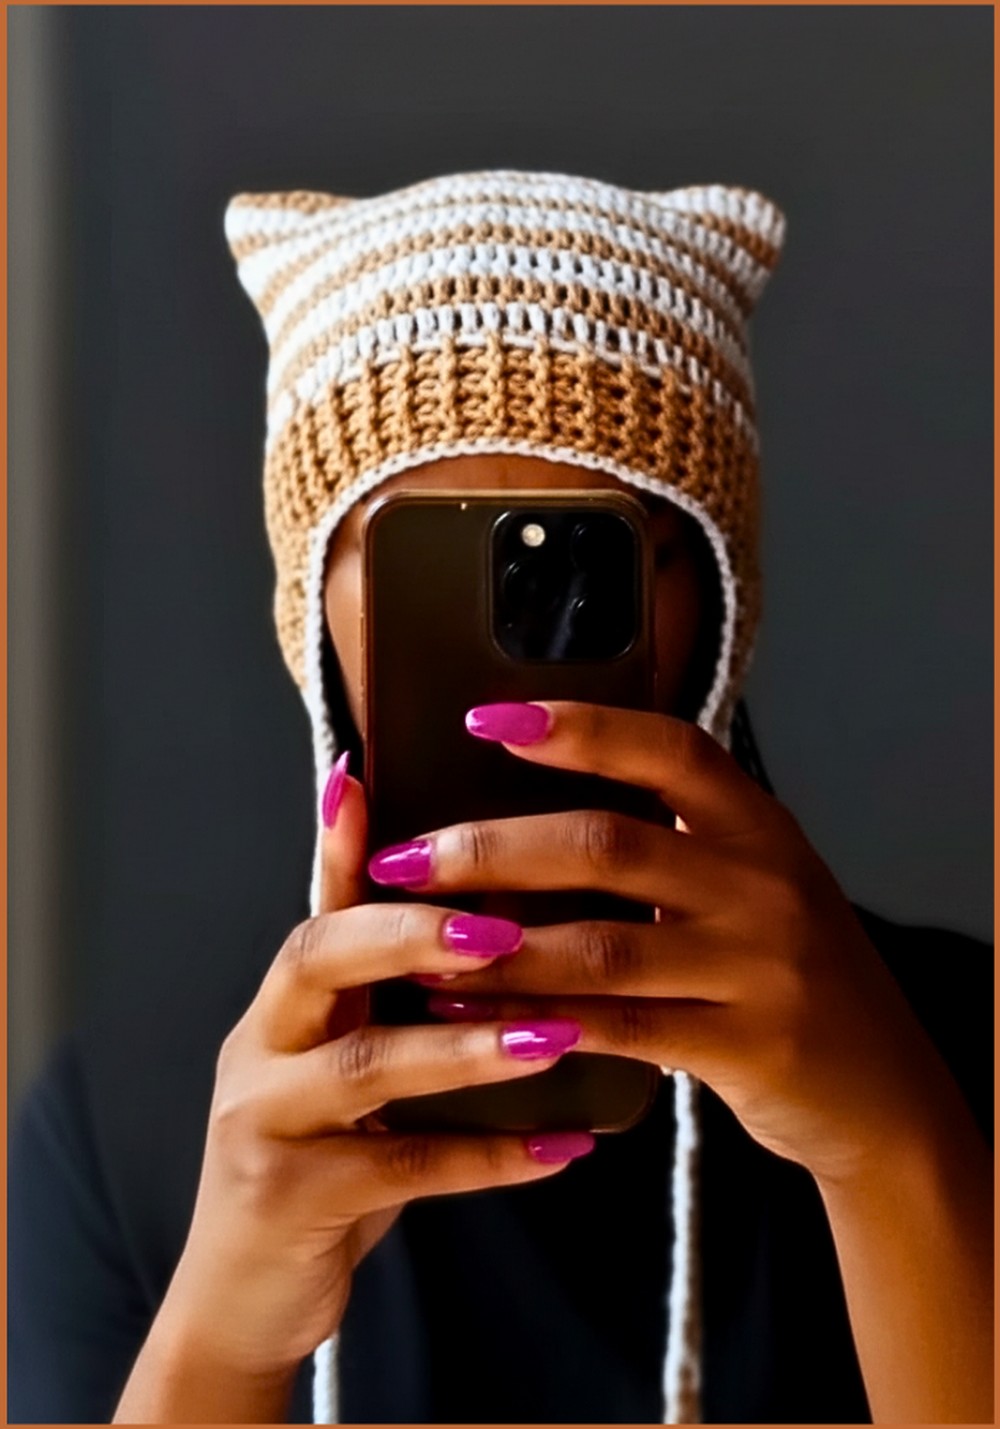
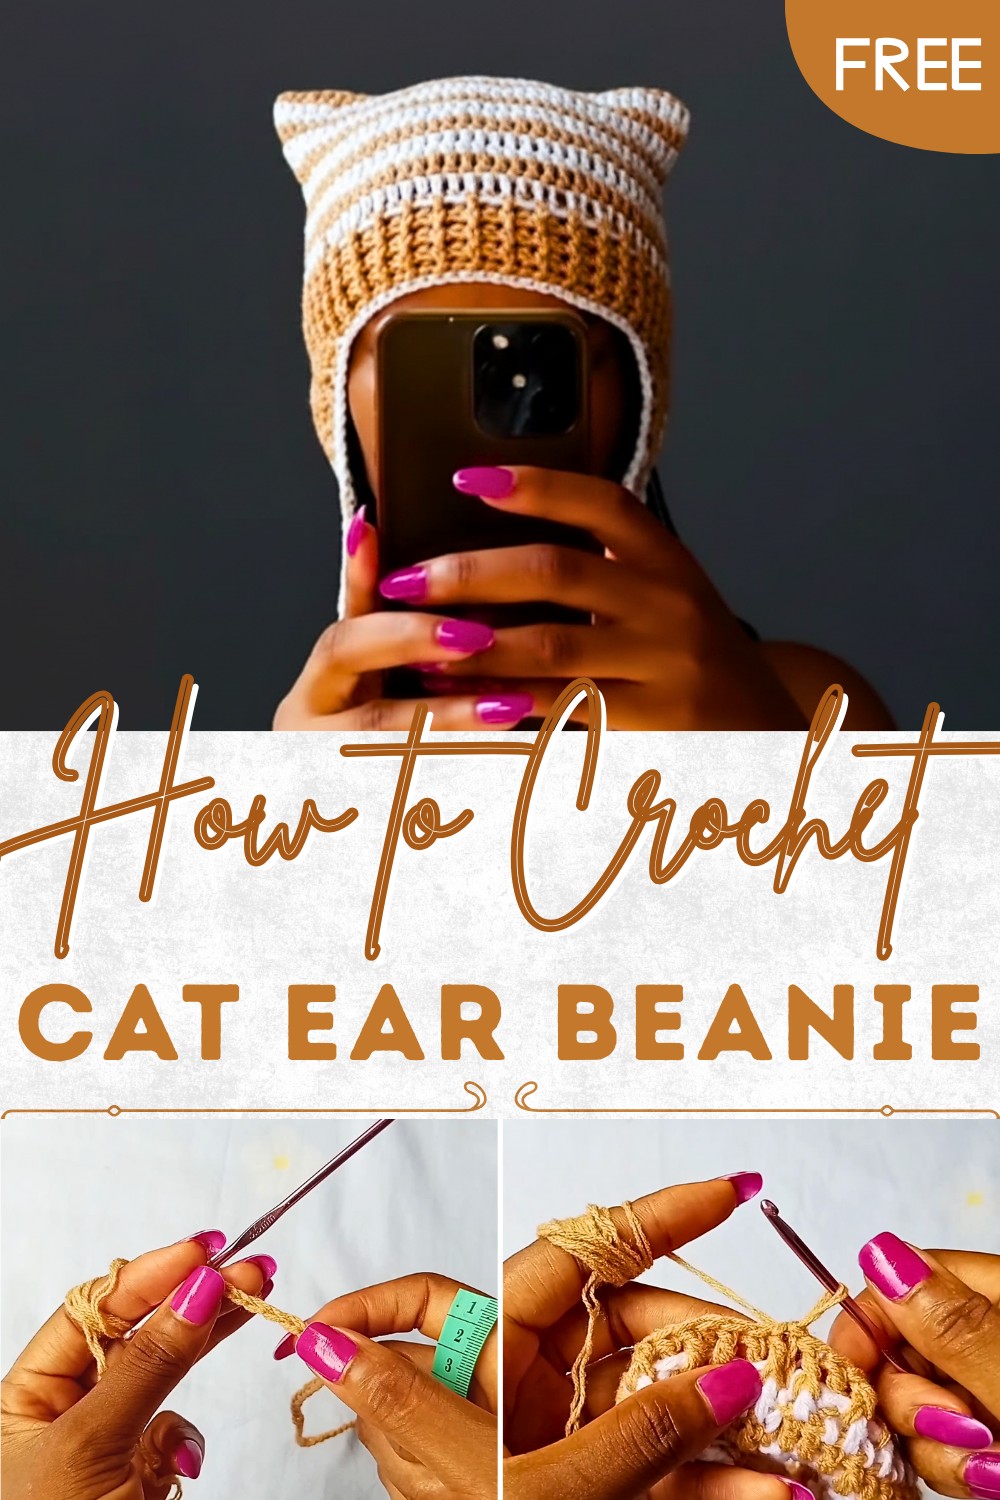
Snuggly Crochet Cat Ear Beanie Pattern You’ll Love Wearing
Show playful style with Crochet Cat Ear Beanie Pattern that gives a cozy look and adds fun charm to winter for kids teens and adults alike.
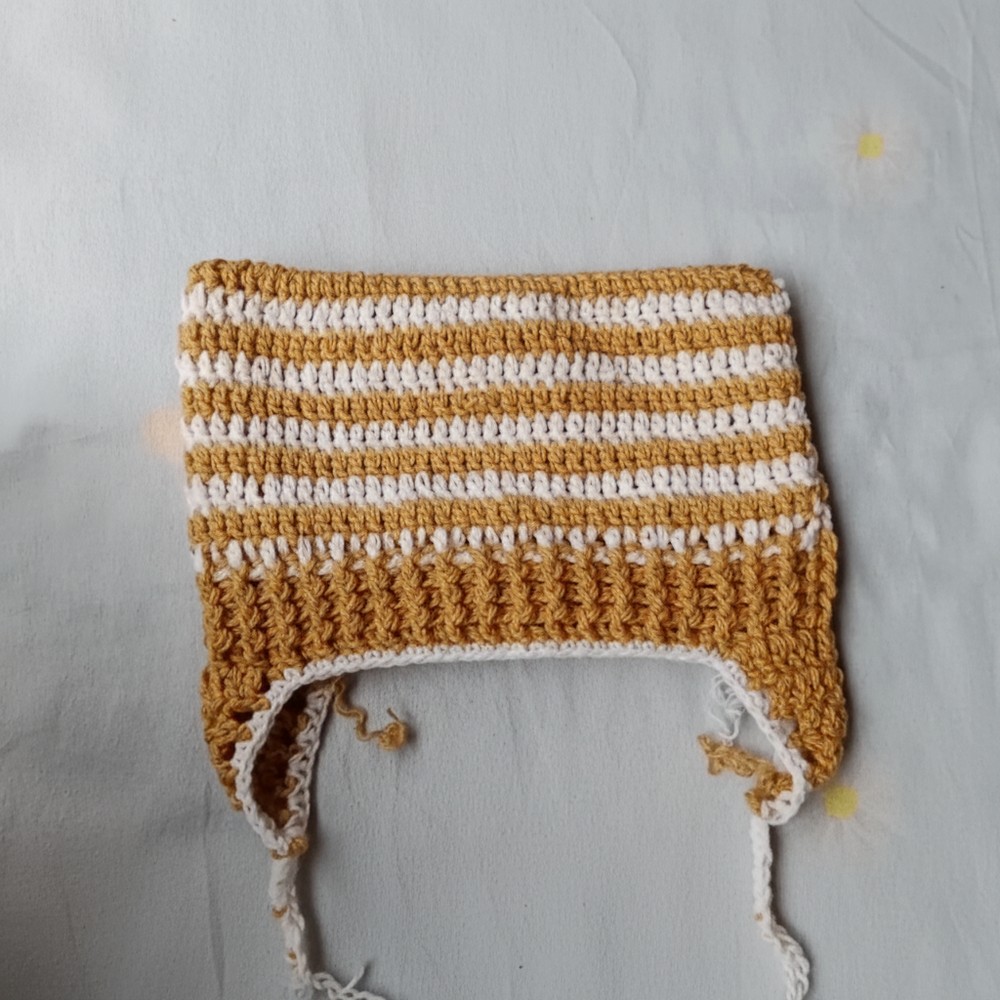
Cute and playful winter accessories can make cold days feel more fun and stylish. A soft beanie with little cat ears brings a sweet and charming look that many people love. The gentle shape of the ears gives the hat a unique style that stands out in a crowd. It keeps the head warm while also adding a touch of personality to simple outfits.
Kawaii Crochet Cat Ear Beanie Pattern That Looks Extra Cute
You can wear it on a chilly morning walk, during school days, at casual outings, or while enjoying outdoor winter fun with friends and family. Using a Crochet Cat Ear Beanie pattern makes it easy to shape this adorable hat with beautiful stitches and soft yarn. Different colors can give it a bold look or a calm and cozy feel. This hat is loved by kids and adults alike. It is warm, cute, and full of handmade charm that makes every winter day brighter.
Materials
- Yarn: Size 3 (DK/Light Worsted Weight) Acrylic Yarn (two colors, e.g., Nude and White)
- Hook: 3.5 mm crochet hook (use one size smaller than the yarn calls for a tighter stitch)
- Tapestry Needle: For weaving in ends and seaming
- Stitch Markers: For ear flaps placement (optional)
- Measuring Tape
- Scissors
Key Abbreviations (US Terms)
| Abbreviation | Term |
|---|---|
| ch | chain |
| st(s) | stitch(es) |
| sl st | slip stitch |
| dc | double crochet |
| fpdc | front post double crochet |
| bpdc | back post double crochet |
| sc | single crochet |
| rep | repeat |
Special Notes
- Pattern is written for a standard adult size but is easily adjustable.
- Maintain a tight tension for better ear effect and firmer structure.
- Color changes occur every round for a striped effect.
- Be sure to customize the length before splitting for ribbing or closing for cat ears.
- For ear flaps, the center front and back must be marked.
- The pattern includes instructions for both with and without ear flaps.
Pattern
1. Beanie Base
Sizes
- Measure head circumference (exclude ears). Sample is 22 inches (56 cm).
Band/Foundation
- Ch a number of chains (multiple of 2; sample: 76 ch) long enough to stretch comfortably around head circumference (do not make chains too tight).
- Sl st to first ch to form a ring. Be sure not to twist.
Body (Striped Rounds)
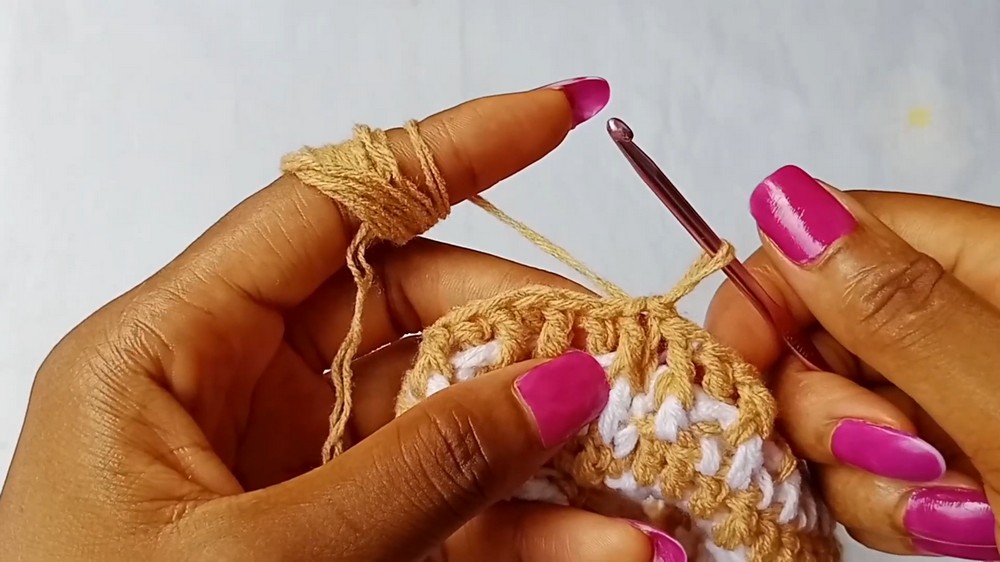
- Rnd 1 (First Color):
- Ch 1 (does not count as a stitch).
- Dc in each ch around. (76 dc)
- At end of round, prepare to change color: Insert hook in first dc, drop current color, yarn over with new color, pull through to complete sl st.

- Rnd 2 (Second Color):
- Ch 1.
- Dc in same st, dc in each st around.
- Change color at end as before.
- Continue alternating colors for each round, always finishing the sl st join with the new color.
- Do not fasten off previous color; carry up the side for minimal ends.
- Repeat Rnd 2 (alternating colors and changing at every round) until piece measures:
- 5 inches (13 cm) from edge if making with ear flaps.
- 9 inches (23 cm) from edge for beanie without ear flaps.
- Sample: 18 rounds for 9-inch length.
- To close tube: After last round, sl st to join, ch 1, fasten off if finished, or proceed to ribbing if making ear flaps version.
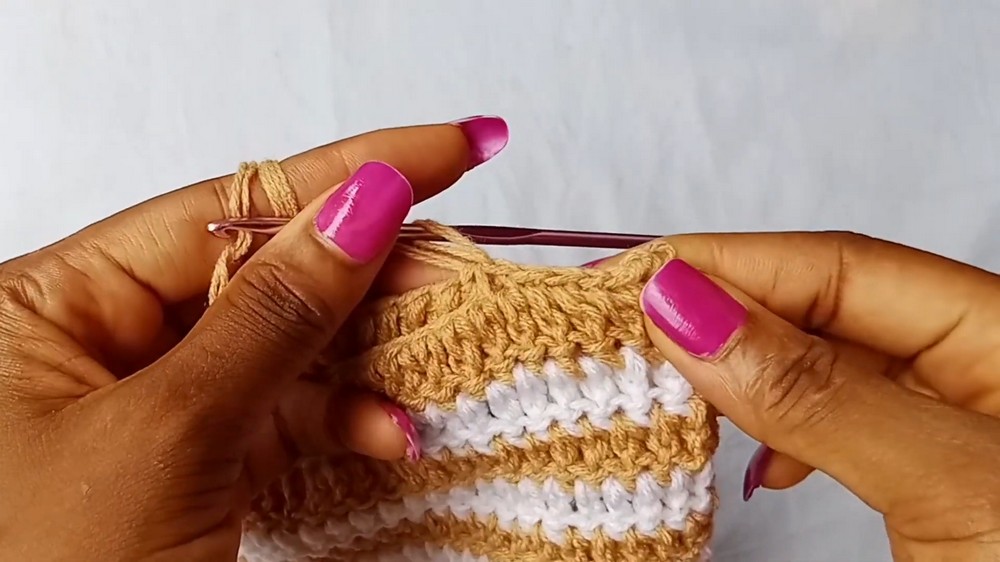
2. Ribbing (For Beanie With Ear Flaps Only)
- Join chosen color at join, ch 1.
- Alternating Rib Stitch:
- [fpdc]: Yarn over, insert hook around post of next st from front to back to front, yarn over and finish dc as usual.
- [bpdc]: Yarn over, insert hook around post from back to front to back, yarn over and finish dc as usual.
- Rnd 1: Fpdc, bpdc around, alternating.
- Rnd 2+: Fpdc into previous fpdc, bpdc into previous bpdc; sl st to join at end of each rnd.
- Continue until ribbing measures approximately 6–7 inches, as desired (sample: 4 rounds ≈ 6.5 inches total with body).
- Optional: Add 1 round of sc around edge to finish ribbing.
3. Ear Flaps (For Beanie With Ear Flaps Only)
- Fold beanie to align seam at back.
- Mark center front and center back with markers.
- Count half the stitches between markers for even placement; if odd, difference should not exceed one st.
Right Ear Flap:
- Join yarn at desired point (5 sts from marker to right).
- Ch 1.
- Row 1: Dc in first st and next 10 sts (11 dc).
- Rows 2+: Ch 3 (counts as dc), turn, skip first st, dc across until last 2 sts, skip next st, dc in last st (decrease at each end).
Repeat until 3 sts rem. - Ch 3, turn, skip next st, dc in last, fasten off.
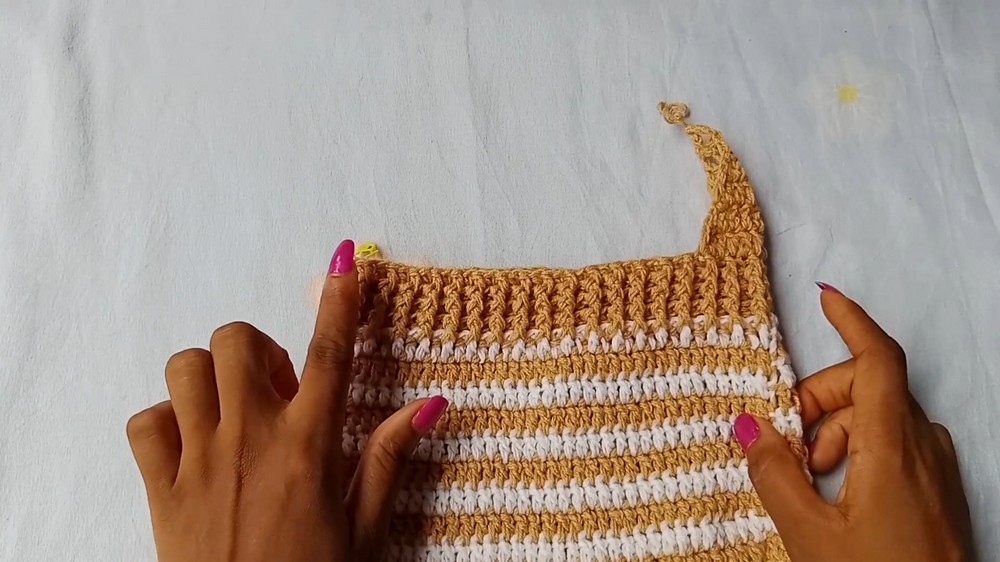
Left Ear Flap:
- Mirror the right: From center marker, count 5 sts to left, join yarn.
- Repeat Right Ear Flap instructions.
4. Edging & Ties (Ear Flap Beanie Only)
Edging:
- Join contrast color at lower edge of right ear flap.
- Ch 1, sc evenly up side of ear flap:
- 1 sc in each dc or st, 2 sc in each dc row end/space.
- At ear tip, make desired number of ch for tie (sample: 60 ch).
- Add decorative end:
- After 60 ch, ch 5 extra, sl st in 6th ch from hook, ch 5, sl st in same ch, ch 5, sl st again in same ch (makes a triple loop).
- Sl st in each ch back to ear (creates tie).
- Continue sc along edge and up to next ear flap, repeating for second tie.
- Join with sl st at start, fasten off and weave in ends.
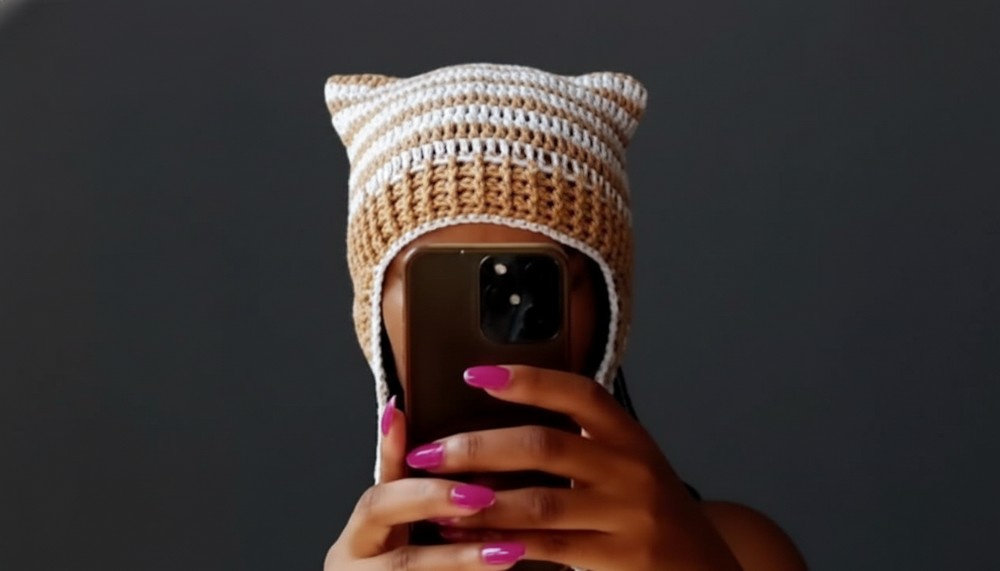
5. Closing Top for Cat Ear Effect
- Turn hat inside out.
- With yarn or tapestry needle, seam top edges together, aligning stitch for stitch.
- Recommended: Use sl st via hook through both layers across top seam for clear cat ear points. Ch 1 at end, fasten off.
- Gently tug seam to loosen; turn right side out. The corners will now create the cat ear shape.
6. For Beanie Without Ear Flaps
- Work as body through the length you prefer (usually 9 inches), then seam the top as above.
- Fold up bottom ribbing for a cuffed look.
Conclusion
With this approachable pattern, you can create a cute, playful Cat Ear Beanie, with or without ear flaps and ties. Alternating colored stripes and ribbing add personality and fit, while the special seam at the crown forms adorable cat ears. Adjust lengths and details to make the beanie fit your personal style.
Pattern Corrections
- Ensure chain count is an even number for ribbing and symmetry.
- If ribbing feels too tight or loose, adjust stitch count or hook size.
- Double-check ear flap placement to ensure symmetry.
Tips
- Carry yarn loosely on color changes to avoid puckering.
- Use stitch markers for cleaner ear flap positioning.
- Try the beanie on before final seaming to ensure perfect fit.
- To further shape “ears,” you can pinch and tack inside corners with a few stitches for extra definition.