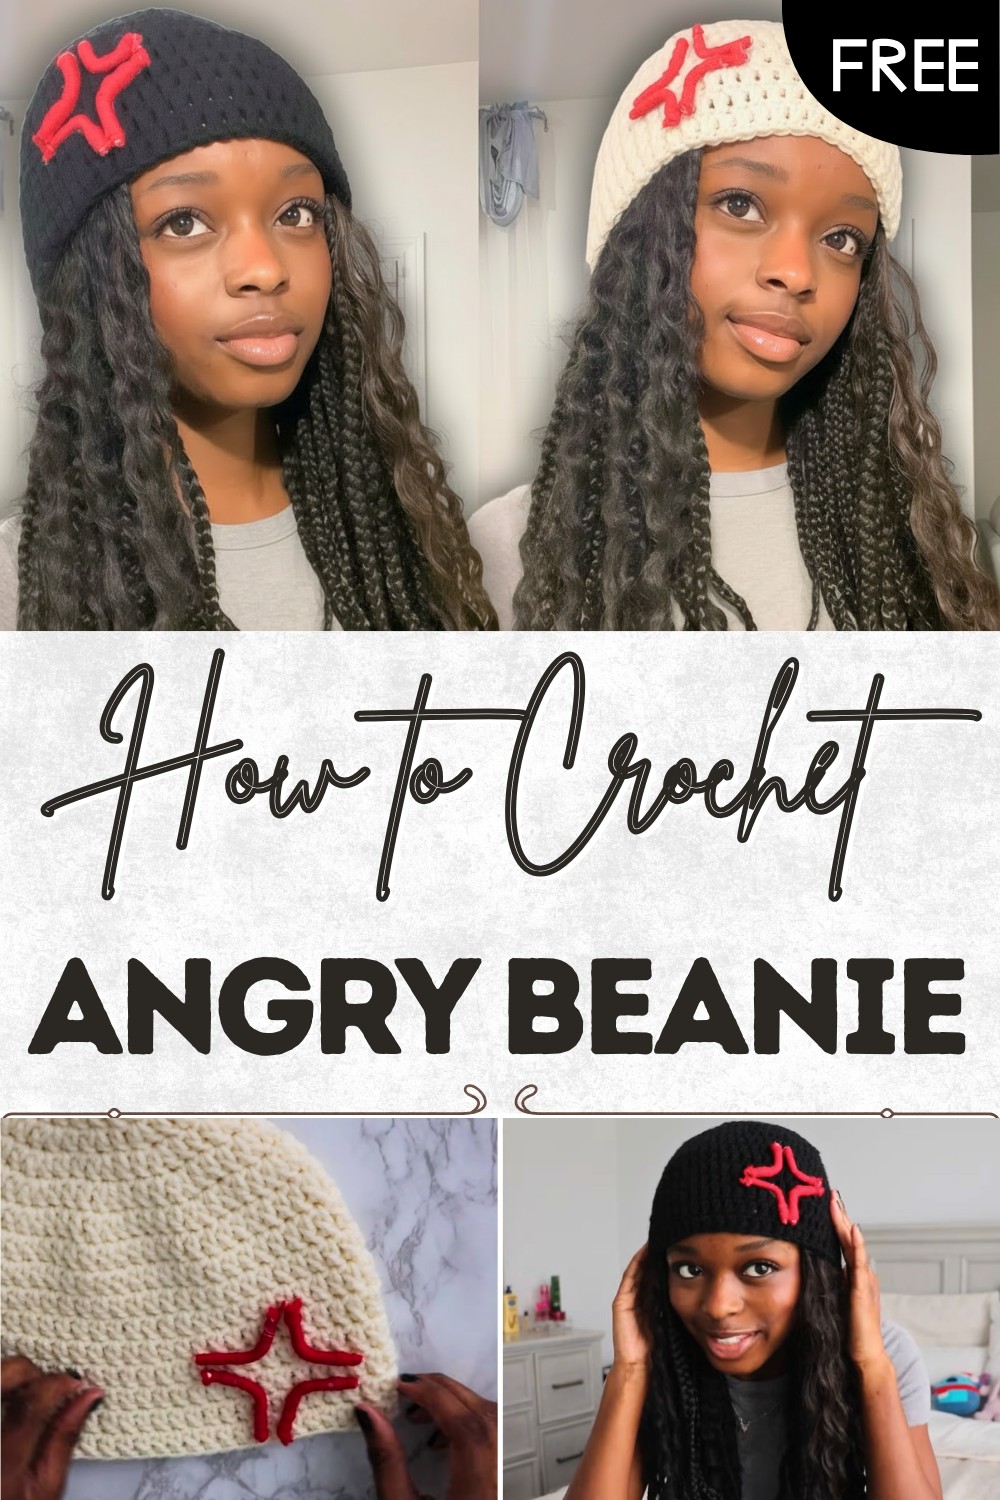
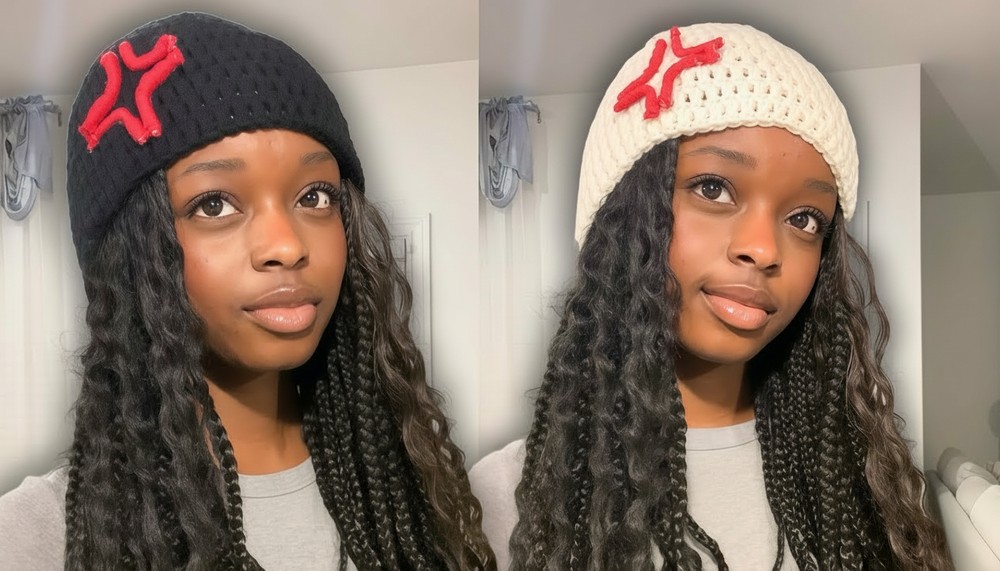
Simple Angry Beanie Crochet Pattern for Free
Spread fun and cheer with this free crochet Angry Beanie pattern that lets every family member stand out with a playful and bold handmade hat.
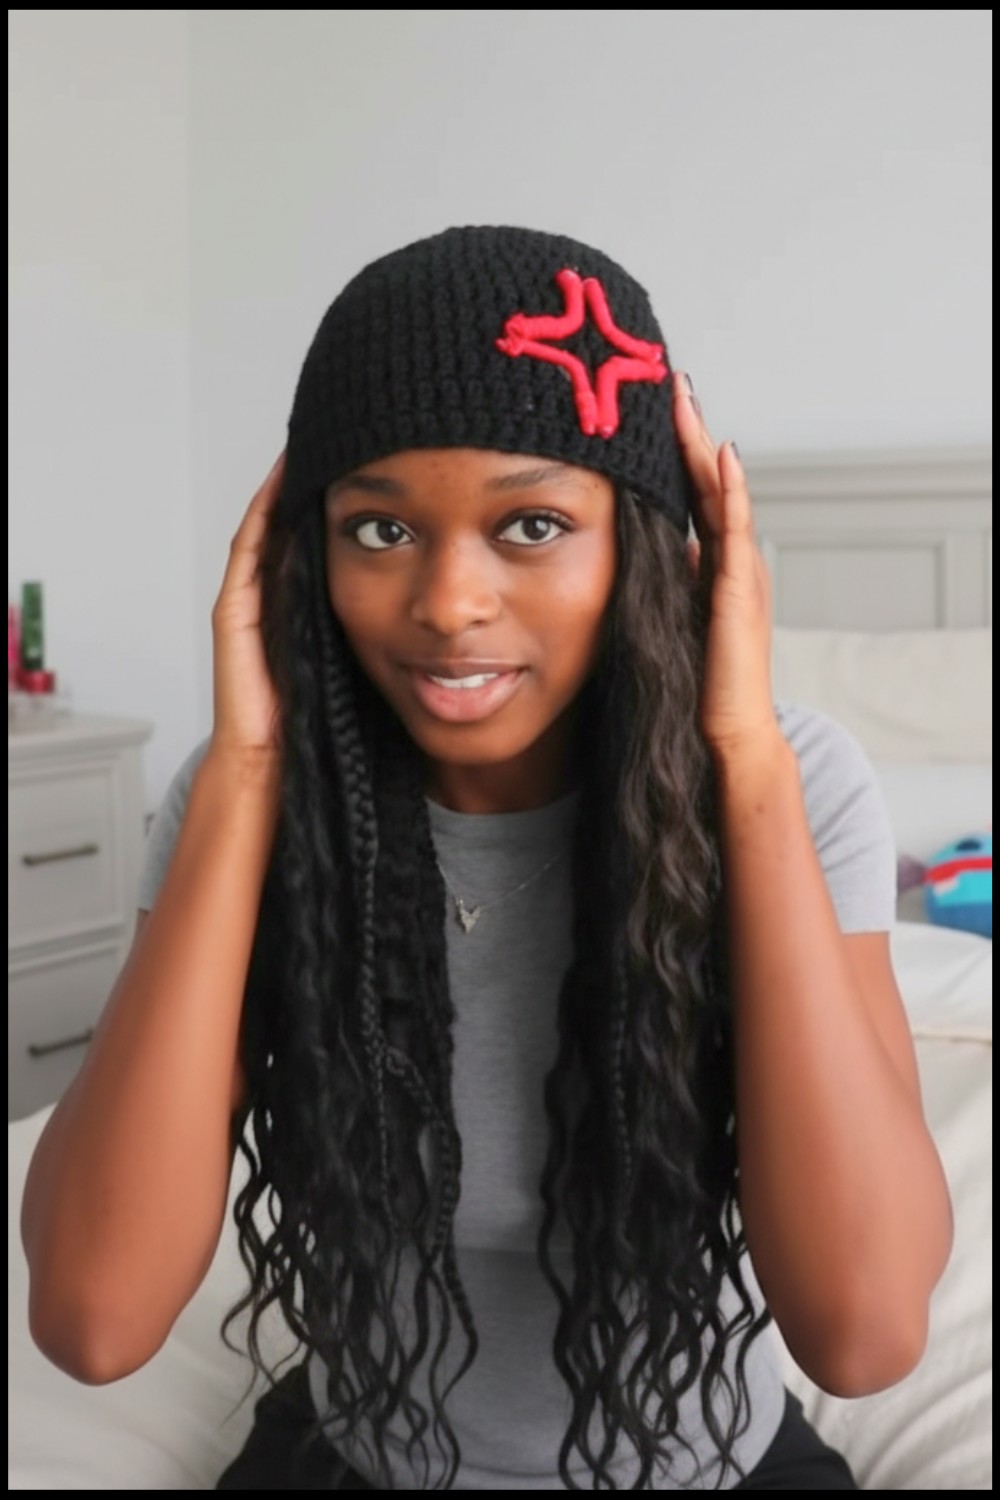
Sometimes regular hats fail to show your feelings or make you stand out in a crowd. A beanie with sharp eyes and a playful face draws smiles and attention, making any day more fun. Using the crochet Angry Beanie pattern, you can make a hat for anyone, even without much experience. Thick yarn keeps your head warm during cold weather, and the stretchy band fits both kids and adults. With its bright colors and interesting look, this beanie becomes a favorite for games, walks, and family gatherings.
Free Angry Beanie Crochet Pattern for Family Fun
The pattern makes each hat special, turning simple stitches into a cool and bold style. Friends notice its unique appearance, and children enjoy showing off their new beanie. This easy project brings happiness to all, letting you enjoy something truly personal. A beanie like this reminds everyone how simple shapes and colors can add laughter and joy to everyday life.
Angry Expression Beanie Crochet Pattern
Materials
- Yarn: Weight 4 (Worsted) acrylic yarn (main beanie color and red for appliqué)
- Crochet Hook: Size to suit yarn, commonly 5 mm (H-8)
- Tapestry Needle: For weaving in ends
- Stitch Marker: Very helpful for beginners
- Scissors
- Hot Glue Gun: For attaching appliqué
- Cotton Swabs (Q-tips): For structure of the angry appliqué
- Measuring Tape (optional): To check beanie diameter
- Optional: Yarn needle for burying ends
Abbreviations
in US Crochet Terminology:
- MR – Magic Ring
- ch – Chain
- dc – Double crochet
- sl st – Slip stitch
- inc – Increase (2 dc in same st)
- rep – Repeat
- st/sts – Stitch/Stitches
Special Notes
- The beanie is worked in the round, from the top down.
- You may increase more or fewer rounds as needed for different head sizes (see tips).
- Appliqué can be customized with different colors/shapes.
- Mark the first stitch of each round after joining—this helps you keep your place.
Beanie Instructions
Rounds 1–6: Base & Increases
Round 1:
- Make a magic ring (MR).
- Ch 2 (does not count as a stitch).
- 10 dc in the ring.
- Tighten the ring and join with a sl st to first dc.
(10 sts)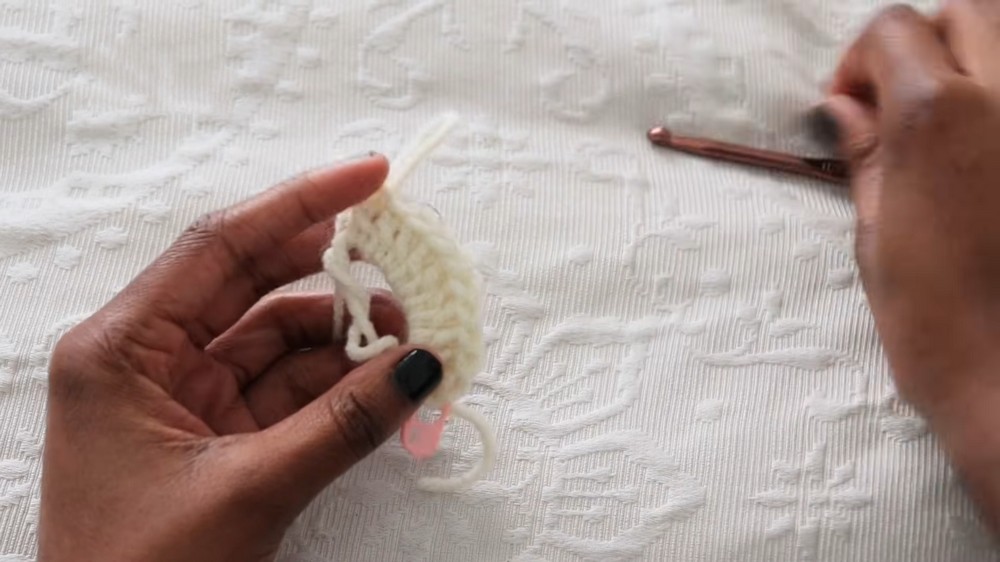
Round 2:
- Ch 2.
- Work 2 dc in each st around (i.e., inc in each st).
- Join with a sl st to the first dc.
(20 sts)
Round 3:
- Ch 2.
- (1 dc in next st, 2 dc in next st) rep around.
- Join with a sl st to the first dc.
(30 sts)
Round 4:
- Ch 2.
- (1 dc in each of next 2 sts, 2 dc in next st) rep around.
- Join with a sl st to the first dc.
(40 sts)
Round 5:
- Ch 2.
- (1 dc in next 3 sts, 2 dc in next st) rep around.
- Join with a sl st to the first dc.
(50 sts)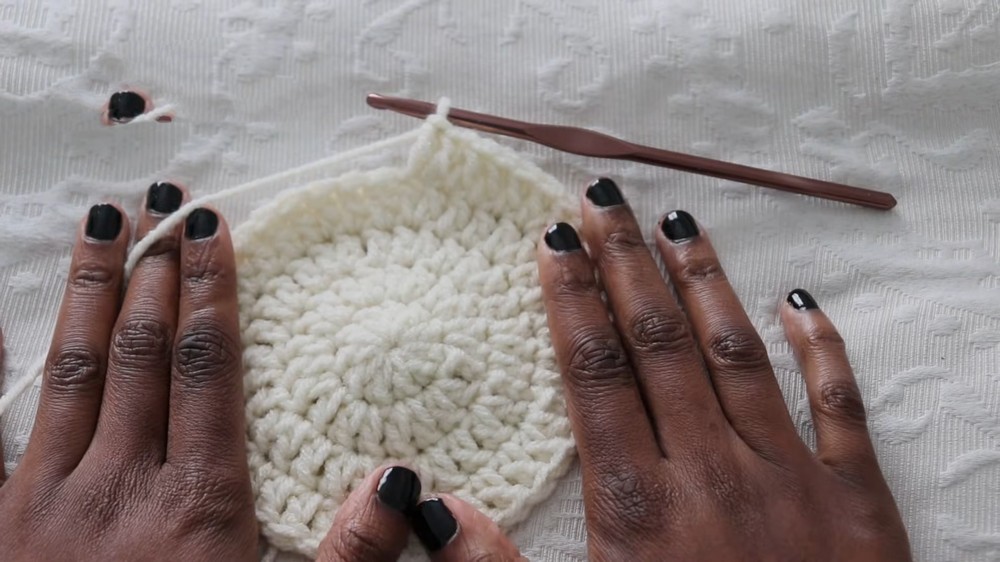
Round 6:
- Ch 2.
- (1 dc in next 4 sts, 2 dc in next st) rep around.
- Join with a sl st to the first dc.
(60 sts)
Note: At this point, your beanie crown should measure about 6–6.5” in diameter. If you need a larger size, continue increasing with the sequence (1 dc in next 5/6/7/…sts, 2 dc in next st) to add 10 stitches per round, measuring until you reach the diameter for the intended size.
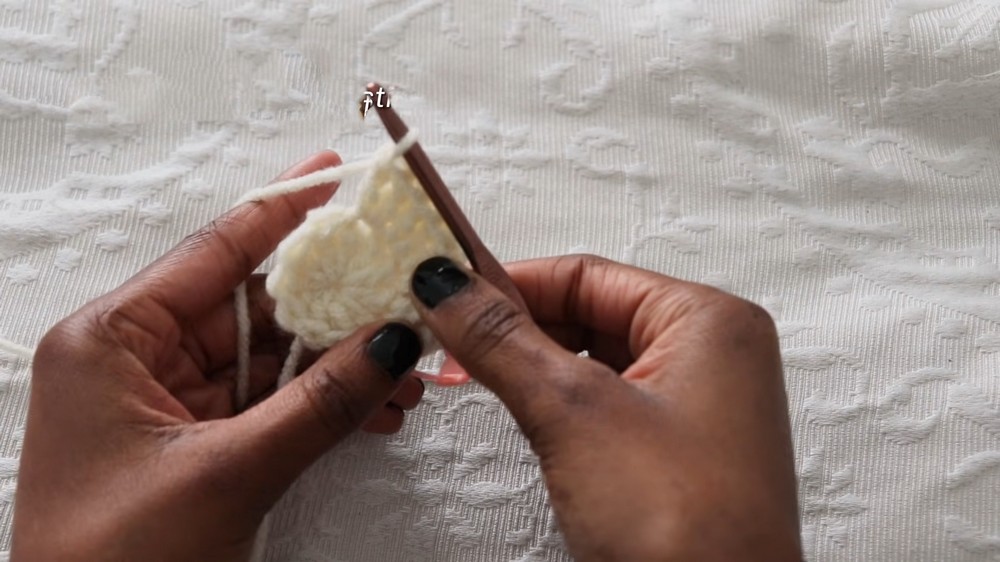
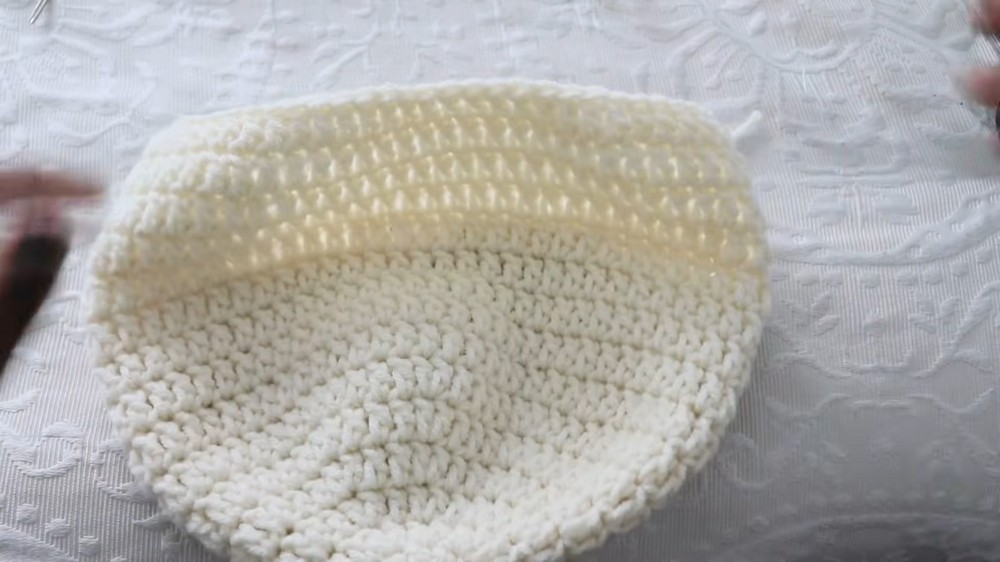
Rounds 7–15: Body of Beanie
Rounds 7–15:
- Ch 2.
- 1 dc in each st around (no increases).
- Join with a sl st to the first dc.
- Repeat until you have reached 15 rounds, or desired length (~8.5–9” tall for average beanie).
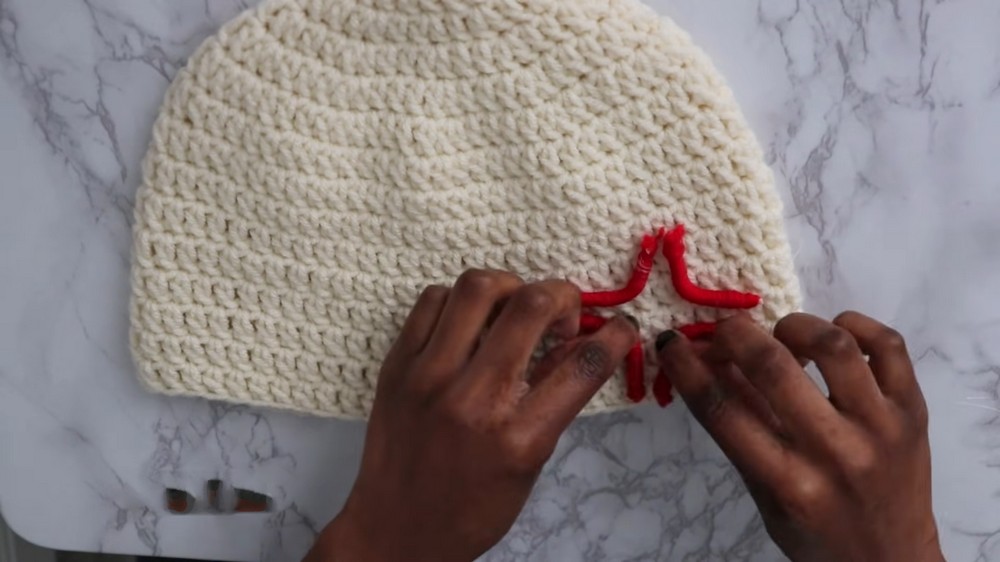
Appliqué: Angry Expression
- Prepare “Angry Eyebrow” Sticks:
- Take cotton swabs and hot glue.
- Apply a thin layer of glue to the stick, and wrap red yarn (or desired color) around.
- Add more glue as you wrap firmly for coverage.
- Shape/bend the stick for the expression as you glue.
- Make as many as needed for your beanie’s design.
- Attach:
- Arrange the wrapped “eyebrows” on the front of the beanie.
- Hot glue them in place at the desired angle.
Finishing
- Weave in all yarn ends securely with a tapestry needle.
- Block lightly with steam if desired for a smooth fabric.
- Enjoy your new beanie!
Conclusion
This fun, beginner-friendly “angry beanie” is worked in basic double crochet rounds, finished with an expressive, playful applique. The project works up quickly (about 2 hours) and is easily sized up or down for different head sizes or tastes.
Customize with your own colors and expressions for extra personality!
Pattern Correction
- Stitch count: Double check stitch counts at the end of each increase round to keep your hat flat and even.
- Round joining: Always join to the first dc (not starting chain) to avoid visible seams.
- Increases: For larger or smaller hats, add or remove increase rounds following the established pattern.
Tips
- Sizing: To size up, continue the increase pattern until you reach desired crown diameter, then stop increases.
- Fit: After round 6, check the circle’s size against your head or a beanie you like.
- Yarn: While acrylic is recommended for stretch and warmth, cotton can be used for a lighter/warmer-weather beanie.
- Appliqué: If the yarn sticks don’t hold their shape, use pipe cleaners or wire for more structure before wrapping them in yarn.