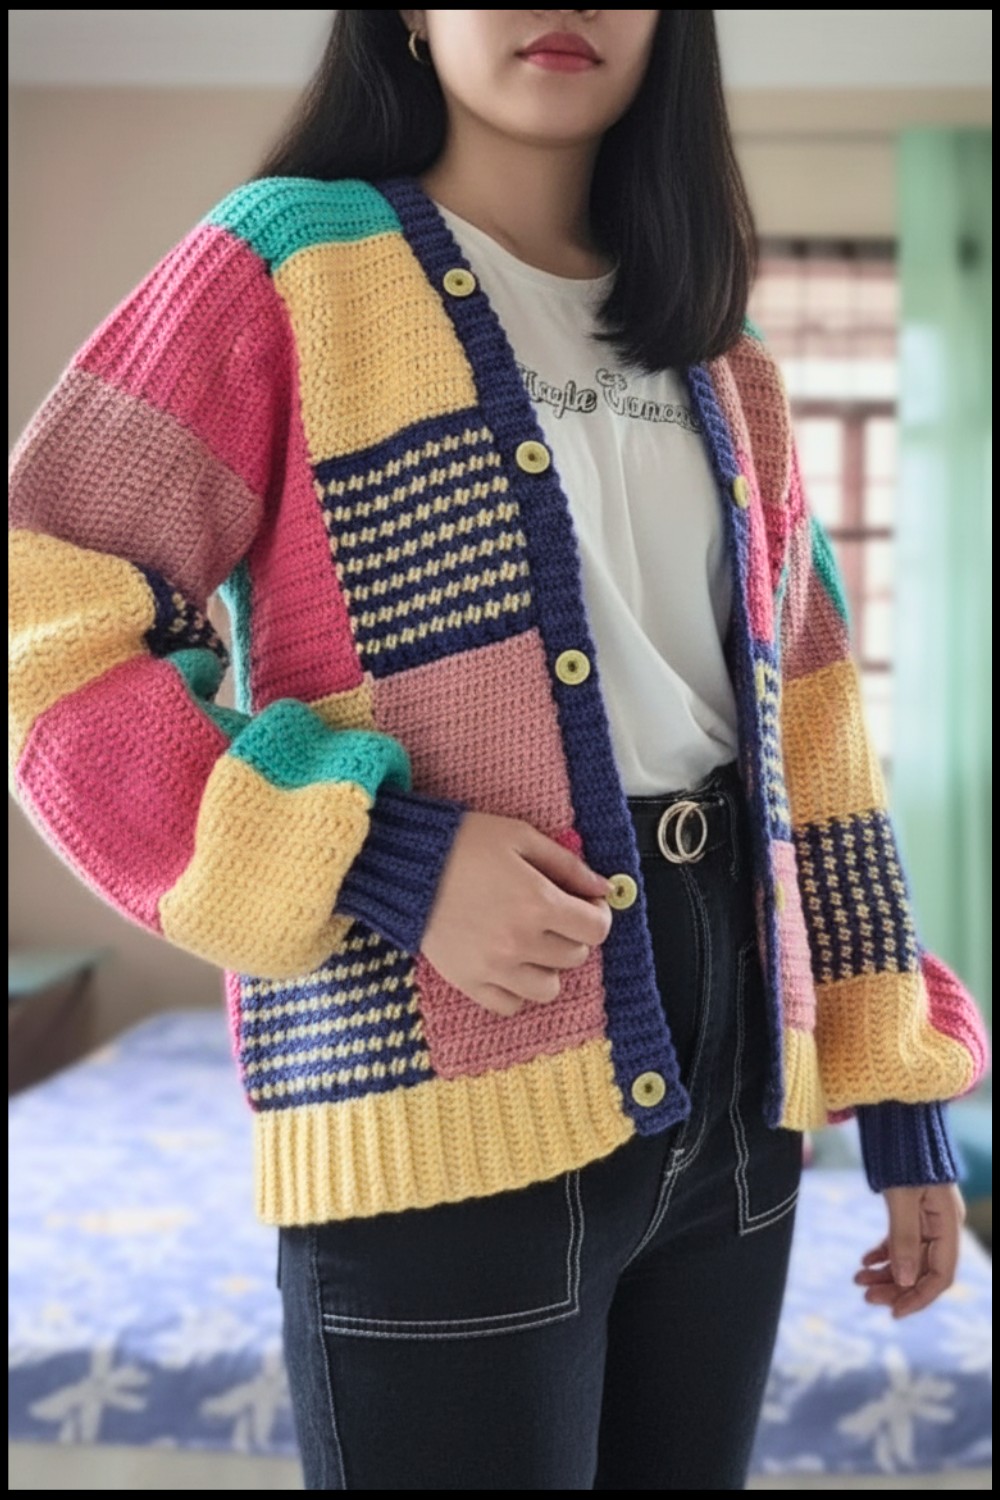
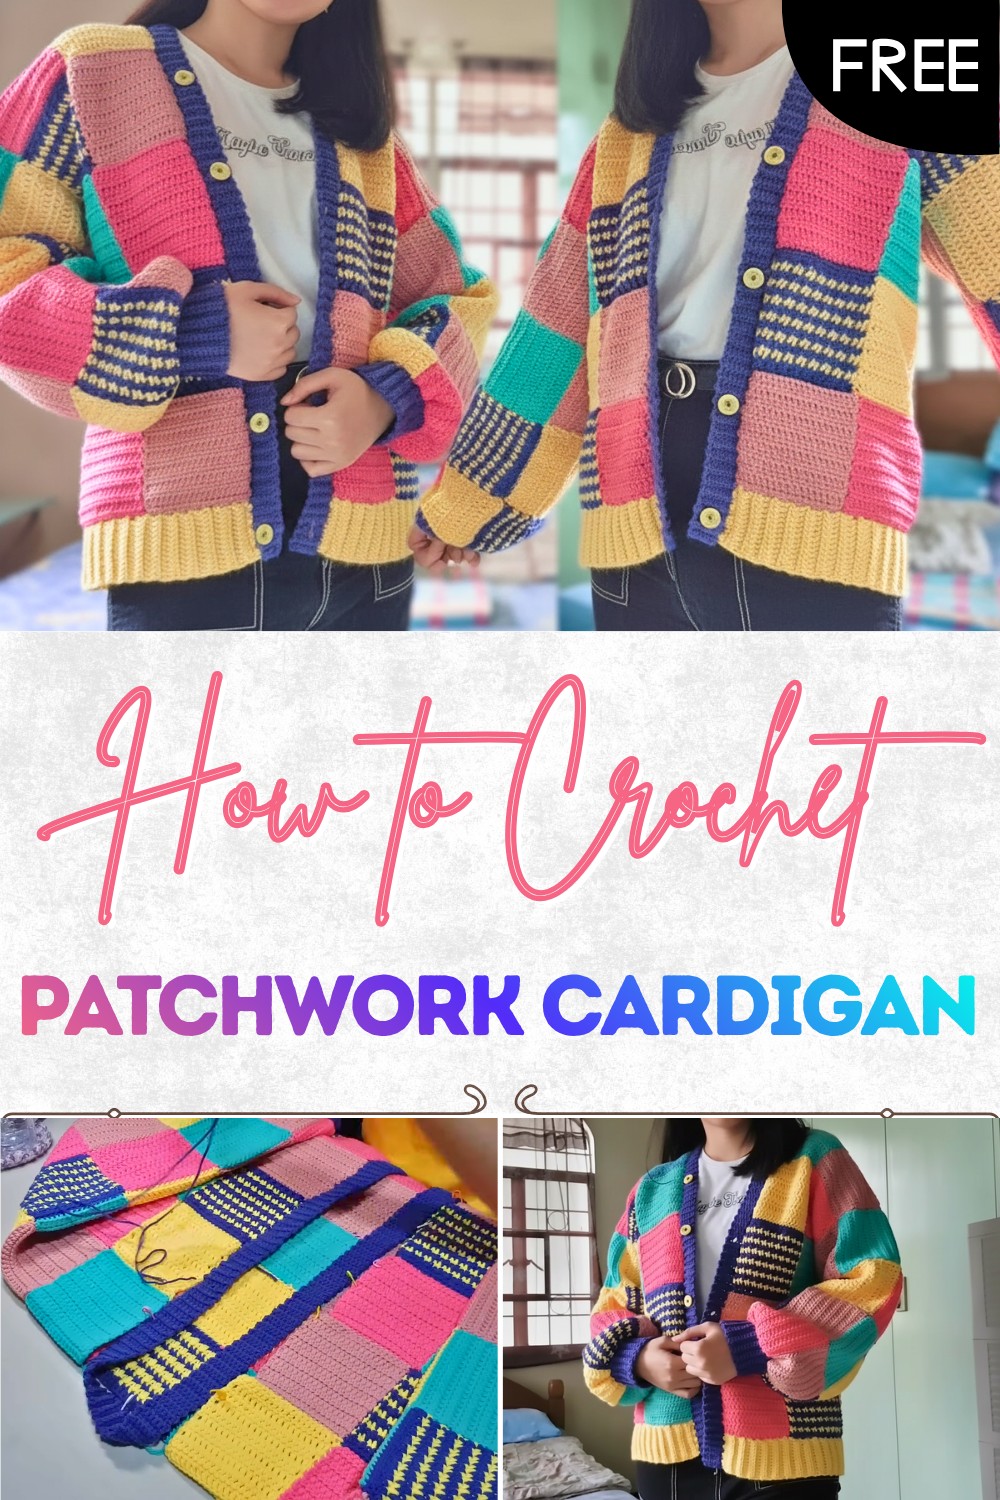
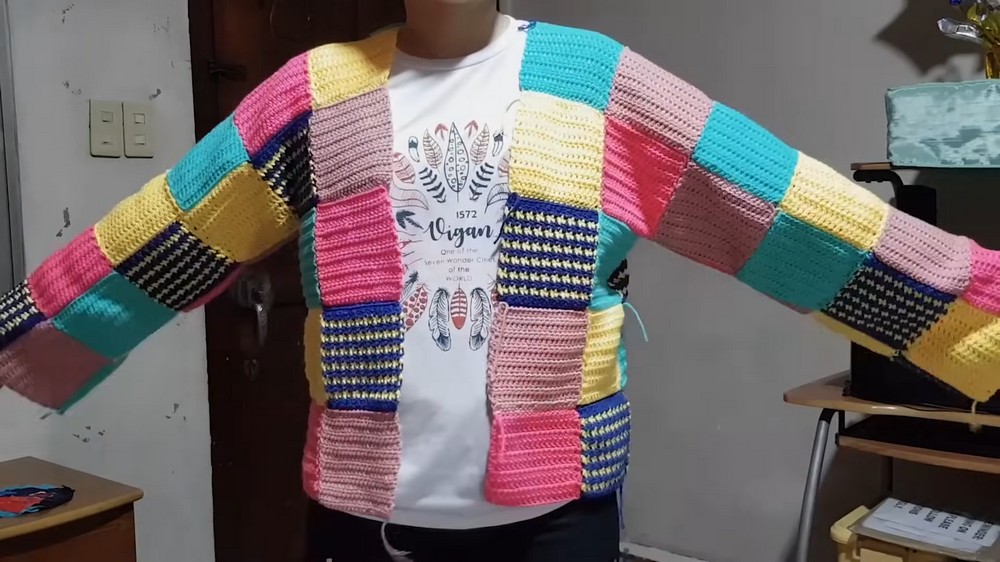
Free Crochet Patchwork Cardigan Boho Layer for Festival
Find your new favorite style with this free crochet patchwork cardigan pattern, and making a cozy layer that stands out for every occasion.
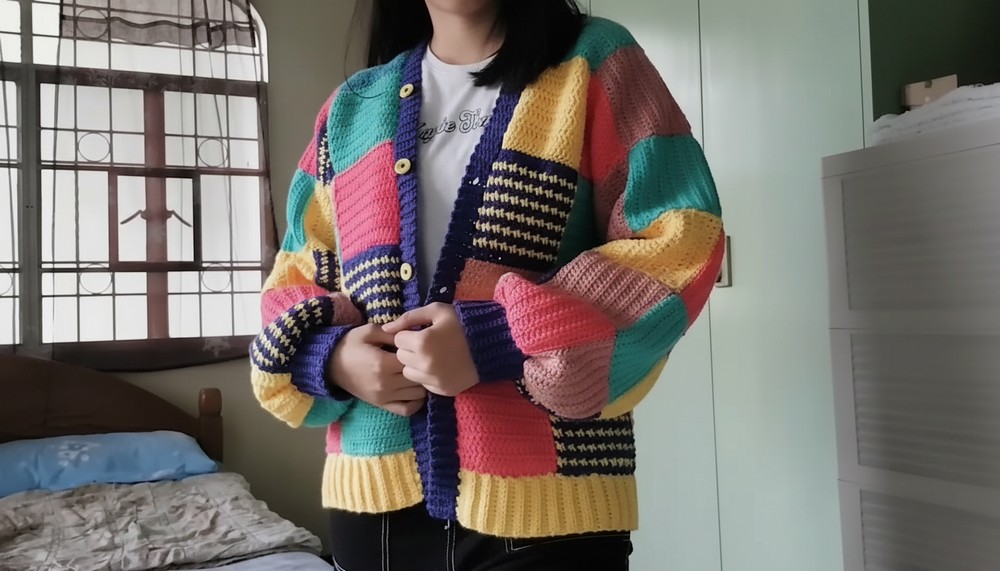
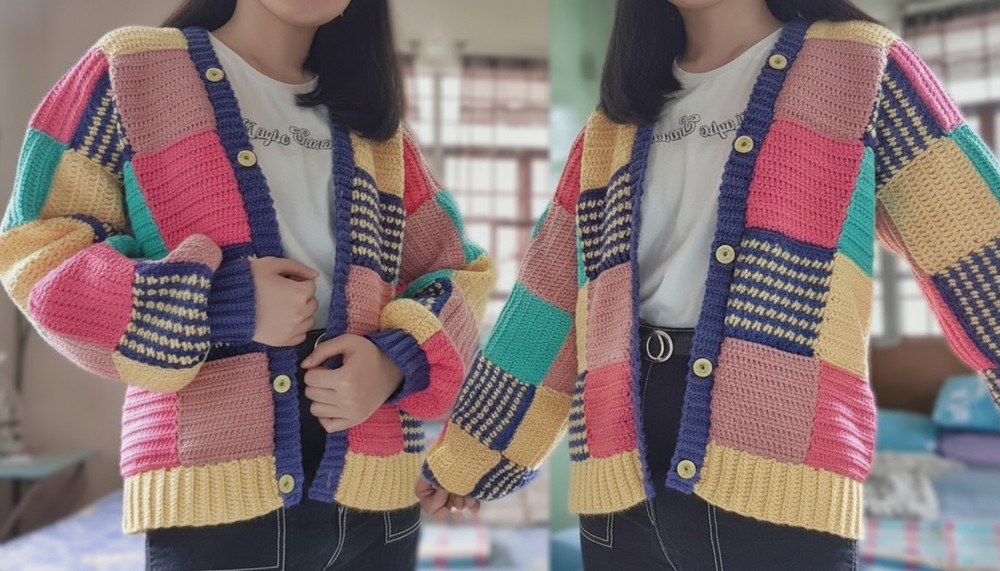
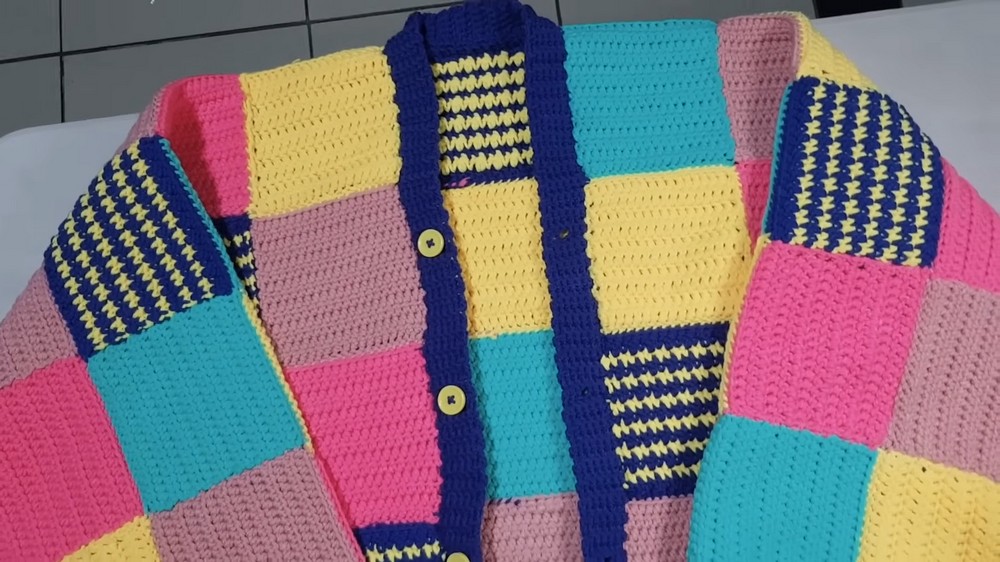
Sometimes, all it takes is a handful of colorful yarn scraps to bring a little brightness into everyday life. Different shades and textures blend together as little squares are joined in rows, forming a cardigan that stands out for its patchwork beauty and heartfelt charm. The crochet patchwork cardigan pattern turns even the simplest scraps into a unique piece full of personality, offering warmth as well as a happy burst of color—no matter where you go.
Patchwork Cardigan – Free Crochet Pattern With Step-by-Step Guide
It makes outfits more interesting and lets you layer in any season. As you stitch each patch, memories and smiles collect along the way, making the finished cardigan far more than just clothing. Using the crochet patchwork cardigan pattern gives everyone a chance to add their own touch and turn old yarns into something brand new to love. Easy to wear, perfect for daily life, and always ready to cheer up any day.
Patchwork Cardigan (Harry Styles Inspired)
Materials
- Yarn:
- Milk cotton yarn, or soft worsted weight (#4) yarn in multiple colors: Dark Blue, Cyan, Dark Pink, Rose Pink, Yellow, Black (for optional patterns).
- Hooks:
- 4.5 mm crochet hook
- 5.0 mm crochet hook
- Notions:
- 5 buttons (sample: yellow, ~2 cm diameter)
- Darning/tapestry needle
- Scissors
- Measuring tape
Key Abbreviations (US Terms)
| Abbreviation | Description |
|---|---|
| ch | chain |
| st(s) | stitch(es) |
| sc | single crochet |
| hdc | half double crochet |
| dc | double crochet |
| sl st | slip stitch |
| BLO | back loop only |
| rep | repeat |
| RS/WS | Right/Wrong side |
Special Notes
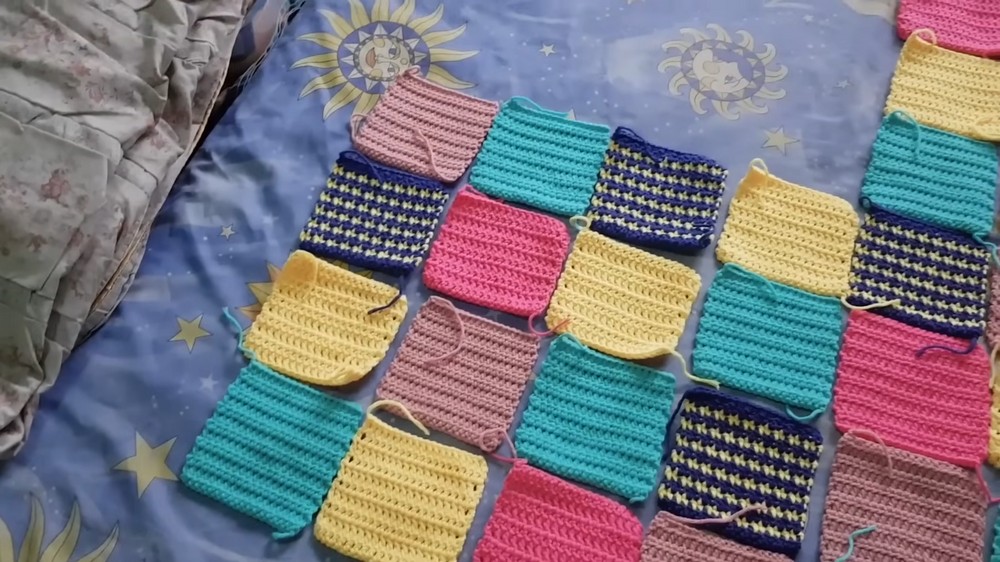
- Each square is worked in rows of hdc, finishing at approx. 12 x 12 cm (4.75 x 4.75 in).
- The pattern consists of one back panel, two front panels, and two sleeves, assembled from sewn squares.
- Ribbing (sleeve cuff, hem, button band) is added after assembling panels.
- Exact gauge is not crucial; aim for consistent size squares.
- Mix solid color squares and one patterned (e.g., houndstooth) for a patchwork effect as desired.
Step-by-Step Pattern
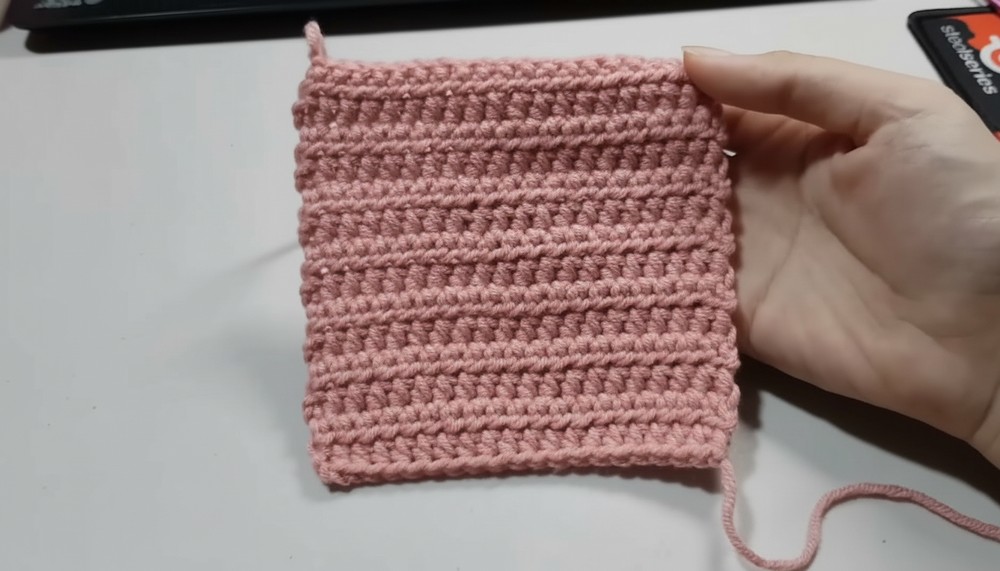
1. Patchwork Squares
Each Square:
- With chosen color and 5 mm hook (or 4.5 mm if you crochet loosely),
- Ch 19.
- Row 1: Hdc in 2nd ch from hook and in each ch across. (18 sts)
- Rows 2–14: Ch 1, turn. Hdc in each st across. (18 sts)
- Fasten off, leave tail for sewing.
- Tip: Make a gauge swatch. Finished square should be approx. 12 x 12 cm (4.75 x 4.75 in). Adjust hook/yarn if needed.
- Sample Color Distribution:
- 16 squares each: Dark Pink, Yellow, Cyan
- 15 squares: Rose Pink
- 14 squares: Houndstooth (see below)
Houndstooth Option:
- Alternate sc and dc within a row, switching colors each row (e.g., row 1: sc, dc, sc, dc; row 2: with second color, sc in dc of row below, dc in sc, etc.).
2. Arrange and Sew Panels
- Lay out squares as desired for each panel:
- Back: ~5 squares wide × 5 squares tall (adjust as needed for fit).
- Front Panels (2): ~2 squares wide × 5 squares tall.
- Sleeves (2): ~7–8 squares each, arranged to fit your arm.
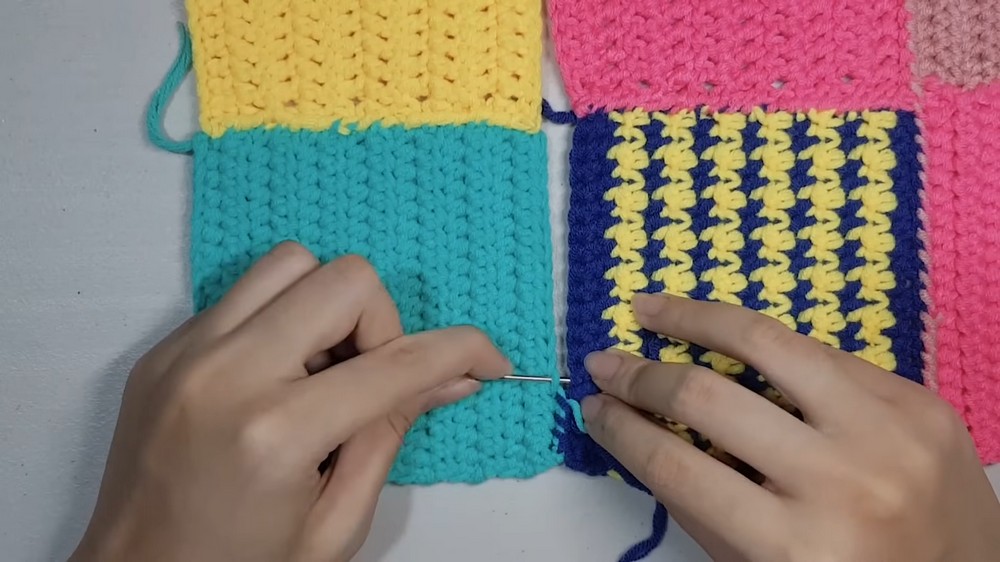
- Sew squares together using a darning needle and the mattress/back loop stitch:
- Working RS facing, stitch backs of squares together (to minimize visible seams).
- Use square tails or matching color yarn for minimal visibility.
- Join row by row, then sew rows into full panels.
3. Assemble Cardigan
- Attach panels as follows:
- Join front panels to back panel at shoulders.
- Join sleeve panels at armholes, aligning evenly.
- Fold cardigan at shoulders, sew side seams and underarms.
- Turn RS out after all seams are complete.
4. Crochet Ribbing & Cuffs
A. Sleeve Cuffs (Make 2)
- With Dark Blue, ch 11.
- Row 1: Sc in 2nd ch from hook and each ch to end (10 sts).
- Rows 2–N: Ch 1, turn. Sc BLO in each st.
- Repeat until strip wraps snugly around wrist; join edges using sl st (foundation row to last row). Fasten off, leave tail for sewing to sleeve.
B. Bottom Ribbing
- With Yellow, ch 13.
- Row 1: Hdc in 2nd ch from hook and across (12 sts).
- Rows 2–N: Ch 1, turn. Hdc BLO in each st.
- Repeat until ribbing matches the full width of cardigan bottom edge.
- Fasten off, leave tail for sewing.
C. Button Band
- With Dark Blue and 4.5 mm hook, ch 7.
- Row 1: Sc in 2nd ch from hook and across (6 sts).
- Rows 2–N:
- Ch 1, turn; sc BLO in each st.
- Every 17 rows (~10 cm), create buttonhole as follows:
- For buttonhole row: Sc BLO in first 2 sts, ch 2, skip 2 sts, sc BLO in last 2 sts.
- Next row: Sc BLO in each st (work sc in each ch-sp and st).
- Repeat until the button band equals the front edge (collar to hem).
- Fasten off.
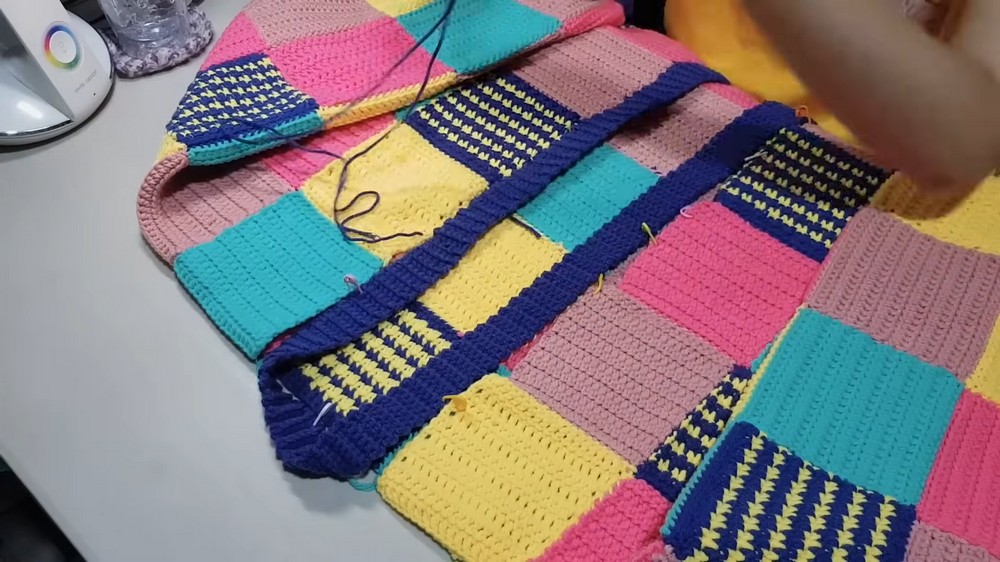
5. Attach Ribbing and Finishing
- Attach Sleeve Cuffs: Sew ribbing to end of each sleeve, slightly bunch sleeve for puff effect.
- Attach Bottom Ribbing: Sew ribbing flat to bottom hem all the way around; unravel extra rows if ribbing is too long.
- Attach Button Band: Sew button band to the edge of the cardigan opening, making sure the buttonholes are positioned on the correct side.
- Sew on Buttons: Align with buttonholes and securely stitch through with yarn and small darning needle.
6. Final Finishing
- Weave in all ends securely.
- Turn cardigan RS out.
- Steam or block as needed (especially square edges and seams).
Conclusion
This patchwork cardigan is a customizable, beginner-friendly take on the Harry Styles cardigan trend. You can easily adapt sizing/palette and panel arrangement for a truly unique garment. The project is approachable for those with basic knowledge of crochet stitches, panels, and simple seaming.
Pattern Correction
- Adjust square count and panel assembly for your measurements; the listed counts are a sample.
- Measure as you go, and be consistent with tension and hook size for even squares.
- Button placement and count are adjustable for preference.
Tip
- Mix textured and smooth squares for added interest.
- Select soft yarns for comfort.
- Consider adding a collar for the classic “JW Anderson” look.
- Add a fabric lining for extra structure (optional).
- Try slip stitch or whipstitch for seaming if you prefer a different finish.