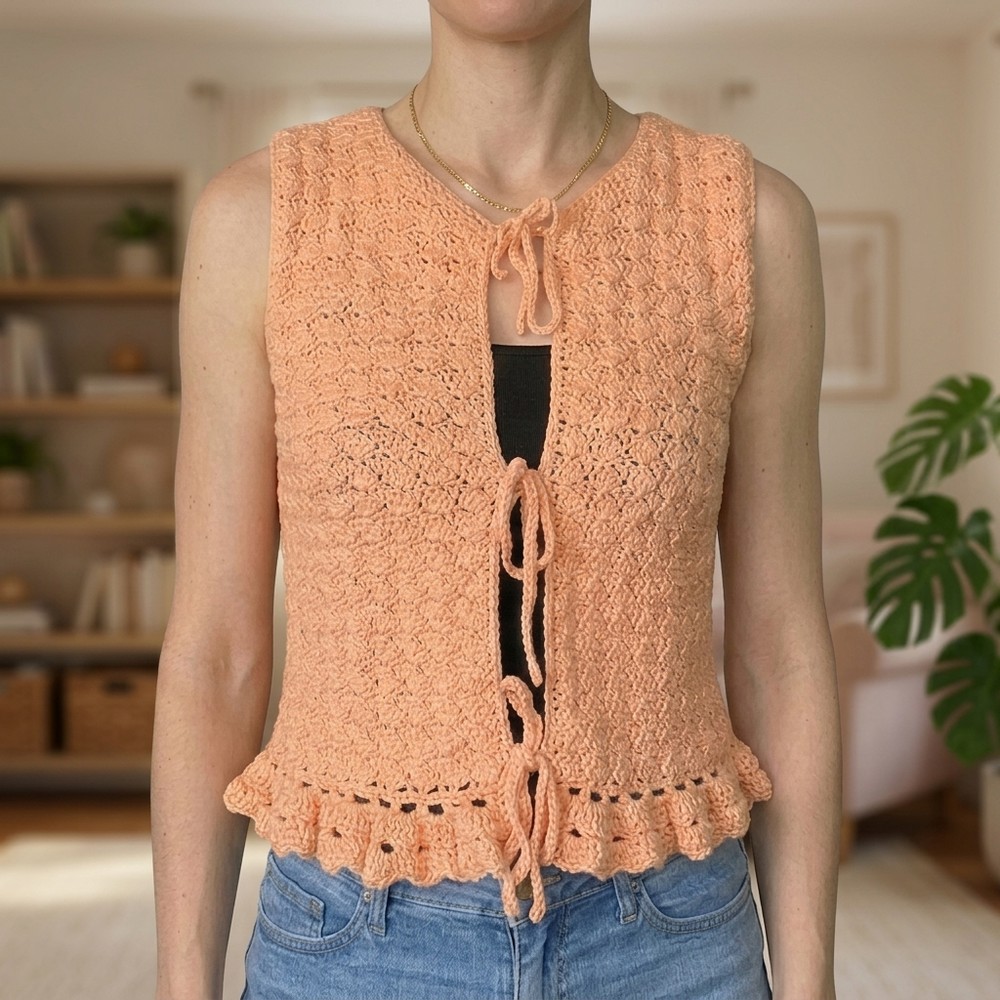
Free Crochet Irene Top Pattern For Casual Chic Looks

Refresh your wardrobe with this Free Crochet Irene Top Pattern, a stylish and comfortable project perfect for casual wear or thoughtful handmade gifts.
You’re going to love this free crochet Irene Top pattern, it’s like a breeze you can wear. I designed this top to be the perfect mix of comfy and chic, with a light, lacy stitch that feels oh-so-breezy on warm days. The relaxed shape gently hugs your body without being clingy, making it a flattering go-to piece whether you’re dressing up for brunch or lounging in the sun. What really makes it pop is that gorgeous openwork texture, kind of like wearing a little piece of wearable art.
Step by Step Crochet Irene Top Pattern
Whether you’re a crochet newbie looking to level up or an experienced hooker craving a fun project, this pattern’s got your back. It comes in plenty of sizes, and you can easily customize the fit by swapping yarns or changing hook sizes. The Irene Top is mostly worked in rows with some playful shaping around the neckline, so you’ll get a little stitch adventure without getting overwhelmed.
Pro tip: pick a soft cotton or cotton blend yarn, it shows off the lacy details beautifully and keeps your top light and breathable.
The inspiration? View sunlit afternoons, iced lemonade, and that perfect summer vibe, this top captures all that carefree spirit! It’s a fab gift idea, too, especially if you love to add your own creative twist, maybe a splash of color or a cute trim. Trust me, once you make one Irene Top, you’ll want to crochet a whole wardrobe.
Pattern Notes
- The top is made in three panels: one back, two front. Straps and ruffles are worked separately.
- Adjust chain counts for your desired sizing. For each panel, fold and place a marker to find exact centers before creating straps.
- Panels are joined with single crochet; finishing includes borders and customizable details for a professional look.
- Where “reduce” is explained, two techniques are shown – both suitable for shaping armholes.
- For best sparkle and drape, a lightweight, glittery yarn is recommended.
- Pattern is written for size Medium, with notes on customizing for other sizes.
- The term “Shain” in the transcript refers to “chain.”
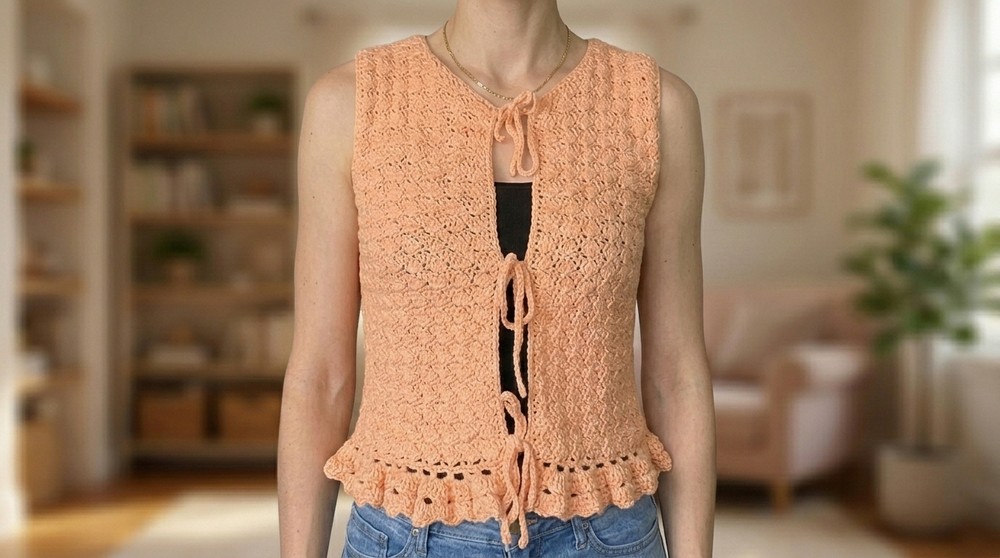
This lightweight, sparkling crochet top features beautiful ruffle detailing along the hem and elegant panels for a polished look. Designed for layering, its construction breaks down into simple steps with clear shaping and finishing techniques. Modern, flattering, and easy to customize, this project is a festive addition to your handmade wardrobe.
Sparkling Ruffle Crochet Top
Skill Level
Easy (Beginner-Intermediate): Knowledge of basic stitches (single crochet, double crochet, slip stitch, chain), shaping and joining.
Materials
- Yarn: Hobby Panetone or other lightweight, sparkling yarn
- Hook: 4.5 mm crochet hook
- Stitch markers
- Scissors
- Yarn/tapestry needle (for sewing/hiding tails)
Measurements / Sizing (Optional Schematic)
- Back Panel (Medium): 80 chains + 1; 29 rows before shaping.
- Each Front Panel: 40 chains + 1; 29 rows before shaping.
- Straps: Width equal to the folded center, shaped over 6 rows.
- Finished chest width and length may be customized as per preference.
- See description for alternate chain counts for other sizes (not provided here; please refer to video description).
Gauge
- In shell stitch pattern: 4” x 4” = approx. 10 shell repeats x 12 rows.
- Check gauge after completing first few rows for accuracy.
Stitch Abbreviations
- ch = chain
- sc = single crochet
- dc = double crochet
- sl st = slip stitch
- rep = repeat
- st(s) = stitch(es)
- RS = right side
- WS = wrong side
Special Stitches
- Shell Stitch: 3 dc in same st or space (used throughout for texture)
- Reducing (Armhole Shaping): insert hook into two adjacent sts, yarn over, pull through both, then pull through all loops on hook.
- Ruffle: Ch 5, skip 2 sts, sc into next; then 5 dc into ch-5 space, sc into next, rep for ruffle effect.
The Crochet Pattern
Back Panel
- Foundation:
Make a slip knot; ch 80 + 1 (Medium; see notes for other sizes). - Row 1:
Sc into second ch from hook.
Ch 3, 3 dc in same space.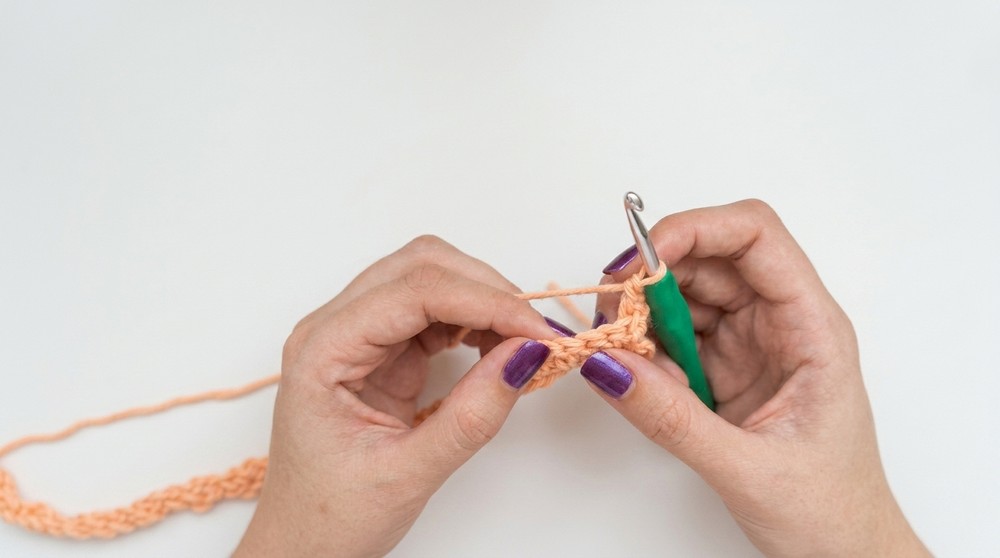
Skip 3, sc in 4th st, ch 3, 3 dc in same st, rep across.
End row with sc in last ch. - Row 2:
Ch 3, turn.
2 dc in same sc.
Sc between previous shell’s ch-3 and dc, shell (3 dc) in previous row’s sc, rep across.
End row with shell, sc in final space. - Row 3:
Ch 1, turn.
Sc in first space, ch 3, 3 dc in same space.
Sc in last dc before previous row’s sc, shell in same st, rep.
End with sc before middle sc, shell in same st to finish row. - Row 4:
Ch 3, turn.
2 dc in sc.
Sc between shell’s ch-3 and dc, shell in previous sc, rep.
End with sc; dc in last sc. - Pattern Repeats:
Alternate Rows 3 and 4 for a total of 29 rows.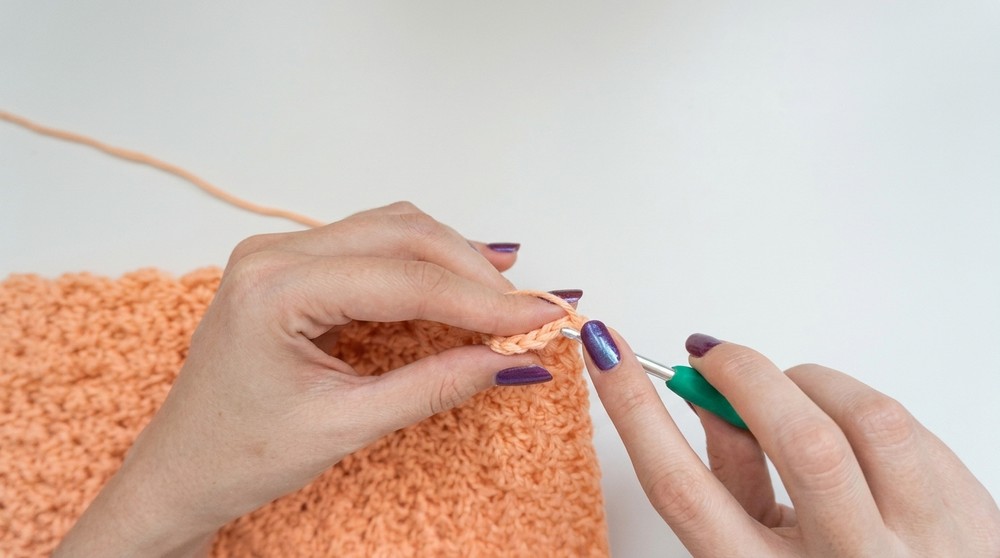
Armhole Shaping (Reducing)
- Start Reduction – Row 30:
Ch 1, turn.
Reduce: Insert hook in first sc, then next, yarn over, pull through both, pull through all loops. Rep once more to reduce two sts.
Work as per established pattern across, ending reduction on opposite side as shown. - Rep Reductions:
Reduce in this manner at armhole edge for three shaping rows (total). - Work 5 rows:
After reductions, work 5 rows in established pattern, no decreasing.
Straps
- Divide Panel:
Fold panel to find exact center. Place marker.
Work strap section on each half (7 shells per strap). - Strap (Side 1):
Begin shaping by working established pattern, reduce at strap base for three rows as shown.
Work six more rows straight (no reducing).
Fasten off. - Strap (Side 2):
Reattach yarn at base of opposite half.
Work strap following same steps – reduce three times, then six rows straight.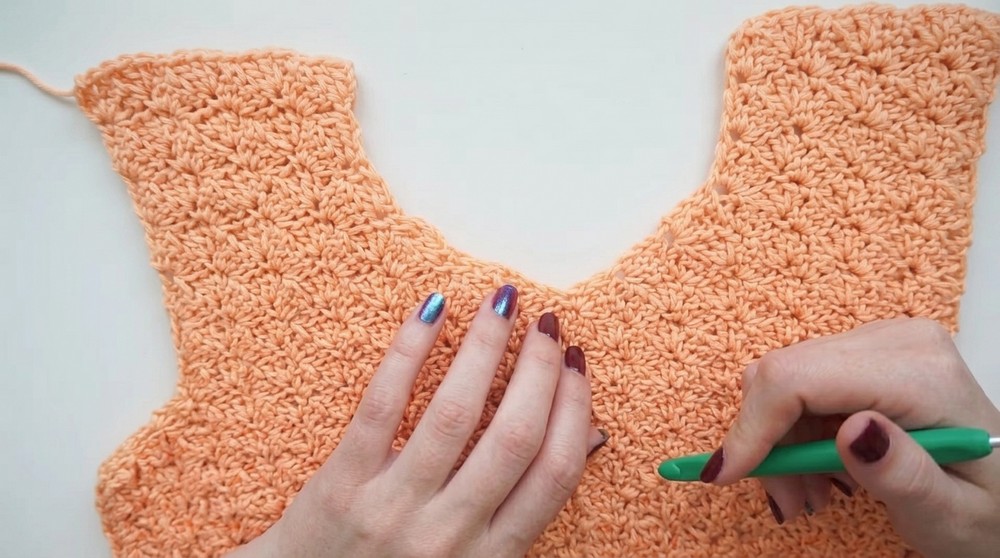
Front Panels (make 2)
- Foundation:
Ch 40 + 1, then 1 extra for turning. - Rows:
Work the same pattern as back panel for 29 rows. - Shaping:
Reduce at armhole edge three times.
Work five rows more.
Divide for strap, reduce at neckline three times; work six straight rows.
Fasten off.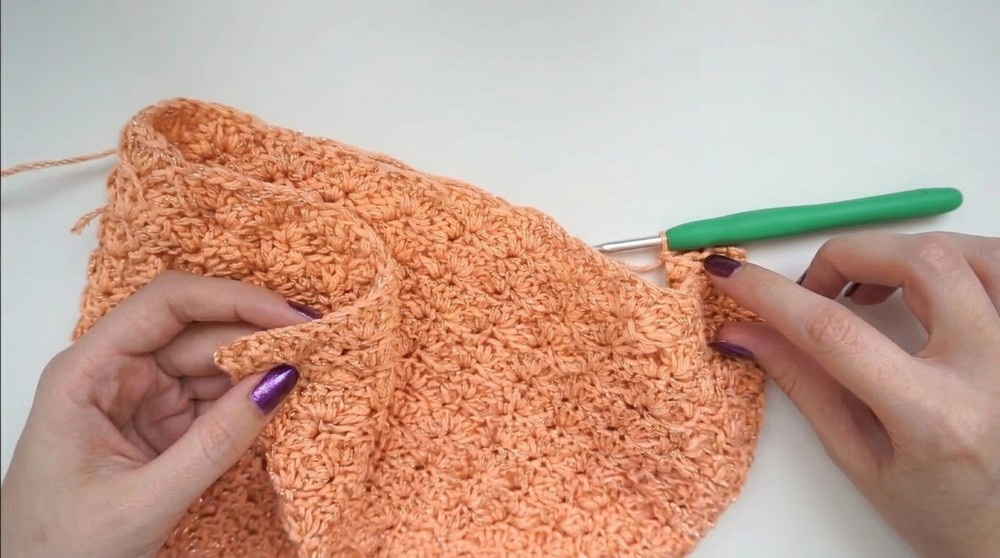
- Mirror Shaping:
Second front panel shapes as a mirror; place reductions on opposite sides so fronts face each other correctly.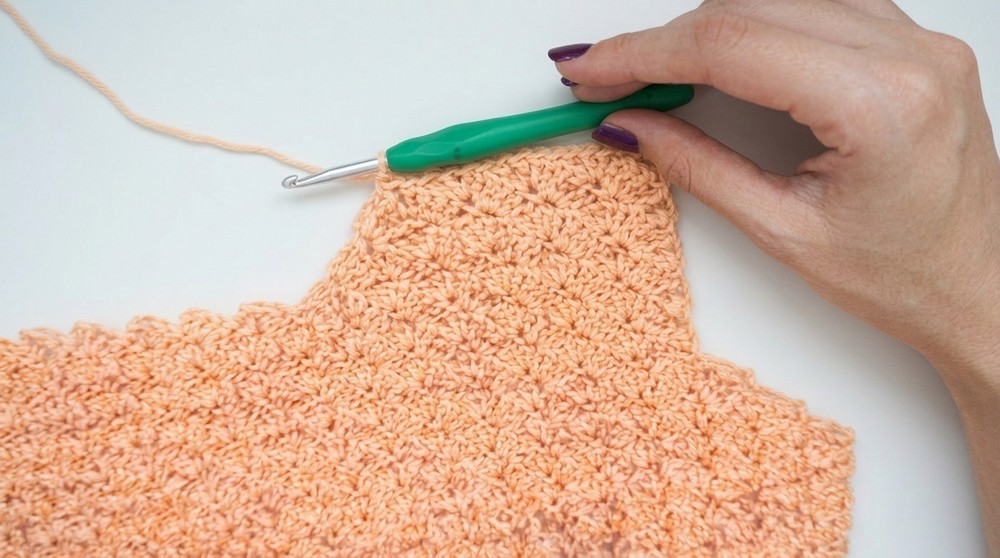
Assembly & Finished Size
- Join shoulders of back and front panels with sc (or slip stitch/needle) seam.
- Attach sides with same joining method, leaving desired depth for armholes.
- Make sure both panels and straps align evenly at joins.
Edging
- Border:
Attach yarn at neckline.
Work sc around all edges, placing two sc in each corner for definition.
Continue around, join to first sc, fasten off.
Ruffle Detail (Bottom Edge)
- Row 1:
Attach yarn at bottom edge.
Sc in first st.
Ch 5, skip 2 sts, sc in 3rd. Rep across bottom edge. - Row 2:
Ch 1, turn.
Sc in first sc of previous row.
5 dc in each ch-5 space, sc in each sc, rep. - Row 3:
Ch 1, turn.
Sc in first sc.
Dc in each dc, sc in each sc across. - Row 4 (Optional):
If longer ruffle desired: Ch 4, turn.
Skip first 2 sts, sc in next.
Ch 5, skip two, sc next, rep.
Work as previous round for ruffle layering.
Front Strands / Bows
- Placement:
Measure from neckline corner to side seam, divide in half, place marker. - Strand 1:
Attach yarn at corner, ch 55.
Sc back along chain.
Slip stitch along edge to middle marker. - Strand 2:
At marker, repeat: ch 55, sc back. - Strand 3:
Continue along edge, ch 55, sc back. - Finish:
Fasten off; weave in tails.
Optional Armhole Border
- Attach yarn at armhole edge.
- Work sc evenly around for a neat finish.
- Fasten off; repeat for other armhole.
Assembly & Finished Size
- Back and front panels joined at shoulders and sides with single crochet seam.
- Straps made as part of panel shaping with mirrored decreases for perfect fit.
- Edges finished with single crochet borders.
- Ruffle hem added as two or more rounds for desired fullness.
- Three bow strands created at front for tying and decorative touch.
- Optional: armhole borders for clean finish.