Crochet Drawstring Pouch Free Pattern – Travel Essentials Bag

Create a stylish and functional accessory effortlessly with this Free Crochet Drawstring Pouch Pattern, perfect for storing your essentials in a handy design.
Keeping small essentials organized is something many of us struggle with and that is exactly why I designed a favorite little project a pouch that is as charming as it is useful. The free crochet drawstring pouch pattern offers a fun way to create a soft flexible bag that closes securely with a drawstring making it perfect for storing jewelry coins or even small crafting supplies.
Adorable Free Crochet Drawstring Pouch Pattern for Kids
This drawstring pouch features a rounded slightly pouchy shape with a textured surface created by simple stitches that give it a cozy handmade feel. Its style is casual yet neat perfect for everyday use or gifting. One of the best parts is the drawstring closure which not only keeps your items safe but also adds a decorative element you can customize with beads or colorful cords. You can make this pouch in various sizes small for coins and earbuds medium for cosmetics or larger for toiletries simply by adjusting your hook size or yarn thickness.
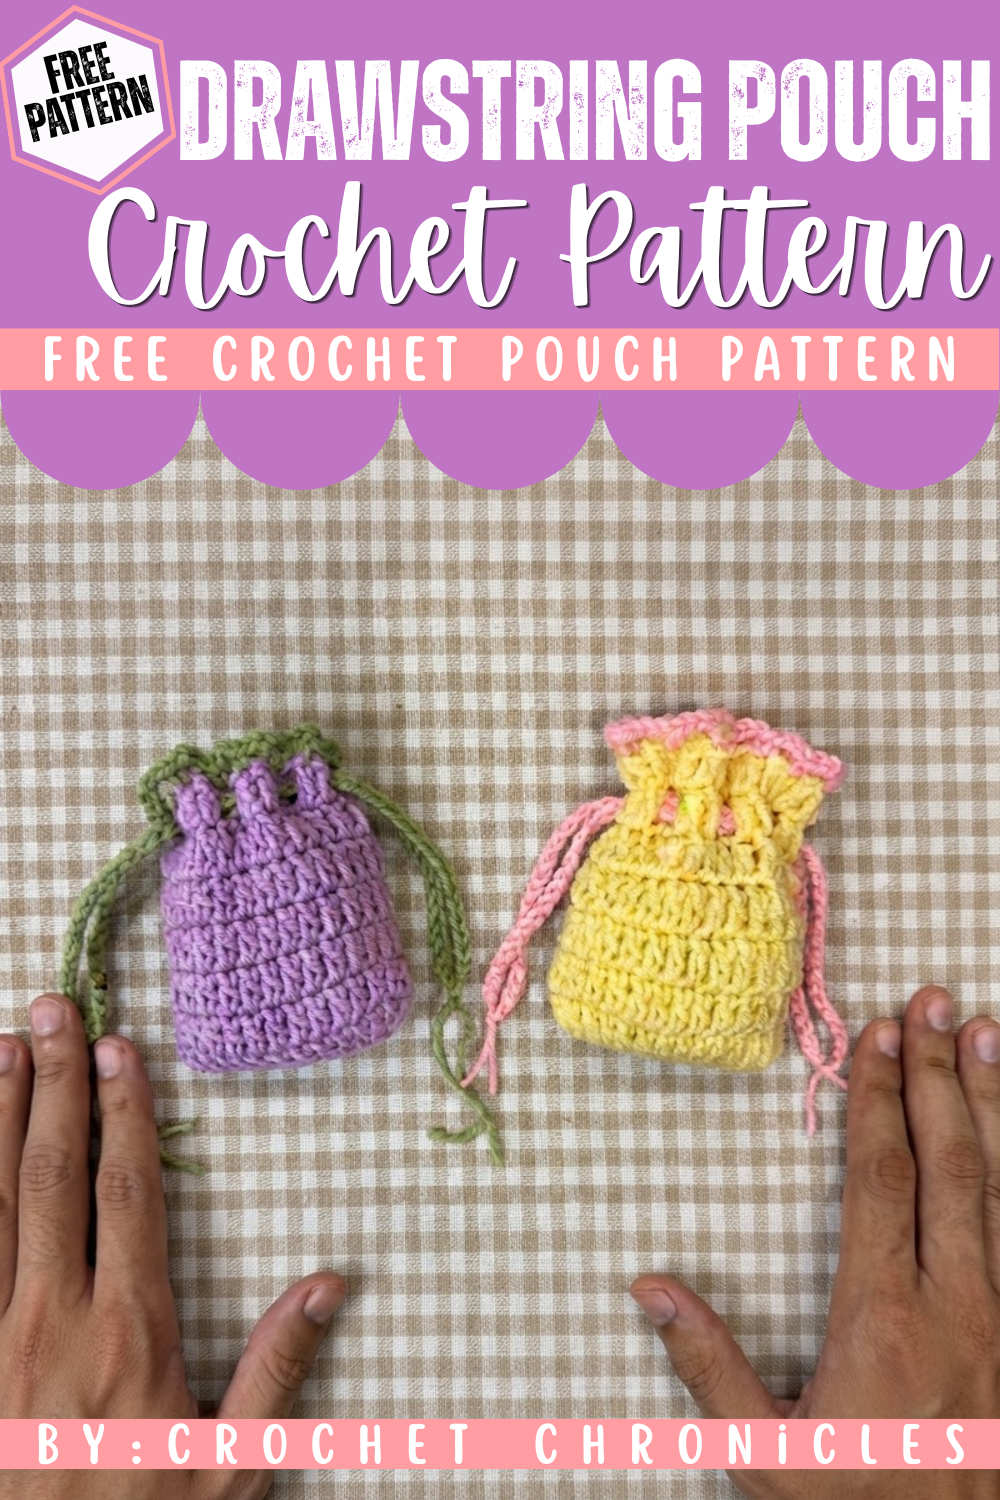
The pouch is usually worked in rounds from the bottom up using stitches like single and double crochet that create a sturdy yet soft fabric. A helpful tip is to pick a yarn with some structure cotton blends or acrylic work great because they hold the shape well and show off the stitch texture beautifully. I was inspired to design this pouch because I wanted a cute pocket sized organizer that did not need zippers or buttons just something quick and practical.
This free crochet drawstring pouch pattern makes thoughtful handmade gifts for birthdays holidays or bridesmaids. It is also a great project to let your creativity shine experiment with colors add embroidery or try fun drawstring materials. If you want a cozy and useful accessory that is quick to make this pattern is a delightful choice.
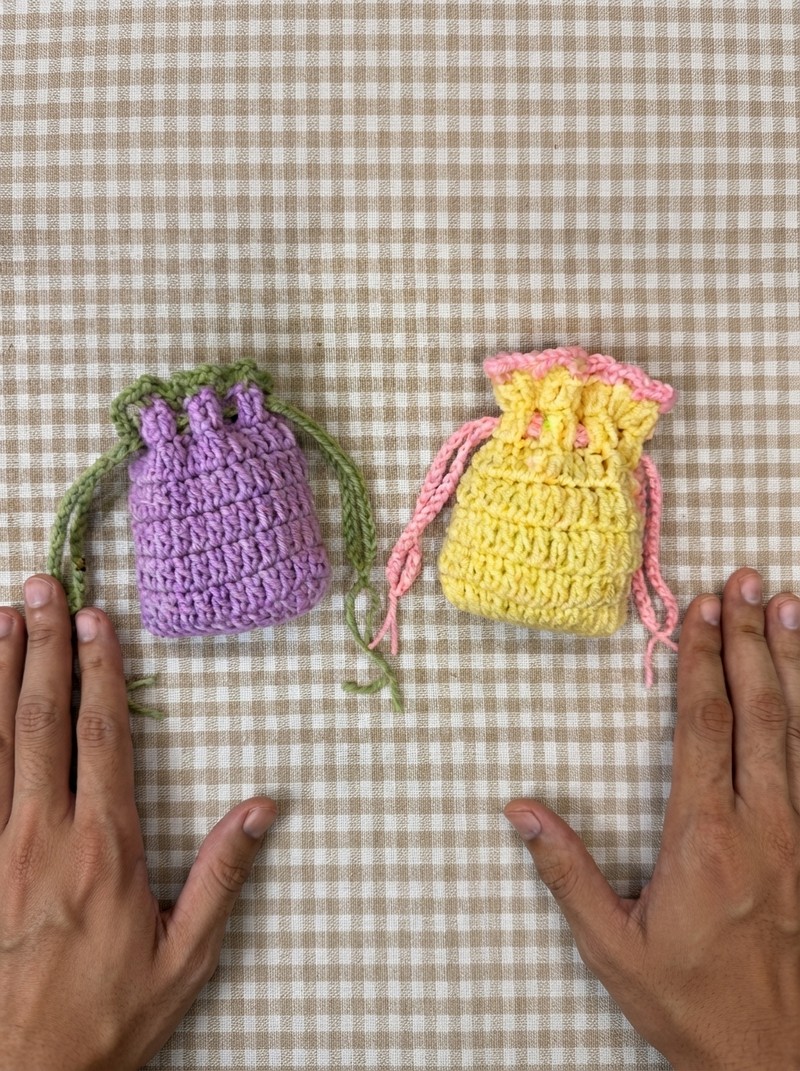
Cute & Easy Crochet Drawstring Pouch Pattern
(As taught by Ishwaria of Crochet Chronicles)
Introduction
Hello everyone, welcome to Crochet Chronicles! I am Ishwaria, and in today’s tutorial, you’ll learn how to create these cute and easy crochet drawstring pouches. They are a quick project made with beginner stitches (double crochet, single crochet, and chain), finished with a sweet and simple frill border at the top. Let’s begin!
Quick Overview of Pattern
- The pouch is worked in the round from a foundation chain.
- Uses only basic stitches: chain, double crochet (dc), and single crochet (sc).
- The body is worked in dc rounds for seven rounds.
- Decorative frill border is added using single crochet and chain stitches.
- Two separate drawstring chains are created and threaded through the pouch.
- Choose a frilly or simple look by changing where you thread the drawstrings.
Notes
- Pattern is written in US crochet terminology.
- Keep consistent tension for even sides and a professional finish.
- Always count your stitches at the end of each round to ensure the correct stitch count (26 dc).
- Chains at the start of each round (ch 3) count as the first double crochet.
- Weave in yarn tails securely on the inside/wrong side.
- The look of the pouch changes depending on which round you use to insert the drawstrings.
Skill Level
Beginner
Familiarity with slip knot, chain stitch (ch), double crochet (dc), single crochet (sc), slip stitch (sl st), and basic round construction is helpful.
Materials
- DK / Weight 3 acrylic yarn in any two colors of your choice (main color and contrast for frill/drawstrings)
- 4.0 mm crochet hook
- Pair of scissors
- Darning/tapestry needle with a large eye
Measurements / Sizing
- Pouch: Approx. 3.5” wide x 4” tall (not including frill; varies with yarn and tension)
- Chains for drawstrings: approx. 46 ch (about 12–14” long)
- Finished pouch comfortably fits earbuds, makeup, small gifts, etc.
Gauge
Not crucial for this project. For reference:
26 dc around = approx. 3.5–4” in width after 7 rounds.
Stitch Abbreviations
- ch: chain
- dc: double crochet
- sc: single crochet
- sl st: slip stitch
Special Stitches
- Frill Border: (sc, ch 3, skip 1 st, sc) repeat around, ending with a slip stitch.
- Working in front and back loops: For round 1, first work in the back loops of foundation chains, then rotate and work in the unworked front loops.
The Crochet Pattern
Foundation + Round 1 (Oval Base)
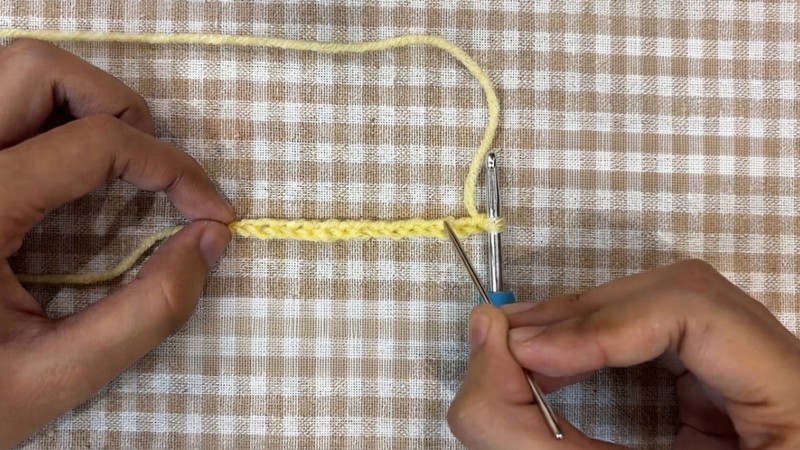
- Slip Knot and Foundation Chain
- Start with a slip knot.
- Ch 15. (Do NOT count the loop on the hook.)
- Round 1, Part 1:
- Work 1 dc in back loop of 4th chain from the hook (ch-skip counts as your first dc).
- Dc in each back loop of the next 10 ch.
- You now have 13 dc including the turning ch-3.
- Round 1, Part 2 (End of Chain):
- In the last chain, work 2 dc (both in the same back loop; this is the tip of your oval).
- Rotate your piece to work into the unworked front loops on the foundation chain (the “bottom” of the chain).
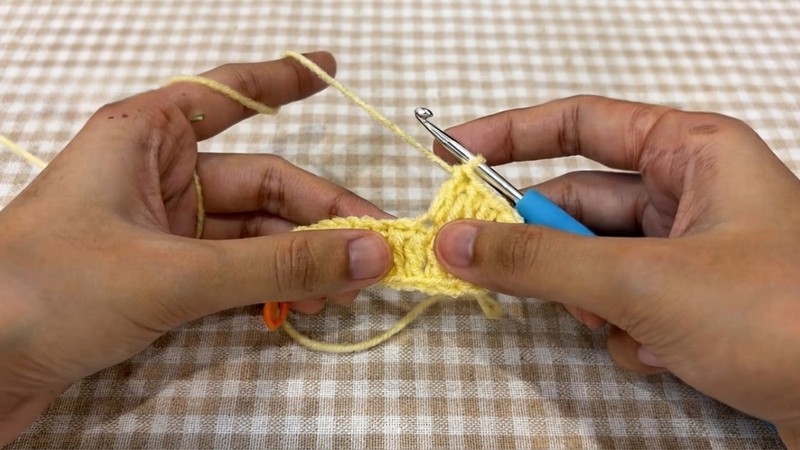
- Work 1 dc in each front loop of the next 11 chains (moving back toward your first chain).
- At the final chain (same as the one with 2 dc), work 2 dc (in the same front loop).
- You now have an oval with 26 dc all around (including original ch-3 as a stitch).
- Slip stitch into the top chain of the beginning ch-3 to close the round.
Rounds 2–7 (Pouch Body)
- Round 2:
- Ch 3 (counts as 1st dc).
- Dc in each stitch around (total 26 dc).
- Sl st to top of ch-3 to join.
- Rounds 3–7:
- Repeat Round 2: ch 3 (counts as 1st dc), 1 dc in each st around (26 dc), sl st to join.
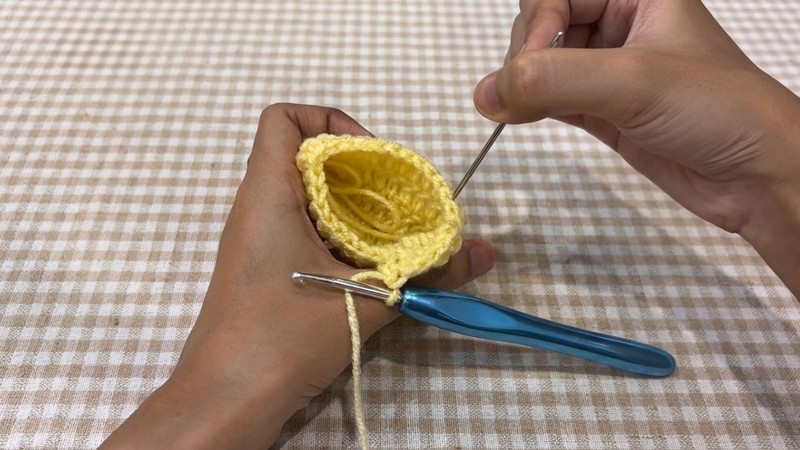
- At the end of Round 7, finish with a sl st in top of ch-3.
- Fasten Off:
- Ch 1.
- Cut yarn, leaving a tail to weave in.
- Pull hook out to form a knot.
- Weave in all ends securely on the inside of the pouch.
Frill Border (Contrast Color)
- Attach new color yarn to top of first dc (top ch-3 from Round 7).
- Insert hook in the top ch of ch-3, pull new color through, chain 1 to lock.
- Border Round:
- (Sc in same st, ch 3, skip next st) repeat around top of pouch.
- At end of round, join to first sc with a sl st.
- You should have a frilly edge with small loops.
- Fasten off: Ch 1, cut yarn, pull through to form a knot. Weave in ends inside flap of frill.
Drawstring Chains (Make 2)
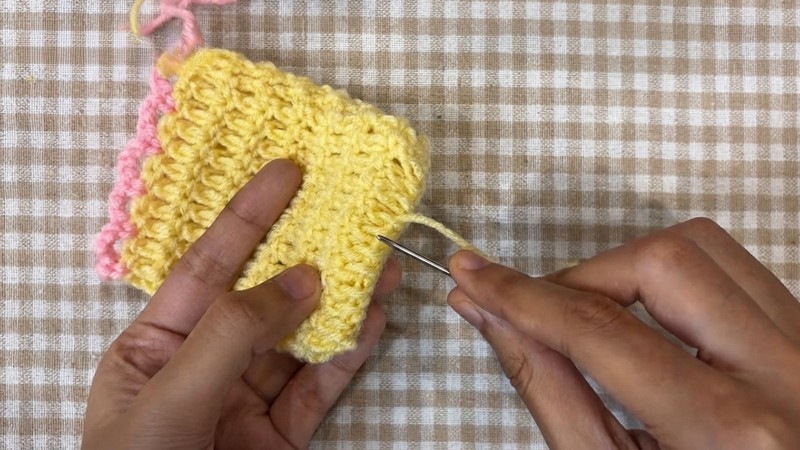
- For each Drawstring:
- With contrast color, make a slip knot.
- Ch 46 for each string.
- Ch 1 to lock, cut yarn, and pull through.
- Tie knots at both ends or leave as is.
Assembly & Finished Size
- Turn pouch inside out to weave in all remaining ends with your darning needle. Hide them behind dc bars.
- Turn the pouch right side out.
- Add drawstrings:
- For a frilly look, thread the drawstrings through the 6th round up from the bottom; for a cined, simpler look, thread through the 7th round (just below the frill).
- To thread:
- Using the yarn needle, weave 1 drawstring in and out of every 2 dc stitches all the way around beginning from the right side.
- Thread the second drawstring the same way but start at the left side, weaving in the same round in the opposite direction.
- Pull both sets of ends to close the pouch, adjust to be even, knot ends, and trim extras to desired length.
- Finished Dimensions:
- Pouch: ~3.5–4” wide, ~4” tall (without frill).
- Each drawstring: ~12–14” (adjustable).
Conclusion and Ending Words
Congratulations! Your cute, easy crochet drawstring pouch is ready to use. Adjust where you run the drawstring for different looks: frilly and fun, or neat and cined-up. Use these for earbuds, makeup, small gifts, or party favors.
Thank you for following along. Please visit for more beginner-friendly patterns, and leave a comment if you have suggestions for future patterns.