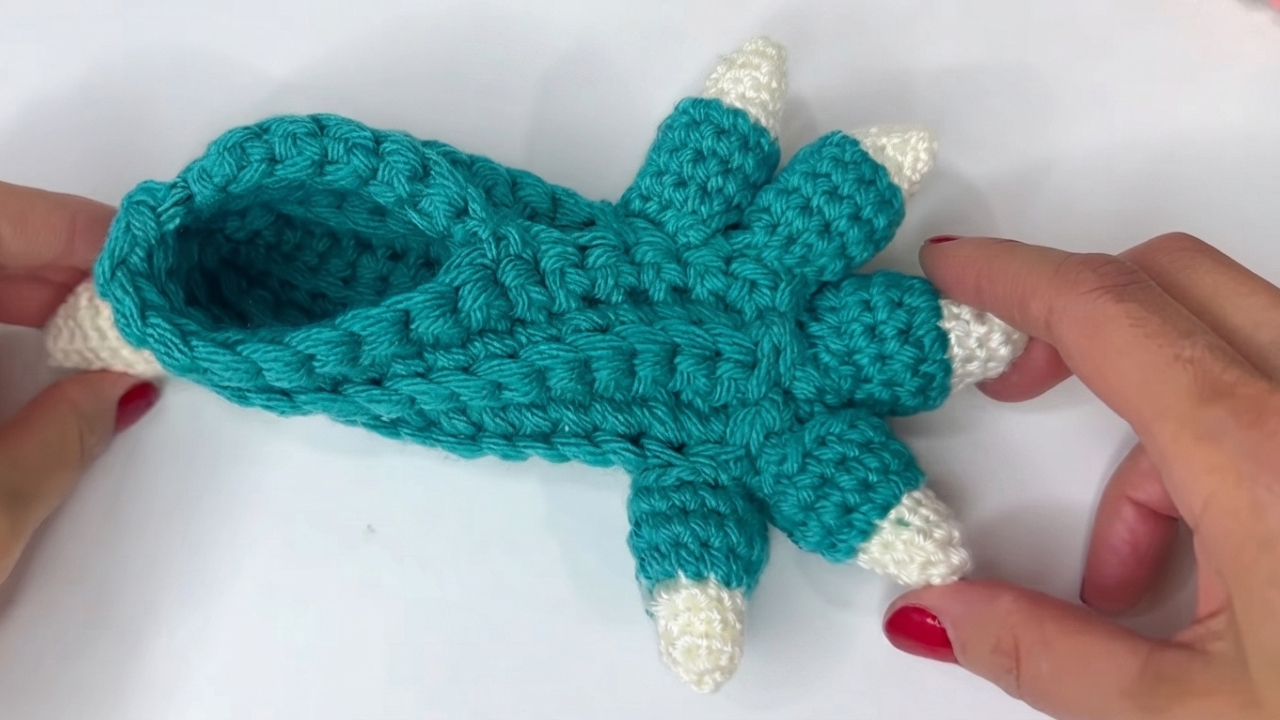
Adorable Crochet Monster Slipper Pattern with Fun Details

Cozy and playful free crochet monster slippers bring warmth and fun to your feet with easy steps and soft comfortable materials anyone can enjoy.
One chilly evening, I found myself searching for a fun and cozy project to brighten up my day. That’s when I came across the Free Crochet Monster Slipper designs on Quiereme Mucho crochet y amigurumis. These slippers quickly became my favorite because they aren’t just warm and comfortable—they look like adorable little monsters. Available in fun colors like bright green, purple, and rainbow, they bring a playful touch to keeping your feet cozy. Perfect for both kids and adults, these crochet monster Slipper are soft, snug, and full of charm. If you want to add some fun and warmth to your day, this project is definitely worth trying.
Colorful Free Crochet Monster Slipper Pattern Inspired by Cartoon
One great thing about Free Crochet Monster Slipper patterns is that you can customize the size easily. This means crochet slippers can fit little children, teenagers, or grown-ups by simply changing the number of stitches. Everyone gets a pair that fits just right. The funny monster faces make cold or lazy days much more fun.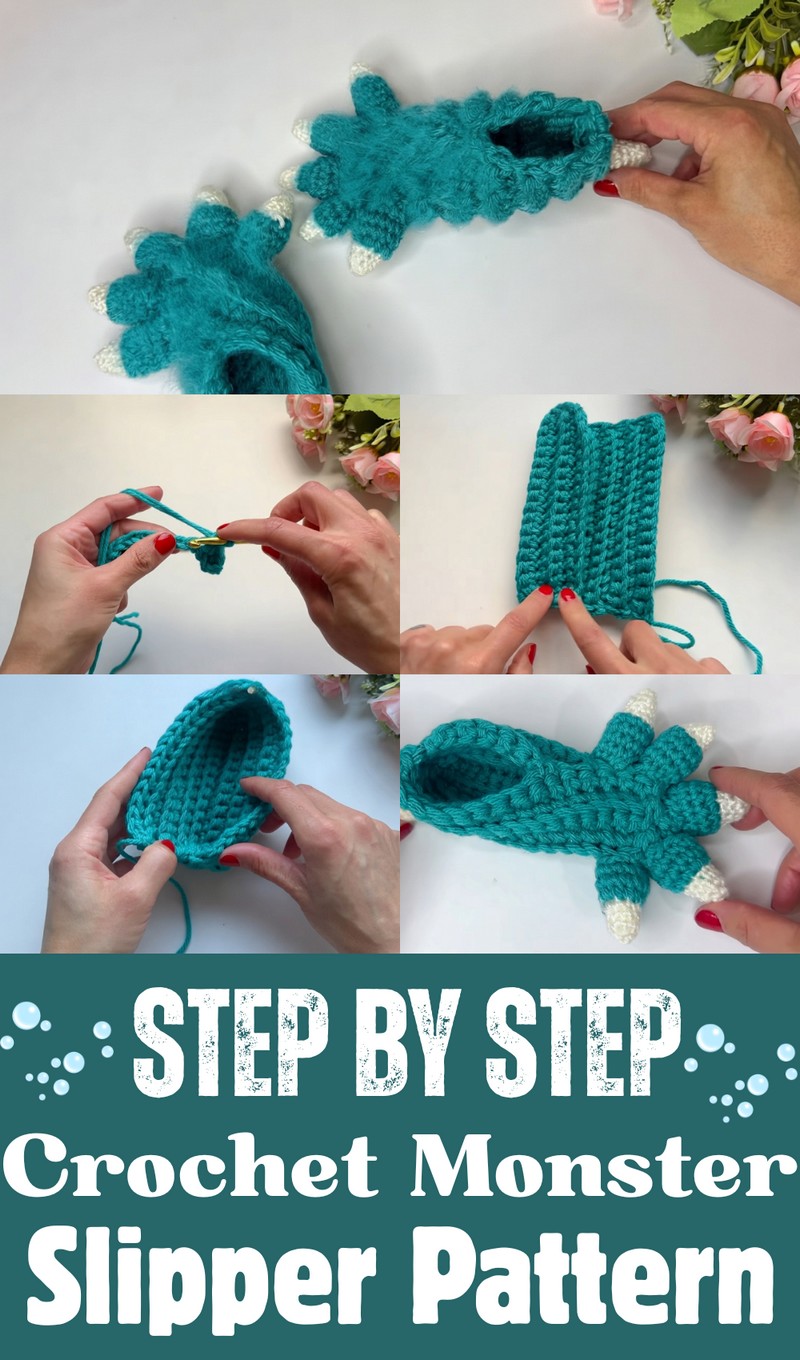
These crochet slippers are made using a simple crochet stitch called single crochet. This stitch makes the fabric thick and strong, perfect for keeping feet warm. Other basic stitches help add eyes, teeth, and monster features. Because the pattern uses easy stitches, beginners can also try making these slippers with some guidance.
Besides warmth, Free Crochet Monster Slipper designs can be wonderful gifts. You can choose any color or size and add cute extras like buttons or yarn hair. It’s an enjoyable crochet project for kids when done with adults.
Easy Little Monster Slippers Crochet Pattern
Free Crochet Monster Slipper projects combine comfort, creativity, and bright colors. They keep feet cozy and bring smiles with their funny monster faces. This simple and fun crochet idea is perfect for all ages and skill levels.
Pattern Notes
- The slippers are constructed by crocheting a square fabric piece that is folded and sewn into shape.
- The pattern uses single crochet (sc), chain stitches (ch), and working into back loops for texture.
- Using double strands of yarn and a thicker hook (6mm) improves durability and warmth but it’s optional depending on your desired thickness.
- Measuring the foot length plus 2 cm determines the size of the square you will crochet.
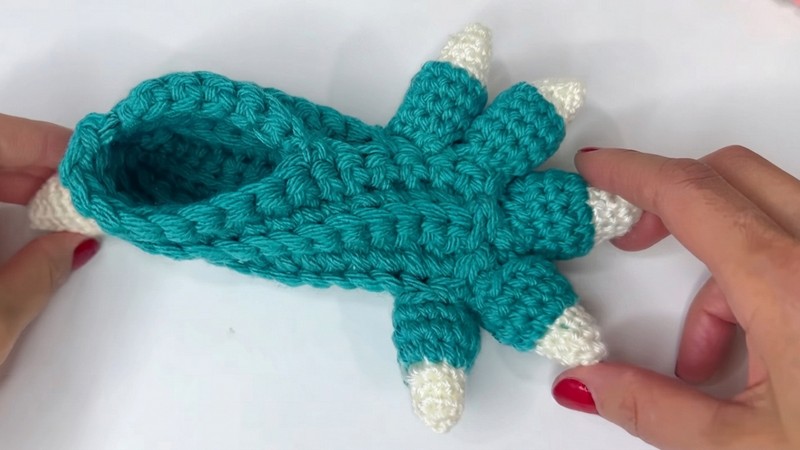
- The little monster claws are made separately by crocheting small rounds and attaching them later.
- Adding hot glue lines underneath creates an anti-slip sole.
Skill Level
Beginner to Easy: Basic crochet stitches and hand sewing skills required.
Materials
- Yarn of choice: cotton, acrylic, wool, or a mix — use double strands for warmth and sturdiness, or single strands for lighter slippers.
- Crochet hook size 6 mm (or suitable for your yarn thickness).
- Yarn needle for sewing pieces together.
- Scissors.
- Optional: polyester fiberfill or silicon-coated fleece for stuffing claws.
- Hot glue gun (for anti-slip sole).
- Small metal comb or brush (optional, for brushing yarn to create fur effect).
Measurements / Sizing
- Measure the foot length of the wearer (e.g., 11 cm for toddler).
- Add 2 cm to this measurement for ease and comfort.
- The result is the length and height of the square fabric to crochet. For example, for 11 cm foot, crochet a 13 cm x 13 cm square.
Gauge
- Gauge is not critical for this pattern but the square should measure approximately the foot length plus 2 cm in both width and height.
- Work single crochet stitches tightly enough to make a solid fabric.
Stitch Abbreviations
- ch = chain
- sc = single crochet
- sl st = slip stitch
- st(s) = stitch or stitches
- inc = increase (2 sc in one stitch)
Special Stitches
- Back-loop only single crochet (sc BLO): Insert the hook only into the back loop of the stitch below and complete the single crochet. This creates a ridge and texture.
The Crochet Pattern!
Step 1: Measure the Foot and Start Foundation Chain
- Measure the foot length you plan to make the slipper for. Add 2 cm to this length to allow for ease.
- Using double strands of yarn and a 6 mm crochet hook (for thicker, warmer fabric), chain enough stitches to reach this length. For example, chain 13 cm in length for a toddler’s foot length of 11 cm + 2 cm.
Step 2: Crochet the First Row
- Starting in the second chain from the hook, make 1 single crochet (sc) in each chain across the row.
- This will create your foundation row with a row of single crochet stitches.
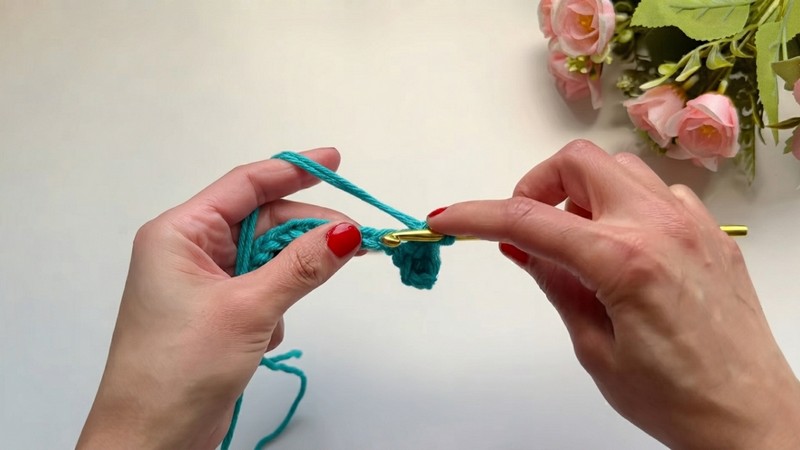
Step 3: Crochet the Square Body
- Chain 1, turn your work.
- Work one single crochet (sc) in the back loop only (BLO) of each stitch across the row.
- Repeat this row, always using sc BLO, until your piece reaches the height of foot length plus 2 cm (same as foundation chain length). You should have a square (e.g., 13 cm x 13 cm).
- Fasten off.
Step 4: Fold the Square into Three Equal Parts
- Lay out your square flat. Fold one third of the square inward from one side.
- Fold the remaining third over the first fold so your square is folded into three equal parts.
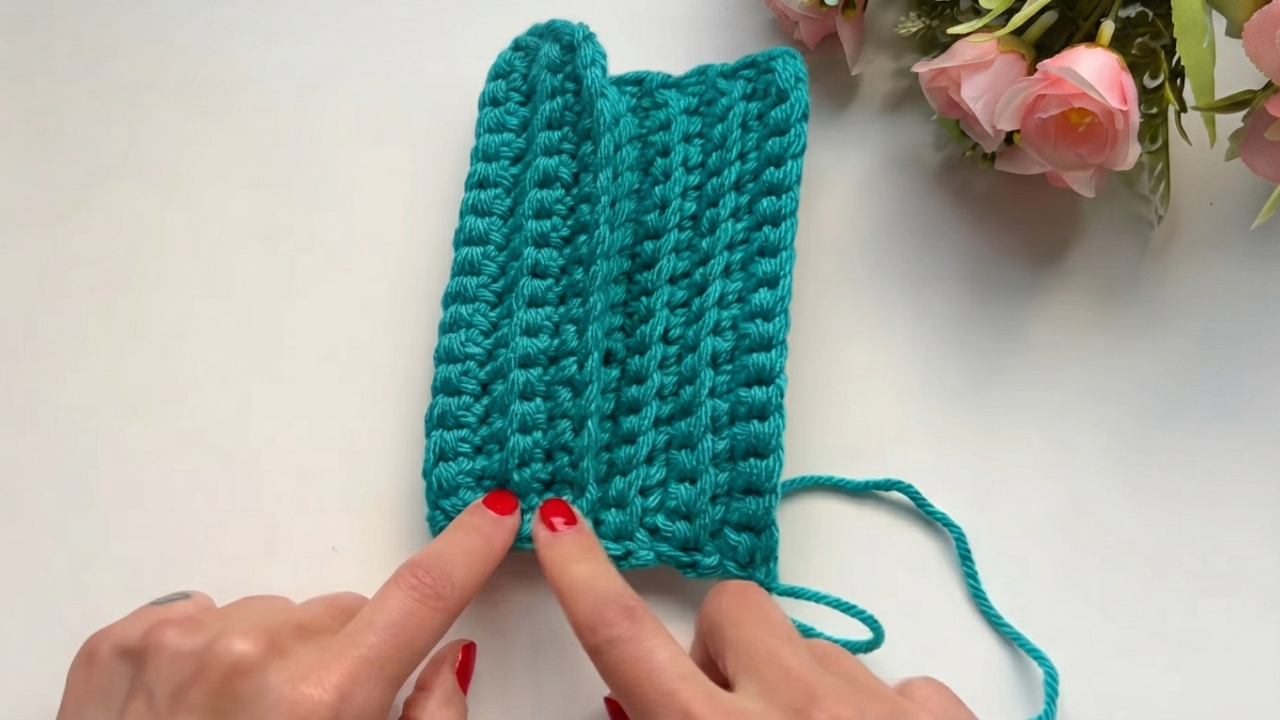
Step 5: Sew the Toe (Front) Part
- Thread your yarn needle with yarn.
- Sew the first fold closed by stitching from the top edge to bottom edge, forming the toe section.
- Tie a knot at the bottom.
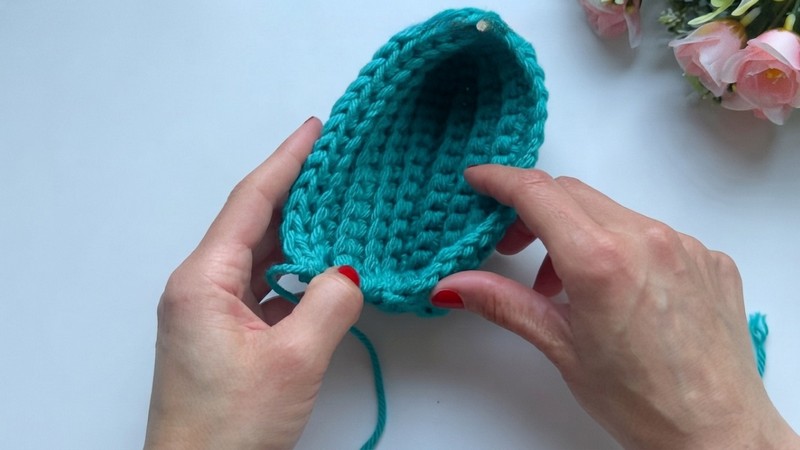
- Pull yarn tight to gather and close the toe area firmly.
- Tie another knot and cut excess yarn.
Step 6: Sew the Heel (Back) Part
- Fold the remaining open part in half vertically towards the heel.
- Sew along this fold from top to bottom, reinforcing the seam nicely.
- Tie off and cut yarn.
Step 7: Finish the Slipper Shape
- Turn the slipper right side out through the opening.
- Check the shape, ensuring toe gather and heel seam are secure.
Step 8: Attach the Toe Stopper / Top Cover
- Fold the leftover flap toward the toe of the slipper.
- Sew along both sides of the toe stopper flap, securing it to the slipper.
- Leave the foot opening clear for easy wear.
- Step 9: Optional – Make the Monster Claws
Claw Pattern for Baby Size:
- Start with Magic Ring of 6 sc.
- Round 2: 1 sc, inc repeat around.
- Rounds 3 & 4: 9 sc evenly.
- Change color.
- Next Round: 2 sc, inc repeat.
- Stuff claws lightly with fleece/fiberfill.
- Make 3-5 claws per slipper.
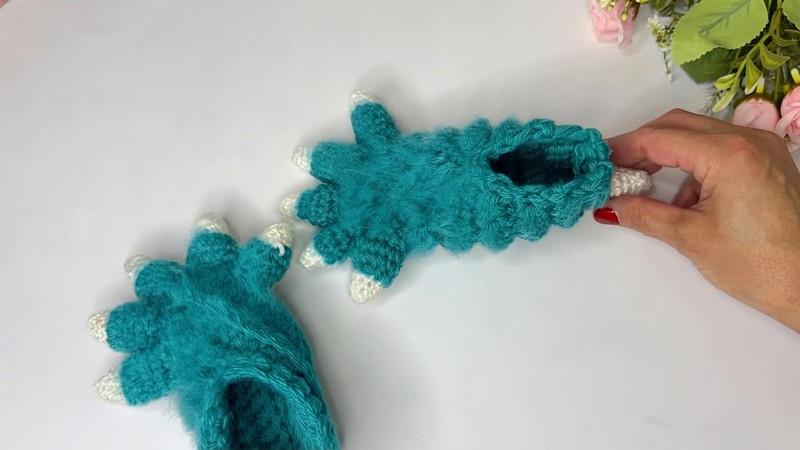
For larger sizes, increase stitches accordingly (notes included in pattern).
Step 10: Attach Claws & Final Assembly
- Sew claws on front and optionally heel parts of slippers.
- Use matching yarn to sew securely.
- Optionally brush claws with metal comb for fuzzy effect.
Step 11: Add Anti-Slip Sole
- Apply hot glue dots or lines on soles for grip.
- Let glue dry before wearing.
Assembly & Finished Size
- Fold square and sew toe gather.
- Fold heel fold and sew securely.
- Attach toe stopper flap along edges, leaving opening.
- Sew claws (3-5 per slipper).
- Add anti-slip glue on sole.
- Finished size equals foot length + 2 cm ease (e.g., 13 cm square for toddler).
Summary
Create a pair of fun and cozy slippers inspired by little monsters! Starting from a simple crochet square, this beginner-friendly pattern incorporates basic stitches and a clever folding and sewing technique to shape the slipper. You will also learn how to add cute claws to complete the monster look. These slippers can be made with various yarn types and sized for babies or adults.