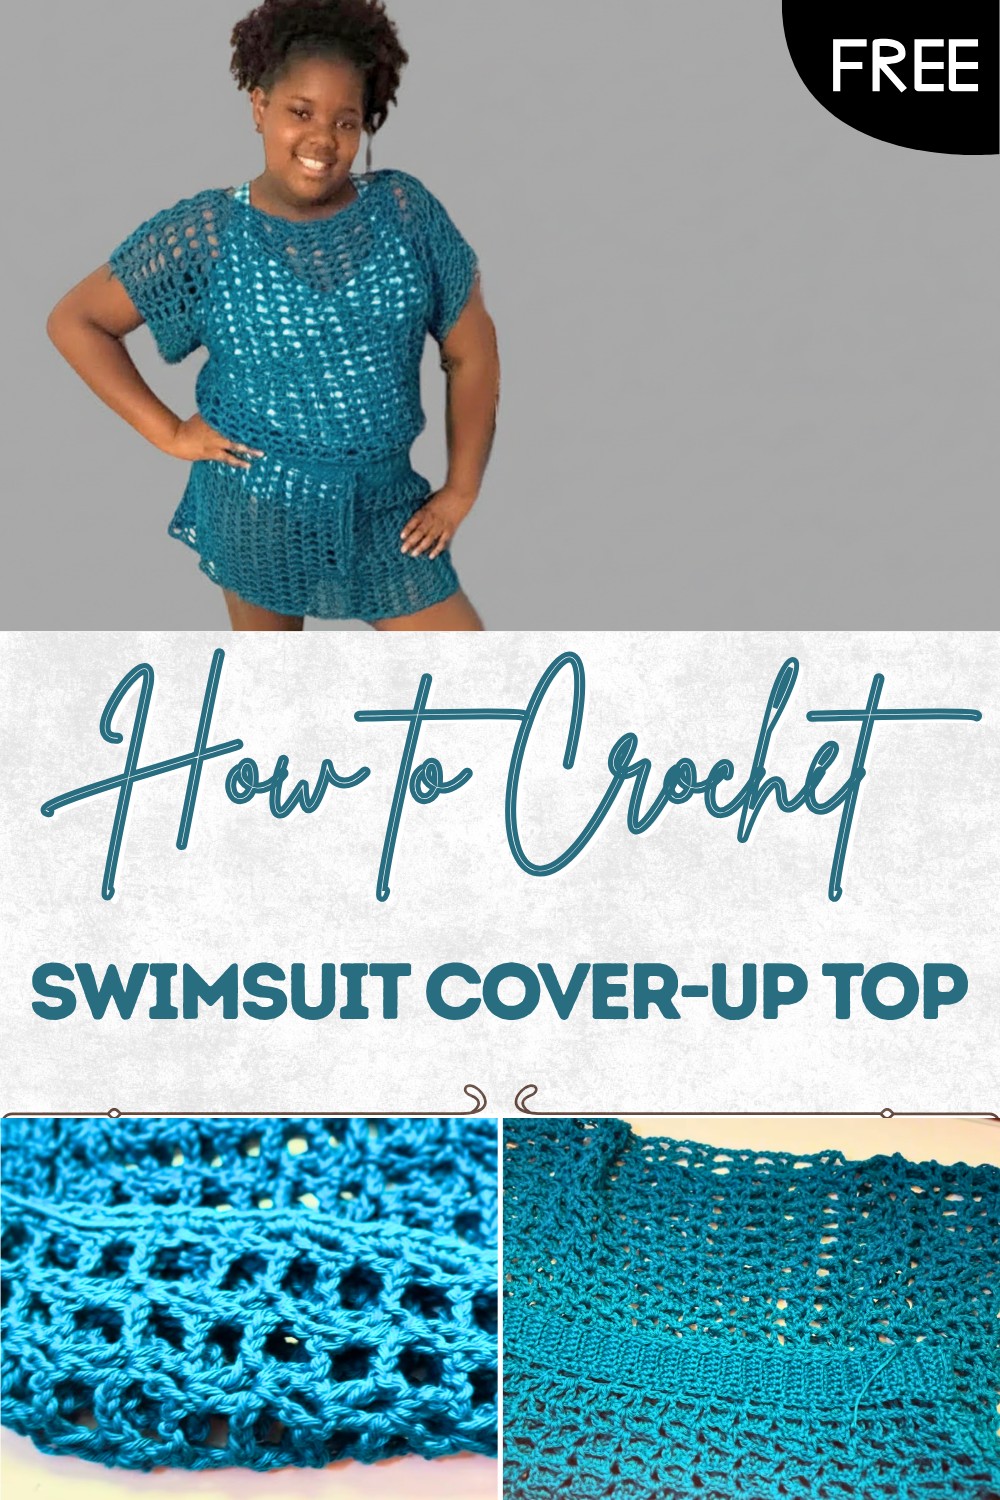
Free Crochet Swimsuit Cover-Up Top Pattern for Beach Days
Wear your confidence by the water with this free crochet swimsuit cover-up top pattern that offers sunny day comfort and style for everyone.
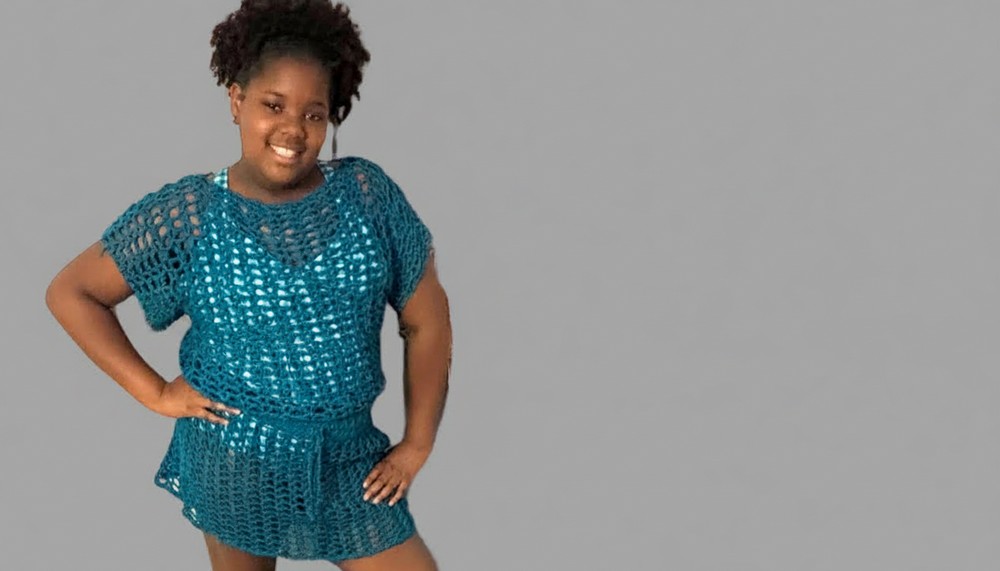
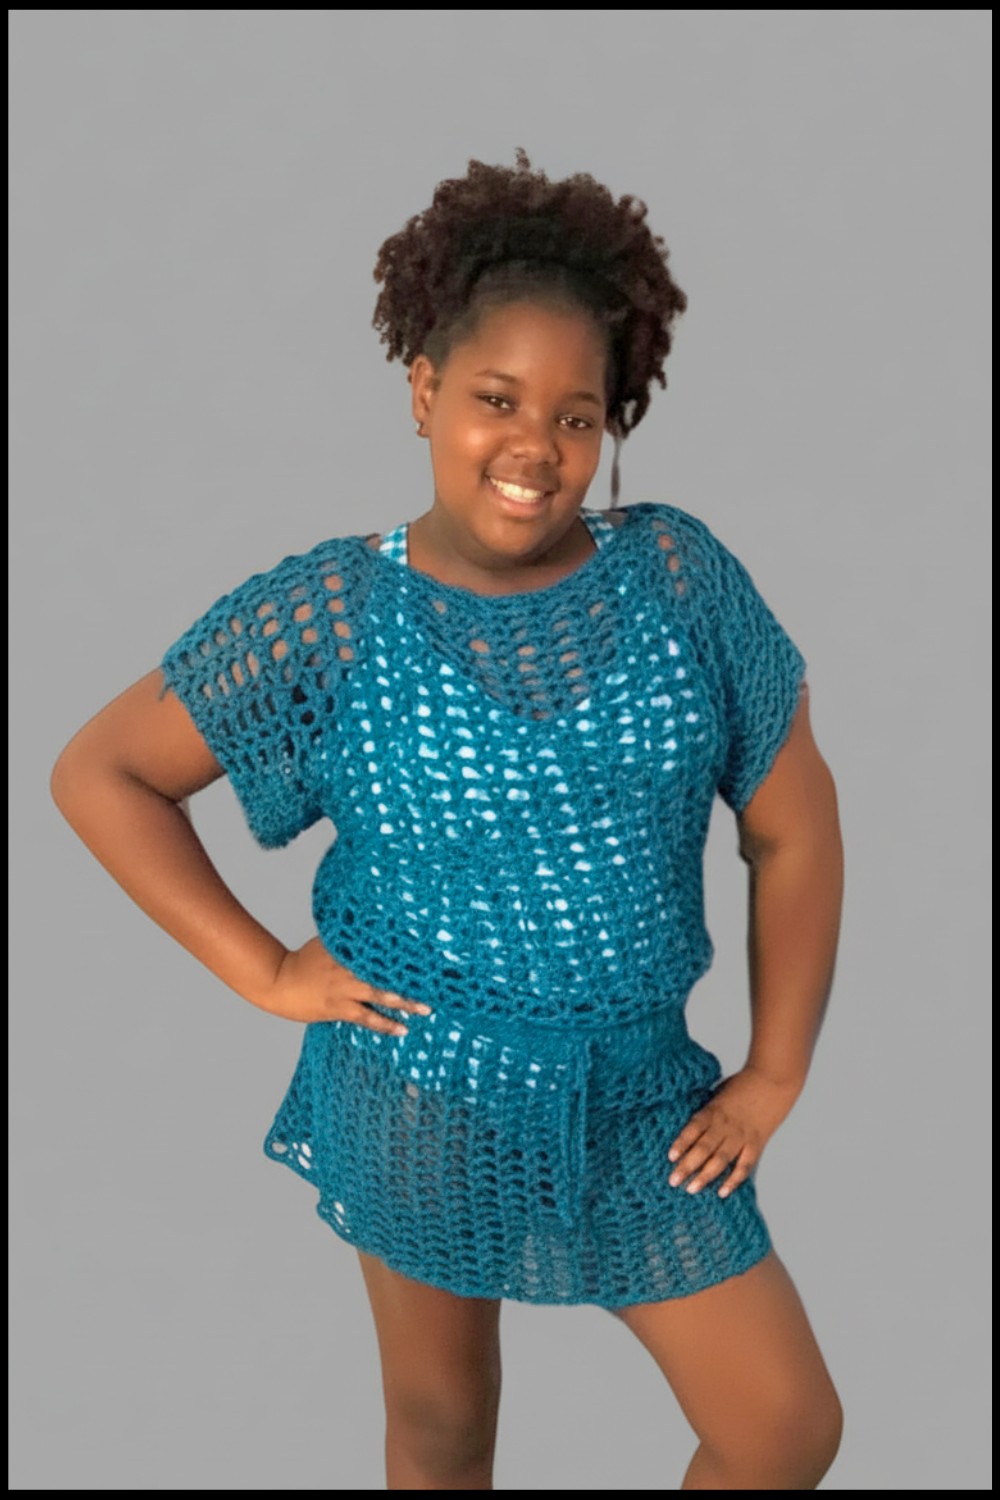
Standing near cool water, feeling the gentle touch of a handmade top on your skin. This soft cover makes every moment special. Its light design keeps your body fresh while giving you a bit of style and comfort that stands out. Crafted from colorful yarns, this chic piece shines with a unique charm. The crochet swimsuit cover-up top pattern brings simple shapes together for a beautiful look, allowing you to show your personality in every stitch.
Beginner-Friendly Free Crochet Swimsuit Cover-Up Top Pattern
When you walk along the beach or relax beside a pool, the cover-up easily fits over your swimsuit, giving you protection from sun and privacy when needed. It is easy to wear at home or outside, making it a smart choice for many occasions. Created for all sizes, this wonderful piece lets you feel confident and lovely wherever you go. With every finished cover, people notice your joyful spirit and handmade beauty, making each trip memorable.
Crochet Swimsuit Cover-Up Top Pattern
Materials
- Yarn:
- I Love This Yarn! (Worsted/Aran weight, 100% acrylic)
- Approximately 2 balls (keep extra for different sizes)
- Hook:
- 5.5 mm (I/9) crochet hook
- Notions:
- Scissors
- Tapestry (darning) needle
- Stitch markers
- Measuring tape
Key Abbreviations
- ch – chain
- st(s) – stitch(es)
- sl st – slip stitch
- sc – single crochet
- dc – double crochet
Special Notes
- The pattern is highly adjustable: Measure as you go for the perfect fit!
- Top is created in two rectangular panels, joined at the shoulders, then worked in the round for sleeves.
- Waistband and sleeves will stretch: Always measure “stretched,” not slack, for snug fit.
- Edge stitches are worked through both loops for structure; the rest are worked in back loop only for stretch.
Instructions
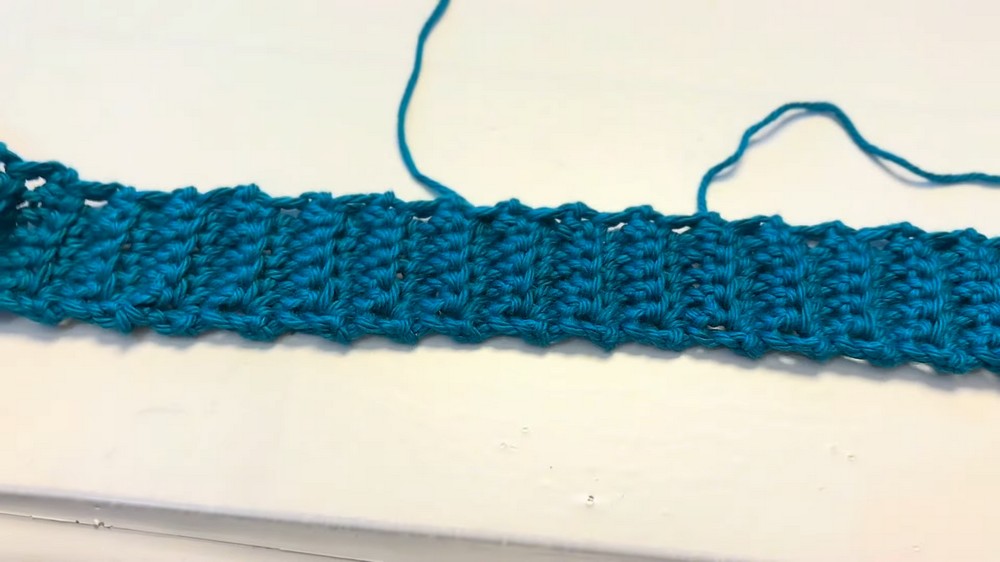
1. Waistband
- Make a magic circle (optional for neat edge) OR simply ch 7.
- Row 1:
- Beginning in 2nd ch from hook, sc in each ch across. (6 sc)
- Ch 1, turn.
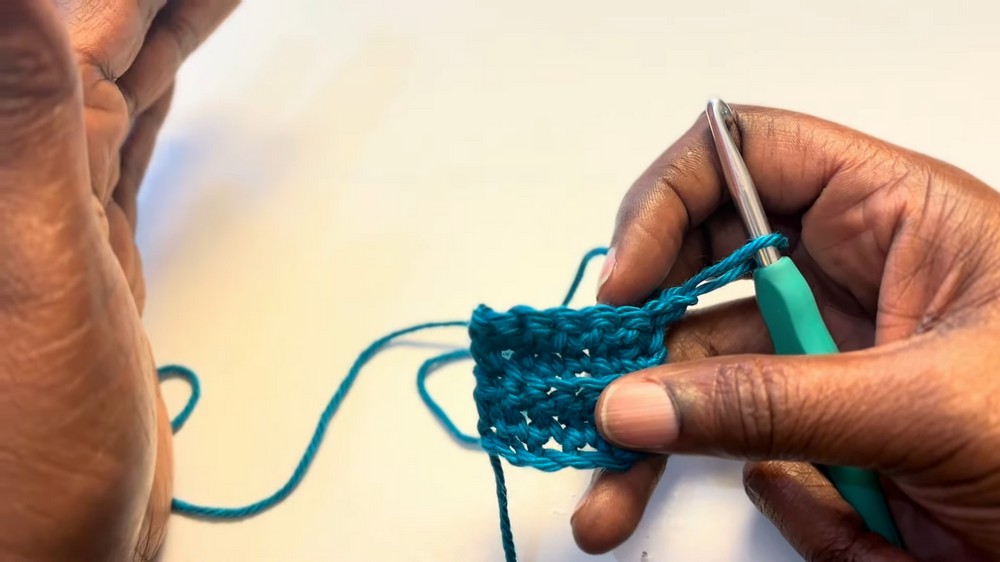
- Row 2 and Onward:
- In first st, sc through both loops (for a firm edge).
- Next 4 sts, sc in back loop only (for stretch).
- In final st, sc through both loops.
- Ch 1, turn.
- Repeat Row 2 for 50 rows or until your current length, when gently stretched, equals your desired waist (e.g., 20 inches relaxed for 20” stretched fit).
- Join ends with sl st or by sewing to form a band.
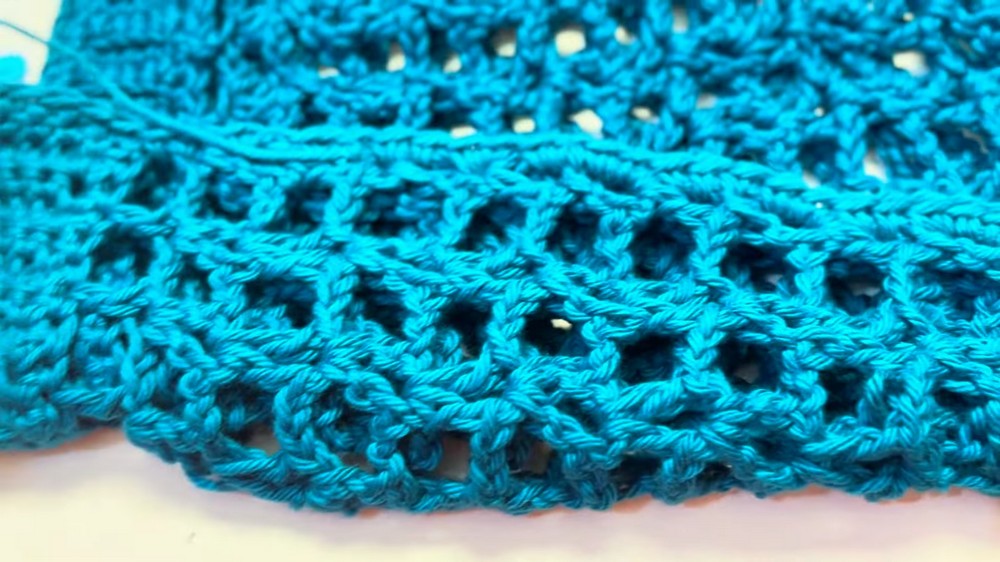
2. Lower Body Mesh Panel
- With band flat (not twisted), begin working into end rows of waistband.
- Row 1:
- Sc evenly across the long edge of the band: For 50 rows, work 1 sc per row edge (50 sc).
- Ch 5, turn.
- Row 2 (Mesh/V stitch):
- Skip 2 sts, dc in next st.
- Ch 2, skip 2 sts, dc in next st; repeat across.
- (Your ch-5 counts as first dc + ch-2 space.)

- (Your ch-5 counts as first dc + ch-2 space.)
- End as mesh fits across, with dc in last st.
- Row 3 (Start V-stitch repeat):
- Ch 5, turn.
- Dc in same sp as ch-5 (makes starting V).
- Ch 2, dc in top of next dc below, ch 2, dc in same st (V-stitch over V-stitch).
- Continue:
- [Ch 2, in top of next dc below (the “post”), work (dc, ch 2, dc)]
- Continue to end, finishing last V in final dc.
- Repeat Row 3 for a total of 28 rows (or until the piece measures your desired “top-to-underarm” height; e.g., 20 in flat/un-stretched).
- Adjust row count for desired length/fit.
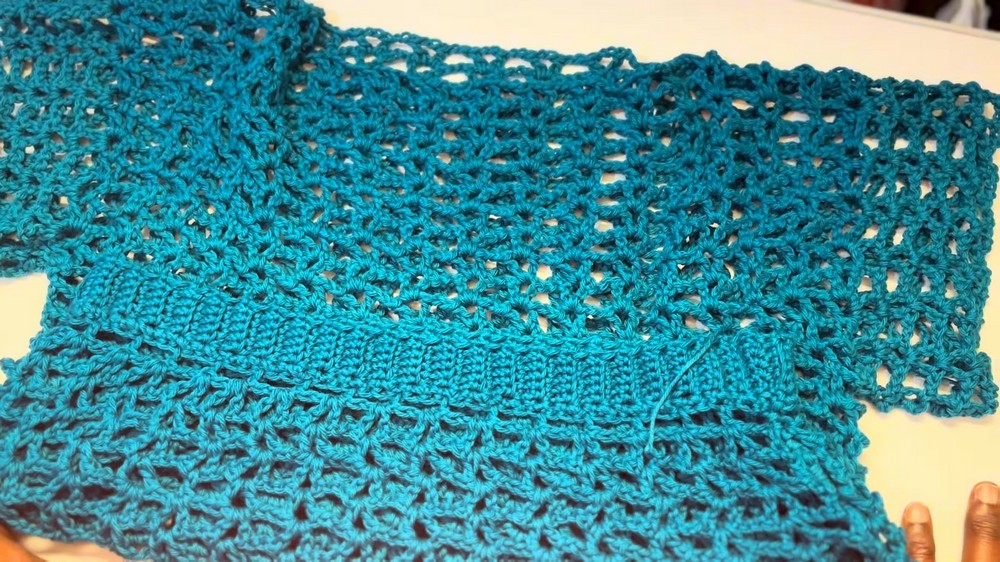
3. Make 2 Panels
- Repeat all steps above to create a second rectangle (front and back pieces).
4. Assemble Shoulders
- Place panels right sides together, align edges.
- Join shoulders:
- Use stitch markers to mark shoulder width (or desired neck opening—can be wide for “off-shoulder”).
- Sew or sl st the two panels together along the top edges, leaving neck opening unworked.
- Suggested: Seam 2–3 inches at each edge (customize to preference).
5. Side Seams & Armholes
- Mark armhole depth with measuring tape (measure around arm for comfort—e.g., 11 in circumference).
- Seam sides from waist up with sc (work into mesh spaces, not stitch tops):
- Place 2–3 sc in each mesh space.
- Continue up to armhole marker.
- Fasten off, repeat for both sides.
6. Sleeves
- Joining Yarn:
- At underarm, join with sl st.
- Ch 5 (for first V-st).
- Round 1 (V’s in armhole):
- Repeat mesh/V pattern:
- (dc, ch 2, dc) in mesh/V spaces around.
- Sl st to beginning ch to join.
- Repeat mesh/V pattern:
- Subsequent Rounds:
- Ch 5, (dc in same space),
- Continue (ch 2, dc, ch 2, dc) in each V around for a total of 5 rounds (or to length desired).
- Repeat for both sleeves.
- Finishing:
- Cut yarn, weave in all ends.
- Remove stitch markers.
Pattern Correction & Tips
- Correction: When creating the waistband, do NOT crochet to the final measurement unstretched; always use a stretched measure for proper fit.
- Tip: Try the top on before seaming sleeves and sides to ensure the fit is flattering and comfortable; add or remove rows for adjustments.
- Customizable: Adjust panel size for smaller/larger fits; measure as you crochet. For longer crop, simply add more rows before splitting for armholes.
- Seaming: Add decorative lacing or ties at the shoulder for an adjustable neckline if desired.
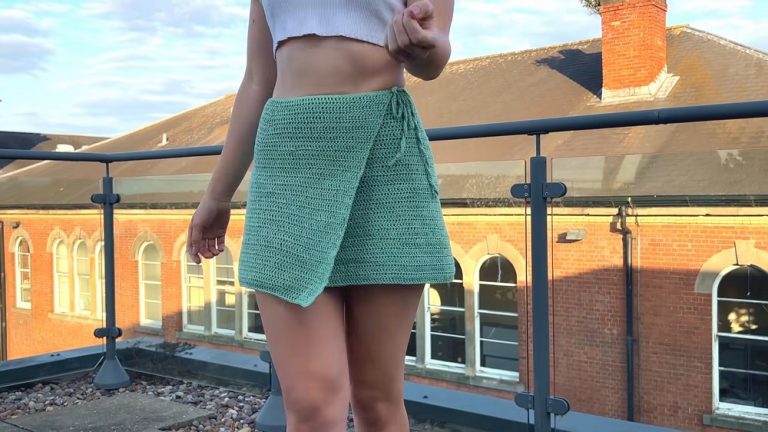
- Make a Set: Pattern for matching skirt available separately!
Conclusion
This mesh swimsuit cover-up top is quick, customizable, and perfect for layering over swimwear. The V-stitch mesh drapes beautifully and the stretchy band hugs comfortably, making this a versatile warm-weather garment. Adjust length, width, and sleeves for a truly personalized fit.