Free Crochet Flower Mirror Keychain Pattern to Style Your Accessories
Brighten your space with Free Crochet Flower Mirror Keychain Pattern that guide beginners to a charming accessory perfect for gifts and decor.
A small and beautiful flower keychain is easy for everyone to use and love. It fits right in your hand and has a shiny mirror in the center for quick checks before you go out. With the Crochet Flower Mirror Keychain pattern you can make this lovely creation easily at home using simple steps. There’s no need to be an expert you just need soft yarn and a little time.
Handmade Free Crochet Flower Mirror Keychain Pattern for Your Bag

Hang it on your keys or bag to show your style and carry a touch of beauty everywhere you go. This little flower is also a wonderful gift for family and friends making them feel special. Each time you see your handmade flower keychain it will bring a happy feeling to your day and remind you of the joy of creating something bright and useful.

Materials List
- Yarn: Worsted weight cotton or acrylic in main color for cover, pink or preferred color for flower, green for leaves
- Crochet Hook: 3.5 mm (E) or 3.75 mm (F) as appropriate for yarn thickness
- Mirror: Round, approx. 5.7–6 cm diameter (adjust rounds for larger mirrors)

- Notions:
- Scissors
- Yarn needle
- Stitch marker
- Hot glue or fabric glue (optional, for flower/mirror attachment)
- Optional: Keychain hardware or split ring, small decorative pebbles or stones
Key Abbreviations (US Terms)
| Abbreviation | Meaning |
|---|---|
| MR | Magic Ring |
| ch | Chain |
| sc | Single Crochet |
| sl st | Slip Stitch |
| inc | Increase (2 sc in same st) |
| dec | Decrease (sc2tog) |
| FO | Fasten Off |
Special Notes
- Pattern is worked in rounds; adjust the number of rounds/increases to fit your mirror snugly.
- Flower and leaves can be sewn or glued onto cover for decoration.
- All instructions are in US terminology.
Pattern Instructions
Mirror Cover (Main Color)
- Magic Ring:
- Make a MR, ch 1 (does not count as a stitch).
- 6 sc into ring. (6)
- Pull ring tight, sl st to first sc to join.
- Round 2:
- Ch 1, 2 sc in each st around. (12)
- Place stitch marker at beg/end if desired.
- Round 3:
- (2 sc in first st [inc], 1 sc in next st) repeat around. (18)
- If you have 20–21 sts, that’s OK for this pattern; adjust to fit mirror.

- Round 4:
- (1 sc in next 2 sts, 2 sc in next st [inc]) repeat around. (24)
- Test against your mirror. If larger, repeat the following increases:
- Round 5: (1 sc in next 3, 2 sc in next) (30)
- Round 6: (1 sc in next 4, 2 sc in next) (36)
- Continue as needed for your mirror size.

- Fitting Round:
- Once your piece fits the mirror’s diameter, work 1 sc in each st around for 2–3 rounds without increases.
- This forms the cover’s edge and helps the cover grip the mirror.

- Decrease Round (Final Edge):
- [1 sc in next st, 1 dec in next two sts (sc2tog)] repeat around if needed for tighter fit.
- Sl st to join, ch 1, FO.
- Weave in ends.
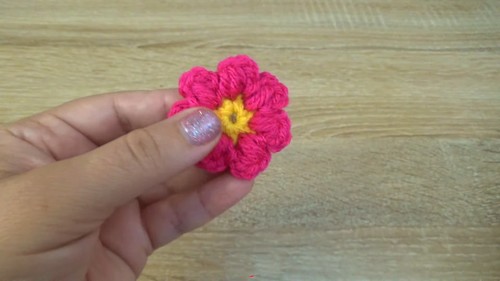
Flower (Accent Color)
- Magic Ring:
- MR, ch 1 (does not count as a stitch).
- 6 sc into ring.
- Pull ring tight, sl st to first sc.
- Petals:
- Attach new flower color in any st.

- Ch 2, (Yarn over, insert hook in same st, pull up loop, repeat for 3 loops total—yarn over, pull through all) for small puff/petal, ch 2, sl st into same st.
- Repeat for 6 petals, working: ch 2, puff (3 loopy stitches), ch 2, sl st in same st for each petal.
- FO, leaving a tail to sew or glue to cover.
- Attach new flower color in any st.
Decorative Leaves (Green Yarn, Optional)
- Use green yarn and yarn needle to embroider small stitches next to flower for leaf shapes.
- FO after stitching.

Assembly & Finishing
- Attach Flower:
- Sew or glue flower to center/top edge of cover.
- Optional Leaves/Stones:
- Embroider leaves, glue small stones/pebbles or beads as desired.
- Insert Mirror:
- Fit mirror snugly inside cover (add glue at edge if desired for security).
- Keychain Option:
- Attach split ring/keychain hardware to top or side if desired.
- Or crochet a chain and sew as a hanging loop.
Conclusion
You now have a beautiful, creative mirror cover adorned with a crochet flower. Use it as a keychain, bag charm, or decorative accent. The pattern is easily adjustable—simply work the base cover until the round fits your mirror’s diameter, then add extra rounds and decorative flourishes as you wish!
Pattern Corrections & Tips
- Correction: If stitch counts differ due to yarn/hook or mirror size, simply add or skip an increase round—fitting over your own mirror is most important.
- Tip:
- For larger mirrors, continue increases in the same pattern (adding one more sc between increases each round).
- The final rounds without increases deepen the cover edge and keep the mirror secure.
- Use a sturdy cotton yarn for durability.
- Personalize with beads, small stones, or embroidery.