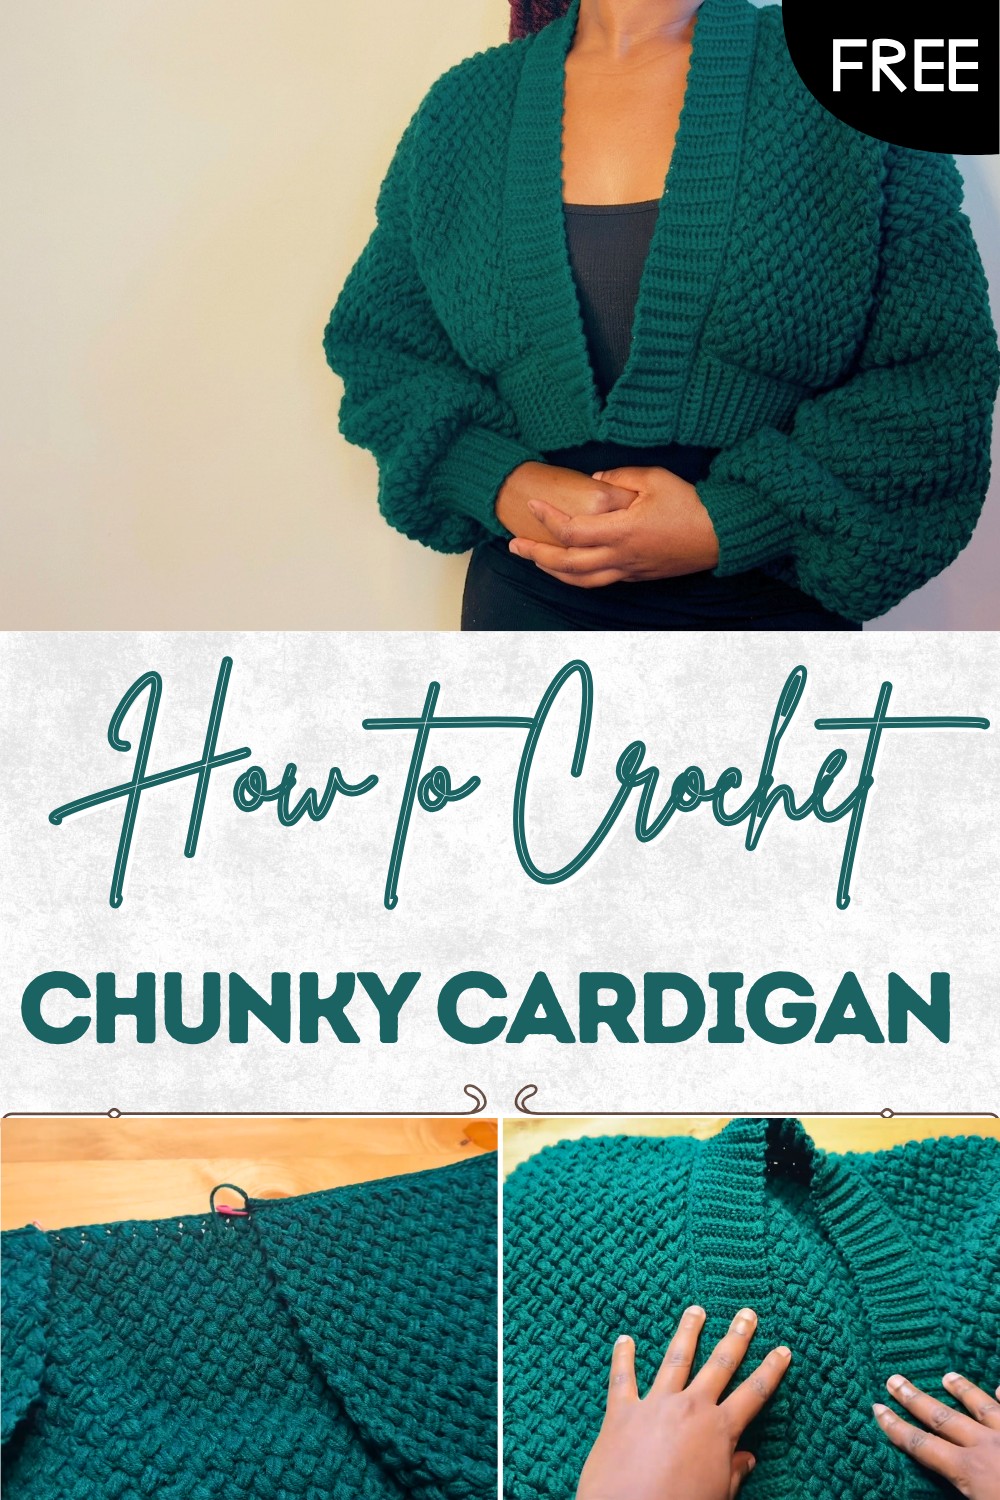
Free Crochet Chunky Cardigan Pattern To Stay Warm
Feel the comfort with this Free Crochet Chunky Cardigan Pattern and enjoy a cozy layer perfect for adding charm to any wardrobe instantly.
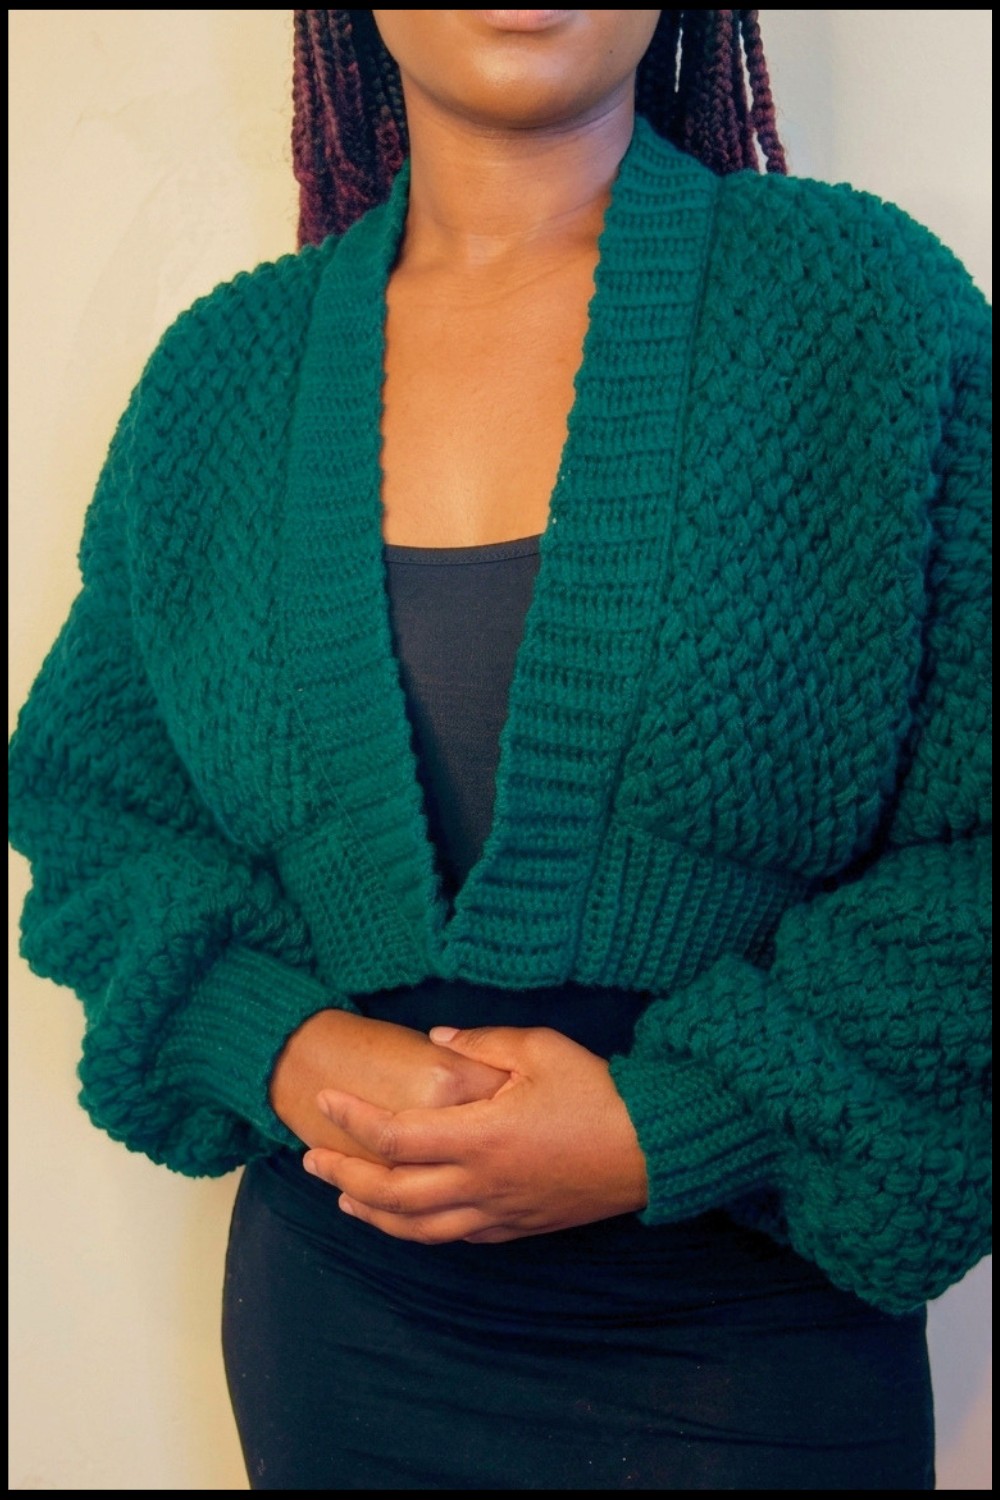
Nothing feels quite like a thick sweater pressing gently against your skin and bringing warmth to your day. The Crochet Chunky Cardigan pattern makes it easy for anyone to make a cardigan with big bold stitches and a cozy look. This cardigan suits every moment at home or outside and lays gracefully over any outfit. You can pick colors to make the look fit your taste and mood. Making one is simple and doable even without experience.
Crochet Chunky Cardigan Pattern (Free)
It offers comfort without heavy weight and lets you move freely. The unique handmade texture gives it charm and beauty. Use your cardigan for extra warmth or as a stylish layer for any occasion. With every stitch and color choice, you give your cardigan a personal touch that stays with you, making your days brighter and more comfortable.
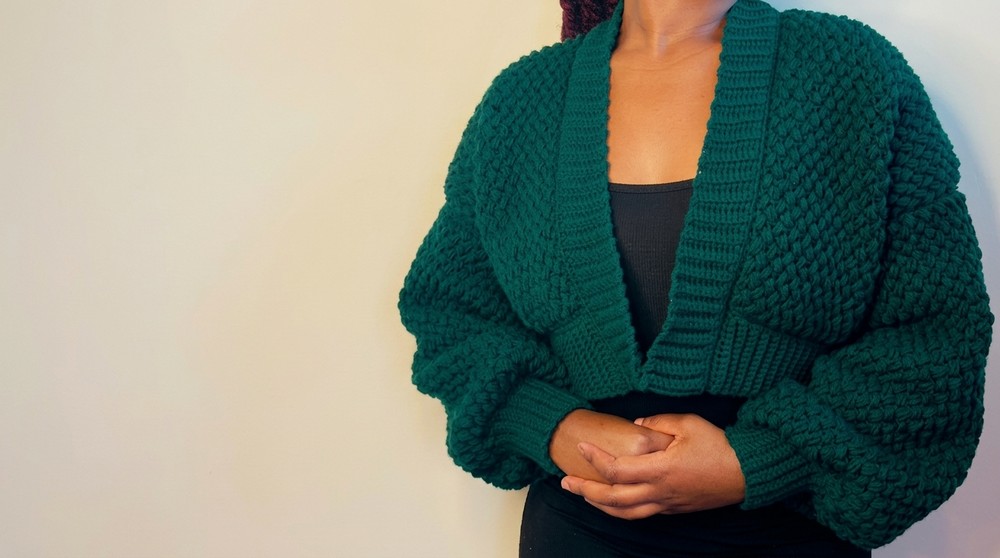
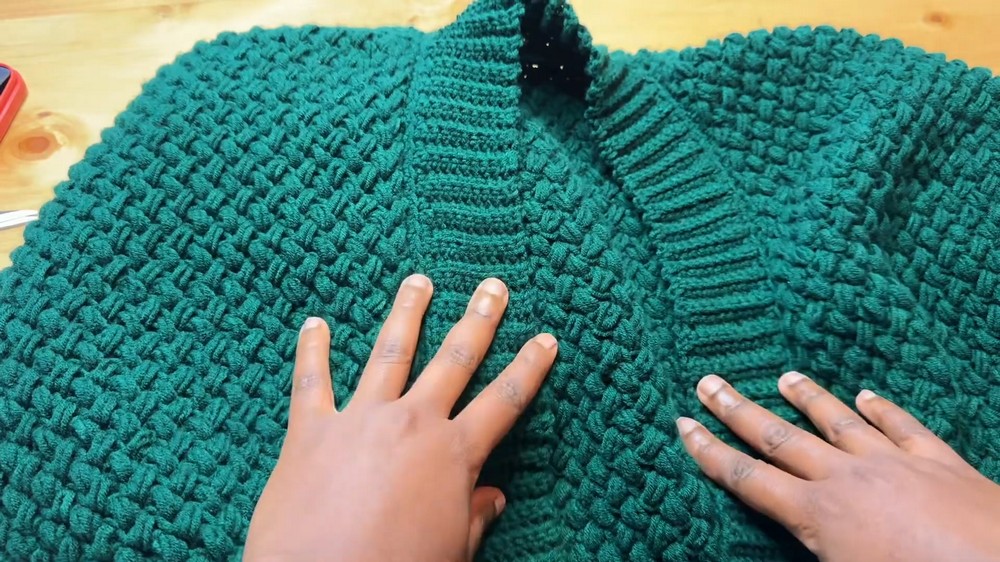
Cropped Pin Stitch Cardigan Pattern
Materials
- Yarn: Super Saver or similar worsted weight yarn (#4); yardage depends on size (medium sample uses several skeins)
- Hook: 3.5 mm (E/4) crochet hook (for body and sleeves)
- Optional for ribbing: 3.0 mm (D/3) crochet hook (for a firmer ribbing)
- Notions:
- Scissors
- Tapestry/yarn needle
- Measuring tape
- Stitch markers
Key Abbreviations
- ch – chain
- sc – single crochet
- hdc – half double crochet
- sl st – slip stitch
- st – stitch
- rep – repeat
- RS/WS – right side/wrong side
Special Notes
- Pattern is for size Medium:
- Back Panel: 24″ x 15″ (width x height)
- Each Front Panel: 10″ wide (before ribbing), 2″ front ribbing
- Sleeve (inc. cuff): 17″ long
- Total Cardigan Length: 15″ (super-cropped style)
- For larger/smaller sizes, chain more or fewer for panel width, and adjust row count for panel/sleeve length. Ensure starting chain is an even number.
- The ribbing is made using back loop only single crochet for a neat, stretchable finish.
Instructions
1. Back Panel
Foundation Chain:
Ch 80 (or your chosen width, in even number).
Row 1:
Ch 1 (does not count as stitch), sc in 2nd ch from hook and in each ch across. (80 sc)
Turn.
Row 2 (Pin Stitch):
Ch 2, skip first st.
- [Pin Stitch]:
- Insert hook into the next st, pull up loop (2 loops on hook),
- Yarn over, insert into same st, pull up loop (4 loops on hook),
- Yarn over, insert into same st, pull up loop (6 loops on hook),
- Yarn over and pull through all 6 loops,
- Ch 1 to secure.
- Skip 1 st, work [Pin Stitch] in next st, ch 1.
Rep until 2 sts remain.
Skip 1, into last st: work Pin Stitch, ch 2, turn.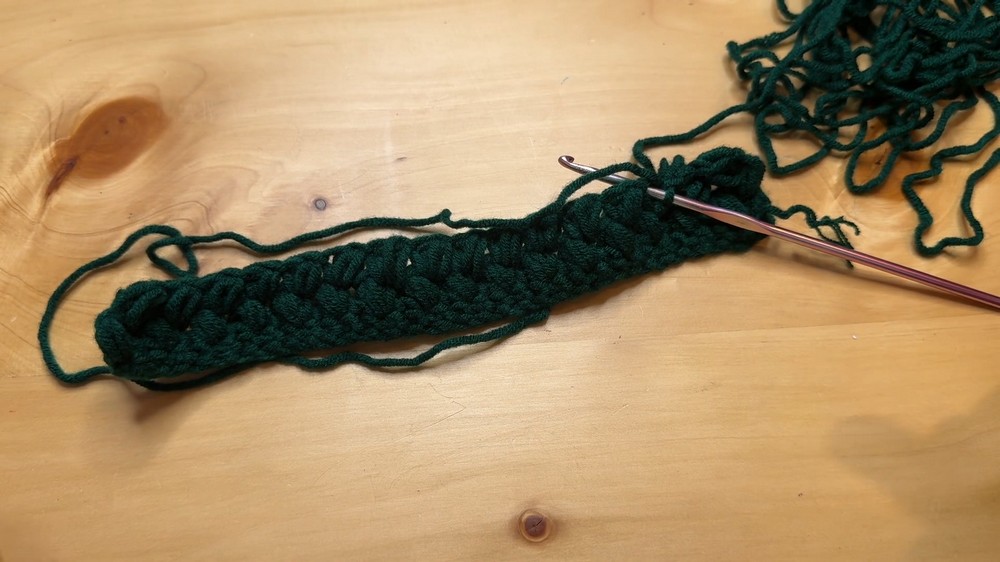
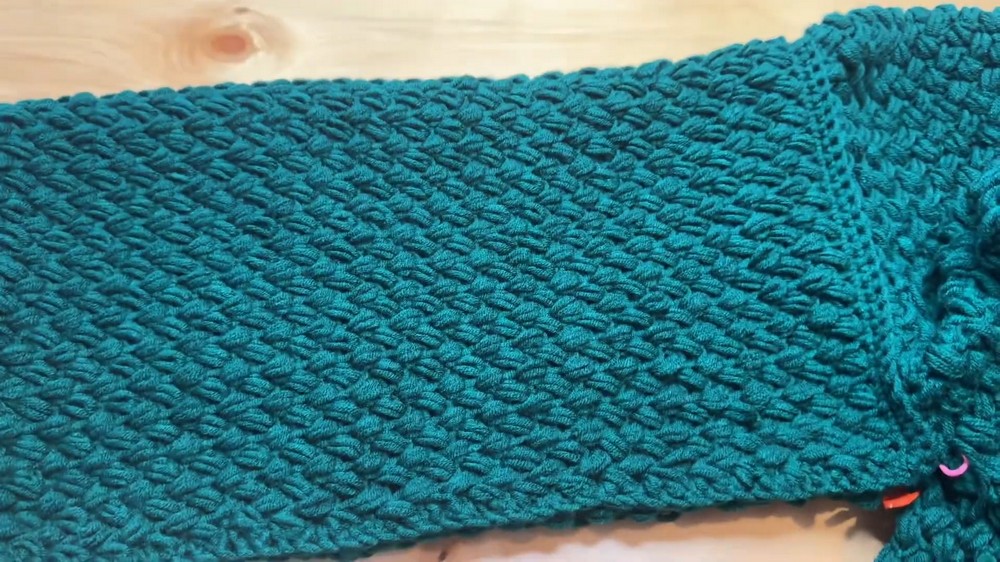
Row 3–37:
Rep Row 2, always working Pin Stitch clusters into previous row’s ch-1 spaces. Each row should begin and end with ch 2.
Final Panel Dimensions: approx. 24″ wide x 15″ tall (37 rows) for a cropped fit.
2. Front Panels (Make 2)
Foundation Chain:
Ch 32.
Row 1:
Ch 1, sc in 2nd ch from hook and each across. (32 sc)
Row 2:
Work Pin Stitch pattern as for back panel:
- Ch 2, skip first st, Pin Stitch in next st, ch 1, skip 1; rep to last 2 sts, Pin Stitch in last st, ch 2, turn.
Rows 3–37:
Rep as for back.
Each front panel should measure 10″ wide (before ribbing), 15″ tall.
Single crochet border:
After last repeat, ch 1, sc evenly across final edge (32 sc total). Fasten off.
3. Seaming Shoulders
- Align front panels to back panel at shoulders, with RS facing in.
- Mark 32 sts from edges and seam shoulders together with single crochet (sc), working through both thicknesses for durability.
- Fasten off and repeat for both shoulders.
4. Sleeves (Make 2)
Foundation Chain:
Ch 60 (width of sleeve around the arm; adjust to preference).
Row 1:
Ch 1, sc in 2nd ch and in each across (60 sc).
Row 2:
Ch 2, skip first st, work Pin Stitch in next st, ch 1, skip 1 st; repeat as per body.
- Work 42 rows, always starting and ending the same.
Row 43:
Ch 1, sc in each ch-1 space and Pin Stitch across (should have 60 sc).
- Leave long tail for seaming.
5. Setting in Sleeves and Side Seams
- On front/back panels, mark armhole: count down 7 rows from the top on both front and back (leave approx. 30 rows for sleeve opening).
- Starting at marked point, pin sleeve evenly onto arm opening.
- Join with single crochet, working through back panel, sleeve edge, and front panel, for 30 sts.
- Continue to seam sleeve into a tube with sc, working from underarm to wrist.
- Repeat for other sleeve.
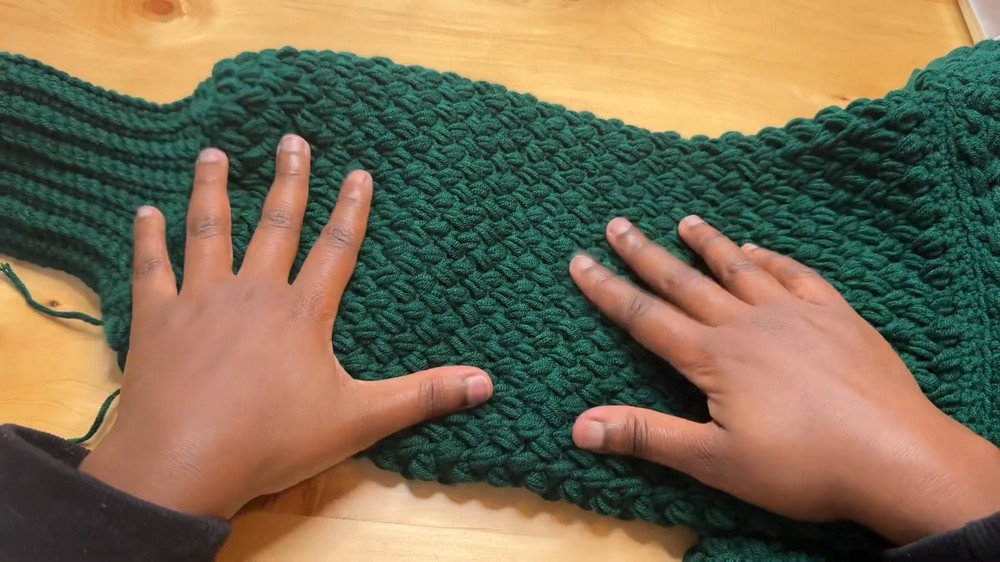
6. Sleeve Cuffs
- With 3.5 mm or 3 mm hook, ch 16 for cuff ribbing.
- Row 1: Sc in 2nd ch and each across (15 sc). Ch 1, turn.
- Row 2: Sc in back loop only across (15 sc). Ch 1, turn.
- Rep Row 2 until ribbing fits snugly around wrist (approx. 42 rows, or desired fit).
- Slip stitch ends together to form a ring and sew to sleeve.
- Repeat for second cuff.
7. Side and Underarm Seams
- With WS facing up, fold sweater at shoulders.
- With sc, join from hem to underarm, then continue down sleeve to wrist.
- Repeat for both sides.
8. Bottom (Hem) Ribbing
- Count sts along bottom edge:
- Back panel: 80 sc
- Front panels: 32 sc each
- Total = 32 + 80 + 32 = 144 sc (+2 at corners = 146)
- With 3.0 mm hook, ch 12.
- Row 1: Sc in 2nd ch from hook and each across (11 sc). Ch 1, turn.
- Row 2: Sc in back loop only across. Ch 1, turn.
- Repeat for 146 rows. May add/subtract a row for fit.
- Join rib to hem edge with sc or whipstitch. Do NOT cut yarn until attached.
9. Front Band Ribbing (Button/Neck Band)
- Count up stitches along front edges & neckline: sample is 122 rows (may vary by size; slight stretch is fine).
- With 3.0 mm hook, ch 10.
- Row 1: Sc in 2nd ch and each across (9 sc), ch 1, turn.
- Row 2: Sc in back loop only across, ch 1, turn.
- Repeat to 122 rows, or measured length.
- Sew one edge to cardigan front opening; ensure a slight stretch for a snug fit.
10. Final Finishing
- Work a row of sc to neatly connect bands/ribs at corners if needed.
- Weave in all ends.
- Block gently to even out stitches and seams.

Pattern Corrections & Tips
- Correction: The starting chain should be an even number for all pieces.
- Fit Adjustments:
- For larger/smaller width, adjust starting chains in multiples of 2.
- For length, add or remove rows.
- Tip: Use a smaller hook for ribbing for a snug and professional finish.
- Use stitch markers to help align key points for seaming and ribbing.
Conclusion
The cropped pin stitch cardigan is a modern, comfortable, and easy-to-adjust garment that’s perfect for layering. The textured pin stitch creates visual interest, while simple construction ensures beginner-friendly assembly. Customize by adjusting panel sizes, sleeve width, or ribbing to suit your style.