Vibrant Crochet Charger Cord Cover for Stylish Setups
Keep your cords neat and stylish with a charming Crochet Charger Cord Cover Pattern that blends function with playful elegance.
In modern households, electronic devices are indispensable, and their accessories often endure constant use and wear. A frayed or tangled charging cord can be frustrating, but a thoughtfully crocheted cover not only protects the cord but also adds a touch of charm and personalization. The Crochet Charger Cord Cover Pattern transforms ordinary cables into functional and decorative items, combining durability with handmade appeal.
Charming Crochet Charger Cord Cover for Neat Displays

The process begins by wrapping the cord with a snug, flexible crochet sheath, providing a protective layer that resists bending, fraying, and general wear. Midway, textured stitches or playful motifs can be added to enhance grip and aesthetic appeal, while the soft yet resilient material ensures the cord remains easy to coil and store. The cover accommodates different cord lengths and can be customized with colors, stripes, or small decorative elements, making it as stylish as it is practical.
Beyond simple protection, the Crochet Charger Cord Cover Pattern encourages creativity and mindfulness in crocheting, allowing the maker to infuse everyday items with personality. Lightweight, durable, and reusable, it turns a mundane electronic accessory into a small but meaningful piece of art. Each stitch combines functionality with charm, making charging cords safer, more organized, and visually appealing in any home or workspace.
Materials Needed
For this project, you will need the following:
- Yarn: Various colors of weight 4 acrylic yarn, including green for the vine and additional colors for the flowers. Leftover scrap yarn works perfectly for this.
- Crochet Hook: 4.25mm crochet hook.
- Additional Materials:
- A scissors
- Tapestry needle for weaving in ends
- Your charger cable
Special Features
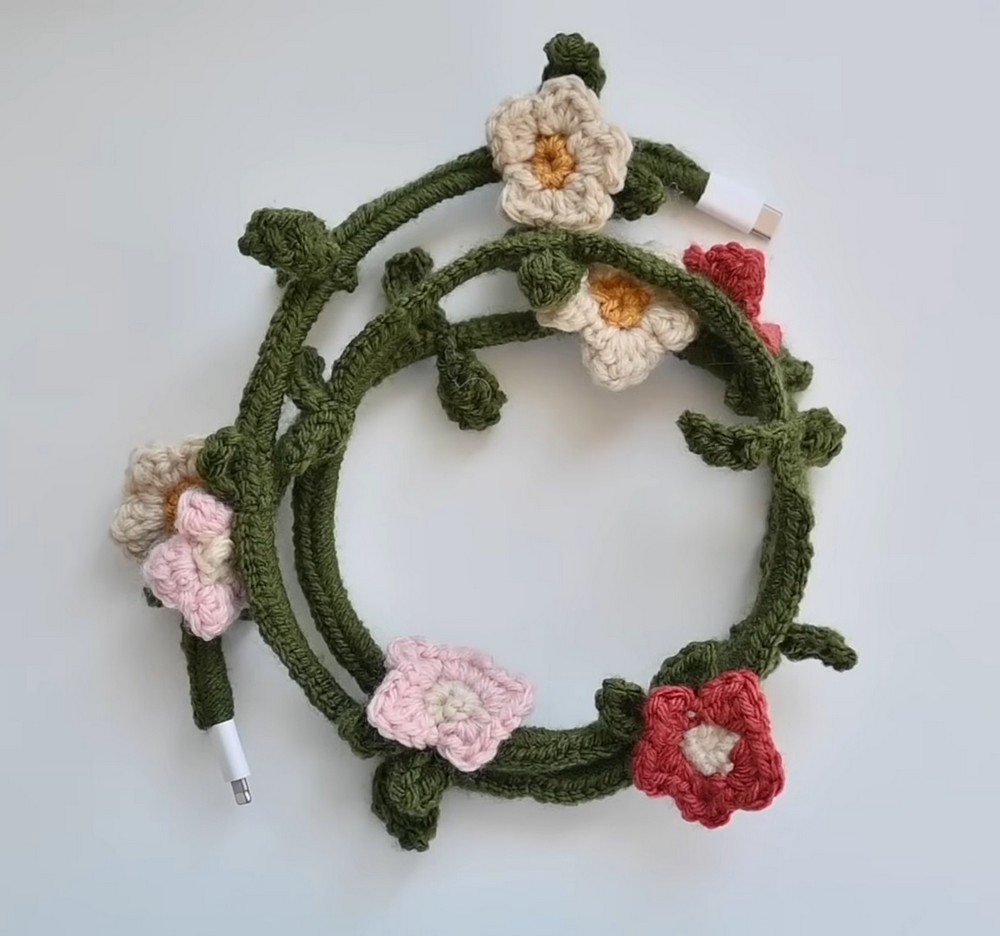
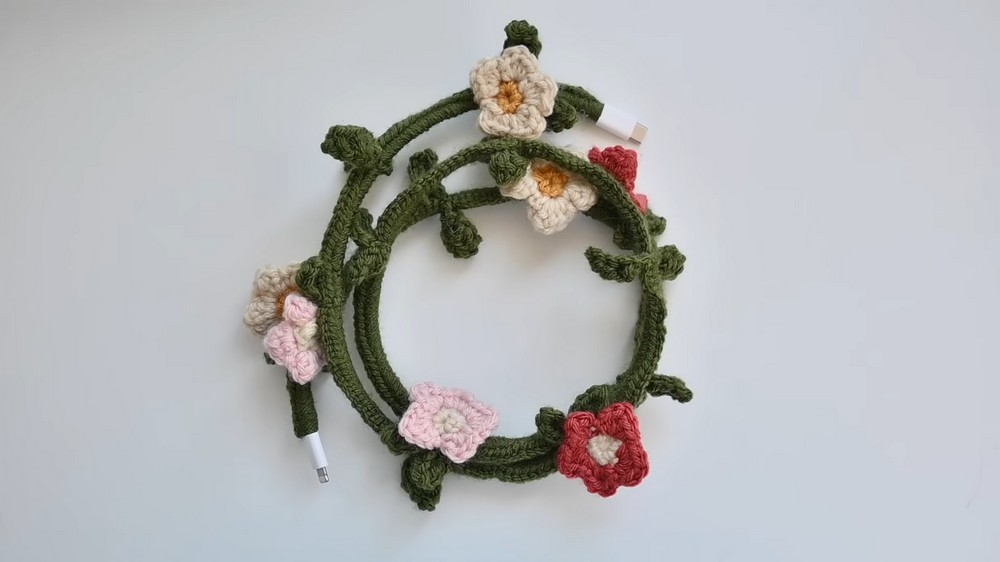
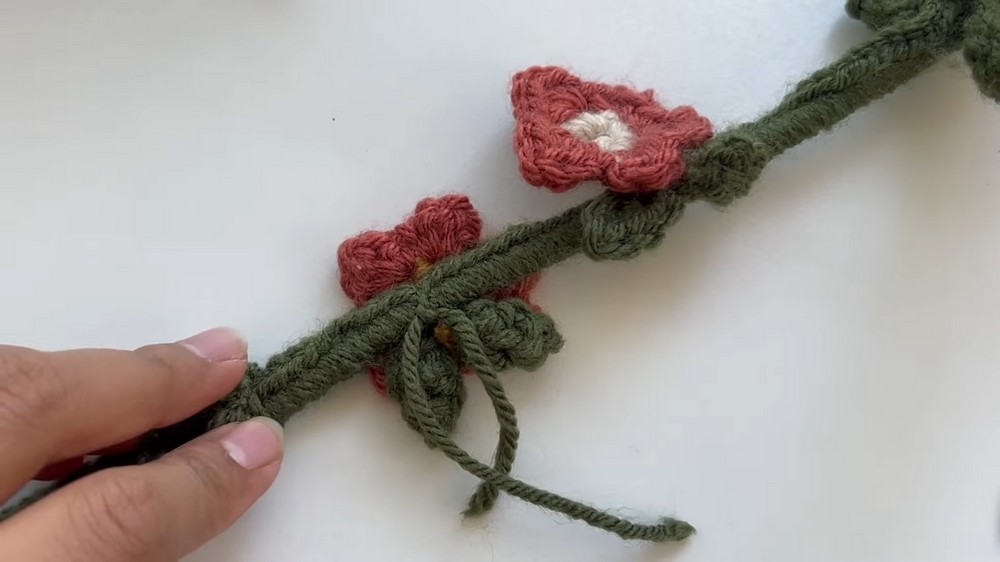
- Vine Design: The main body of the cable cover resembles a vine wrapping around the wire.
- Leaves and Flowers: Adorn the vine with crochet leaves, sprouting from the base, and colorful flowers for decoration.
- Protective Function: The cover helps protect your cable from wear, while also deterring pets from chewing on it.
- Beginner-Friendly and Quick: The simplicity of the stitches makes this project doable for beginners, and it can be completed within a single day.
Level of Difficulty
This is a beginner-friendly project with clear instructions and basic stitches such as single crochet, half-double crochet, double crochet, and slip stitch. It’s suitable for anyone looking to improve or practice foundational crochet skills while working on a functional item.
Step-by-Step Instructions
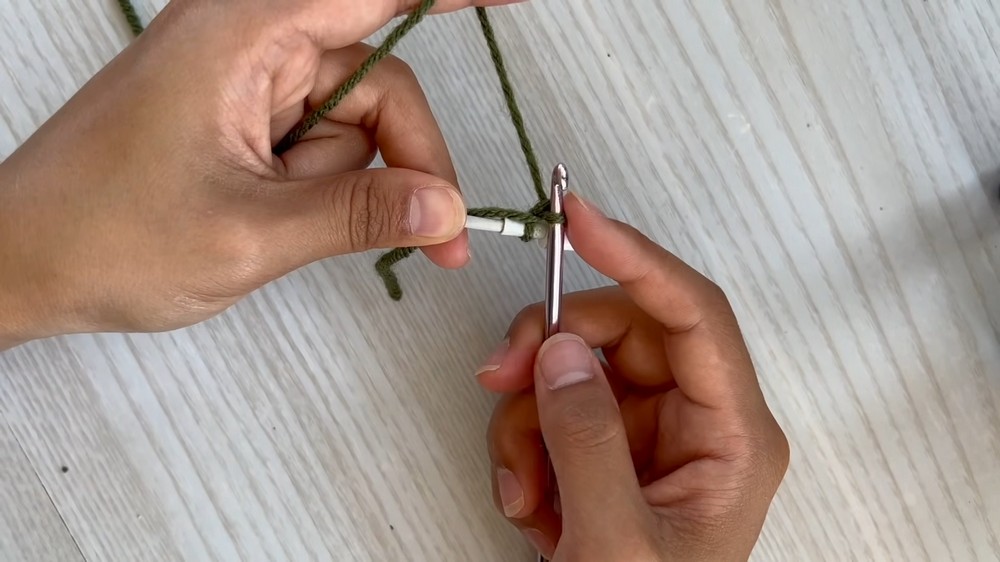
1. Crocheting the Vine (Main Cable Cover)
- Start: Select the green yarn for the vine. Create a loop and insert your charger cable into the loop.
- Single Crochet Stitches: Work single crochet stitches around the cable, beginning at the thick end of the charger. Remember to hold the yarn tail flush against the cable as you crochet to secure it.
- Compact Placement: Push the stitches tightly together as you go to ensure there are no gaps. This is particularly important on the thicker portion of the charger where it can be harder to maintain a smooth covering.
- Continue Across the Cable: Keep crocheting in single stitches all the way to the other end. Once you reach the opposite end, cut the yarn, pull the loop long, and weave in the ends.
2. Crocheting the Leaves
- Start a Chain: Using green yarn, make a loop, chain 4, and skip the first chain.
- Shape the Leaf:
- In the second chain, work a single crochet.
- In the third chain, work a half-double crochet.
- In the fourth chain, work another single crochet.
- Slip Stitch and Repeat: Slip stitch to finish the leaf, then repeat the process by chaining another 4. You can make as many leaves as you want to attach to the vine later.

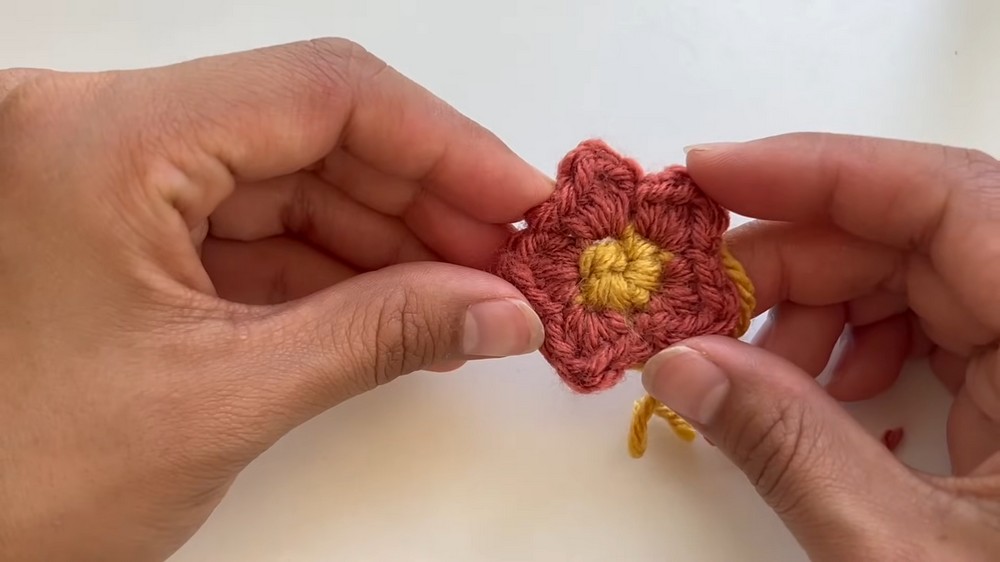
3. Crocheting the Flowers
- Start the Flower: Use yellow yarn (or your preferred flower center color) to chain 4 and slip stitch into the first chain to form a loop.
- Create the Petals:
- Single crochet 5 times into the center of the loop.
- Change to a petal color (such as pink or orange), and work the petals into each single crochet. For each petal:
- Work 1 half-double crochet, 1 double crochet, 1 half-double crochet, and 1 single crochet in the same stitch.
- Chain 1 and slip stitch into the next stitch around the circle.
- Repeat: Continue until you have 5 petals. Slip stitch into your first chain to close the flower, pull a long tail, and cut the yarn.
4. Attaching Leaves and Flowers
- Positioning: Flip over the finished flower and place a sprout or leaf in the desired spot. Tie the ends securely in double knots.
- Weaving In Ends: Use a tapestry needle to weave in the yarn tails to the matching yarn sections.
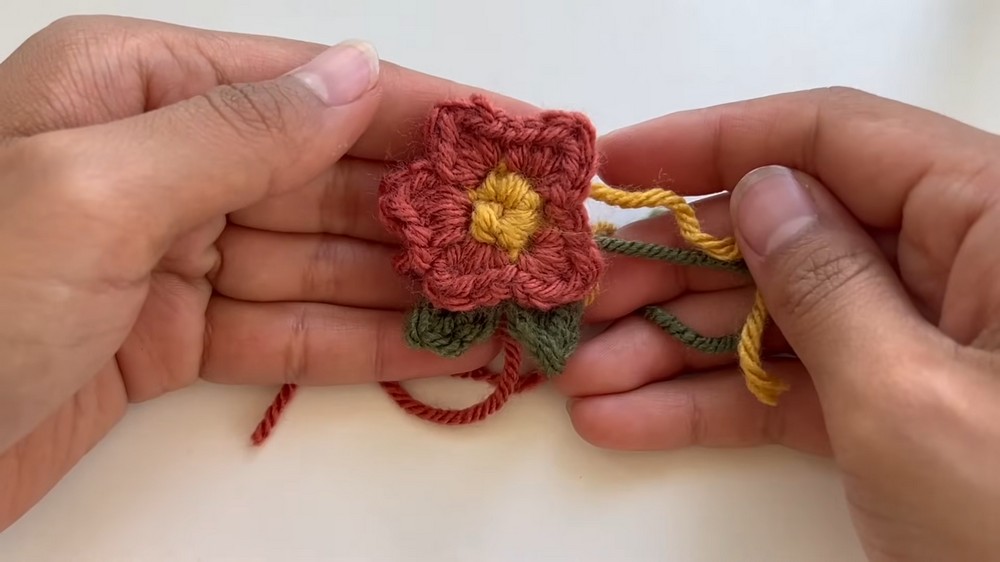
- Attach to Cable: Use the remaining yarn tails to secure the leaves and flowers to the vine-covered cable. Tie them in place and weave in any excess ends.
Tutor’s Suggestions
- Yarn Selection: Use scrap yarn for this project since it doesn’t require much material. Acrylic yarn works well because it is durable and compactable.
- Stitch Tension: Keep your stitches tight to avoid gaps and ensure a neat, polished look.
- Customizations: Mix and match yarn colors to make the design more vibrant and unique.
- Safety Considerations: While this cover protects cables against light damage, it’s important to check cables for electrical safety and replace them as needed.
Uses of the Charger Cable Cover
- Decoration: Elevates the look of a plain charger cable with a pretty, nature-inspired embellishment.
- Protection: Prevents general wear and tear and helps deter pets from chewing on cables.
- Gifting: Makes an excellent handmade gift for friends and family, especially for tech enthusiasts.
Conclusion
With this delightful crochet project, you get to blend functionality with charm—transforming your ordinary charger cable into a beautiful and unique piece of work. The combination of practical protective features and the delicate vine, leaf, and flower embellishments ensures that this project is both useful and visually appealing. Even as a beginner, you can complete this in a single day, making it a perfect quick project to try.
Tip
When attaching the flowers and leaves to the vine, keep the cable taut to avoid bunching and ensure proper placement for a seamless and professional finish.