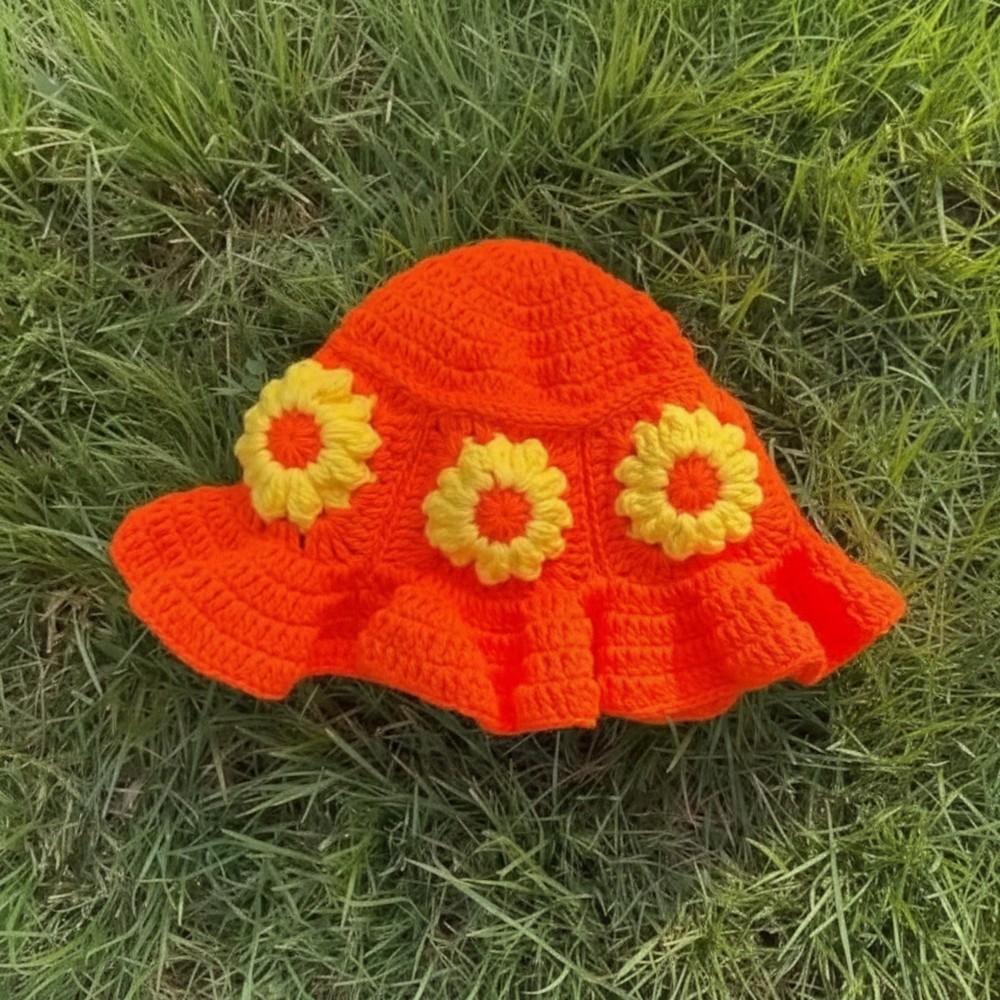
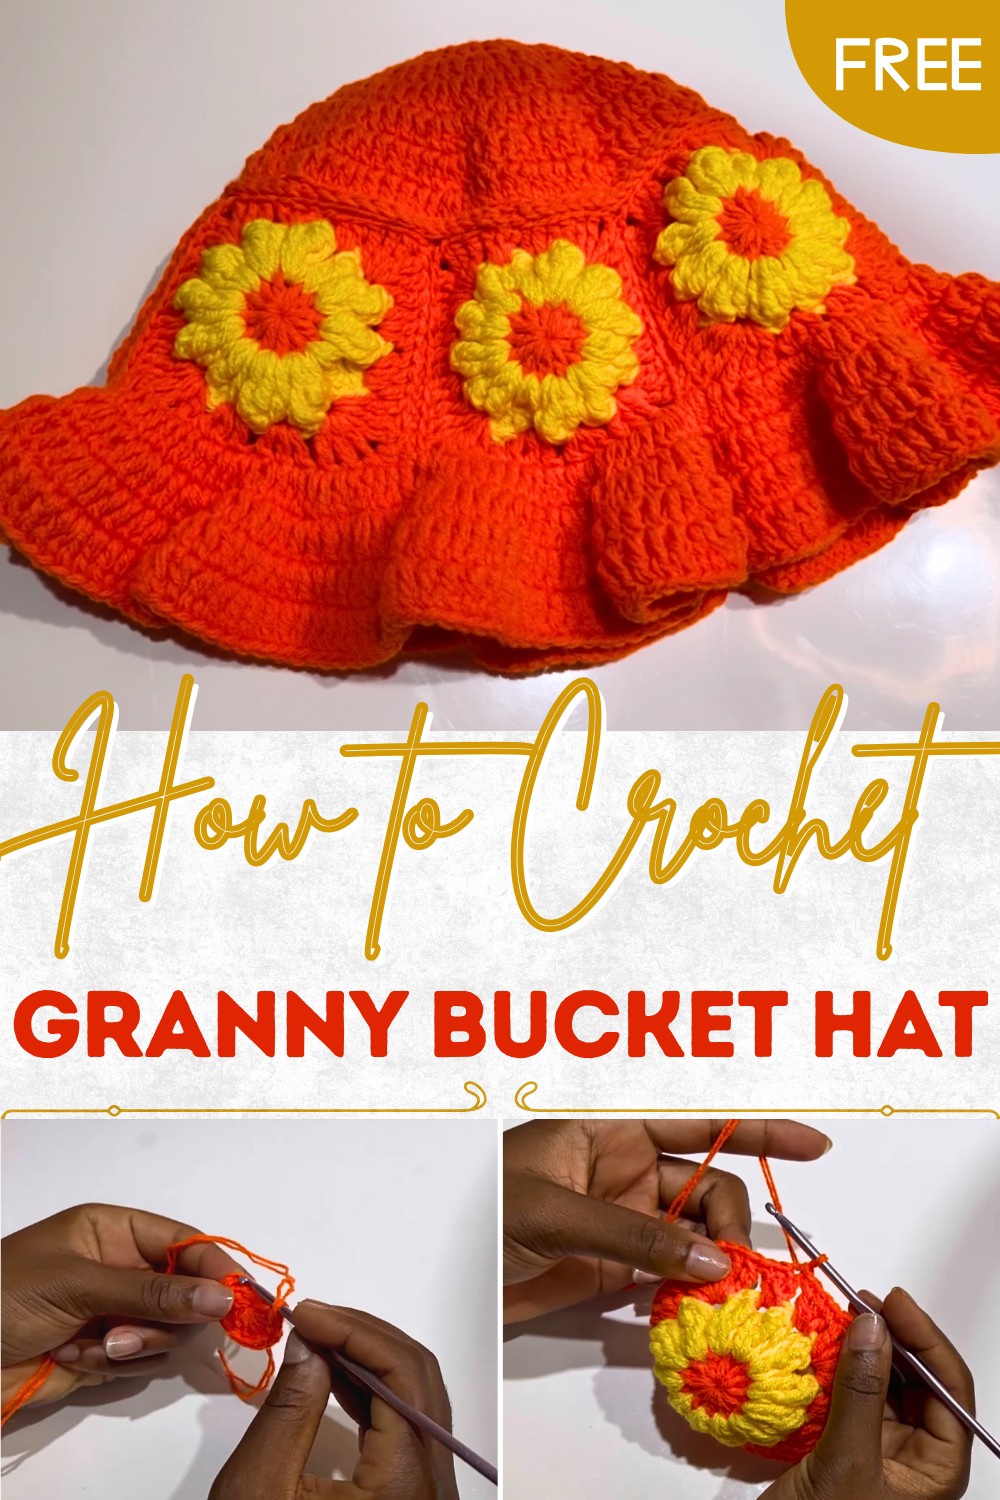
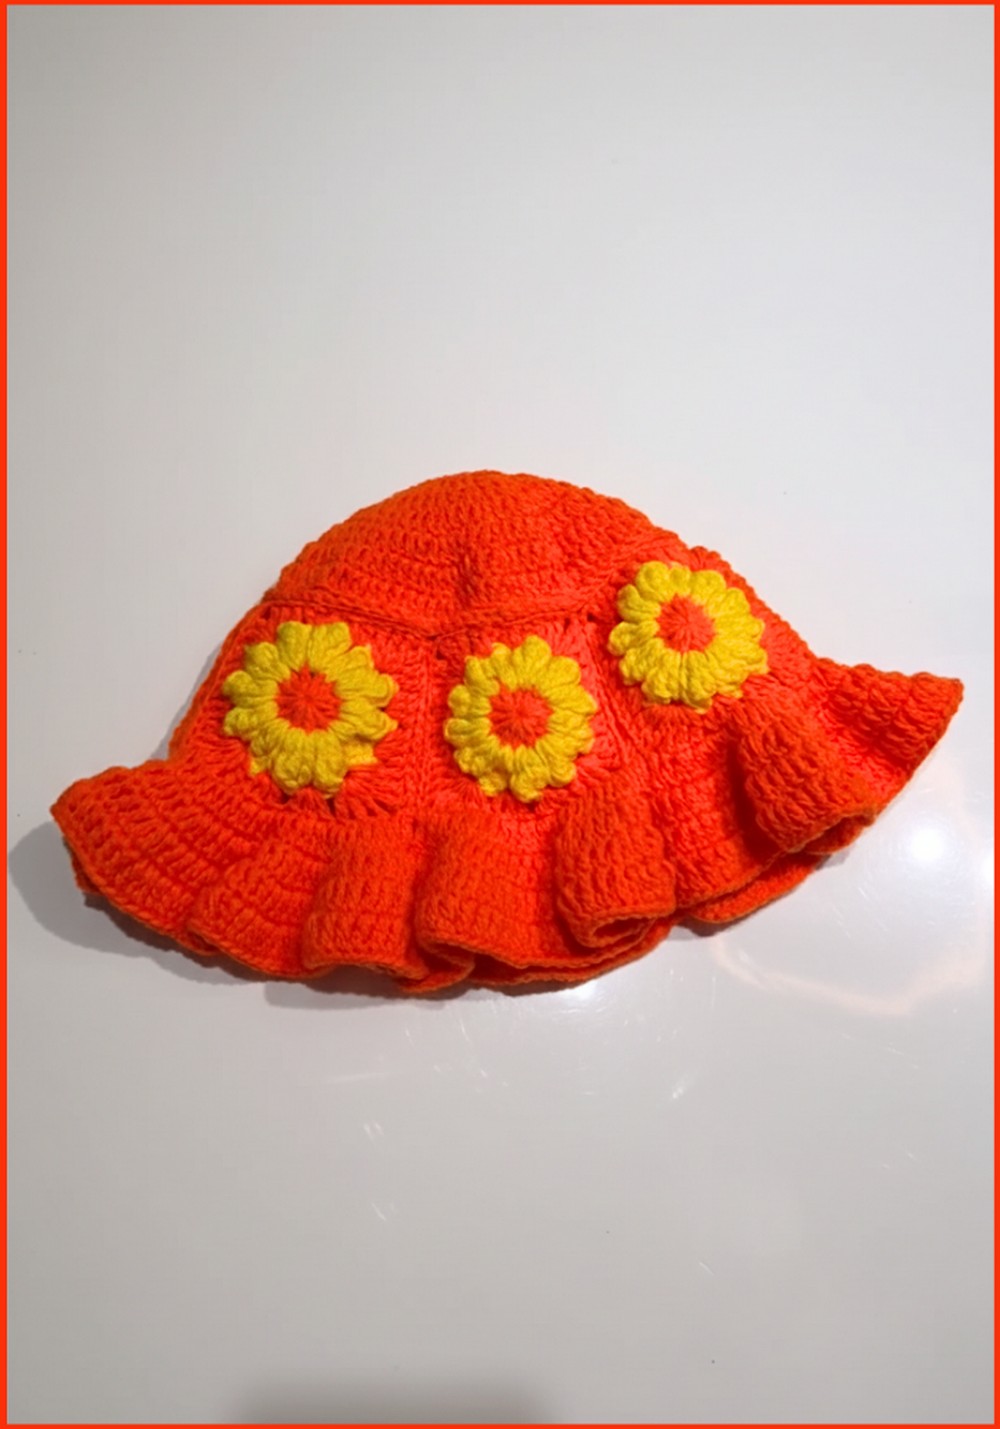
Crochet a Granny Bucket Hat Pattern That’s Perfect for Any Outfit
Simple Crochet Granny Bucket Hat Pattern for Cute Summer Vibes
Its lightweight pattern makes it comfortable to wear, while its customizable color options add a personal touch. The pattern serves as a sustainable and handmade accessory, promoting eco-friendly practices by reducing mass-produced fashion purchases. It’s ideal for beginners or anyone honing their skills with basic crochet techniques like double and treble stitches.
Used as a thoughtful gift or a creative project for self-expression, this pattern is both versatile and functional. Its stylish appeal ensures you’ll enjoy wearing it, while the crochet process itself offers a rewarding experience. With this pattern, charming design meets practicality, making it a must-try for every crochet enthusiast.
Materials Needed
- Yarn: Orange yarn and leftover yellow yarn (Miss Ai suggests doubling the yarn for sturdiness).
- Crochet Hook: A 4.0 mm hook.
- Darning Needle: For attaching squares and finishing.
- Optional: Stitch markers to maintain accuracy.
Special Features
- Unique Design: Combines granny squares with floral aesthetics for a bold and elegant look.
- Lightweight and Breathable: Uses soft yarn suited for casual wear in warm weather.
- Versatility: Suitable for summer or spring outings, adding charm to any outfit.
Level of Difficulty
- This project is classified as beginner-to-intermediate. While basic stitches such as double and treble crochets are used, assembling the squares and ruffles requires attention to detail. Miss Ai provides helpful tips to guide each step, even for those learning crochet techniques.
Step-by-Step Instructions
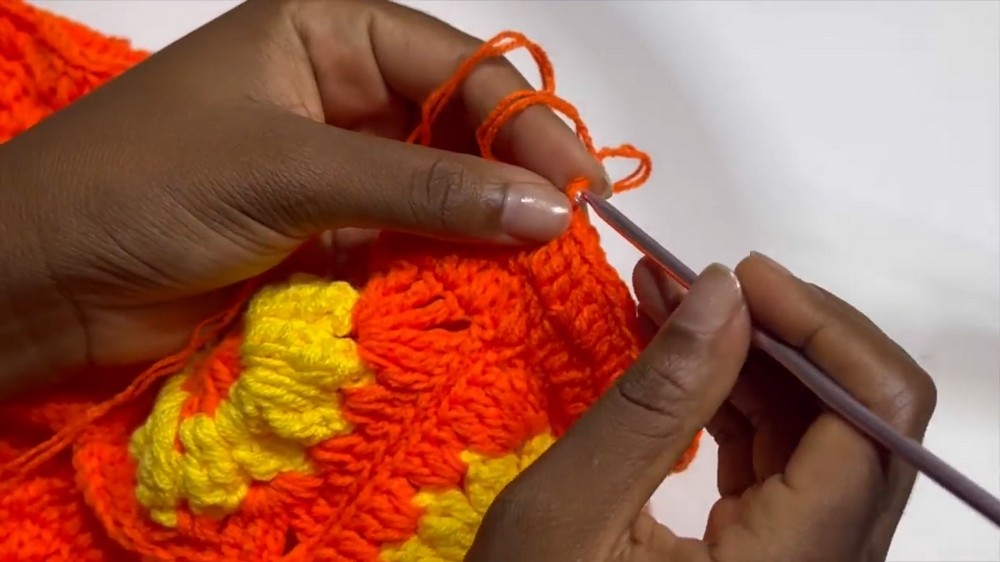
1. Making the Granny Squares
Row 1:
- Begin with a magic circle, or alternatively chain four and slip stitch in the last chain to form a circle.
- Chain 3 (this counts as the first double crochet), then add 11 double crochets in the circle.
- Slip stitch to the top of the chain 3 and fasten off the yarn.
2:
- Attach yellow yarn to any stitch (insert hook in the middle of the stitch).
- Chain 4 (this counts as the first treble crochet), then make four trebles clustered together.
- Continue making four trebles in each space, combining the trebles after every cluster. Complete 12 treble clusters in total.
- Slip stitch, chain 1, and fasten off yarn.
3:
- Attach orange yarn to any chain-2 space.
- Work 3 double crochets in each space, alternating between simple stitches and “corners” (corners consist of 3 treble crochets, chain 2, and 3 treble crochets in the same space).
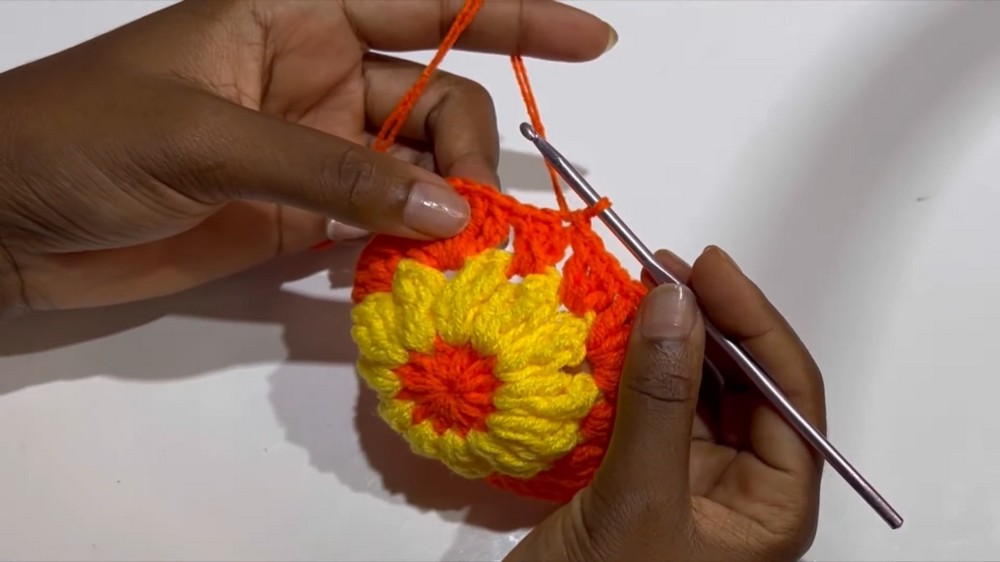
- Repeat the pattern to complete one granny square. Create six squares following these steps.
2. Attaching the Granny Squares
- Place squares with the wrong side facing up, keeping loose ends aligned.
- Use a darning needle or hook to join squares. To attach:
- Insert a needle through the front loop of the first panel and the back loop of the second panel.
- Pull through and repeat until all squares are joined into a circular band.
- Insert a needle through the front loop of the first panel and the back loop of the second panel.
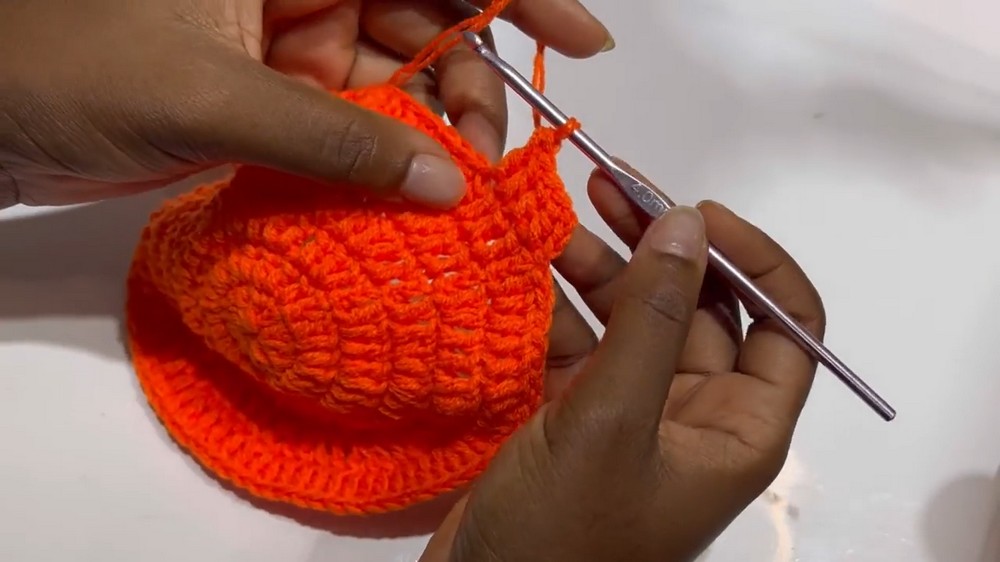
3. Making the Hat Base
Row 1:
- Start with a magic circle, chain 3, and add 11 double crochets in total.
- Slip stitch and complete the round.
2:
- Begin increasing: Chain 3, then place two double crochets in each stitch around. You should have 24 stitches at the end.
3-7:
- Continue increasing by placing more double crochets between increases. For example:
- Row 3: One double crochet followed by an increase.
- Row 4: Two double crochets followed by an increase.
- Row 5: Three double crochets, then increase.
- Row 6: Four double crochets, then increase.
- Row 7: Five double crochets, then increase.
Fasten off and clean loose ends.
4. Attaching Squares to Base
- Align the back loop of the squares with the front loop of the base.
- Attach with your hook or darning needle while carefully matching loops.
- Secure firmly by slip stitching or pulling through.
5. Adding the Ruffles
Row 1:
- Attach yarn, chain 3, and place two double crochets in each stitch.
2-4:
- Progressively increase stitches to expand the ruffles:
- Row 2: Two double crochets, then increase.
- Row 3: Four double crochets, then increase.
- Row 4: Six double crochets, then increase.
Stop at the desired ruffle length and secure all loose ends neatly.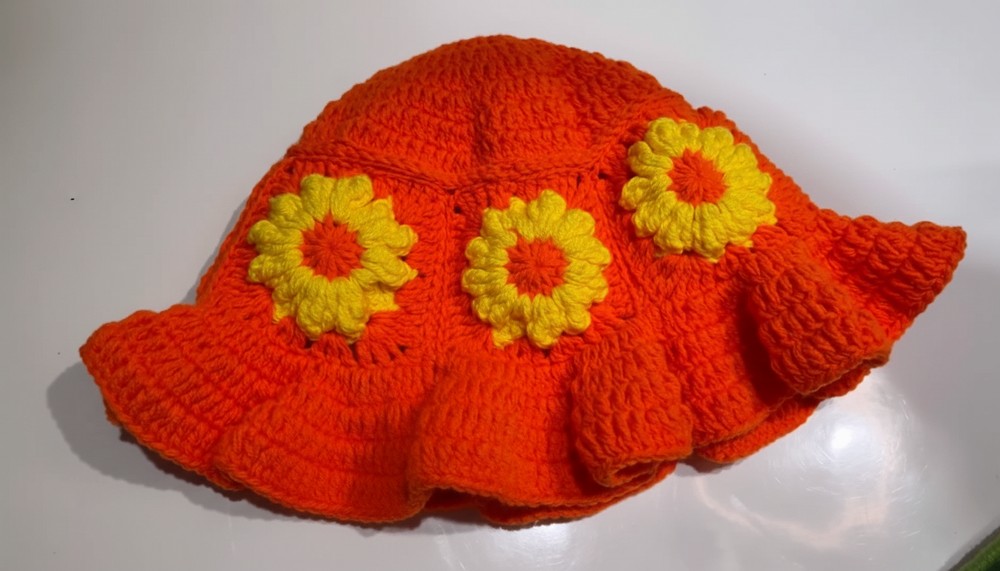
Tutor’s Suggestions
- Loose Ends: Always attach squares from the wrong side, and ensure all loose ends face the same direction for easier sewing later.
- Magic Circle Tip: If working a magic circle feels tricky, chain four and slip stitch instead to form the first loop.
- Use Double Yarn: Doubling the yarn increases durability and helps maintain the hat’s structure.
Uses
- Accessories: A charming bucket hat for sunny days that enhances your outfit.
- Gift Idea: A personal, handmade item perfect for special occasions.
- Creative Outlet: A rewarding project to practice and improve crochet skills.
Conclusion
The Flower Granny Square Bucket Hat is an excellent combination of beauty and functionality. With its vibrant colors and intricate design, this hat is perfect for crochet enthusiasts looking for a fun and satisfying project. It’s beginner-friendly yet requires focus, making it ideal for expanding your crochet skills.
Final Tip:
When making granny squares and assembling them, take your time to block and arrange them neatly. This ensures symmetry and gives your hat a clean, professional finish.