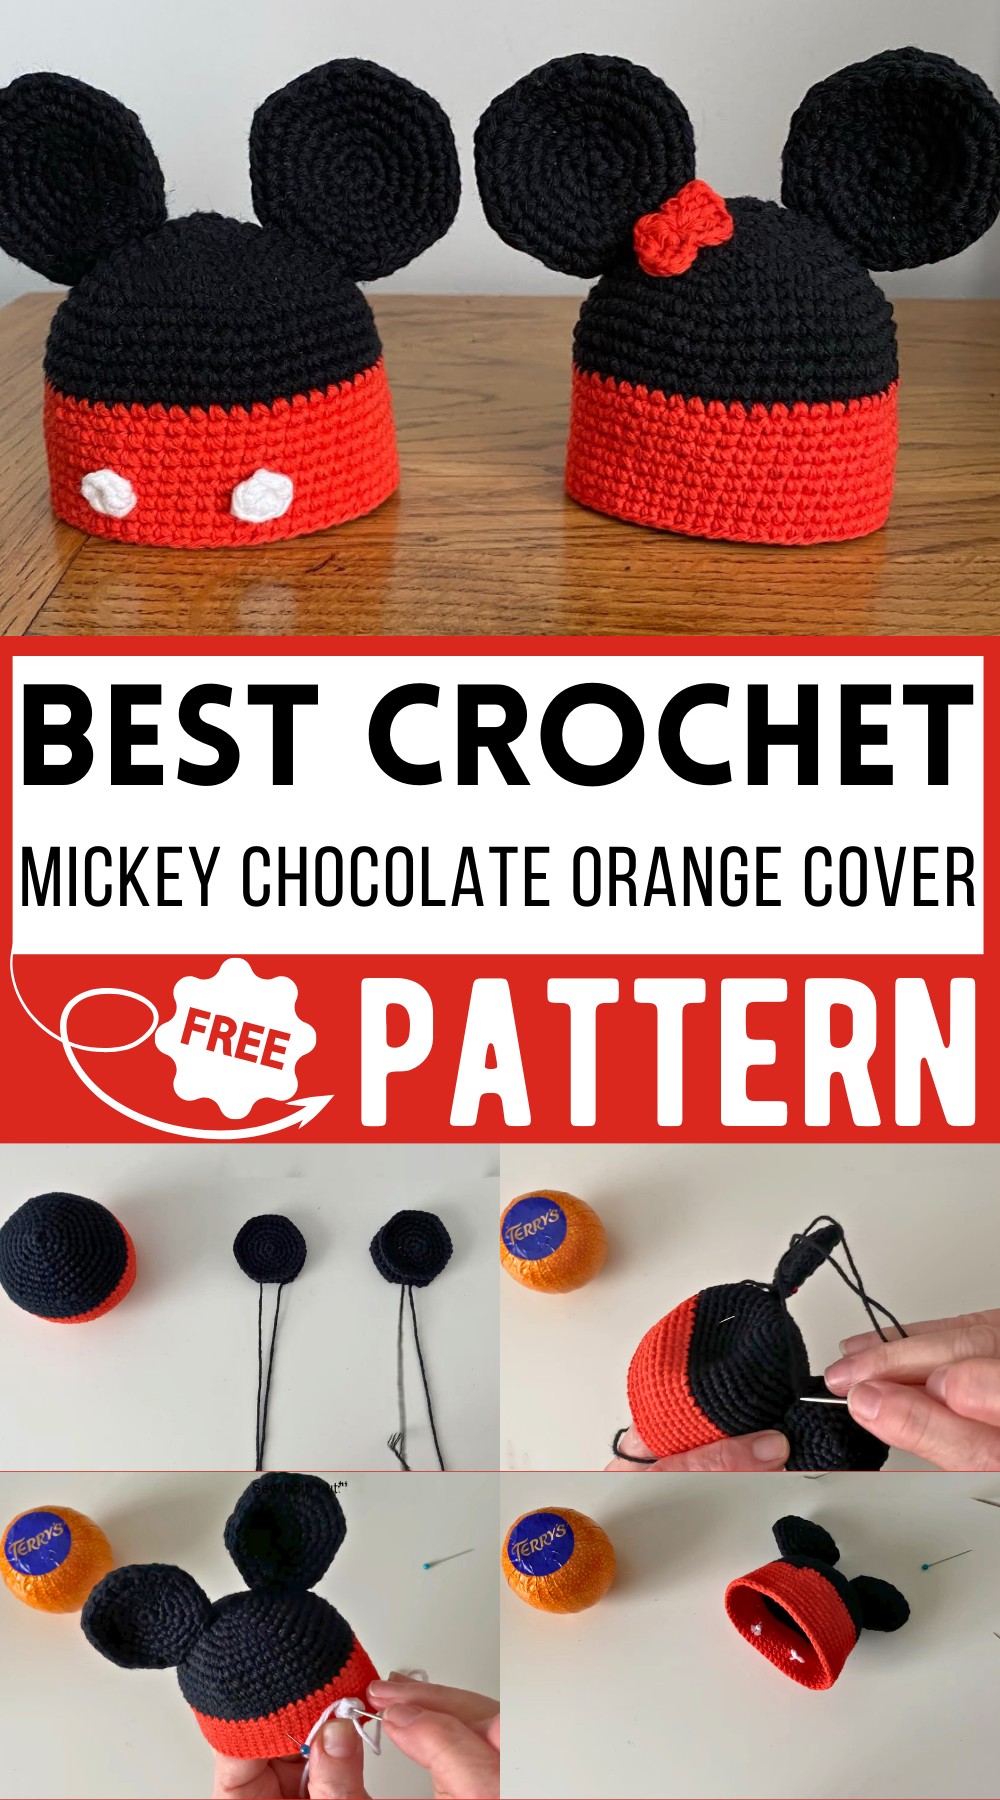
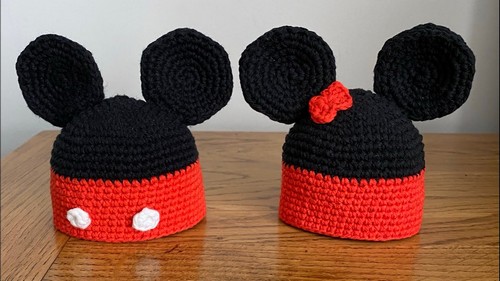
Mickey And Minnie Amigurumi Chocolate Orange Cover Pattern
Create adorable Mickey and Minnie Mouse covers for your Terry’s Chocolate Orange with this quick and easy amigurumi crochet pattern! You will craft charming characters with distinct round ears and fun details like Minnie’s bow and Mickey’s buttons. Perfect for gifting or festive decor, these covers snugly fit around your chocolate orange, adding a playful and sweet touch. This project is beginner-friendly, with clear steps for making magic circles, single crochets, and simple increases to shape your covers perfectly. Let’s crochet some magic today!
Why Love This Pattern?
- Adorable and Festive Design: The Terry’s Chocolate Orange covers in the form of Mickey and Minnie Mouse are absolutely charming. They bring a touch of Disney magic and festive cheer to your gift wrapping, making them ideal for special occasions and holidays.
- Simplicity and Quick Execution: This pattern is straightforward and quick to make with clear, step-by-step instructions. The tutorial simplifies the process of creating a magic circle and increasing rows, making it accessible even for beginners.
- Customization Potential: You can easily customize these covers by choosing different colors or adding additional decorations. This flexibility allows you to personalize each cover and make unique creations for your loved ones.
- Practical and Functional: Besides being cute, these covers serve a practical purpose by adding a decorative touch to your chocolate orange gifts, making them stand out as thoughtful and creative presents.
How To Crochet Mickey And Minnie Amigurumi
Materials
- Amigurumi yarn (similar to ricorium) in red and black
- 2 mm crochet hook
- Stitch marker
- Needle
- Scissors
- Terry’s Chocolate Orange (to gauge the size)
Abbreviations
- Ch: Chain
- Sc: Single crochet
- Inc: Increase (2 single crochets in the same stitch)
- Sl st: Slip stitch
Pattern Instructions
Base Cover
- Magic Circle:
- Begin with black yarn.
- Hold the yarn between your thumb and forefinger, wrap it around your fingers, and make a cross.
- Go under the first side of the loop and pull the yarn back up onto your hook.
- Pull the tail end through the loop, creating your magic circle.
- Round 1:
- Sc 6 into the magic circle. (6 sts)
- Place a stitch marker in the last stitch.
- Round 2:
- Inc in each stitch around. (12 sts)
- Round 3:
- Sc 1, Inc repeat around. (18 sts)
- Round 4:
- Sc 2, Inc repeat around. (24 sts)
- Round 5:
- Sc 3, Inc repeat around. (30 sts)
- Round 6:
- Sc 4, Inc repeat around. (36 sts)
- Round 7:
- Sc 5, Inc repeat around. (42 sts)
- Round 8:
- Sc 6, Inc repeat around. (48 sts)
- Round 9:
- Sc 7, Inc repeat around. (54 sts)
- Rounds 10-13:
- Sc in each stitch around. (54 sts per round)
- Change to Red Yarn:
- At the end of Round 13, switch to red yarn.
- Continue in single crochet using the red yarn.
- Rounds 14-22:
- Sc in each stitch around. (54 sts per round)
- Finish Off:
- At the end of Round 22, sl st to the next stitch and fasten off. Weave in the ends.
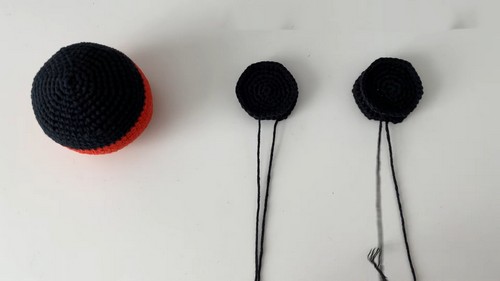
Ears (Make 4)
- Magic Circle:
- Begin with black yarn.
- Hold the yarn between your thumb and forefinger, wrap it around your fingers, and make a cross.
- Go under the first side of the loop and pull the yarn back up onto your hook.
- Pull the tail end through the loop, creating your magic circle.
- Round 1:
- Sc 6 into the magic circle. (6 sts)
- Place a stitch marker in the last stitch.
- Round 2:
- Inc in each stitch around. (12 sts)
- Round 3:
- Sc 1, Inc repeat around. (18 sts)
- Round 4:
- Sc 2, Inc repeat around. (24 sts)
- Round 5:
- Sc 3, Inc repeat around. (30 sts)
- Round 6:
- Sc 4, Inc repeat around. (36 sts)
- Finish Off:
- Sl st to the next stitch and leave a long tail for sewing.
- Assemble Ears:
- Sew two circles together for each ear.
Assembly
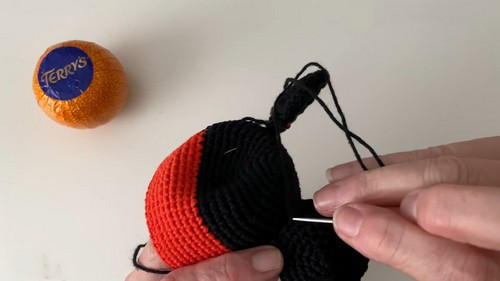
- Attach Ears:
- Position the ears evenly on the top of the cover.
- Sew the ears securely to the cover.
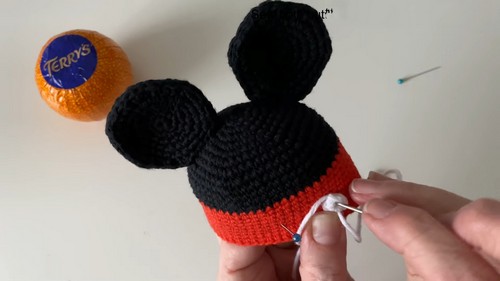
- Optional Buttons (for Mickey Mouse Cover):
- Use white yarn and create a magic circle with 5 sc.
- Sl st to join and make two such buttons.
- Sew the buttons onto the front of the red section.
Minnie Mouse Bow
- Make the Bow:
- With red yarn, Ch 4 and join with a sl st to form a ring.
- Ch 3, then make 3 dc into the ring, Ch 3, join with a sl st into the ring for one half.
- Repeat the previous step to form the other half of the bow.
- Fasten off and tie the center tightly to form the bow shape.
- Attach Bow:
- Sew the bow onto the Minnie Mouse cover, below the ear.
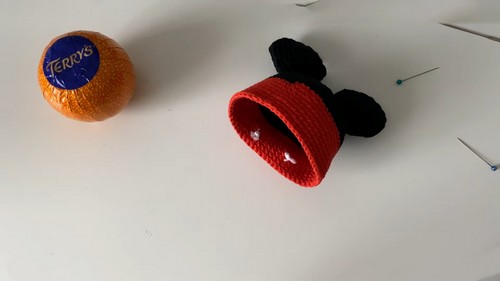
Finished Covers
You now have your completed Mickey and Minnie Mouse Terry’s Chocolate Orange covers!
Enjoy your crocheting!