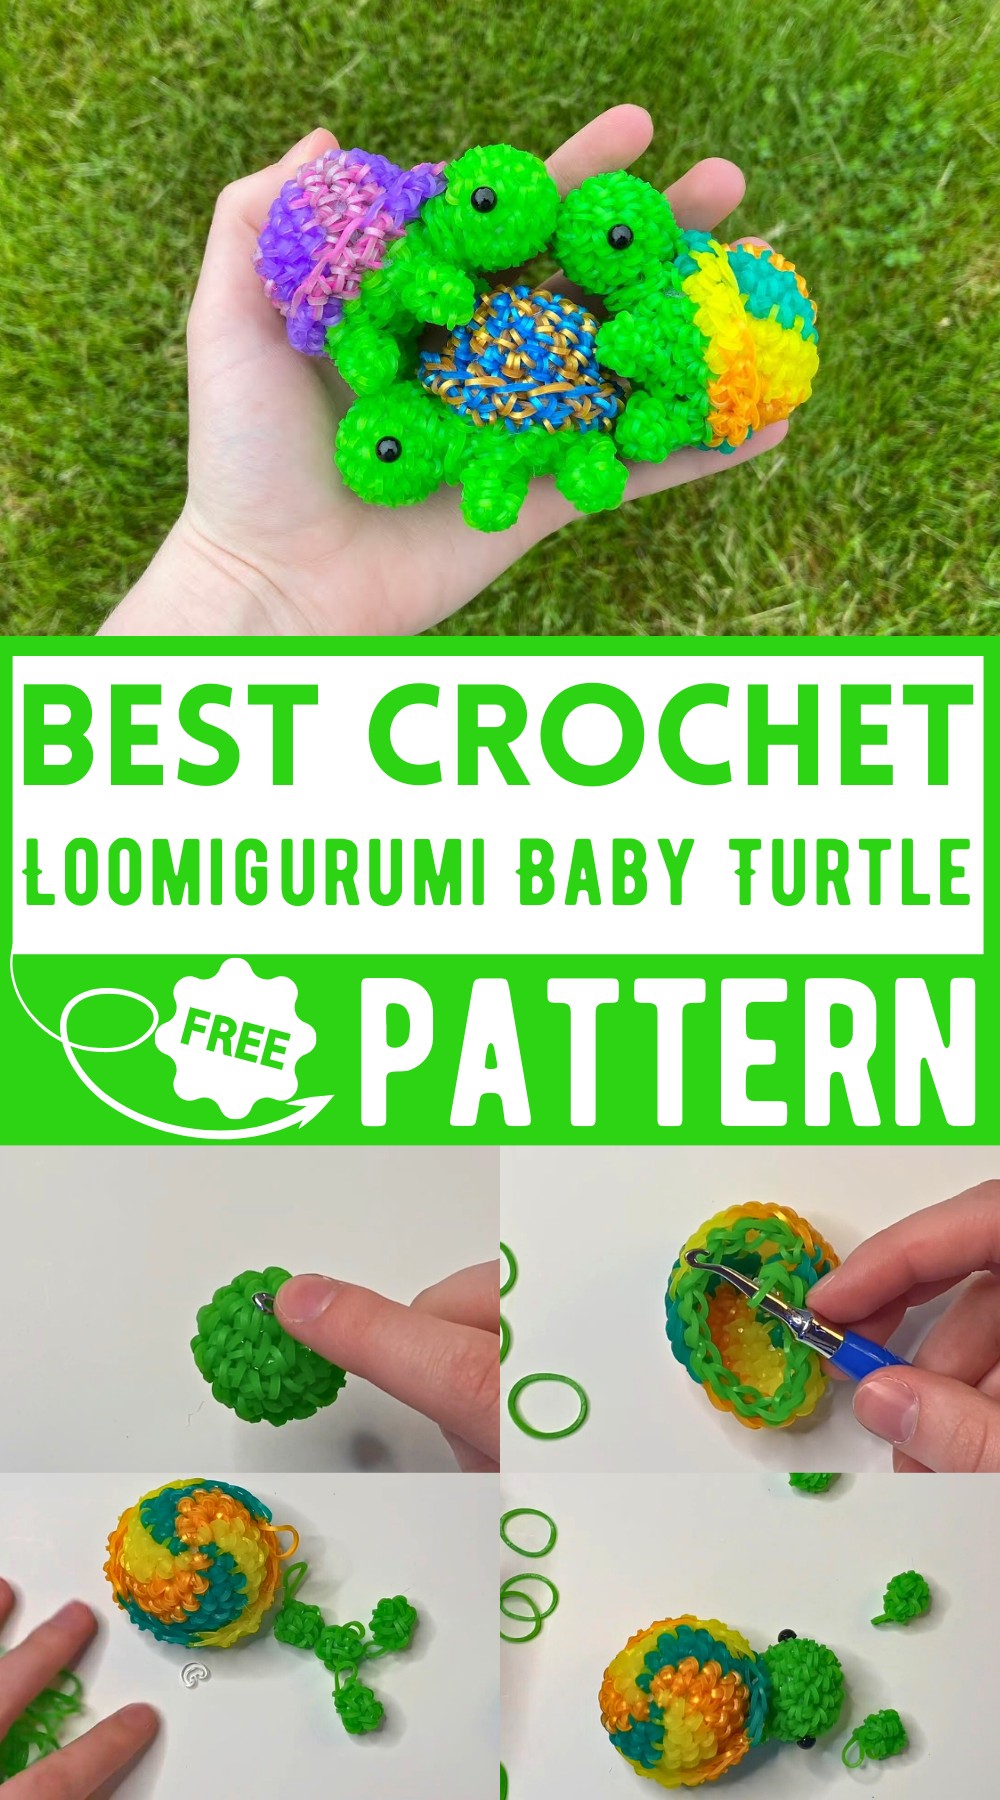
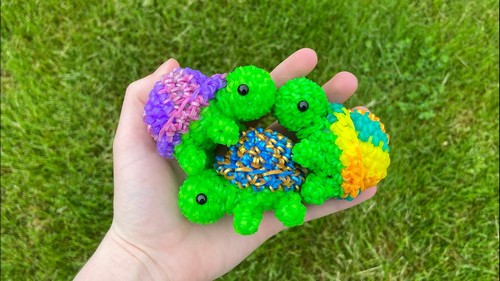
Loomigurumi Baby Turtle pattern For Squeezable Toys
The Loomigurumi Baby Turtle pattern creates adorable mini turtles that are cute, charming, and perfect for gifts or decoration. The baby turtles are significantly smaller than the regular turtles, making them less time-consuming but just as lovable. Featuring a simple, spiraled shell in vibrant colors, safety eyes, and movable limbs, these turtles can be personalized with various color combinations. Use them as keychains, desk ornaments, or small gifts. The compact size and ease of the pattern make it an ideal project to practice loomigurumi skills.
Why Love This Pattern?
- Adorable and Compact: This Baby Turt design is incredibly cute and small, which makes them less time-consuming to create compared to larger versions. They are not just cute but also a great hit in sales.
- Perfect for Beginners: The pattern includes a detailed step-by-step guide, which makes it perfect for beginners. Every step, including using the hook, creating a magic ring, and making legs, is clearly explained.
- Versatile Design: You can personalize the pattern with different colors and materials, making each Baby Turt unique. The tutorial provides suggestions for creating a swirl pattern on the shell, using a variety of band colors, and options for inserting eyes.
How To Crochet Loomigurumi Baby Turtle
Materials Needed:
- Hook: Any type of hook works, but a rainbow hook is recommended.
- C clip or stitch marker
- 6 mm safety eyes
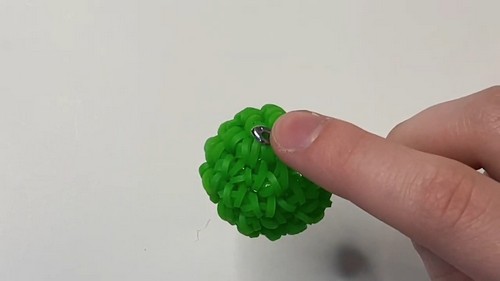
- Body color bands: Semi-opaque lime green (or similar)
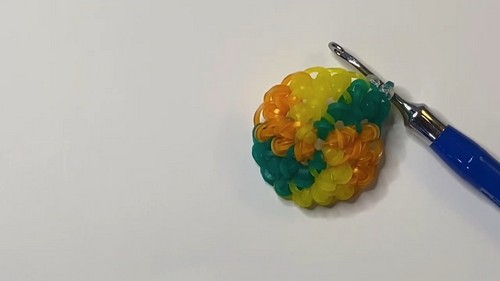
- Swirl colors for the shell: Persian sunkiss, jelly yellow, jelly teal
- Stuffing: Polyfill, cotton balls, or tissues
Pattern Steps:
Legs (Make 4):
- Magic Ring of 5:
- Take one band on your hook and wrap it around two times creating three loops.
- Take another band and slide these three loops onto it, reclaiming the other end.
- Slip the back loop over the front loop.
- Repeat to make a band ring of 5.
- Continue the magic ring process five times.
- Row of Single Crochet:
- Instead of the cap band, go into the first loop.
- Pull a band through and pull the back two loops over the front one.
- Repeat until you have a full row of single crochets.
- Slip knot loosely.
Head:
- Magic Ring of 6:
- Just like the leg, create a magic ring with six single crochets.
- Increase Round:
- Do an increase around resulting in 12 stitches.
- Three Rows of Single Crochet:
- Crochet three rows of single crochet around the head while maintaining 12 stitches.
- Single Decrease Round:
- Single crochet, then decrease all the way around which will give you eight stitches.
- Prepare for Stuffing:
- Crochet into the next stitch and pull a band through everything and slip knot loosely.
- Stuff the head and set aside.
Shell:
- Magic Ring of 6:
- Using your first shell color (e.g., orange), create a magic ring with six single crochets.
- Color Changes and Increases:
- For a swirl effect, each time you crochet into the same colored stitches (orange for orange, yellow for yellow, etc.), increase.
- Next round: single crochet, then do an increase all the way around resulting in 18 stitches.
- Four Rows of Single Crochet:
- Crochet four rows around the shell, maintaining the swirl pattern or your chosen design.
- Edge Preparation:
- Do a half-row by picking up the front half of each loop and pull a band through then crocheting normally after the color change.
- Crochet a single row all the way around in the body color.
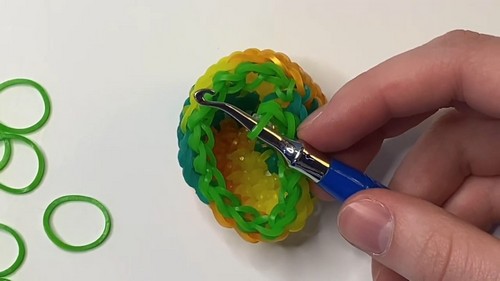
- Single Decrease Round:
- Single crochet, then decrease until 12 stitches.
- Stuff and Close:
- Do decreases all the way around until you have six stitches left.
- Slip knot and trim.

Attaching Parts:
- Attach Head:
- Use green stitches just below the shell edge to attach the head.
- Sew or slip knot head stitches onto these body stitches, ensuring the head is secured tightly.
- Attach Legs:
- Following the same technique, attach the legs to the body using slip knots or sewing.
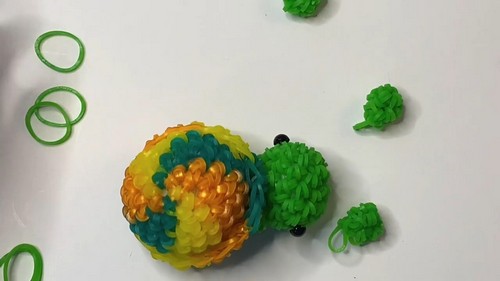
- Finishing Touches:
- Tuck in all ends inside the turtle body.
- Insert safety eyes and secure.

Enjoy making your adorable baby turtle!