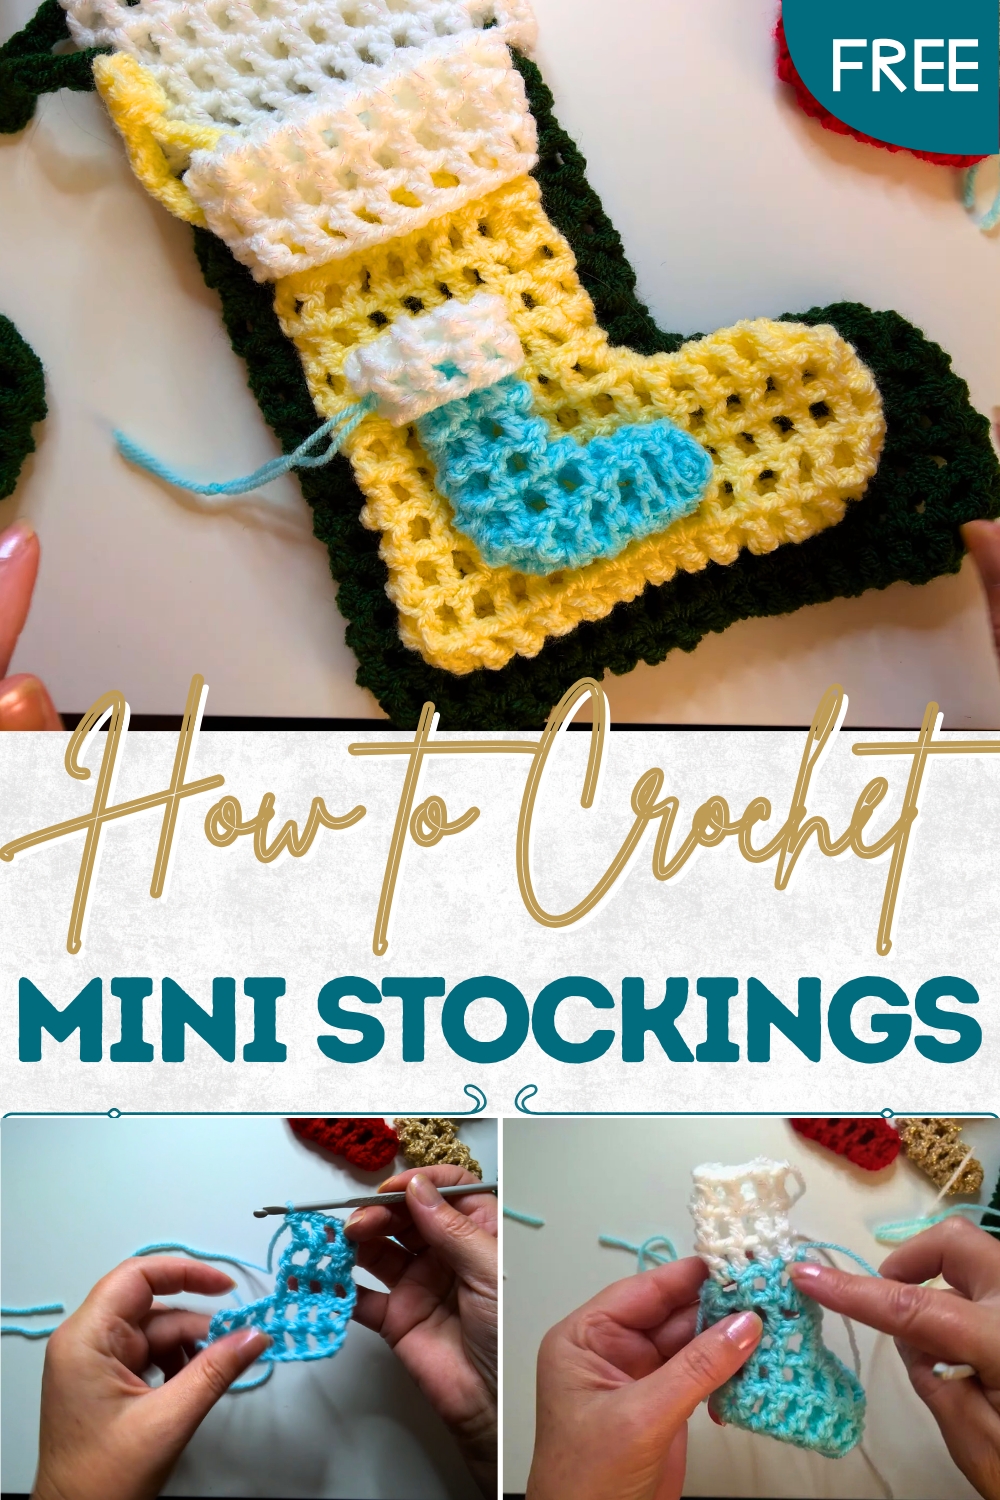
Festive Crochet Mini Stockings Pattern in Christmas Decor
Delight in the holidays with this Crochet Mini Stockings Pattern for a playful, charming accessory that enhances festive décor and gifts.
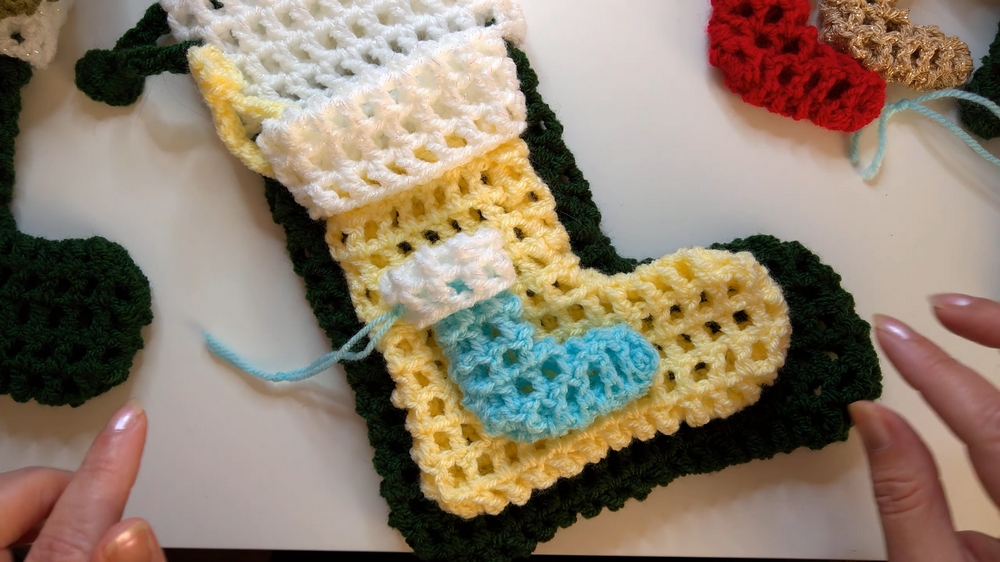
Modern celebrations filled homes with twinkling lights, tiny stockings were treasured for holding small tokens of joy and surprise. The crochet mini stockings pattern captures that nostalgic charm, transforming it into delicate handmade pieces that radiate warmth and festivity. Each miniature stocking is crocheted with attention to detail, from the textured body to the soft cuff, creating a charming accent that fits perfectly on a mantel, tree, or tabletop. Their compact size makes them ideal for holding tiny treats, notes of affection, or small keepsakes, turning simple gestures into meaningful moments.
Cozy Crochet Mini Stockings Perfect for Winter Style
Beyond their practical uses, these mini stockings add a whimsical touch to any space, blending seamlessly with holiday décor while evoking a sense of tradition and care. The beauty of the pattern lies in its versatility—colors, threads, and subtle finishing touches can be personalized, making each stocking unique. These handmade treasures also serve as thoughtful gifts, embodying the spirit of giving and thoughtfulness that defines the season.
More than decorative items, crochet mini stockings bring charm, character, and a cozy, heartfelt aesthetic, offering an elegant way to celebrate special moments and create enduring memories for family, friends, and guests alike.
Materials Needed
- Yarn
- Any scrap yarn (Karen uses a sparkly white yarn for the top and colored yarn for the body).
- You can experiment with different yarn types to achieve custom effects.
- Hook Size
- A 4 mm crochet hook (G6 in the US).
- Additional Supplies
- A darning needle for sewing and weaving the ends.
- Scissors for cutting yarn.
- Optional Accessories
- Small items to use as fillers (e.g., candies, lip balms, mini chocolates).
- Ribbons or bows for decoration.
Special Features
- Quick & Easy: These lightweight stockings can be completed in a short amount of time, making them ideal for last-minute projects.
- Great for Scrap Yarn: The design effectively uses leftover yarn from other projects.
- Multi-Sized Options: Karen explains how to scale the project for larger stockings.
- Creative Gift Ideas: The stockings can be filled with small goodies, making them versatile for gifting.
- Customizable Colors: They can be crocheted in matching sets or with multiple color combinations.
Level of Difficulty
The project is beginner-friendly, but some familiarity with basic stitches (e.g., double crochet, single crochet, chain stitches) and techniques like turning chains and working into stitch tops is recommended. While most steps are repetitive, assembling the two sides of the stocking and finishing the project may require extra attention for beginners.
Tutor’s Suggestions
- Yarn Usage: Use leftover yarn for an affordable and resource-efficient project. Experiment with sparkly yarn for the top trim to make the stockings more festive.
- Chain Count: For larger stockings, ensure the foundation chain count is even and increase the number of rows accordingly.
- Neatness in Stitches: Use careful and tight stitches to ensure the stocking keeps its form, especially when stuffing it with goodies.
- Attaching the Hanging Loop: Save longer yarn tails or scraps to create the hanging loop. Alternatively, use keyring loops for multifunctional stockings (that can also serve as keychain charms).
- For Beginners: Watch out for splitting the yarn while working, especially when working into chains or turning it inside out. Take your time to manage tension and tighten stitch transitions.
Step-by-Step Instructions
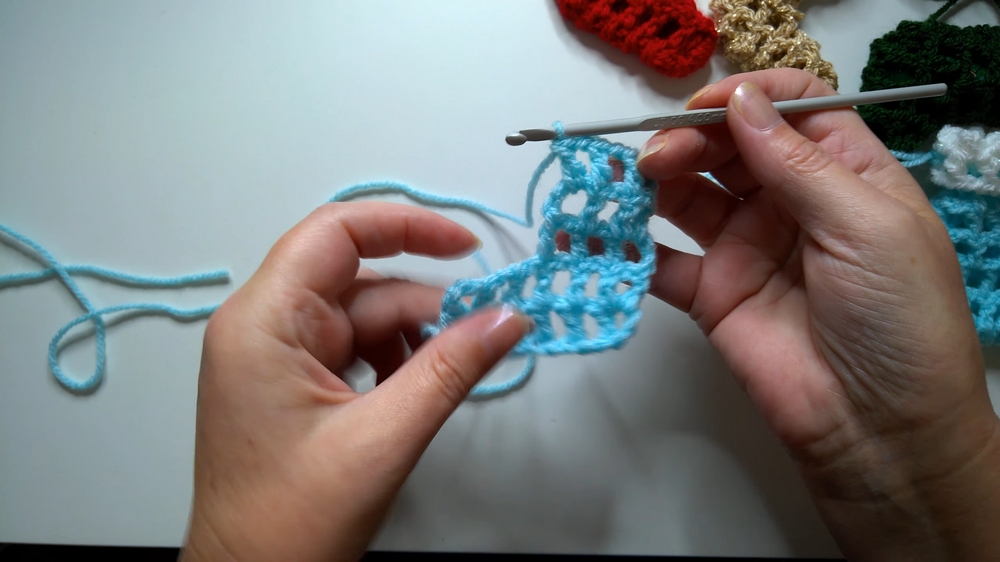
1: Crochet the Stocking Base
- Start with a Foundation Chain:
- Make a slip knot and chain 14 stitches.
- In the fourth chain from the hook, work a double crochet (US) or treble crochet (UK).

- Create Ladder Stitches:
- Chain 1, skip 1 chain, and work a double crochet into the next stitch.
- Repeat this sequence (chain 1, skip 1, double crochet) until the end of the row. This will create a “ladder” effect.
- Turn and Build Rows:
- Chain 3 and turn your work. Continue working chain 1, skip 1, double crochet into the next stitch across the second row.
- At the end of the row, double crochet into the top of the turning chain from the previous row to maintain the structure.
- Repeat Rows (3 or More):
- Keep building rows until you’ve reached the desired size. For smaller stockings, Karen demonstrates creating three total rows for each side.
2: Assemble the Stocking
- Make a Second Side:
- Crochet an identical second piece following the same steps.
- Sandwich & Join the Pieces Together:
- With the wrong sides facing, align both pieces.
- Use single crochet (US) or double crochet (UK) to join the sides together, working through the edges. Add stitches in the corners for neatness.
- Add the Toe Curve:
- Pay special attention to the curved edge (toe of the stocking), adding extra stitches as needed to make it round and smooth.
- Close the Bottom and Finish the Edge:
- Crochet across the bottom to seal the stocking.
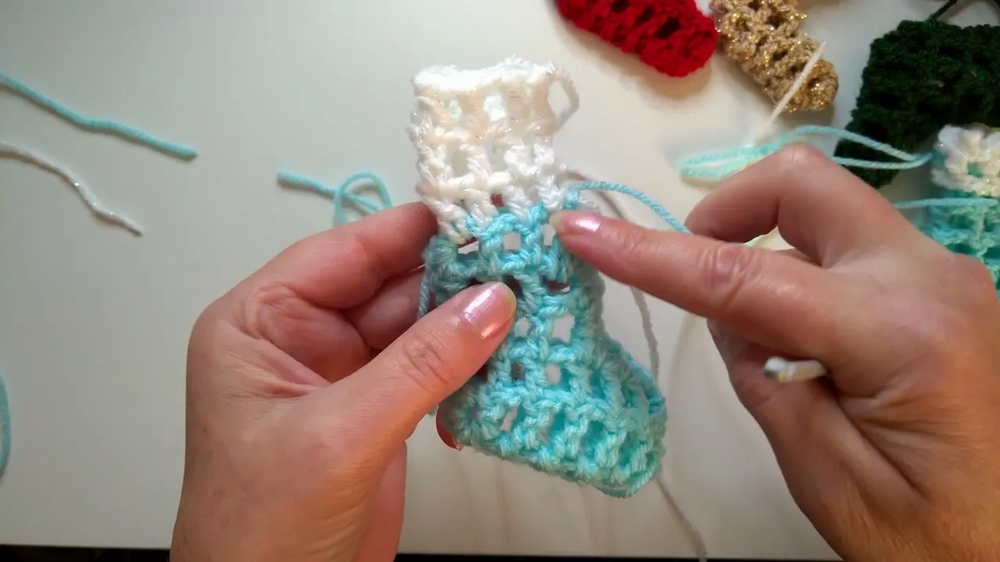
3: Create the Trim and Details
- Add the Trim:
- Change to the white or sparkly yarn.
- Crochet into the spaces between the posts of the last round to create a decorative top edge using double crochet stitches.
- Work in rounds, turning after each row, to complete 2–3 rounds for the stocking’s cuff.

- Make the Hanging Loop:
- Save a long tail of yarn at the end. Create a simple loop by threading it through the top edge with a crochet hook, tying a small knot at the end for security.
4: Final Touches
- Secure Loose Ends: Thread and weave in any remaining yarn tails into their matching color sections for a polished look.
- Flip the Stocking Right-Side Out: Straighten the shape. Ensure the toe and heel sections are rounded and even.
Uses
- Tree Decorations: Hang them on your Christmas tree for a festive display.
- Mini Gift Holders: Fill these stockings with chocolates, lip balms, coins, or small personalized messages.
- Holiday-themed Decor: Add them to garlands or wreaths for an extra festive touch.
- Keychains: Attach a keyring loop to turn them into portable decorations.
Final Tip
For a neat and professional look, stuff the stockings with gifts or fillers after trimming and securing all loose ends. If you plan on gifting them, consider adding a personalized tag or note inside the stocking.
Conclusion
Creator mini Christmas stockings are quick, charming, and beginner-friendly holiday projects that make good use of leftover yarn. With their customizable sizes and creative potential, they’re great for decorations, thoughtful gifts, or even organizing small holiday treats. Follow along with the step-by-step process to create your own mini stockings and spread some handmade holiday cheer.