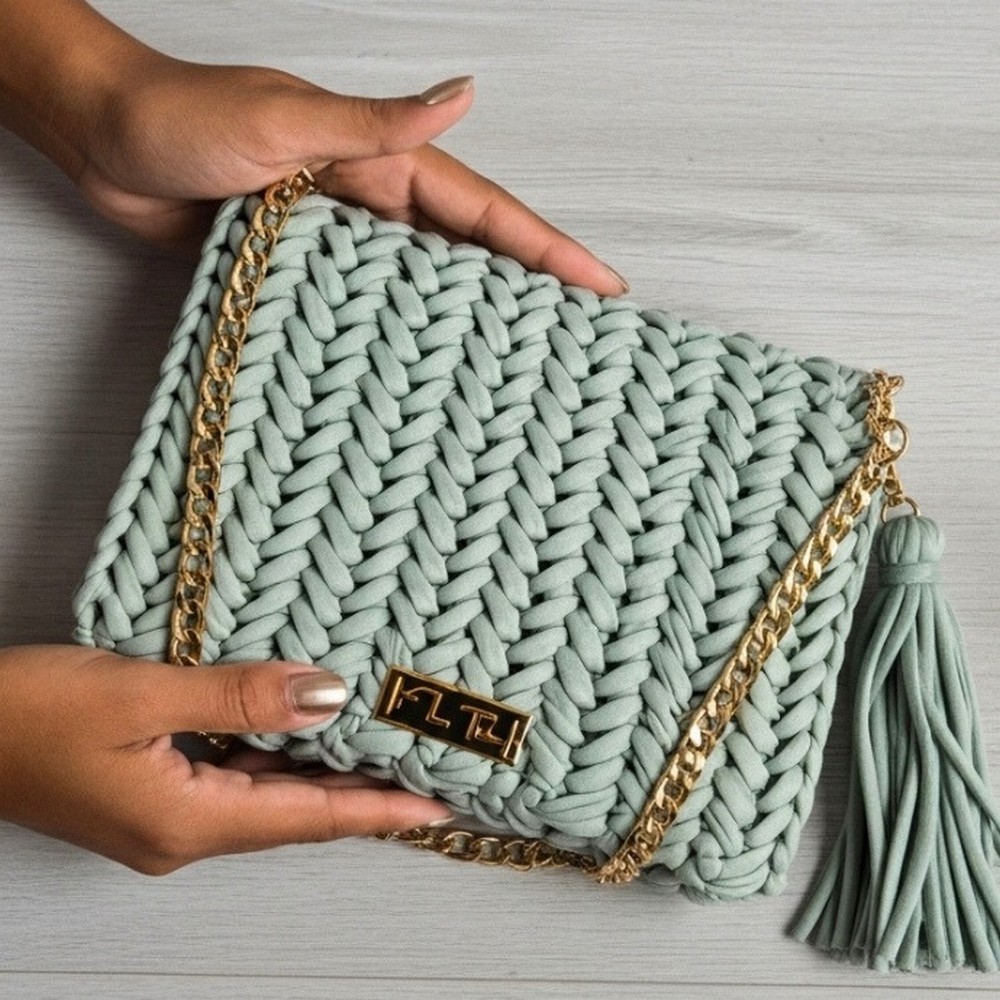
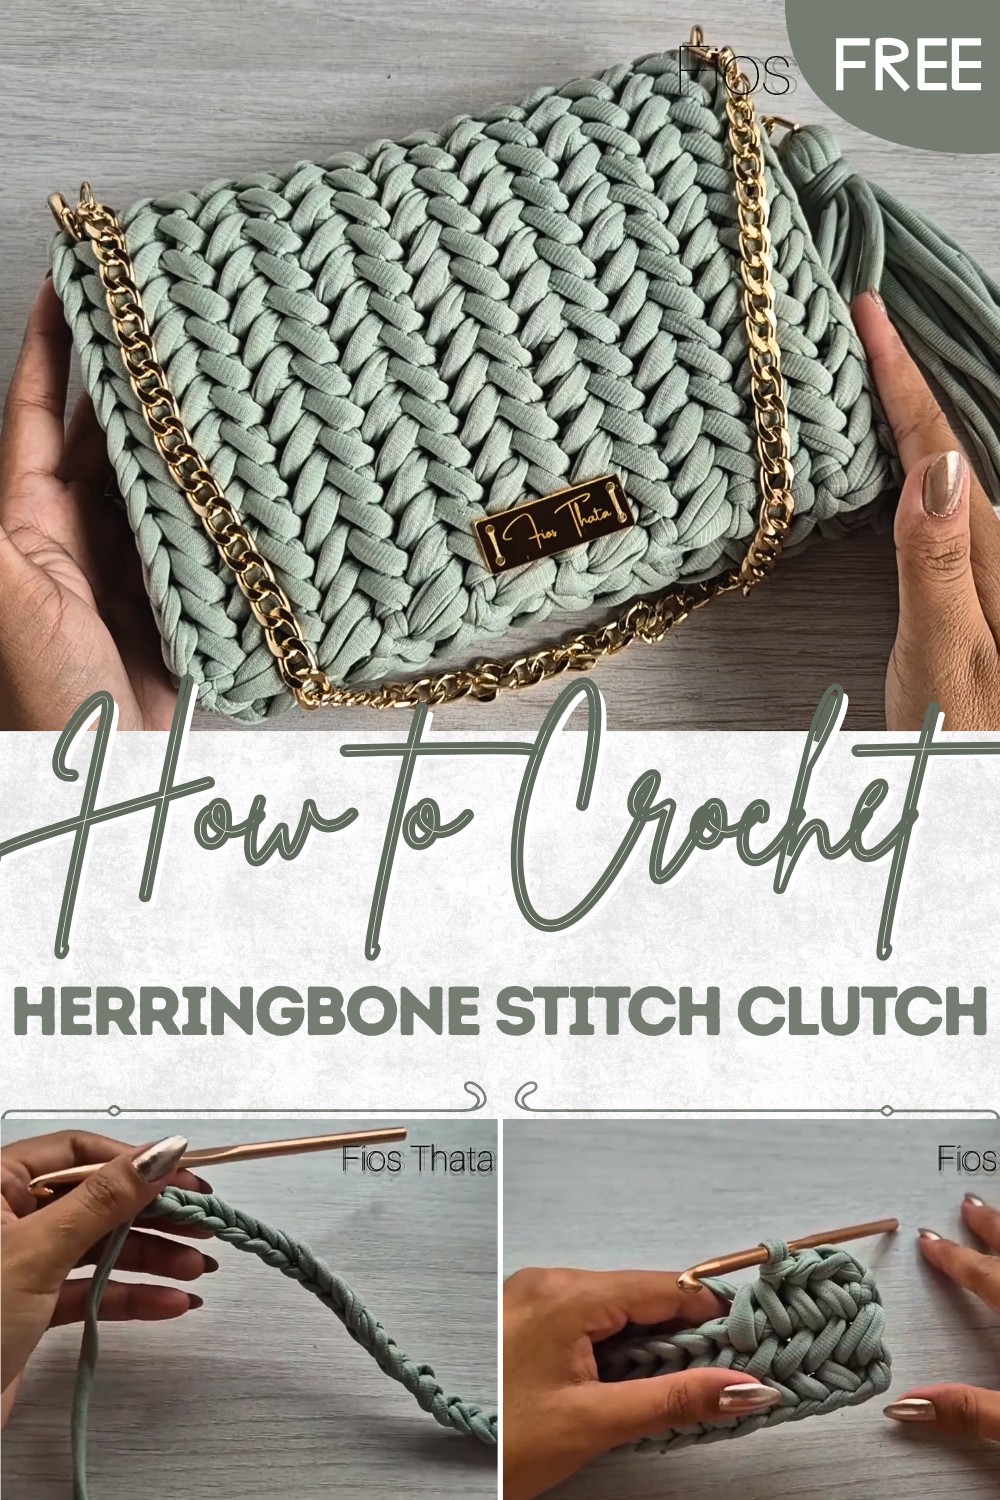
Easy Crochet Herringbone Stitch Clutch Pattern for Stylish Vibes
Free Crochet Herringbone Stitch Clutch Idea for a Fashionable Upgrade
With easy customization options, the pattern allows you to adjust the size, color, and embellishments such as tassels and magnetic closures to suit your personal taste. Beginner-friendly yet rewarding for experienced crocheters, the pattern ensures clean lines and a professional finish with minimal effort. It’s not just about functionality; it’s about expressing your style and creativity through every stitch.
The herringbone stitch enhances the texture, giving the clutch a refined, modern look. Whether you’re gifting it or keeping one for yourself, the pattern offers more than just fashion—it’s practical, adaptable, and a perfect accessory for adding sophistication to your wardrobe.
Materials Needed
- Yarn: Approximately 1.5 skeins of Fios Guarani premium jersey yarn.
- Each skein measures 140 meters in length and has a width of 27 mm.
- Crochet Hook: 5.5 mm needle.
- Additional Tools: Scissors, two hinged rings (2.6 cm), a carabiner (optional for tassels), and two coin-style magnetic buttons.
- Handle: Short handle (approximately 70 cm).
- Thread: Transparent or invisible thread for sewing magnetic buttons and labels.
- Tassel Strips (optional): 8 strips of approximately 35 cm and 1 strip of approximately 55 cm for creating tassels.
Special Features
The Crochet Herringbone Stitch Clutch has several remarkable qualities:
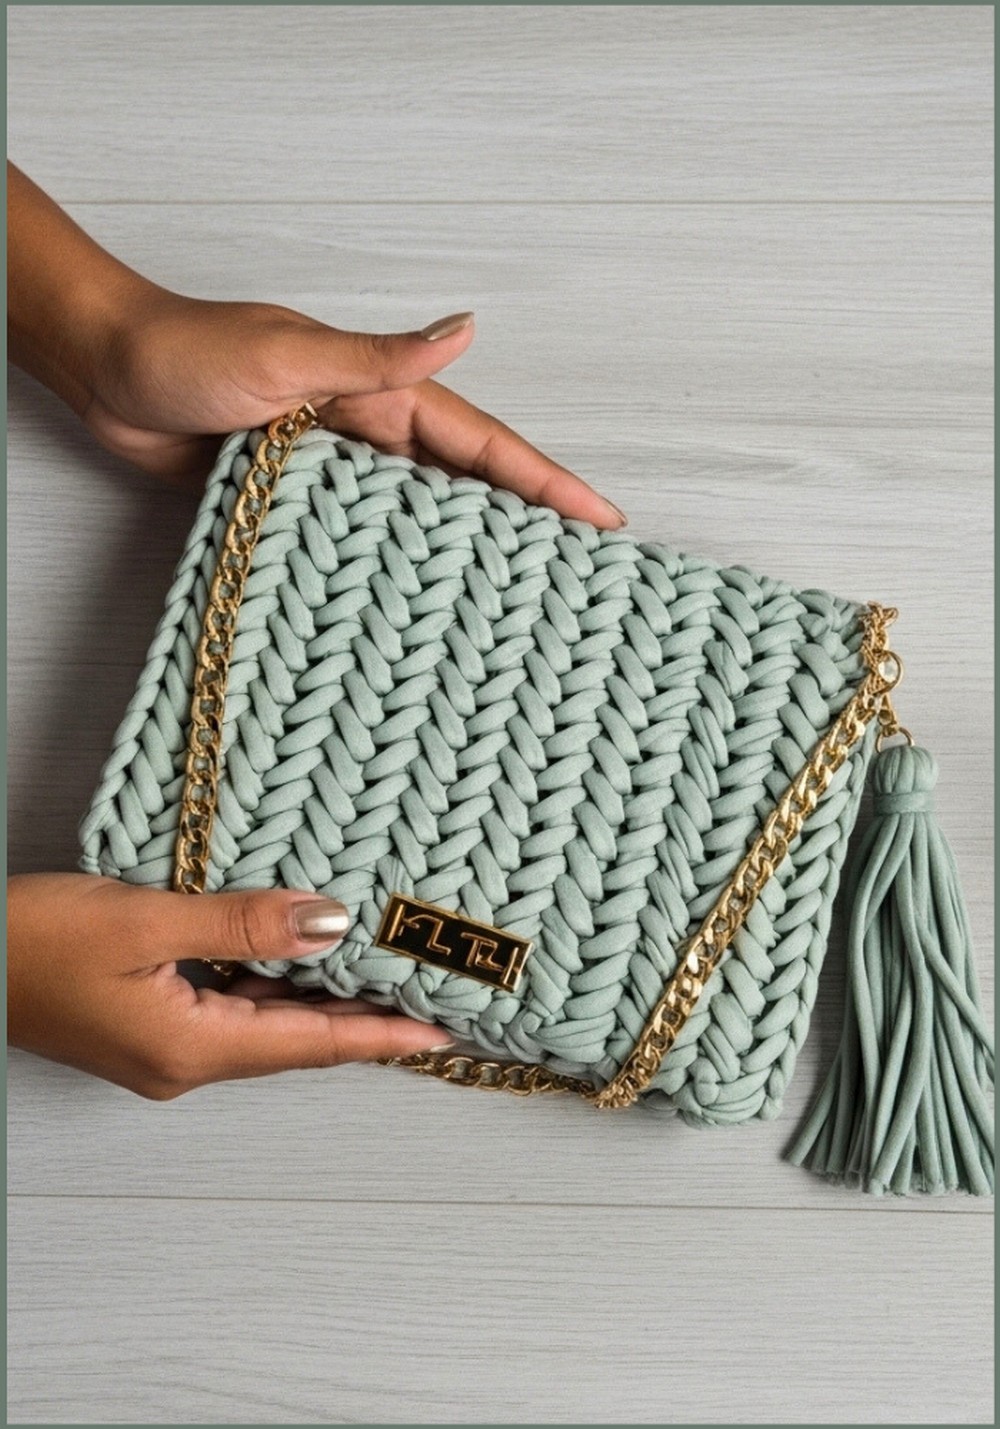
- Sleek Design: Made with premium jersey yarn for durability and a striking textured look.
- Functional Accessories: Includes magnetic coin-style buttons and detachable handle options for convenience.
- Customizable Size: You can adapt the bag’s dimensions and add decorative tassels for a personalized touch.
- Advanced Aesthetics: The Herringbone Stitch creates a refined, elegant finish while remaining lightweight and structured.
Step-by-Step Instructions
1. Create the Chain Base
- Start by making 45 chains; ensure the chain count remains odd for consistent stitch patterns. If you want a taller bag, increase chains in pairs of two while keeping the total count odd.
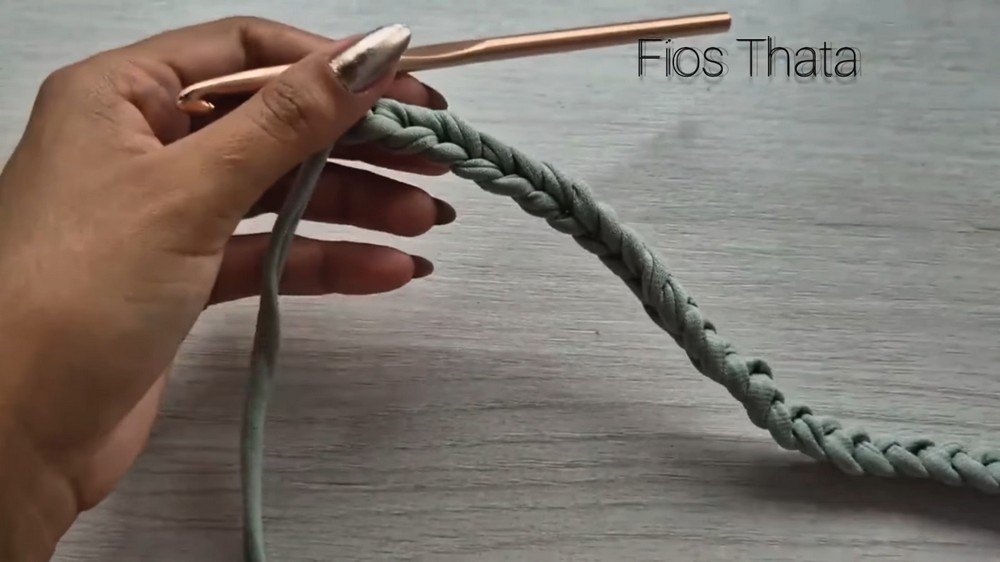
- The initial 45 chains measure approximately 38 cm long.
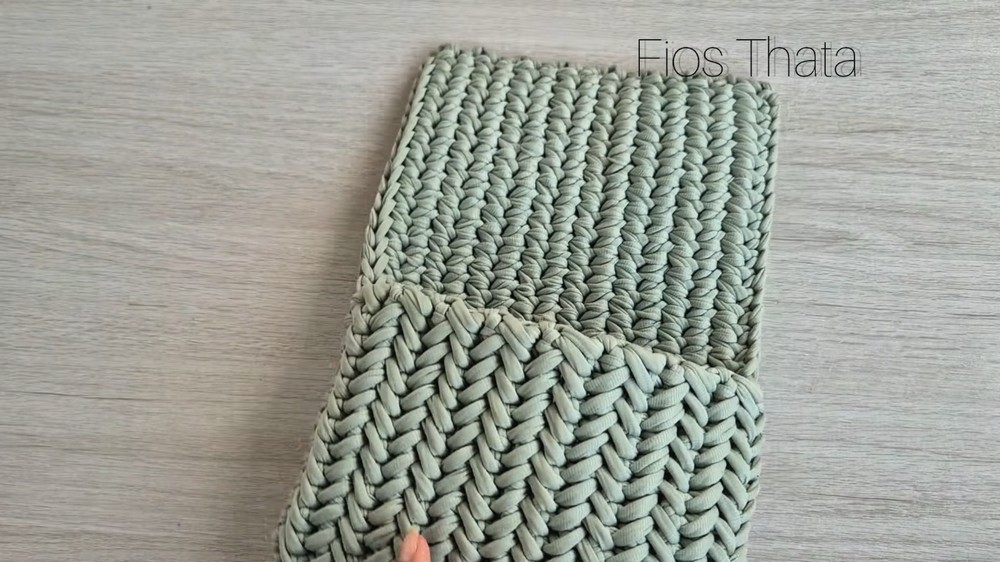
2. Work the First Row
- Turn the chain and work on the back “waves” behind each chain.
- Skip the first wave and begin stitching on the second. For the first stitch in each row, make a single crochet.
- For subsequent stitches, switch to the herringbone stitch:
- Insert the needle under the next wave, pull up the yarn, creating three loops on the needle.
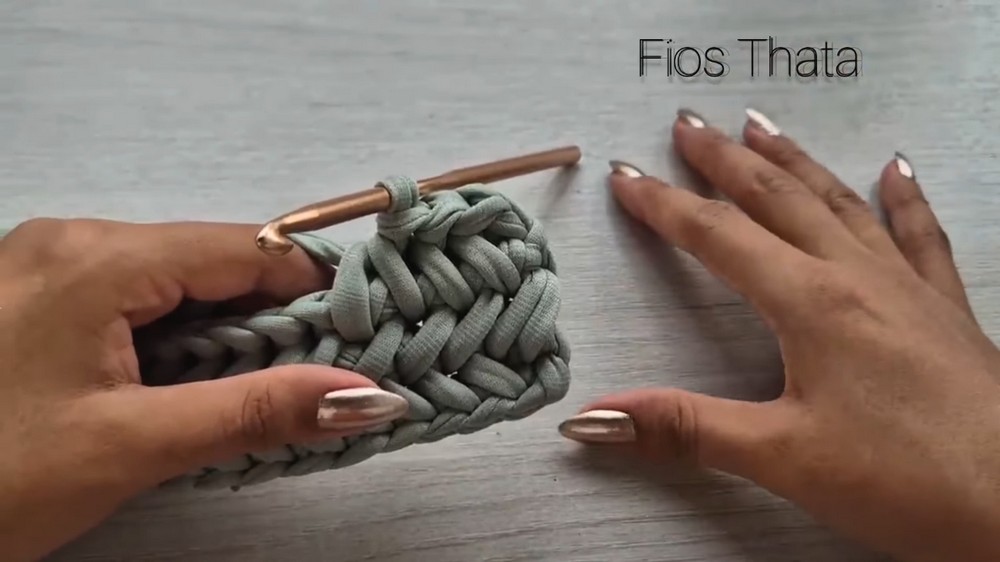
- Yarn over and pull through all three loops at once.
- Insert the needle under the next wave, pull up the yarn, creating three loops on the needle.
- Repeat this pattern (single crochet followed by herringbone stitch) until you reach the end of the row. Ensure each row has 44 stitches.
3. Create Rows to Build the Bag Body
- At the end of each row, chain one, turn your work, and repeat the pattern (single crochet for the first stitch and herringbone stitch for the remaining stitches). Adjust the yarn continuously for a clean finish.
- Continue creating rows until the clutch measures 45 cm in height and about 20.5 cm in width.
4. Finish Off Your Piece
- Once the desired height is achieved, cut the thread, pull it up, and secure the final stitch to prevent unraveling. You can apply a small drop of glue or use a simple locking stitch for added durability.
5. Sew the Side Panels
- Turn the clutch inside out and use single crochet stitches to sew the sides.
- Attach markers or use contrasting yarn to mark where the seams will be.
- Work single crochet stitches by picking up loops from both sides simultaneously, ensuring a clean, professional finish.
- Secure the ends by adding glue or stitching to prevent fraying.
- Repeat this process for both sides before turning the clutch right-side out.
6. Attach Magnetic Buttons and Label
- Use transparent thread to sew on two coin-style magnetic buttons.
- One button should be sewn onto the interior tab, and the other on the body of the clutch to create a flat closure. The buttons are elegant, thin, and designed to remain flush without texture.
- Attach the label to the center of the clutch, taking equal measurements on each side to ensure symmetry.
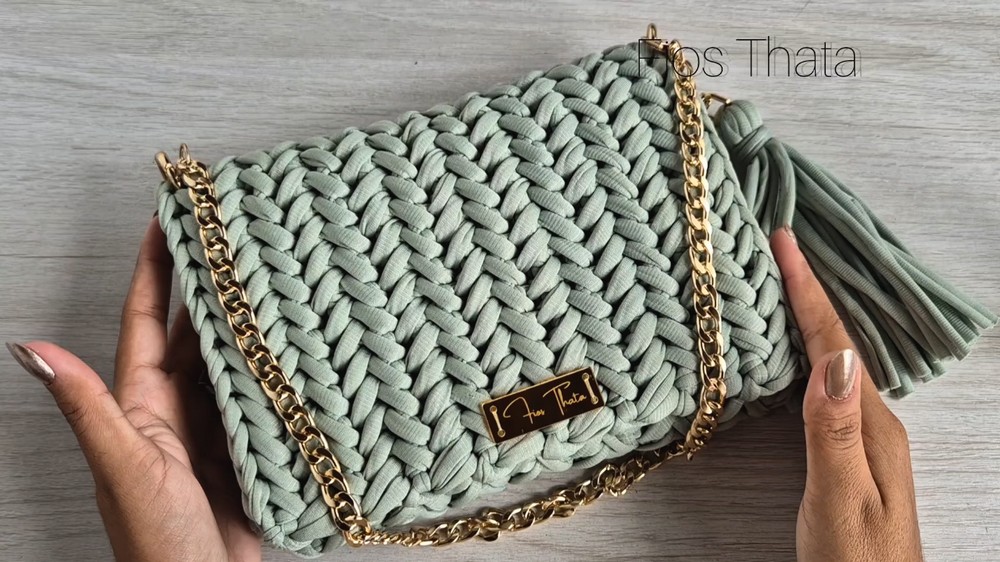
7. Add Hinged Rings and Handle
- Attach two metal hinged rings to the clutch on both ends. If using a short handle, secure it to the rings. For a longer handle (around 1.20 m), loop it through the rings and attach securely.

8. Optional Tassel Creation
- Gather 8 strips of jersey yarn (35 cm each) and 1 longer strip (55 cm).
- Pass the longer strip through a carabiner and tie securely. Wrap one strip around the tassel for a polished look.
- Trim the edges evenly to achieve a finished tassel appearance (~14 cm long). Attach the tassel on one side of the clutch for added flair.
Level of Difficulty
This pattern is rated beginner-friendly, suitable for those familiar with single crochet and learning the herringbone stitch. While repetitive, it requires attentiveness to maintain even tension and a consistent stitch count across rows.
Tutor’s Suggestions
- Always skip the first wave when starting rows and maintain odd chain counts at the beginning of your project. The stitch structure depends heavily on precision.
- Adjust yarn tension frequently to achieve clean, structured stitches that don’t curl or deform.
- Use herringbone stitch consistently after the initial single crochet in each row to maintain the textured look.
- If threading magnetic buttons, sew carefully and ensure the thread doesn’t tangle or fray for a polished finish.
Uses
The Crochet Herringbone Stitch Clutch is perfect for various occasions. Its size and elegance make it ideal for storing wallets, phones, keys, and other essentials without compromising style. It can be used as a shoulder bag, a handbag, or a small evening clutch. The addition of optional tassels and decorative buttons allows you to customize it further to match your aesthetic preferences.
Conclusion
The Crochet Herringbone Stitch Clutch pattern combines elegance and functionality into one beautiful design. With its lightweight yet structured body, it accommodates your essentials while adding a stylish touch to your outfit. The steps are straightforward and adaptable, making this project perfect for beginners and experienced crocheters alike.
Pro Tip
Always double-check your stitch count after each row to maintain symmetry. Keeping each row consistent ensures your final clutch maintains its polished shape and professional finish.