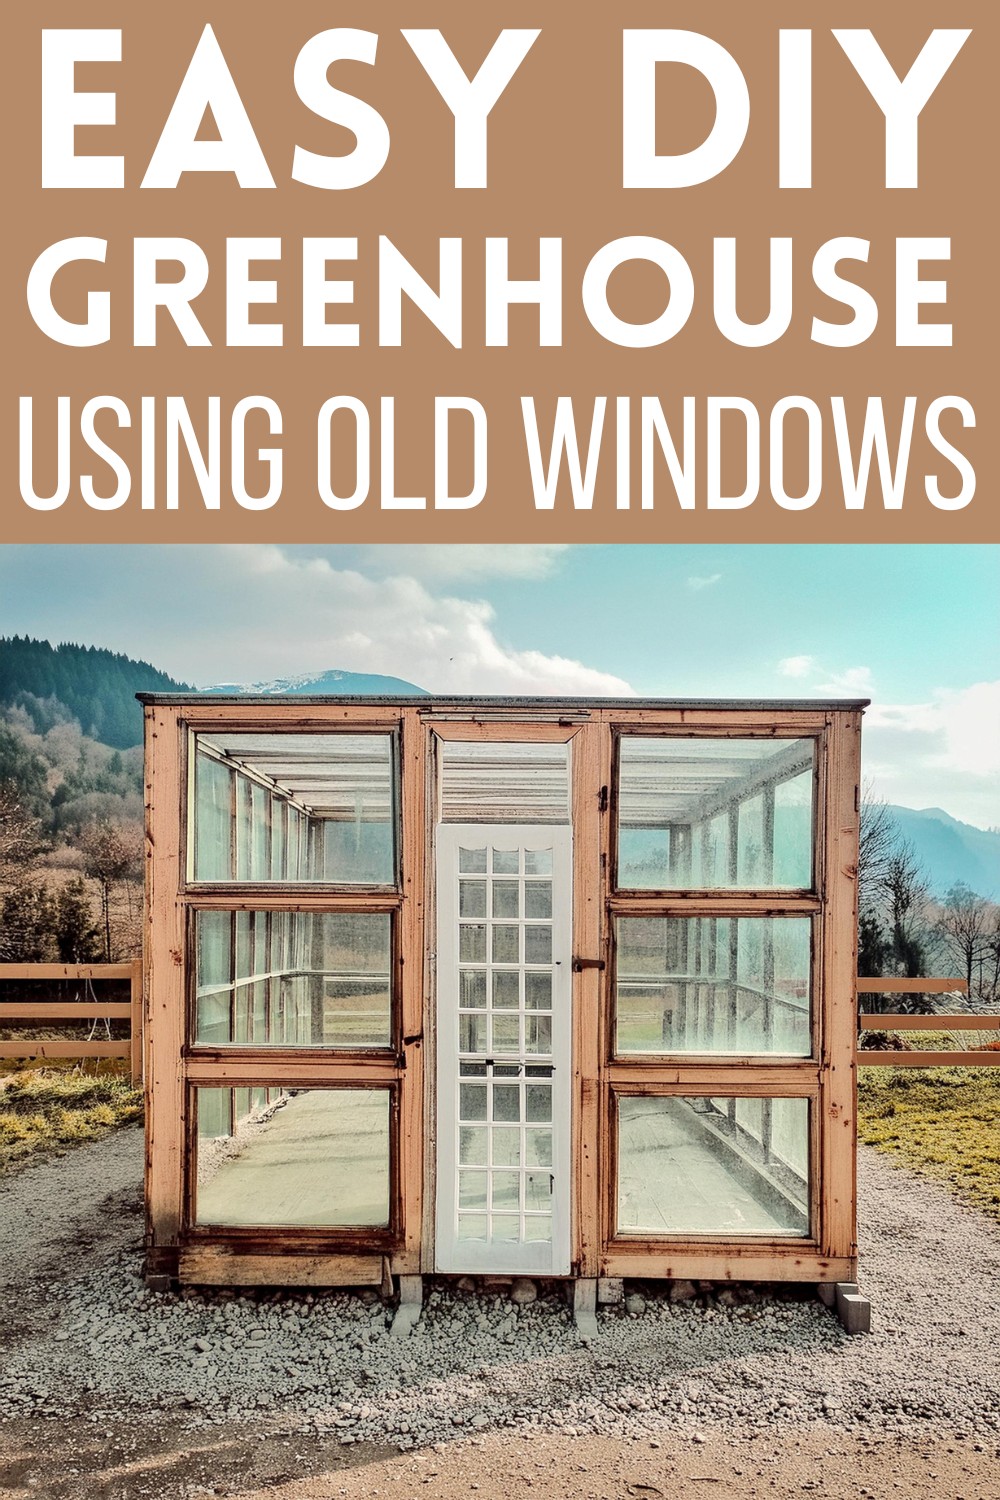
DIY Greenhouse Project Using old windows
Do you want to extend your gardening season, but thought constructing a greenhouse was too challenging or costly? Building a greenhouse from old windows not only recycles materials that might otherwise be discarded, it adds a charming and functional structure to your garden. Whether you are an experienced DIYer or just beginning, DIY Greenhouse Using Old Windows Project can bring your green dreams to life while adding a unique aesthetic to your outdoor space. So, follow the simple guide given below and start turning old windows into a new haven for plants.
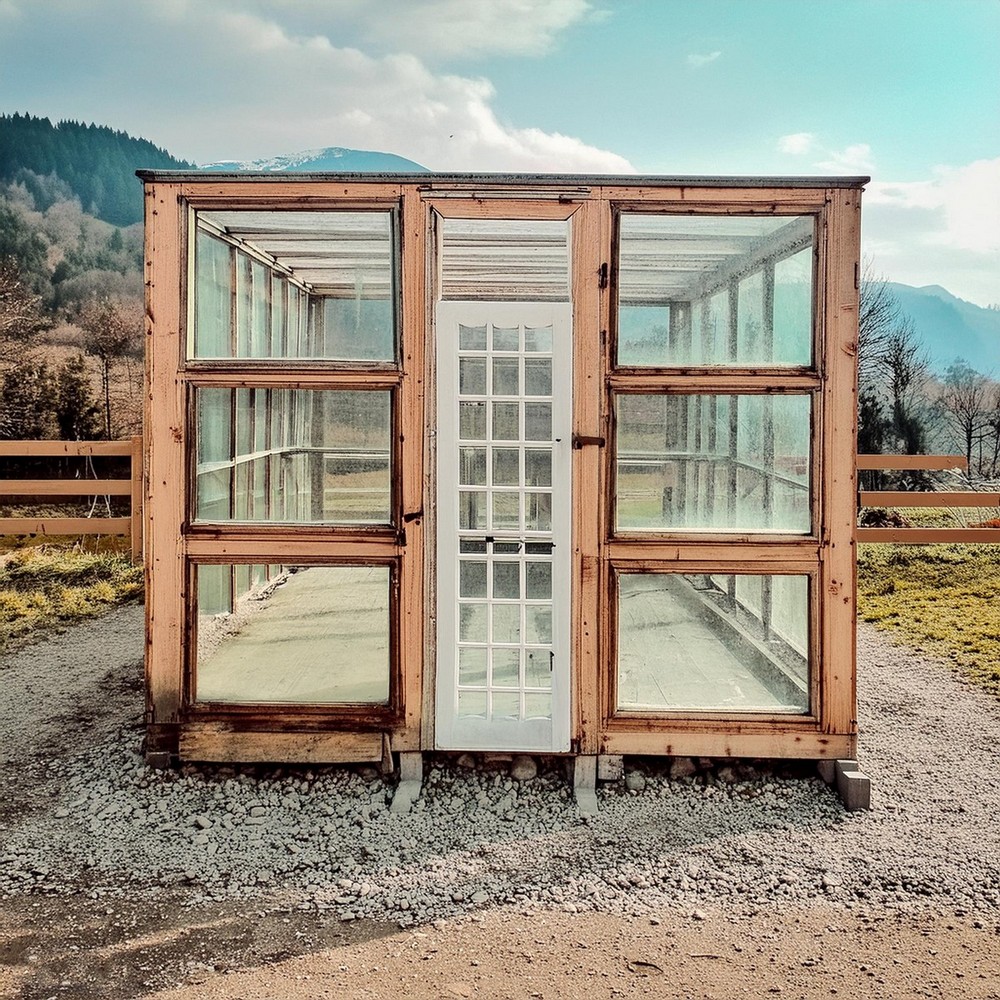
DIY Greenhouse Using old windows
- Materials:
- Old windows of various sizes
- Wooden planks or beams for the frame (exact dimensions will depend on desired greenhouse size)
- L-brackets and screws
- Hinges (if you want any windows to open)
- Weatherproof silicone caulk
- Door (recycled or new, for entry)
- Roofing material (dependent on preference: more windows, polycarbonate sheets, etc.)
- Tools:
- Measuring tape
- Saw (hand saw or power saw, depending on what you have available)
- Drill
- Screwdriver
- Level
- Caulking gun
- Paint or sealant for wood protection (optional)
Building Steps
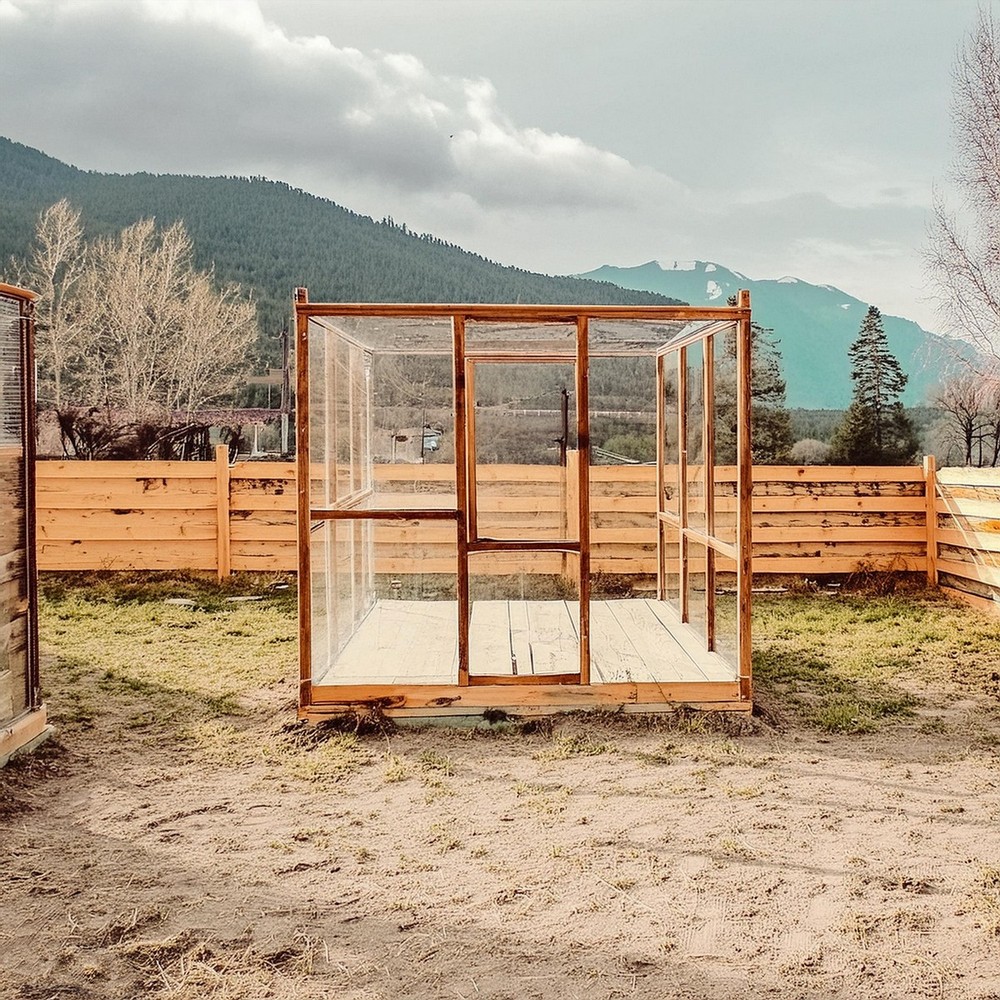
1. Design and Planning
Start by conceptualizing your greenhouse size and design based on the number and size of windows you have. Sketch out a rough blueprint, noting dimensions and where each window will go. Remember to include a space for a door.
2. Preparing the Site
Choose a flat, sunny spot for your greenhouse. Clear the area of debris and level the ground. You might need to lay a foundation of concrete blocks or a wooden frame filled with gravel for improved drainage and stability.
3. Constructing the Frame
Build the wooden frame according to your design. This will serve as the skeleton of your greenhouse, holding the windows in place. Use L-brackets and screws to secure the corners and joints for added stability.
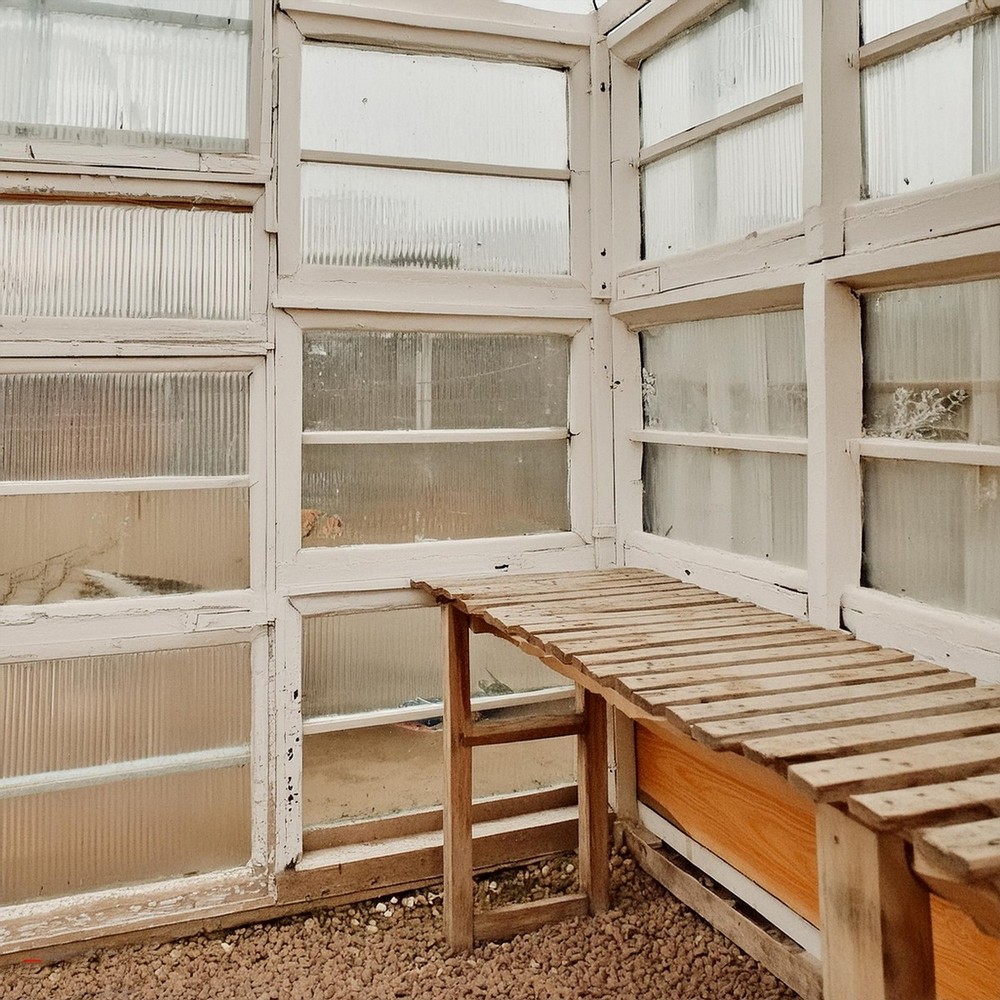
4. Installing the Windows
Once the frame is up, begin installing your windows. Use a level to ensure they’re evenly placed. Secure them with screws, and use weatherproof silicone caulk around the edges to seal against the elements.
5. Adding the Door and Roof
Install the door using hinges, and make sure it opens smoothly. For the roof, decide if you want more windows for light, or a different material. Securely attach your roofing choice, ensuring it’s well-sealed and watertight.
6. Sealing and Finishing Touches
Go over the entire structure with caulk, sealing any gaps to ensure it’s airtight. If you’ve chosen to, now is the time to paint or seal the wood to protect it from the weather. Add any interior shelving or planting tables, and your greenhouse is ready to go!
Conclusion
Building your greenhouse from old windows not only recycles materials in a meaningful way but creates a custom space for growing plants that’s as functional as it is aesthetical. A project like this can be spread out over a few weekends, transforming your gardening experience and extending your growing season. Enjoy the fruits of your labour with a beautiful, eco-friendly greenhouse tailored exactly to your needs and taste. Happy gardening!