DIY Greenhouse Growing Bench For Fresh Herbs Year-Round
Imagine transforming your backyard with a cool, DIY greenhouse where your plants can thrive year-round! That’s what inspired the creation of a unique Greenhouse Growing Bench, designed specifically for garden lovers looking for a smart, space-saving solution. Built with simple materials like 2x4s and hardware fabric, this DIY plant heaven ensures your plants get plenty of sunlight and easy watering. Perfect for green thumbs wanting to maximize their greenhouse space, the bench is a useful DIY project that turns into a versatile, sturdy home for your plants. Plus, it’s customizable for potting needs and extra storage, making it a must-have in your gardening arsenal.
DIY Greenhouse Growing Bench

DIY Greenhouse Growing Bench
Materials List
- 2x4s lumber
- 1x2s lumber
- Half-inch galvanized hardware fabric
- 3” screws
- 2” screws
- 1.25” finish nails
- 1×6 lumber for a small shelf
Tools Used
- Saw (not specified, but a circular saw or a hand saw could be used)
- Tin snips
- Staple gun
- Hammer
- Nail gun
Step-by-Step Guide
Step 1: Dimension Planning and Initial Cuts
Before diving into the building process, it was essential to measure the greenhouse’s doorway to ensure the bench would fit. With a width of 22.25” for the doorway, the benches were planned to be 22” in width overall. Lengths of 2x4s were cut to 92” for the bench’s length, with the understanding that the combination of the 2×4’s thickness and the 1×2’s width determined the final measurements for the structure. All 2×4 joints were connected using 3” screws, establishing a strong frame to support the layers of the bench.
Step 2: Assembling the Shelf Frame and Attaching Hardware Fabric
The initial shelf frame was assembled from the precut 2x4s. Galvanized hardware fabric was then laid on top, slightly larger than the frame to ensure full coverage, which would allow light to penetrate and make watering easier. Tin snips were handy for cutting the fabric to the right size.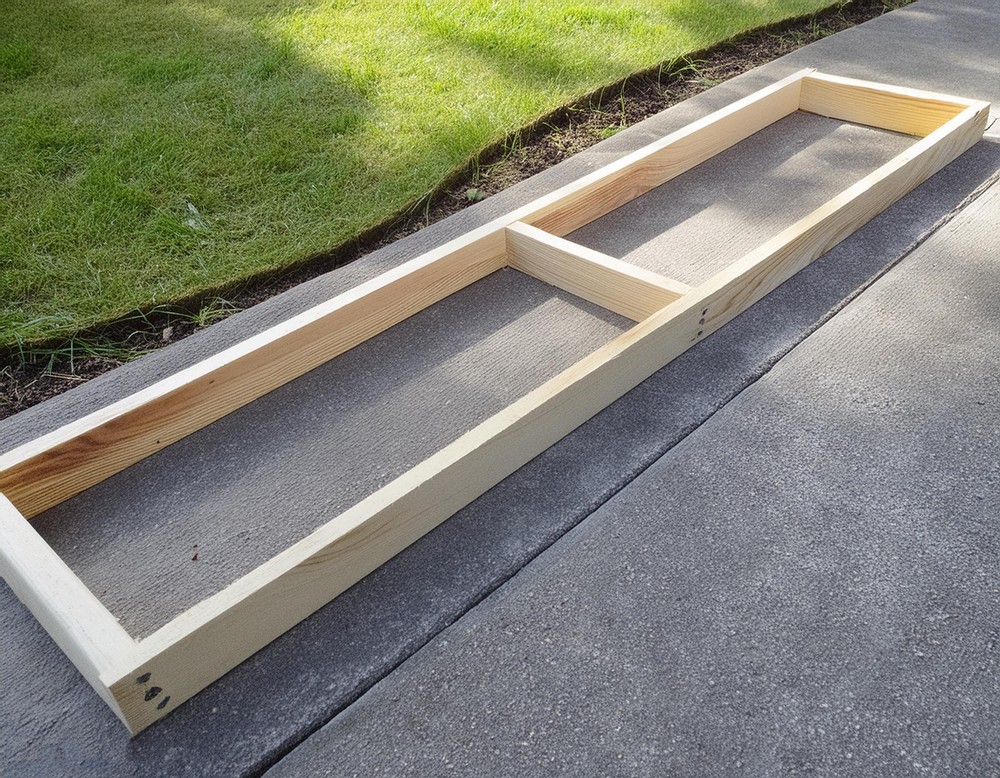
Step 3: Securing the Fabric
After laying the fabric, its edges were folded over the 2×4 frame of the shelf and stapled in place. This step required a bit of muscle as some staples needed an extra tap with a hammer to sit flush against the wood.
Step 4: Adding and Securing the 1×4 Perimeter Pieces
The shelf was then flipped to allow the attachment of 1×4 pieces along the top perimeter, which would also hold the fabric in place securely. These pieces not only added stability but also provided a cleaner look and prevented any sharp edges from being exposed.
Step 5: Preparing for Legs
Using 2×4 scraps as placeholders, 1x4s were cut and attached to the sides of the shelf structure to anticipate the placement of the legs. This visual cue helped in ensuring the rest of the structure would align correctly when assembled.
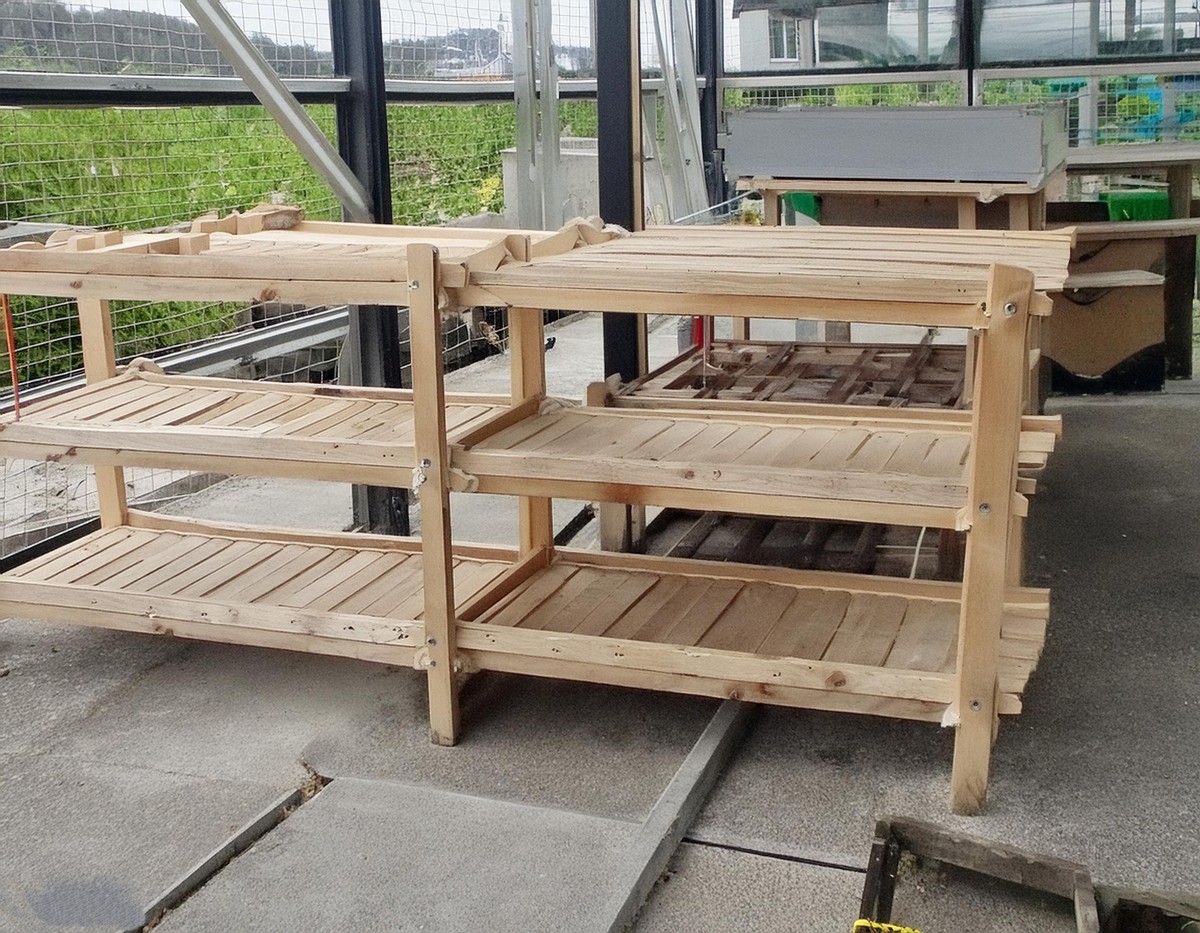
Step 6: Attaching Vertical Support
The actual legs were then prepared and attached. The bench was designed with a slight incline, using taller back legs cut from 2×4 pieces at 48” and shorter front legs at 36”. This incline would help in accommodating the different heights of plants and allow for easier access to the back plants.

Step 7: Finishing Touches and Adjustments
Upon moving the bench into its destined spot inside the greenhouse, certain adjustments were made. The top 1×4 pieces on the ends were removed to not interfere with the greenhouse’s existing structure, and a few strategic cuts were made to better suit the space available.
Step 8: Final Assembly and Additions
The bench was finalized with the addition of a small shelf made from 1×6 lumber, adding functional space for storing gardening tools or smaller pots. It was a testament to the creative and adjustable nature of this DIY project.
Conclusion
This greenhouse growing bench project not only solves the practical need for an organized planting space but also invites a deeper connection with your gardening hobby. Each step, though simple in execution, is a stride towards a self-sustained oasis that supports your green endeavours. Whether you are a seasoned gardener or a DIY enthusiast looking for the next project, this bench will surely be a valuable addition to your greenhouse.