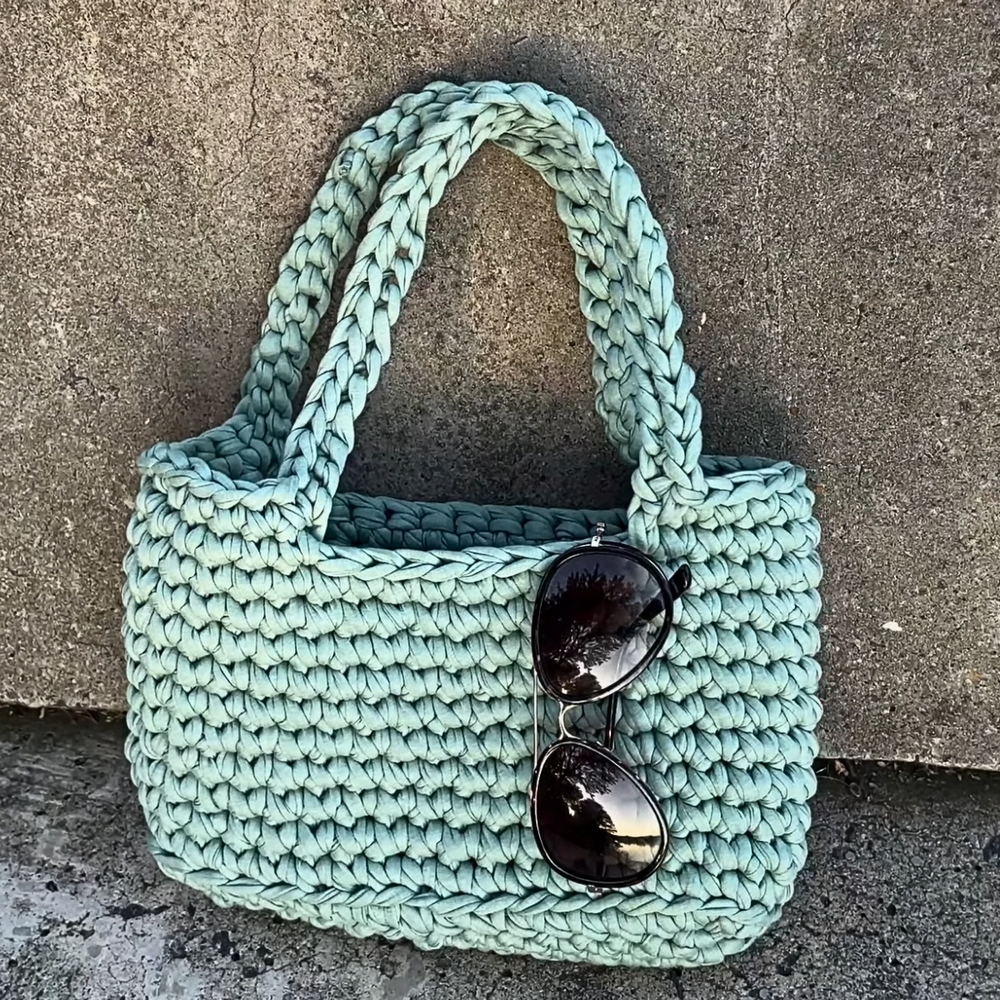
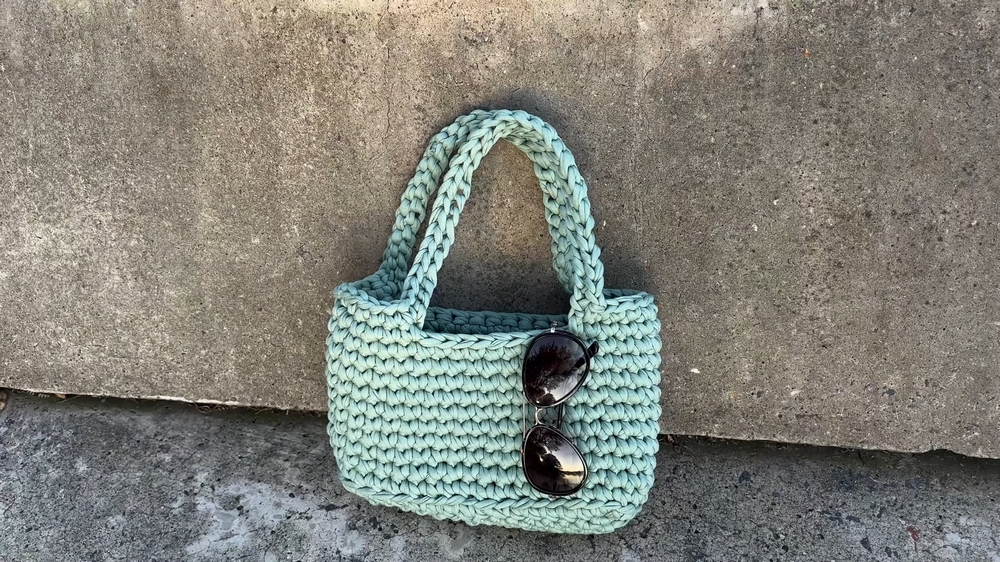
Dazzling Crochet Tote Bag Perfect on Street Style Outfits
Elevate your look with this Crochet Tote Bag Pattern for a stylish, versatile accessory that enhances any outfit or outing effortlessly.
Carrying essentials in style has always been a practical yet personal expression, and a crochet tote bag brings warmth and charm to everyday errands or casual outings. This pattern allows the creation of a bag that is both sturdy and lightweight, capable of holding items such as wallets, keys, notebooks, and small personal belongings comfortably. Its spacious interior ensures organization, while the strong handles provide ease and comfort when carrying heavier loads.
Vibrant Crochet Tote Bag Crafted for Summer Days
The textured crochet stitches add subtle visual appeal, giving the bag a handmade touch that stands out without overwhelming. Beyond its functionality, the tote bag serves as a versatile accessory, suitable for casual wear, shopping trips, or even as a stylish companion for light work essentials. Its handmade construction offers durability and longevity, ensuring it maintains shape and usability through frequent use.
Available in a wide range of colors, each bag can reflect personal style, from neutral tones that complement any outfit to vibrant hues that add a playful accent. Ideal for gifting or personal use, the crochet tote bag brings together practicality, charm, and versatility in one functional accessory. Every stitch contributes to a bag that balances utility with subtle elegance, making it a timeless addition to daily life.
Materials Required
- T-shirt Yarn: Approximately 650 to 800 grams. Keep in mind that the thickness affects the outcome and choice of tools.
- Crochet Hook: Size 10 mm.
- Tape Measure: To measure dimensions of the bag.
- Scissors: For cutting yarn.
- Stitch Markers: For tracking rows and handles.
- Tapestry Needle: For weaving in ends.
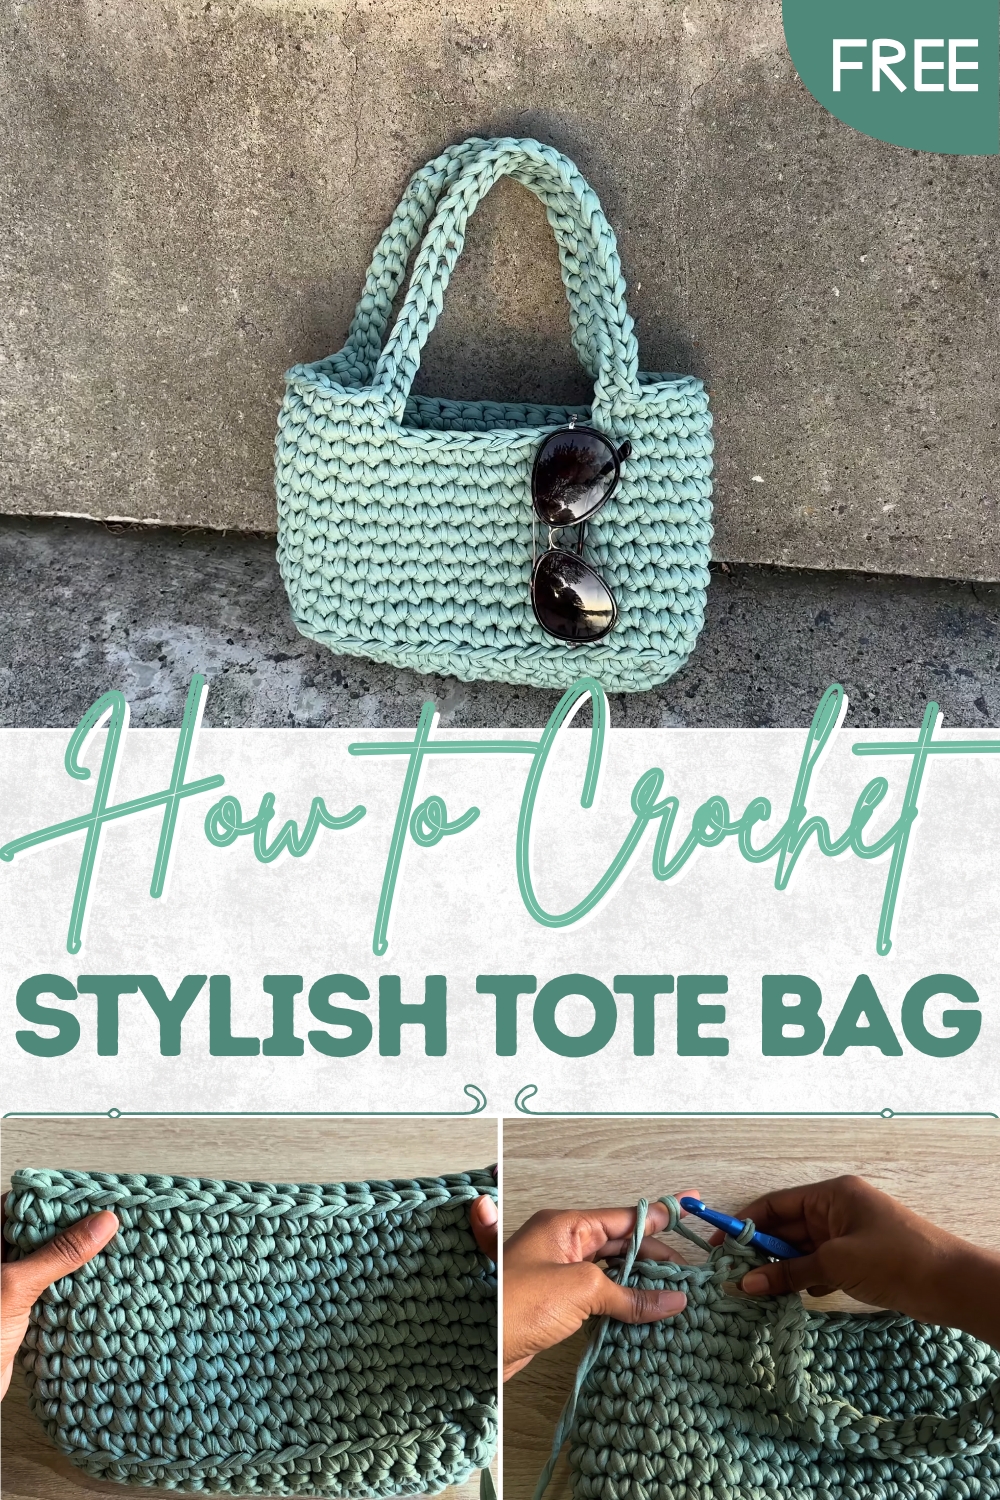
Step-by-Step Details of the Chunky Tote Bag
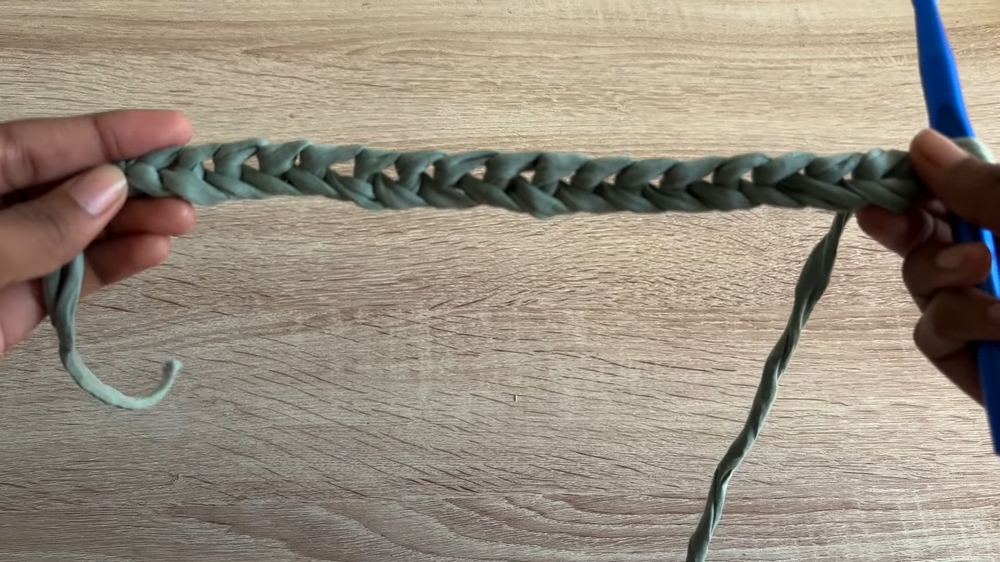
Step 1: Creating the Base
- Start with Slip Knot and Chain:
- Begin by making a slip knot and inserting your hook.
- Create a chain of 17.
- Row 1:
- Skip the first chain and make a single crochet in the second chain from the hook.
- Continue making single crochets across the chain.
- Row 2-5:
- Chain 1, turn your work, and make single crochets across each row.
- Continue this process until you have a total of 5 rows for the bag’s base.
2: Working the Sides
- Crocheting Side Stitches:
- Begin working single crochets along the bumpy side stitches of the base. Insert your hook wherever it fits.
- Crocheted ends can be woven later with a tapestry needle, but Sophie suggests crocheting over the tail for convenience.
- Opposite Side:
- Repeat the process by crocheting single crochets across the opposite side of the base, and continue working single crochets along the next set of side stitches.

- Repeat the process by crocheting single crochets across the opposite side of the base, and continue working single crochets along the next set of side stitches.
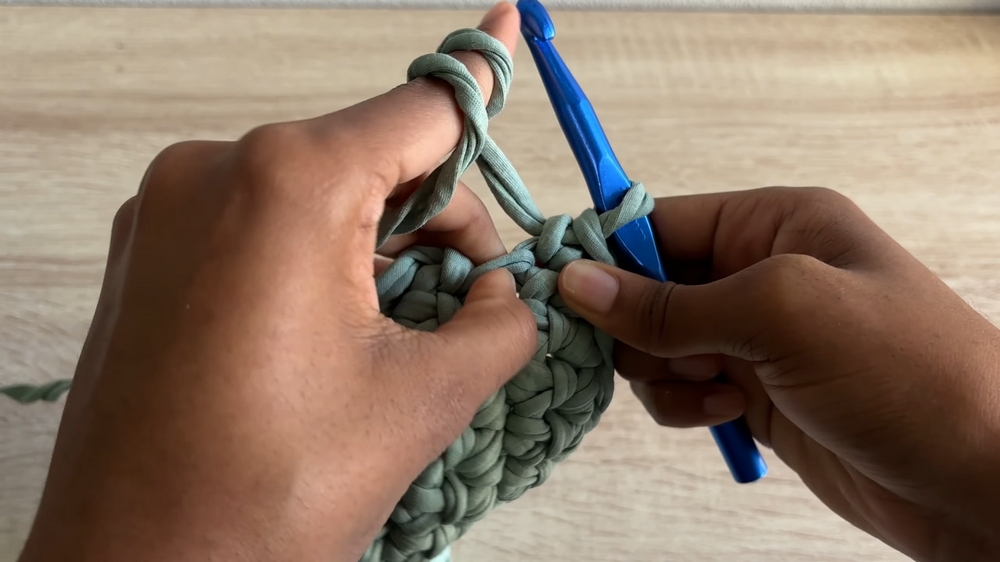
3: Creating Height with Back Loop Stitches
- Back Loop Single Crochets:
- For the next row, make a single crochet in the back loop only of each stitch around the base.
- Use a stitch marker to mark where you begin and end the round.
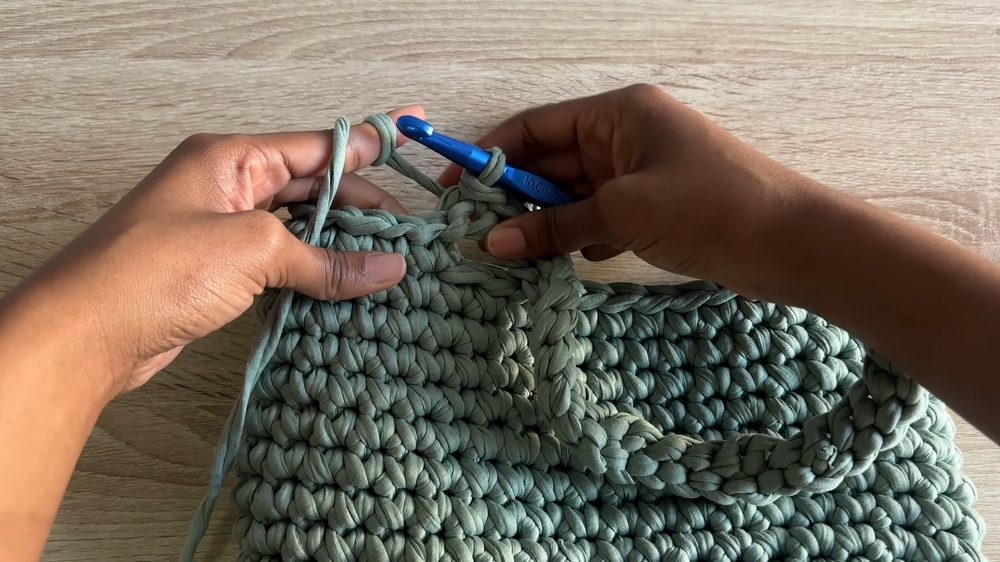
- Standard Single Crochet Rounds:
- After completing back loop stitches, transition to making single crochets in both loops in each stitch.
- Work in continuous rounds, removing and replacing your stitch marker at the start of each round.
- Build the Height:
- Continue making rows of single crochets in rounds until you achieve your desired bag height. Sophie reaches 10 rows.
4: Adding the Handles
- Determine Handle Position:
- Lay the bag flat and use stitch markers to identify where the handles will begin and end.
- Count six single crochets from the stitch marker to define the placement for each handle.
- Creating the Handles:
- Make a chain of 30 stitches and attach the chain to the opposite side with a tight single crochet.
- Repeat the process to create the second handle, ensuring symmetry.
- Reinforce the Handles:
- Work slip stitches along each chain to secure and reinforce the handles.
- Resume making single crochets across the body of the bag in between the handle sections.
5: Finishing the Bag
- Final Rows:
- After completing the handles, make one last row of single crochets across the body of the bag.
- End the row with a slip stitch and chain 1.
- Weaving Ends:
- Cut the yarn, leaving a long tail, and use a tapestry needle to weave in loose ends securely.
Special Features
- Stylish Design: The chunky tote bag is both functional and trendy, making it perfect for everyday use or as a handmade gift.
- T-Shirt Yarn Characteristics: The stretchy and sturdy nature of t-shirt yarn leads to a durable bag while adding a unique texture.
- Customizable: Change the size of the bag, the height, or the color scheme to suit personal preferences.
Level of Difficulty
This pattern is beginner-friendly with techniques like slip knots, single crochet, and simple slip stitch reinforcement. Familiarity with working in rounds and using stitch markers will help ensure even results for beginners.
Tutor’s Suggestions
- Since t-shirt yarn varies in thickness and flexibility, Creator recommends testing your yarn and adjusting the crochet hook size if needed (anywhere between 8mm and 10mm).
- Use a stitch marker to track rows and handle placement for symmetry and alignment.
- The tail of the initial yarn can be crocheted over rather than woven in later to save time and effort.
Tip
To increase durability and add a professional finish to your tote, consider lining the inside with fabric or attaching magnetic snaps or buttons for closures.
Conclusion
The chunky tote bag pattern shared is a fantastic and practical crochet project that’s suitable for beginners and intermediates alike. With its simple yet chic design, this bag is functional for everyday use or as a statement piece. The pattern provides plenty of room for creativity, allowing you to experiment with colors, sizes, or embellishments.