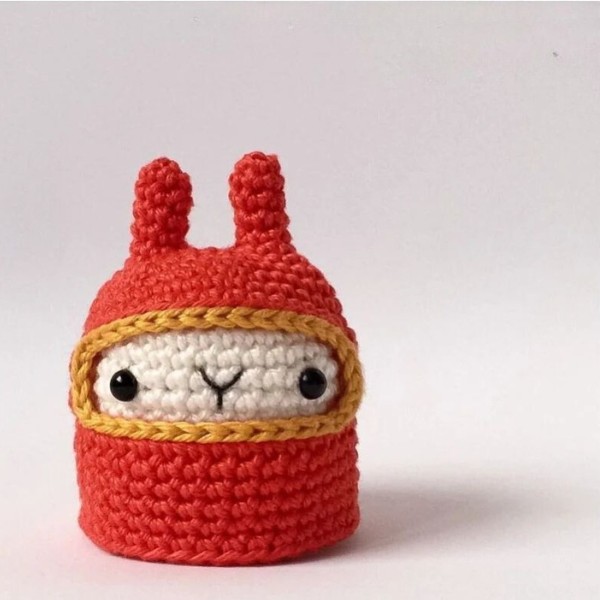
Free Crochet Ninjabunny Pattern For Kids To Play
Are you ready to make a super cute Crochet Ninjabunny? This little ninja bunny is going to be a star in any child’s playable collection. Our guide is easy to follow with simple steps, so you don’t have to worry about getting lost. We’ve got a list of patterns that will make creating your Ninjabunny fun and clear. Each step is clear and designed for you to succeed, guiding you through the process of bringing your ninja bunny to life. Grab your crochet hook, choose your favorite yarn colors, and let’s dive in. As you follow along with the patterns we’ve provided, you’ll see your Ninjabunny taking shape right before your eyes. It’s a wonderful way to unleash your creativity, and the best part is you’re creating a special handmade treasure by yourself.
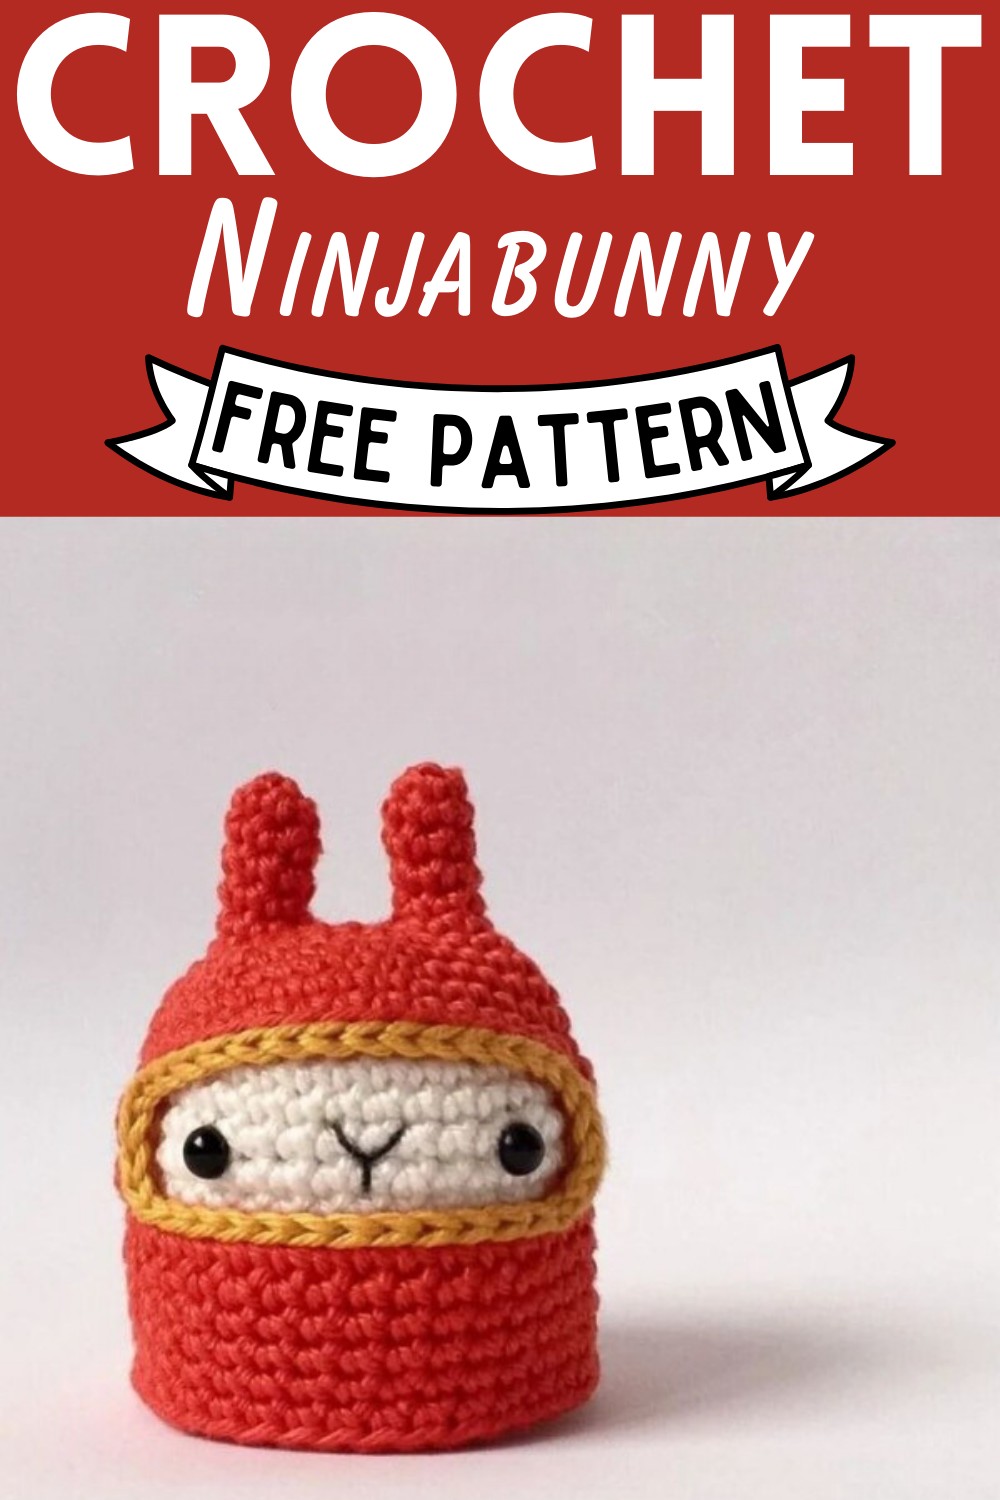
Crochet Ninjabunny
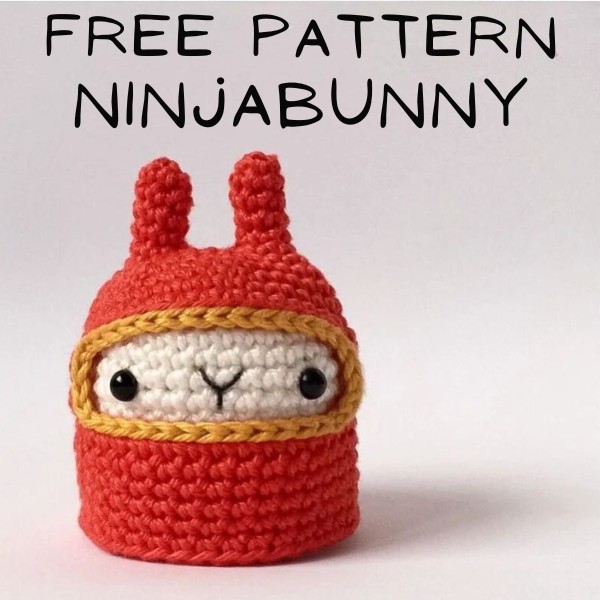
Free pattern by @craftyemmi
Abbreviations
- rnd – round
- st – stitch
- ch – chain
- slst – slip stitch
- sc – single crochet
- hdc – half double crochet
- dc – double crochet
- sc2tog – 2 st together with sc (decrease)
- BLO – in back loops only
- * * – repeat from to x times
MATERIALS
- 2.5 mm crochet hook
- embroidery needle
- sport weight yarn (color A: off-white, color B: tomato, color C: gold)
- black embroidery yarn
- 5 mm black safety eyes
- pellets
NINJA BUNNY
Body
- Rnd 1 6 sc in magic ring
- Rnd 2 *2 sc in next sc* 6x [12]
- Rnd 3 *2 sc in next sc, 1 sc* 6x [18]
- Rnd 4
- Rnd 5 *2 sc in next sc, 2 sc* 6x [24] *2 sc in next sc, 3 sc* 6x [30]
- Rnd 6
- Rnd 7-17 *2 sc in next sc, 4 sc* 6x [36] 36 sc
- Place the eyes between rnd 9 and 10 with 8 st between each eye.
Embroidery a ‘Y’ as nose.
- Rnd 18 *sc2tog, 4 sc* BLO 6x [30]
- Rnd 19 *sc2tog, 3 sc* 6x [24]
- Rnd 20 *sc2tog, 2 sc* 6x [18]
Fill the body with pellets.
- Rnd 21 *sc2tog, 1 sc* 6x [12]
- Rnd 22 *sc2tog* 6x [6], fasten off
NINJA BUNNY
COSTUME (color B)
Start the costume with the first ear.
- Rnd-1 6 sc in magic ring 6 sc
- Rnd 2-5 Fasten off
- Rnd 6 joins in first sc of last rnd of 1. ear with sc, sc in next 5 sc, sc in next ch 3, sc in next 6 sc, sc in next ch 3 [18]
- Rnd 7 *hdc in next sc, sc in next sc, 2 sc in next sc, sc in next 2 sc, sc + hdc in next sc, dc in next 2 sc, 2 dc in next Sc* 2x [24] join in first sc of row 16 with sc, sc in next 21 sc, sc in next ch 14 [36]
- Rnd 8 *3 sc, 2 sc in next sc* 6x [30]
- Rnd 9 *4 sc, 2sc in next sc* 6x [36]
- Rnd 10-11 36 sc
- Row 12 26 sc, turn
- Row 13-15 ch 1, 22 sc, turn
- Row 16 ch 1, 22 sc, ch 14
- Rnd 17 Repeat rnd 1-5 for the second ear, but do not fasten off at the end.
- Rnd 18-22 36 sc Rnd 23 12 sc, fasten off
Make ch 3 after the last st and join both ears in rnd 6 to continue the costume.
Join yarn (color C) in the bottom right corner (seen from the front) to work the border on the face opening.
Slst in next ch 14 of row 16, 4 slst across ends of rows, slst in next 14 sc BLO, 4 slst across ends of rows [36],
fasten off
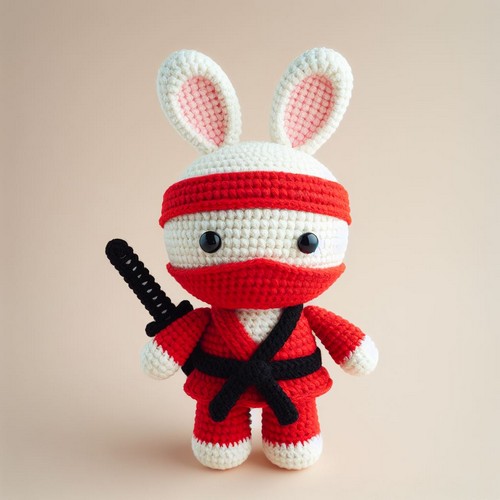
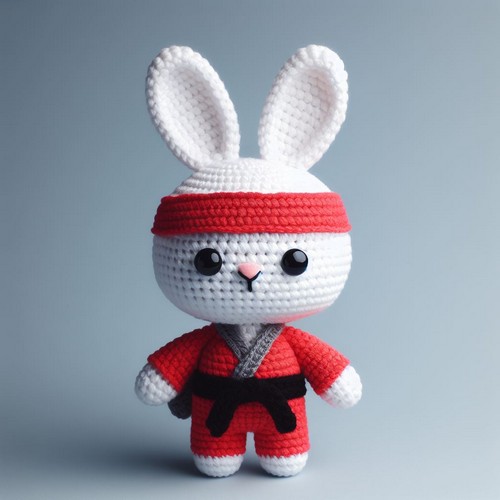
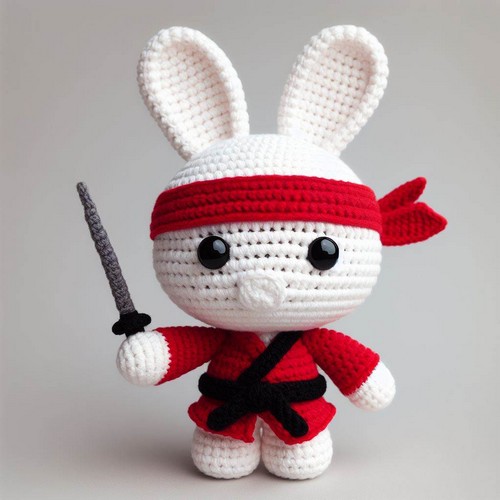
Now, you can explore these AI-generated images for inspiration for the most creative and amazing crochet creations.