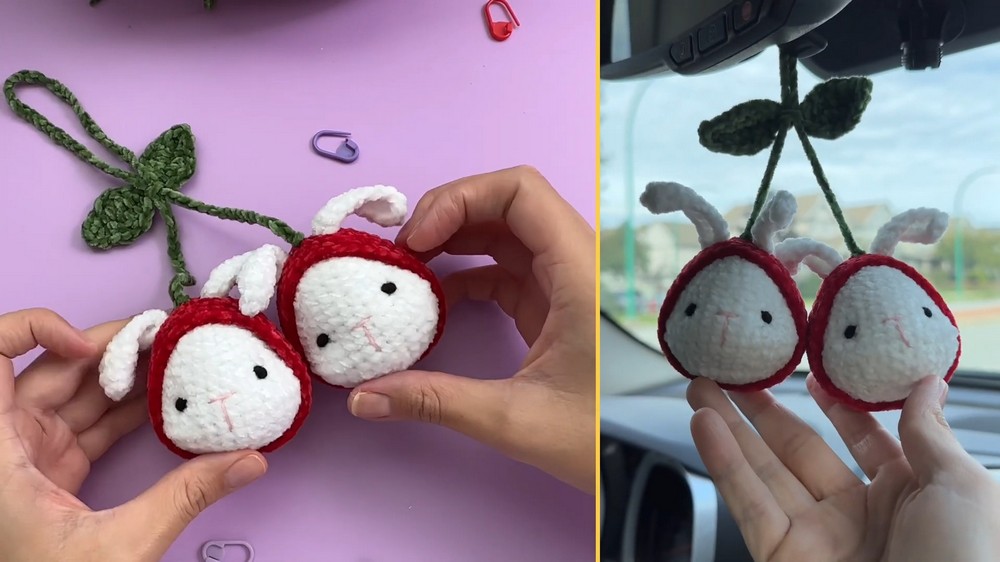
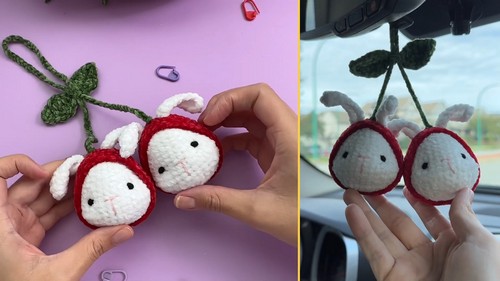
Crochet Hanging Cherry Bunnies Perfect Gift For Autophiles
It’s time to gift a car lover the cutest and most heartfelt gift they’ve ever received. We have the perfect crochet pattern to create adorable bunny car hangers! The pattern features details like pinched cheeks, handmade eyes, and a cherry on top, making each amigurumi ornament truly unique.
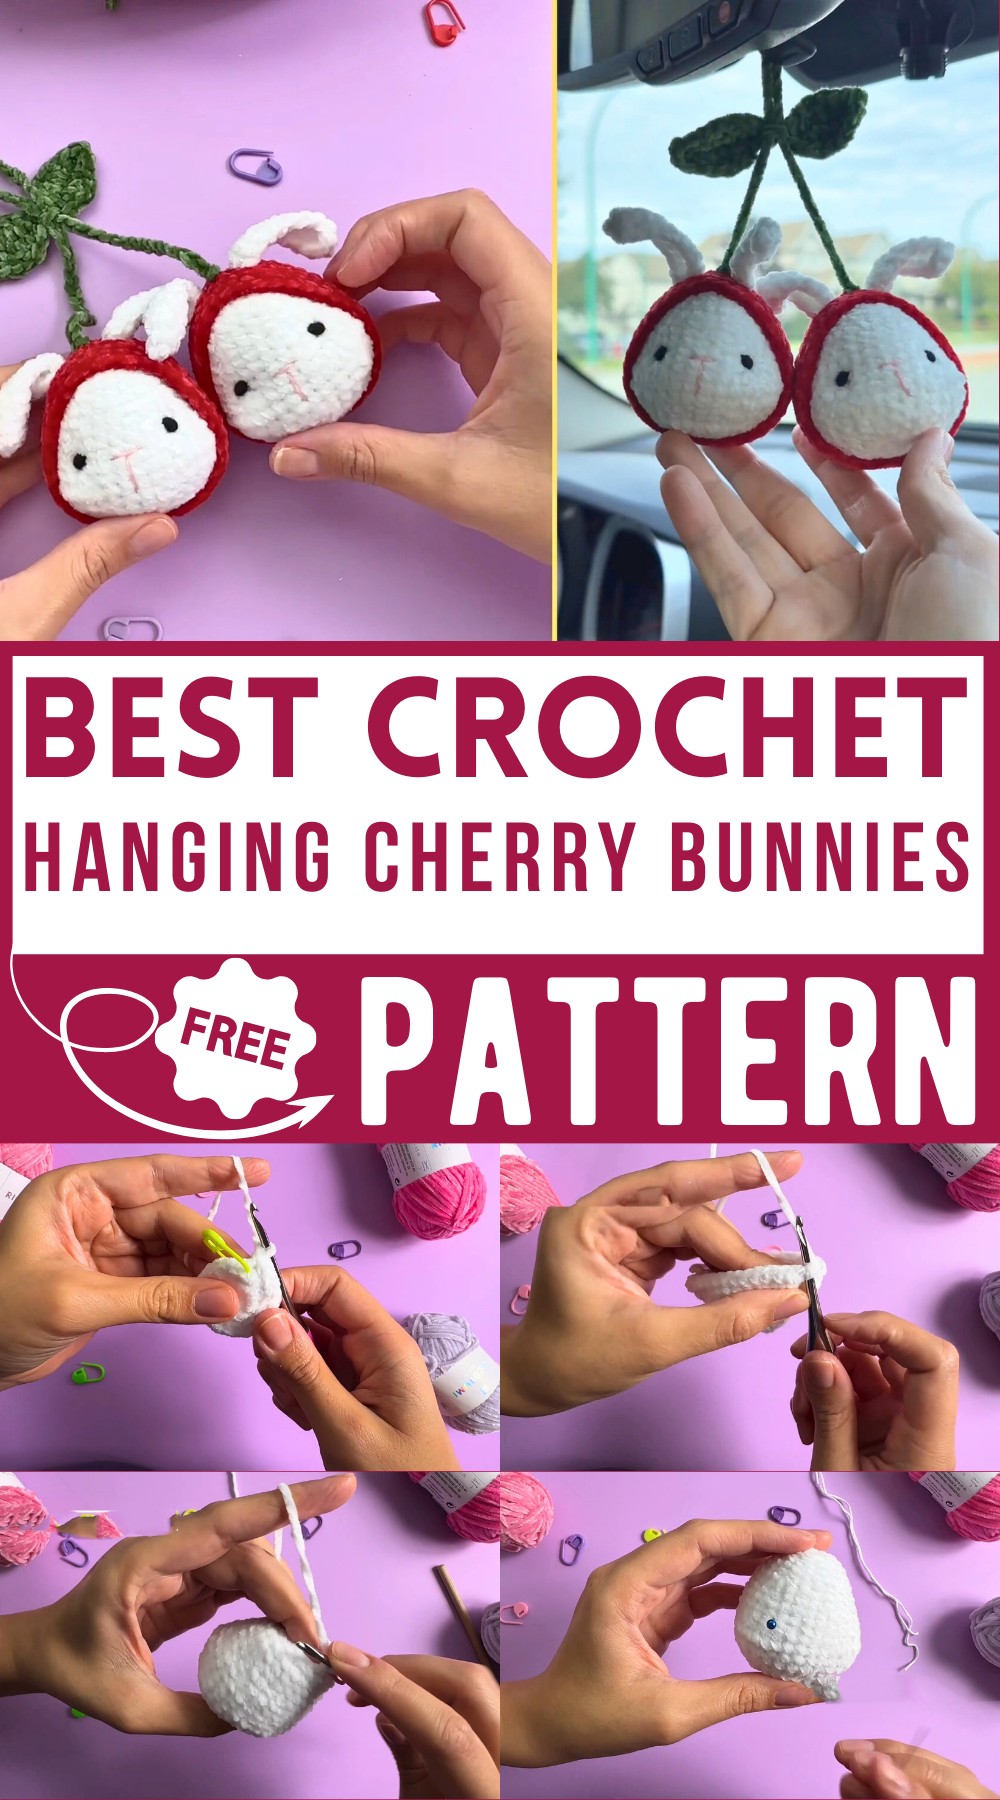
This pattern uses soft DK yarn in vibrant red, green, and white to craft cute bunny heads complete with rosy cheeks and charming facial details. These bunnies can be hung in cars or around the house, adding a touch of handmade love wherever they go. Follow the simple steps and bring these delightful bunnies to life!
Crochet Your Hanging Cherry Bunnies
Materials:
- DK or size 3 weight yarn in white, red, and green (Ricorumi nilli nilli: color codes 1, 9, and 19)
- Small amount of finger weight yarn for face details (eyes, nose)
- Crochet hooks: 3mm and 3.75mm (F hook)
- Stitch markers
- Blunt needle
- Fiberfill for stuffing
- Scissors
Step by step Instructions
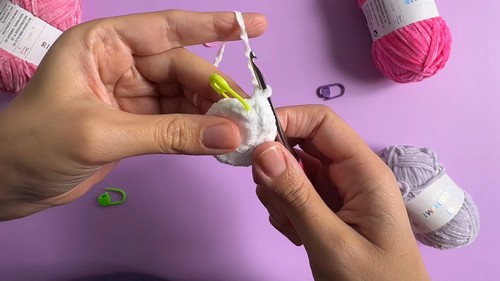
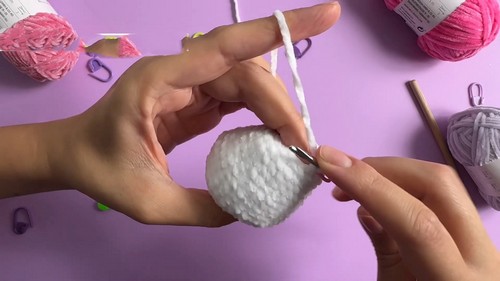
Head and Body:
- Round 1: Using the 3mm hook, make a magic ring, work 6 single crochets (sc) into the ring. (6)
- Round 2: Increase (inc) in each stitch around. (12)
- Round 3: (1 sc, inc) repeat around. (18)
- Round 4: (2 sc, inc) repeat around. (24)
- Round 5: (3 sc, inc) repeat around. (30)
- Round 6: Work in front loops only (FLO) – (4 sc, inc) repeat around. (36)
- Rounds 7-8: Sc in each stitch around. (Note: Round 8 forms the cheeks, use increases accordingly)
- Round 9: (5 sc, inc) repeat around. (42)
- Rounds 10-12: Sc in each stitch around. (42)
- Round 13: (5 sc, dec) repeat around. (36)
- Round 14: (4 sc, dec) repeat around. (30)
- Round 15: (3 sc, dec) repeat around. (24)
- Round 16: (2 sc, dec) repeat around. (18)
- Round 17: (1 sc, dec) repeat around. (12)
- Round 18: Dec around. (6)
Cut yarn, leaving a long end. Use a blunt needle to go through the front loops of the remaining 6 stitches and pull to close the hole.
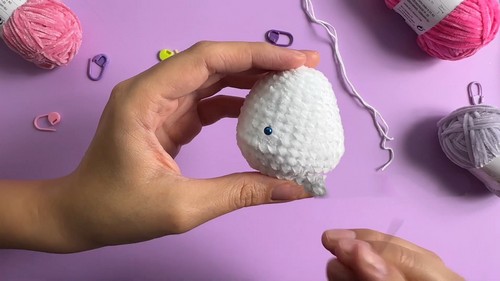
Face Details:
- Eyes:
- Using sport weight yarn, thread from bottom to round 11 with six stitches apart. Repeat for the other eye, skipping one stitch to keep 6 stitches in between.
- Pull to cinch, tie off and weave the ends inside.
- Create a small eye knot by wrapping yarn in a circle 6 times, then pulling ends tight. Attach similarly to marked eye spots.
- Nose:
- Mark between rounds 10 and 11, place pins to mark a stitch and a half wide.
- Insert pink yarn from bottom vertical line, come out from the top center and sides.
Ears:
- Position Ears:
- Position between rounds 19 and 20 or use the cherry top for positioning.
- Crocheting Ears:
- Chain desired length, work from the second chain from the hook. Mark first stitch for reference.
- Slip stitch into the head, continue down the chain without twisting.
- For the bottom part, place 3 sc in the first stitch, then sc down to the head and slip stitch into the same place.
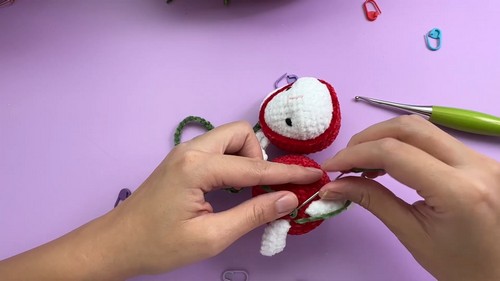
Cherry Cover:
- Follow Head Instructions:
- Start similar to the bunny’s head, up to round 10.
- Attach Cherry:
- Place the cherry on the bunny’s head, chain around the first ear, skip two stitches, chain around the second ear. Ensure tension is right.
- Remove the cherry cover to weave in the end securely.
- Second Bunny:
- Repeat above steps.
Assembly:
- Attach Cherries:
- Leave a long end for the chain to sew onto the bunny’s head.
- If sewed onto the head directly, cherries won’t be removable.
Enjoy your adorable bunny amigurumi!