Crochet Foldable Pumpkin Bag & Ornament Pattern
Enjoy the autumn vibes with charming pumpkin bag! Perfect for fall decor or carrying treasures. Compact, vibrant, and whimsical with easy crochet stitches.
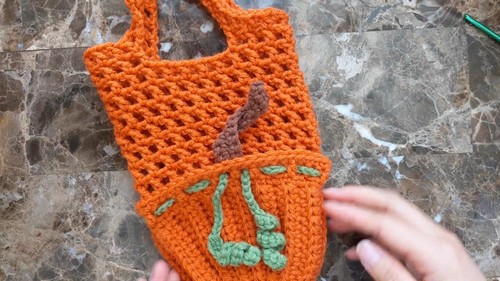
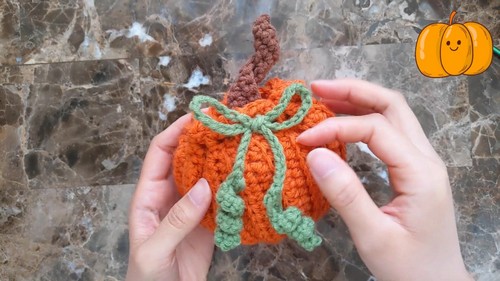
This adorable crochet project combines charm and functionality. Shaped like a cute pumpkin, it transforms into a handy little bag. With its vibrant orange, brown, and green hues, it’s perfect for carrying small treasures or using as a seasonal ornament. The drawstring design makes it easy to open and close, while the folded form keeps it compact. Simple half double crochet stitches and playful ridges create the whimsical pumpkin details. Capture the essence of autumn and add a handmade touch to your decor with this delightful pattern!
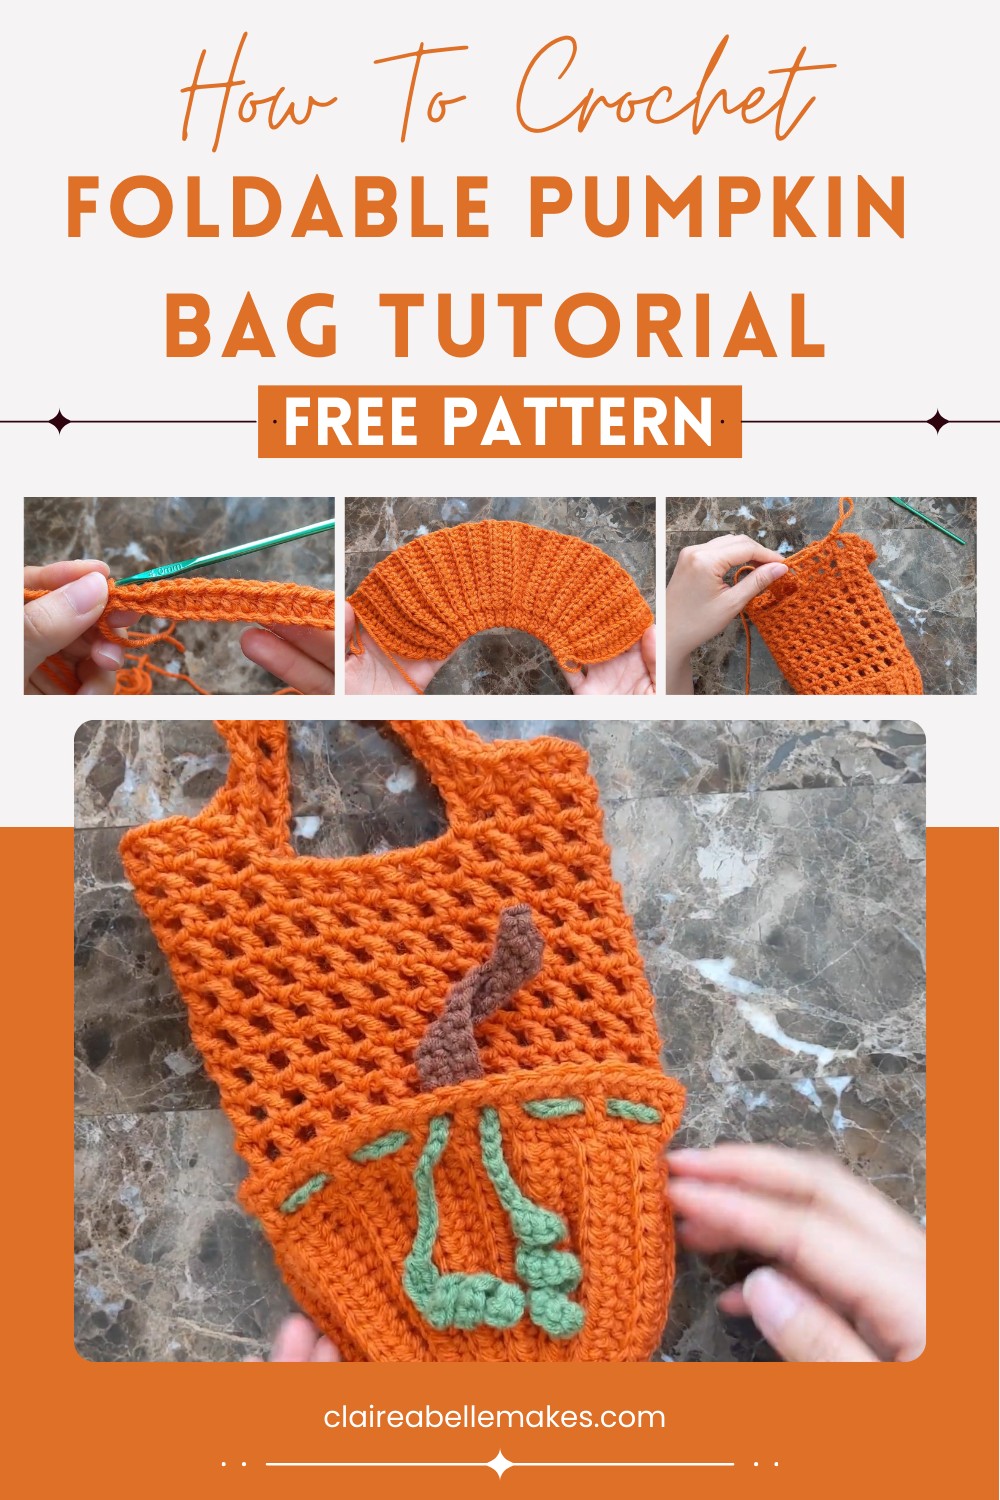
How To Crochet Foldable Pumpkin Bag
Materials Needed:
- Orange yarn
- Brown yarn
- Green yarn
- 4 mm crochet hook
- Scissors
- Threading needle
Pumpkin Shell:
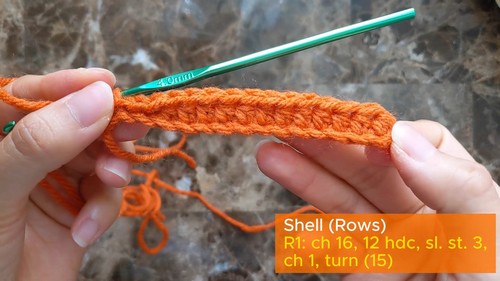
- Row 1:
- Chain 16.
- Starting from the second chain from the hook, make a half double crochet (HDC) in the next 12 stitches.
- Slip stitch in the last three stitches. You should have a total of 15 stitches.
- Chain 1 and turn your work.
- Row 2:
- Slip stitch in the next three stitches.
- Half double crochet in the last 12 stitches.
- Chain 1 and turn your work.
- Row 3:
- Half double crochet in the next 12 stitches.
- Slip stitch in the last three stitches.
- Chain 1 and turn your work.
- Repeat Rows 2 and 3 until you reach Row 32.
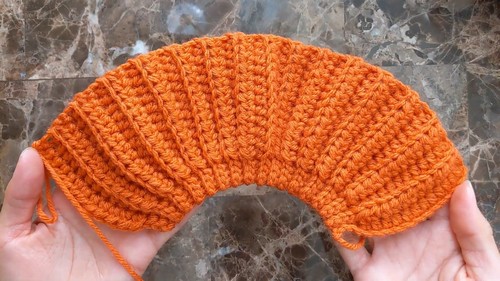
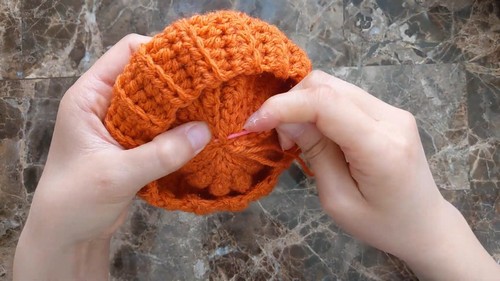
- Closing the Pumpkin Shell:
- Fold the piece in half.
- Slip stitch the sides together to close the ends.
- Leave a long tail to sew the bottom closed.
- Stitch the bottom in a zigzag pattern like a drawstring.
- Pull the string to close the hole, sew in the tail to secure.
- Creating the Border:
- Single crochet around the top of the shell.
- There should be a total of 48 single crochets at the end of the border (put three single crochets between each ridge of the pumpkin).
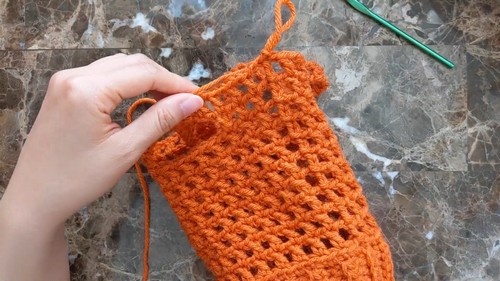
Inner Bag:
- Round 1:
- Chain 4.
- Skip the next stitch, then double crochet in the following stitch (back loops only for this round).
- Chain 1, skip a stitch, and double crochet in the following stitch.
- Repeat all the way around, then slip stitch to join (24 double crochets, counting the chain 1 as 48 stitches in the round).
- Rounds 2-8:
- Repeat what was done in Round 1, but crochet into both loops.
- Round 9:
- Double crochet as usual for the first three stitches.
- Chain 29.
- Skip four double crochets, double crochet into the fifth double crochet below.
- Continue double crocheting for the next seven stitches.
- Chain 29 again.
- Skip four double crochets, double crochet into the fifth double crochet below.
- Continue to the end of the round.
- Round 10:
- Repeat what was done in previous rounds, double crocheting and chaining 1 to create the handle.
- Fasten off and weave in the ends.
Drawstring Portion:
- Round 1:
- Slip stitch your yarn on the top of the shell.
- Chain 3, skip a stitch, and half double crochet into the following stitch.
- Repeat this all the way around (24 half double crochets by the end).
- Round 2:
- Chain 1 and single crochet into every stitch around (total of 48 single crochets).
- Fasten off and weave in the ends.
String for Bag:
- Curly Vine Part:
- Chain 13.
- Skip the first stitch, then increase in the next 12 stitches.
- String:
- Chain to your desired length.
- Second Curly Vine Part:
- Chain an additional 13.
- Increase in the next 12 stitches.
- Fasten off and weave in the ends.
- Weave the string through the holes on the top of the shell.
Stem:
- Row 1:
- Chain 16.
- Starting from the second chain from the hook, single crochet in the next 15 stitches.
- Row 2:
- Chain 1, turn your work.
- Single crochet in the next 11 stitches.
- Increase in the last four stitches.
- Row 3:
- Chain 1, turn your work.
- Single crochet in every stitch (total of 19 single crochets).
- Leave a long tail for sewing.
- Attach Stem:
- Twist the top to curl the stem.
- Place the stem in the middle of the bag, sew through the hole attaching onto the shell only through the back loops.
- Attach to the back of the drawstring portion.
- Weave in the ends.
And with that, your mini foldable pumpkin bag is complete! Enjoy your creative and festive project.