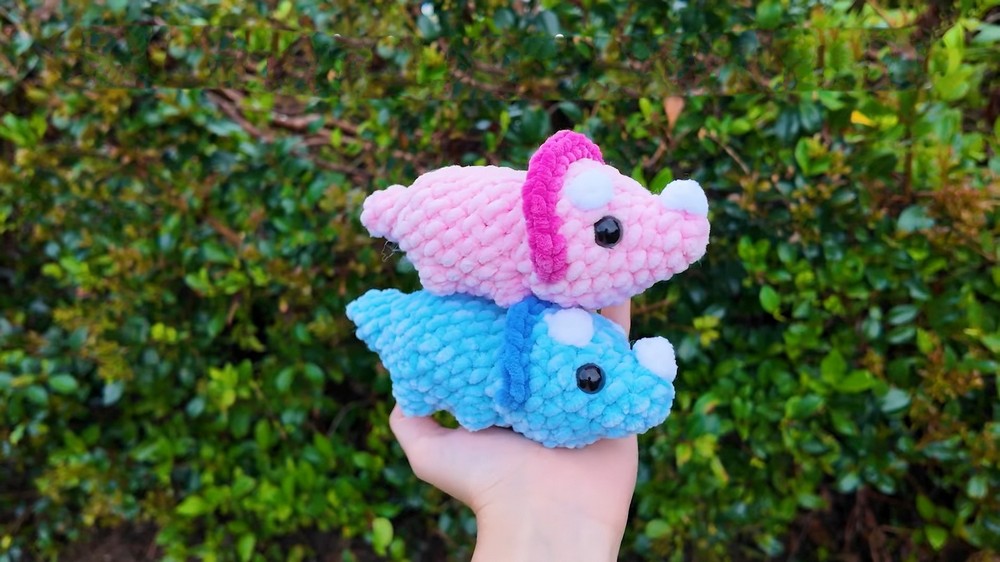
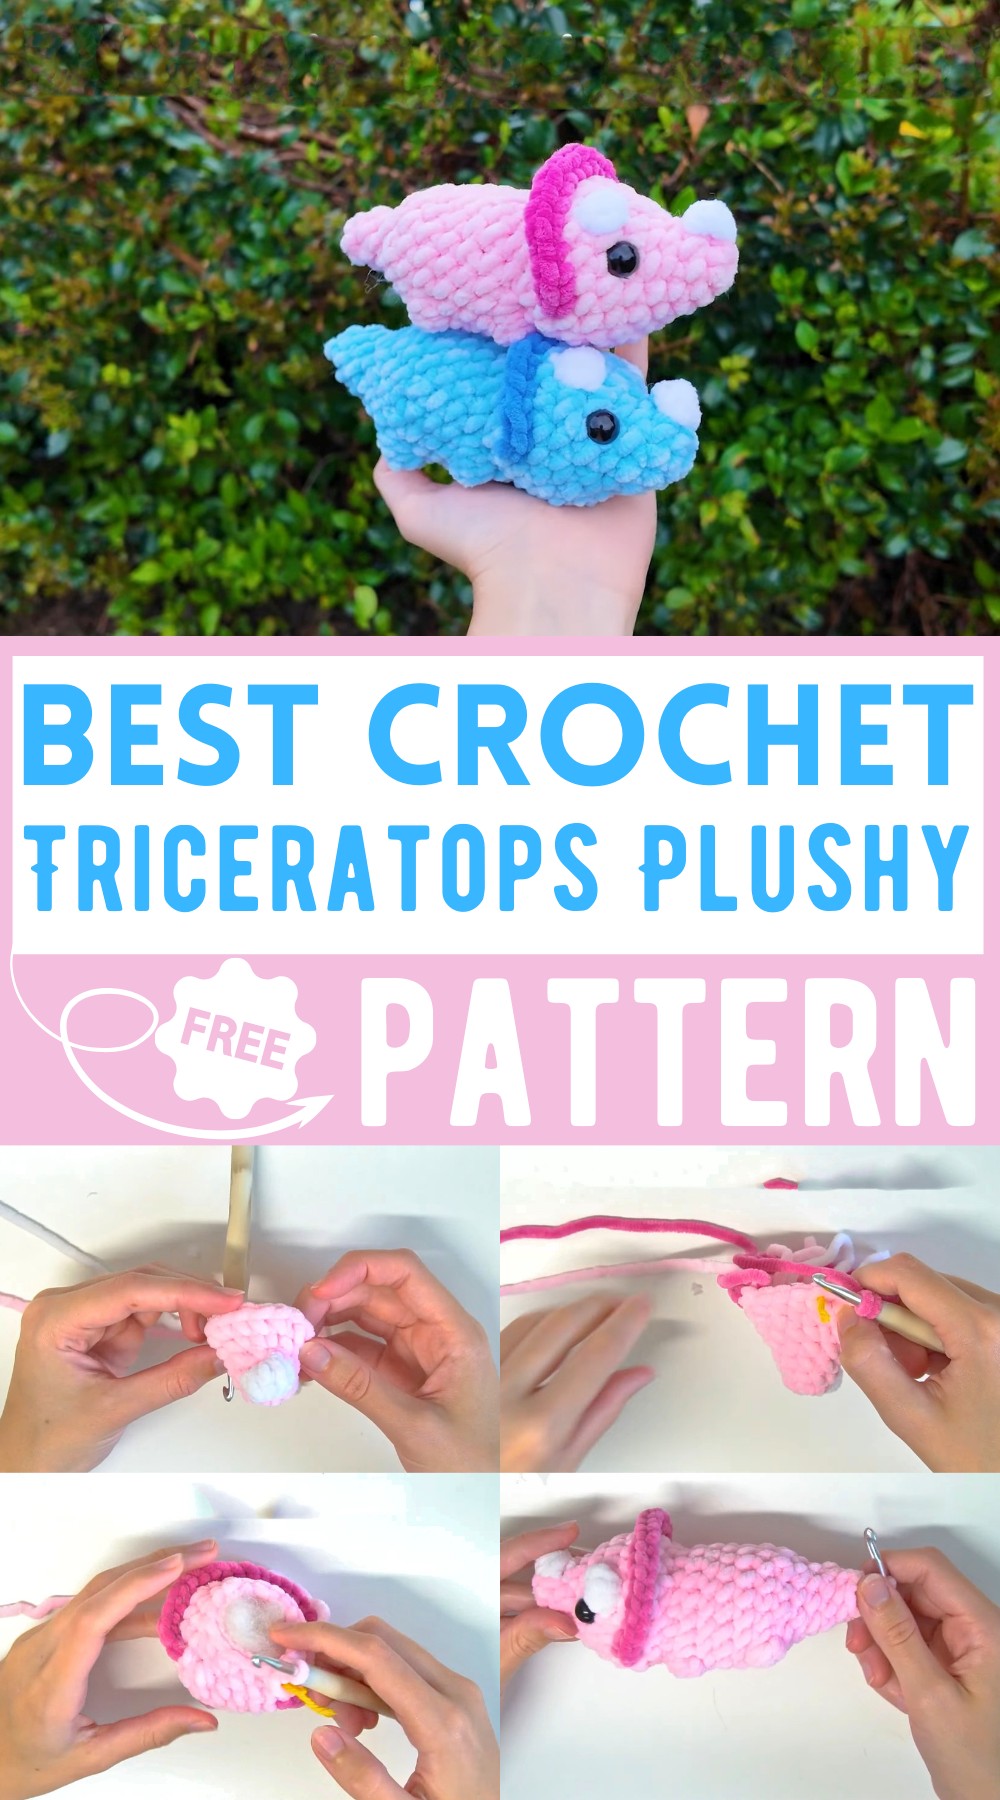
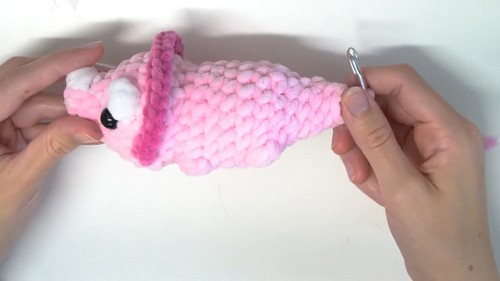
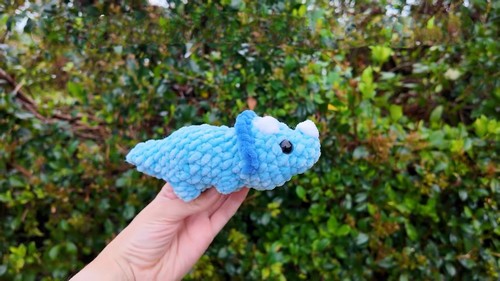
Crochet Amigurumi Triceratops Pattern For Dino Lovers
Creating a Crochet Amigurumi Triceratops is a fun and rewarding project for any crochet enthusiast! This adorable plushy, shining with a light pink body and darker pink frill, is crafted using basic crochet techniques and stitches, including the magic ring, single crochet, and bubble stitch. Its charming design includes details like safety eyes and color changes that make it truly unique. Perfect as a cuddly toy or delightful decoration, this Triceratops pattern is simple enough for beginners yet engaging for seasoned crocheters. Have fun crocheting!
Best Yarn To Choose?
- Primary Yarn: The tutorial suggests using a light pink yarn for most of the body. The specific yarn type used is YarnArt Dolce, which is a type of chenille yarn known for its softness and plush feel, making it an excellent choice for crocheting stuffed toys due to its cozy texture.
- Contrasting Yarn for Details: For the frill and additional details, a darker pink yarn is used. Using a similar type of chenille yarn in a different color will ensure consistency in texture and feel.
- Accent Yarn: White yarn is used for the bubble stitches, adding to the detailing for certain parts such as the horns.
How To Crochet Amigurumi Triceratops Plushy
Materials:
- 5 mm crochet hook
- Scissors
- Yarn needle
- 12 mm safety eyes
- Light pink yarn (primary color)
- Darker pink yarn (for the frill)
- White yarn
- Stuffing

Abbreviations:
- MR: Magic Ring
- sc: single crochet
- inc: increase (2 sc in one stitch)
- dec: decrease
- st: stitch
- sl st: slip stitch
Instructions:
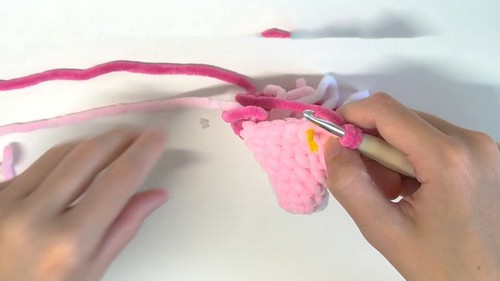
Head
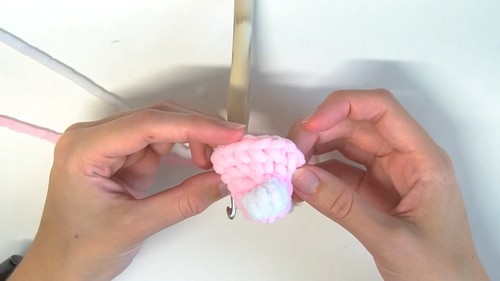
- Magic Ring Creation:
- Start with a slip knot, chain 2.
- Work 6 sc into the first chain (acts as the MR).
- Round 1:
- Sc in first st, inc in next st (2 sc in one stitch).
- Repeat this until end: sc, inc, sc, inc, sc, inc (9 stitches).
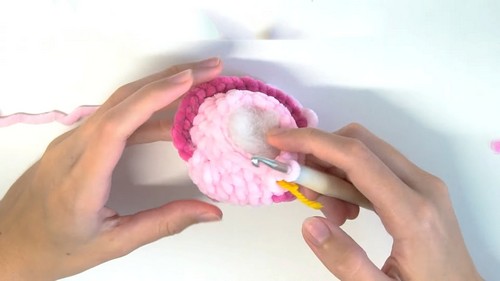
- Round 2:
- Sc in first st, inc in next st, switch to white yarn and create a bobble stitch:
- Yarn over, insert hook into the next st, yo and pull through (3 loops on hook).
- Yo, pull through 2 loops (2 loops on hook).
- Yo, insert hook into the same st, yo and pull through (4 loops on hook).
- Yo, pull through 2 loops (3 loops on hook).
- Repeat one more time until you have 5 loops on hook.
- Switch to pink yarn and pull through all loops on hook to finish bobble stitch.
- Continue ‘sc, inc, sc, inc’ pattern around (9 stitches in total).
- Sc in first st, inc in next st, switch to white yarn and create a bobble stitch:
- Round 3:
- Sc around (9 sc).
- Round 4:
- sc, sc, sc, inc, inc, inc, sc, sc, sc (12 stitches).
- Round 5:
- sc, sc, inc x4 (16 stitches).
- Round 6 (horns):
- sc, sc, inc, repeat pattern making sure to add bobbles and color changes for the horns. Switch colors as instructed in the script above.
- Eyes Placement:
- Insert safety eyes between rounds 5 and 6 on either side.
- Round 7:
- 6 sc, inc x3 (24 stitches).
Frill
- Round 8:
- 5 sc in lighter color, switch to darker color.
- sc into front loops only for next 16 stitches (8 incs in pattern).
- Switch back to lighter color, finish round with 3 sc.
- Round 9:
- Switch between front and back loops of previous round lighter and darker colors respectively.
- sc, dec around (now 16 stitches).
Body
- Round 10:
- 2 sc, dec x4 (12 stitches).
- Round 11:
- sc, inc x6 (18 stitches).
- Legs:
- Create bobble stitches for legs at appropriate positions.
- Rounds 12-15:
- Sc around (18 stitches).
- Round 16:
- sc, dec around and stuff the body and head. (To 12 stitches).
Tail
- Rounds 17-20:
- Follow a pattern for decreasing the stitches:
- sc, dec x6 (8 stitches).
- sc around (8 stitches).
- 2 sc, dec x2 (6 stitches).
- sc around (6 stitches).
- Finish, stuff and close off with yarn needle.
- Follow a pattern for decreasing the stitches:
Assembly:
- Add any required stuffing.
- Sew the end of the tail closed.
Finishing Touch:
- Weave in any loose ends and cut off the excess yarn.
- Adjust and arrange the bobble stitches, frill, and horns properly.