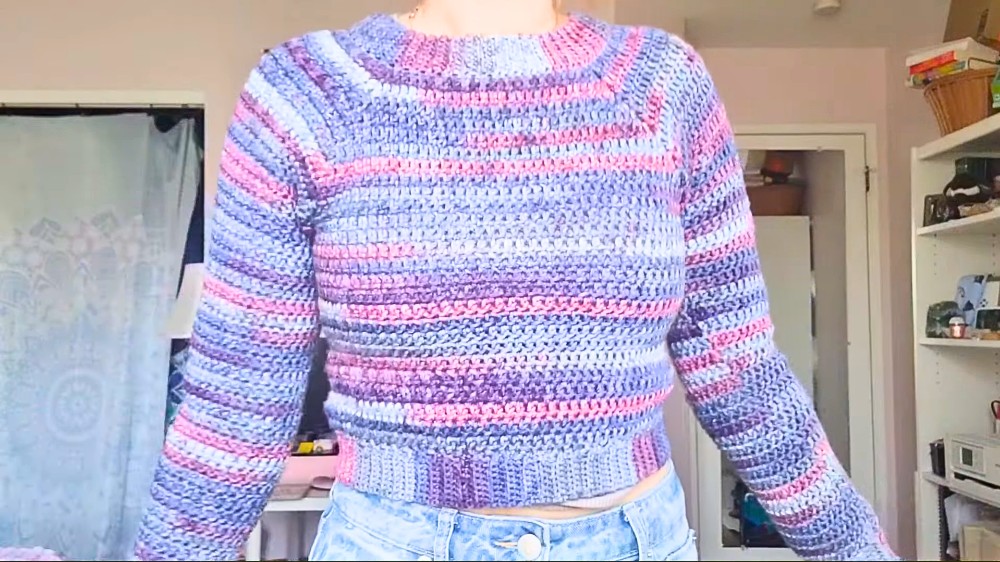
Cozy Crochet Raglan Sweater for Winter Fashion
Step into cozy elegance with the Crochet Raglan Sweater Pattern, blending effortless comfort and stylish charm for every season.
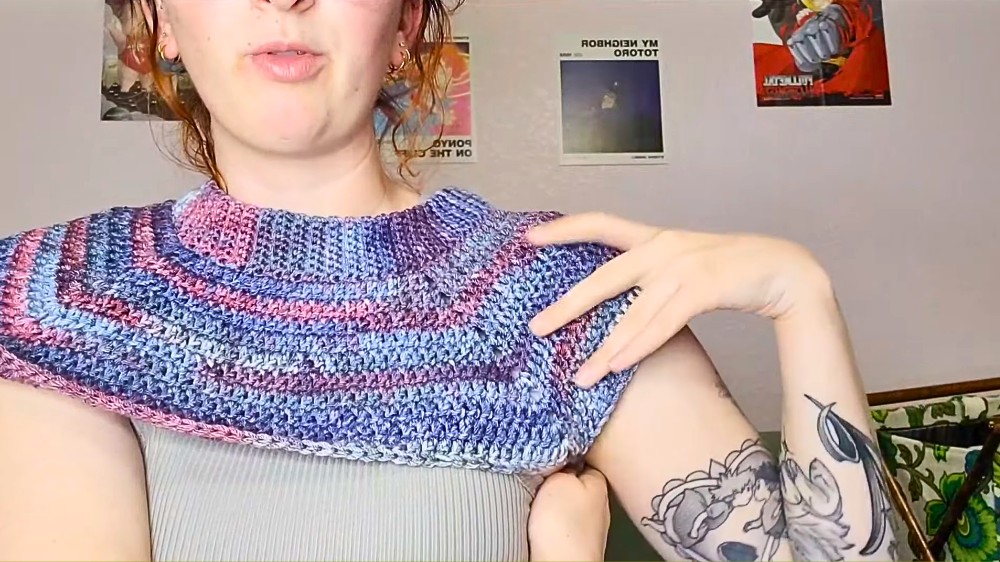
Wardrobes often tell stories of comfort, warmth, and timeless elegance, and few garments embody this better than a sweater that balances simplicity with refinement. The Crochet Raglan Sweater Pattern captures that harmony, offering a garment that is both practical and graceful. With its seamless structure flowing from neckline to cuffs, it ensures a natural fit that flatters the body while allowing ease of movement, making it ideal for everyday wear.
Charming Crochet Raglan Sweater for Relaxed Days
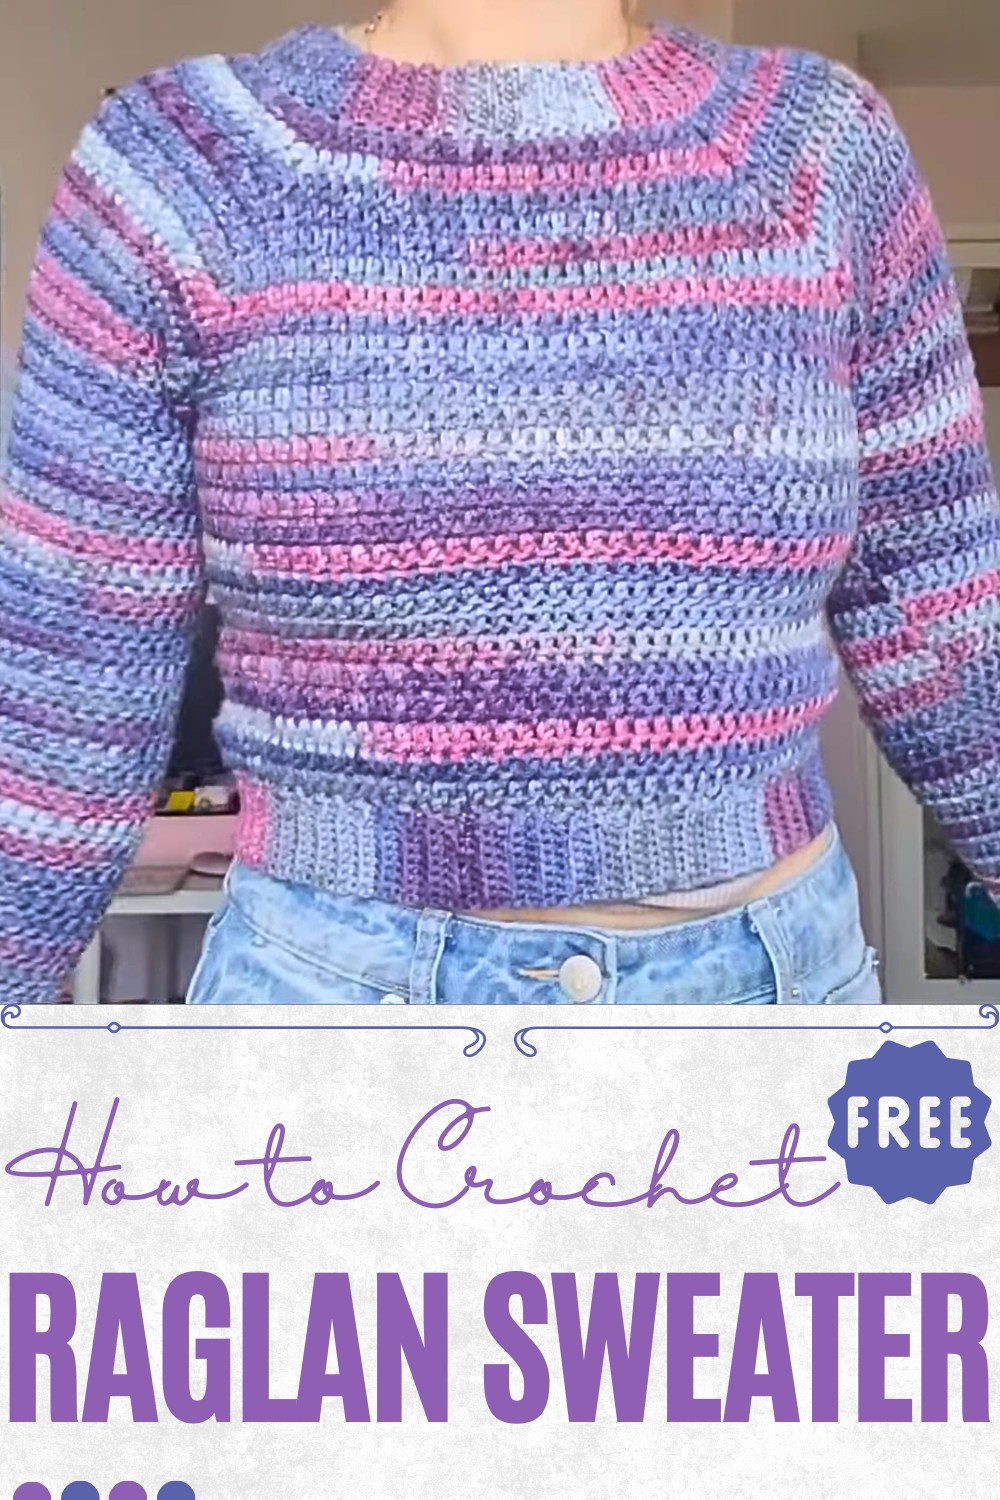
Its versatility is one of its most remarkable features. Lightweight yet cozy, it can be layered over shirts during brisk mornings or worn on its own during cooler evenings, adapting effortlessly to the seasons. The raglan style provides a subtle modern touch while retaining a classic charm, ensuring it pairs beautifully with jeans, skirts, or even more polished attire.
The Crochet Raglan Sweater Pattern is more than clothing—it’s an expression of comfort shaped into a refined silhouette. Each stitch adds texture and strength, making the sweater durable while maintaining a soft drape against the skin. With its balance of elegance and practicality, it becomes a staple piece that not only enhances personal style but also brings a sense of ease and warmth to everyday life.
Materials Needed
- Yarn: 100% acrylic yarn (3 skeins were used for the sample sweater; adjust based on desired size)
- Hooks: G-size hook for ribbed sections; I-size hook for the sweater body and sleeves
- Additional Tools: Scissors, 4 stitch markers, and a sewing needle
Special Features
- No Sewing: As a top-down sweater, it eliminates the need to sew panels or attach sleeves.
- Customizable Fit: The ribbed collar length and overall sweater size are easily adjustable.
- Versatility: Perfect for casual wear and adaptable for various seasons with yarn choices.
- Professional Finish: Ribbed cuffs, hemline, and collar add a textured and polished look.
Level of Difficulty
Beginner-Friendly to Intermediate:
- Basic stitches include single crochet (SC) and double crochet (DC), making it accessible to beginners familiar with these stitches.
- The pattern introduces shaping through stitch increases and decreases, suitable for crocheters looking for a slightly challenging yet manageable project.
Tutor’s Suggestions and Tips
- Ensure your ribbed collar count is a multiple of 4 to divide the sweater into equal sections (front, back, and sleeves).
- Use a smaller hook for the ribbed parts to create a tighter, more structured texture.
- Always check that the collar fits around your head comfortably before proceeding to the main body.
- Maintain even tension when working on the increasing rows for a smooth and symmetrical sweater shape.
Step-by-Step Details
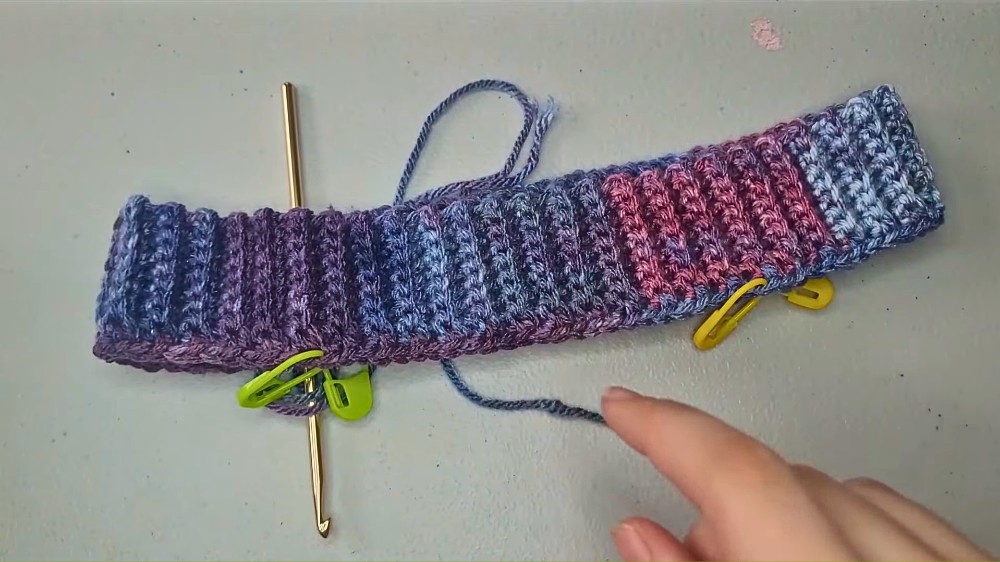
Step 1: Ribbed Collar
- Begin with a slip knot and chain 9 using the G-size hook.
- Work a single crochet (SC) into the 2nd chain from the hook and continue to SC across for 7 stitches.

- Chain 1, turn, and work single crochets in the back loops only for the next row.
- Repeat this process until you achieve the desired length for the neckline (100 rows in the example). Ensure the length fits around your neck and head.
- Join the ends of the collar by matching them up (make sure it’s not twisted). Slip stitch through the back loops of each row to create a seamless join.
Step 2: Divide the Collar into Four Sections
- Flip the collar so that the seam faces away from you.
- Work single crochets evenly around the edge of the collar using the G-hook (100 SCs were used in the example).
- Divide the work into four equal sections using stitch markers. For 100 stitches, each section will have 25 stitches (front, back, and sleeves).
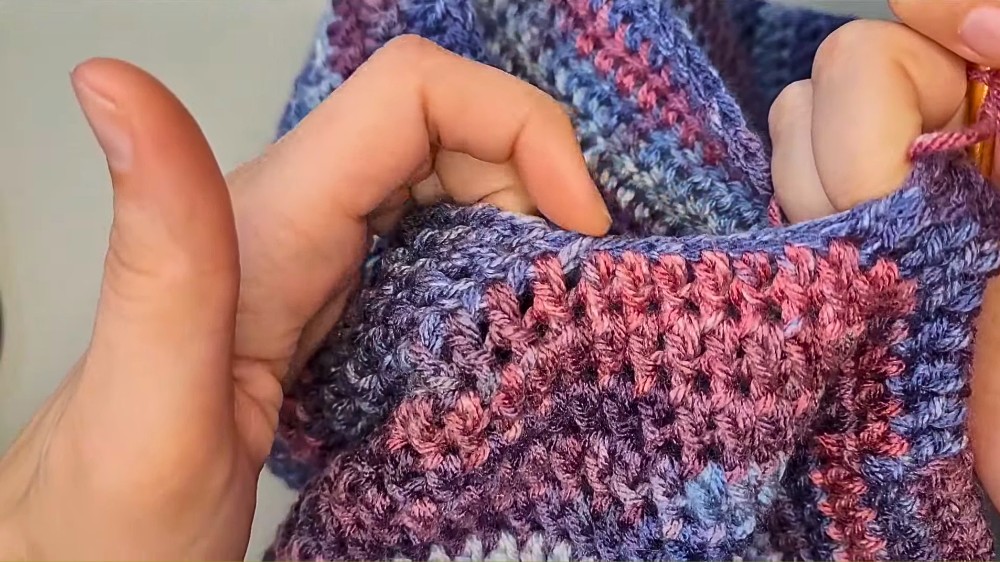
Step 3: Start the Body and Sleeves with Double Crochet
- Switch to the I-size hook and begin working double crochets (DC) around the collar.
- Every time you reach a stitch marker at the section divisions, perform an increase: double crochet, chain 2, and another double crochet into the same marked stitch.
- Continue working in rounds, joining with a slip stitch, and chaining 3 to start each new round.
- For subsequent increasing rows, place increases in the chain spaces from the previous round, but don’t skip the stitch immediately after the chain space to maintain stitch count.
Step 4: Shaping the Body
- Continue increasing at the four section divisions until the work reaches your chest or underarm area.
- Stop increasing once the yoke reaches the desired size, and prepare to divide the work for armholes.
Step 5: Create Armholes
- Crochet double crochets to the first stitch marker for the sleeve. Place a double crochet into the chain space, chain 5–10 (depending on sleeve width preference), and skip to the next marked section.
- Continue double crocheting around, working the same steps for the second armhole.
- Slip stitch to join the round, and proceed with the body section.
Step 6: Complete the Body
- Continue working in rounds of double crochet for the body until you achieve the desired length.
- Add the hemline using the G-hook. Use slip stitches to attach and alternate between regular stitches and decreases for a fitted or flared look.
Step 7: Create the Sleeves
- Reattach the yarn at the underarm and work double crochets around the sleeve opening.
- Use decreases on the underarm side for shaping, tapering the sleeve gradually to the wrist.
- When the desired sleeve length is achieved, finish with a ribbed cuff using the same technique as the collar.
Finishing Touches
- Weave in all the loose ends with a darning needle for a clean finish.
- Ensure the sweater fits well and has an even, polished appearance.
Uses of the Crochet Ryon Sweater
- Everyday Wear: Lightweight and breathable enough for casual winter or fall use.
- Layering: Great for adding an extra layer of warmth without bulky seams.
- Personalized Gift: Makes a thoughtful and functional handmade gift for friends or family with customizable sizing.
Helpful Tip
For a more fitted look, use fewer chains when creating the armholes; if you prefer a looser or balloon sleeve look, add more chains to the armholes and then decrease gradually as you move down to the cuff.
Conclusion
The Crochet Ryon Sweater is a seamless, stylish project that combines simplicity with functionality. Its unique top-down construction eliminates the need for sewing, making it a faster and more beginner-friendly alternative to traditional sweater patterns. With its customizable fit, polished ribbed details, and versatility, this project is perfect for anyone looking to build a personalized piece of cozy wear.Whether you’re crocheting for yourself or as a gift, this seamless sweater is sure to impress.