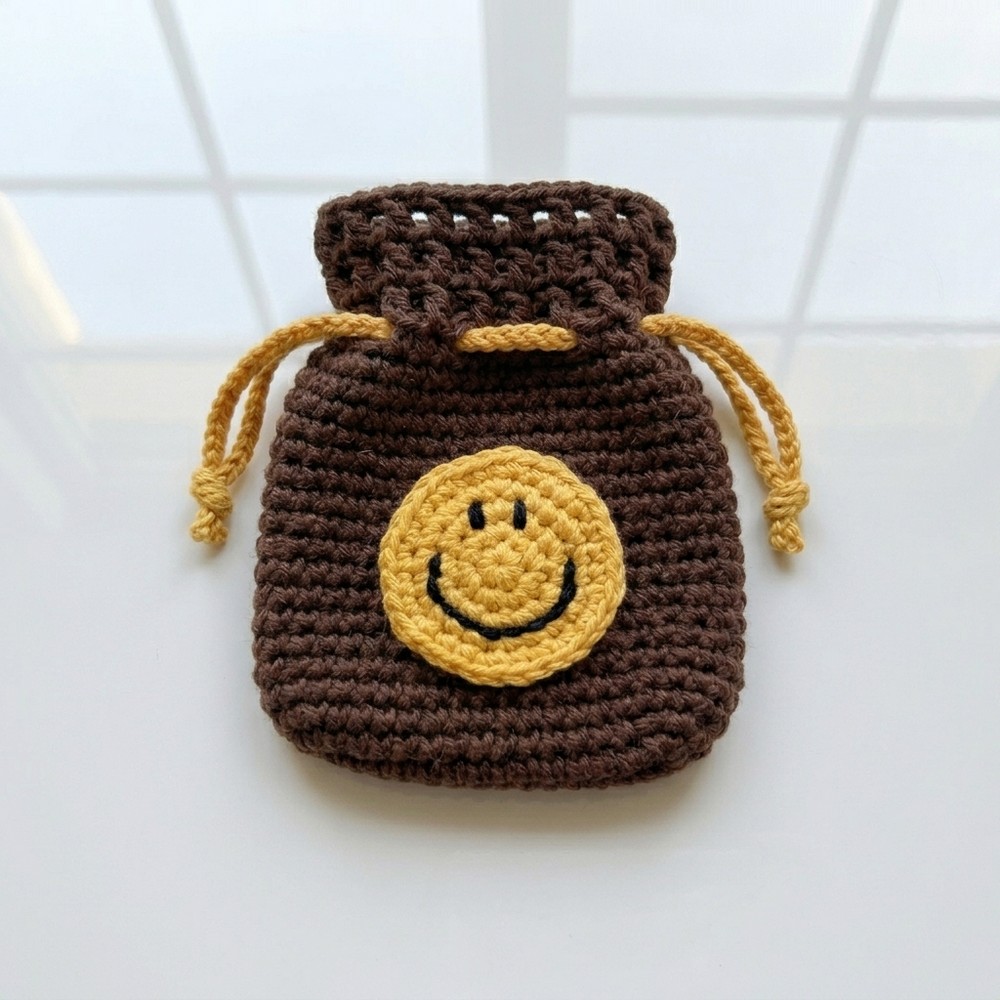
Crochet Smile Pouch Free Pattern for Little Treasures

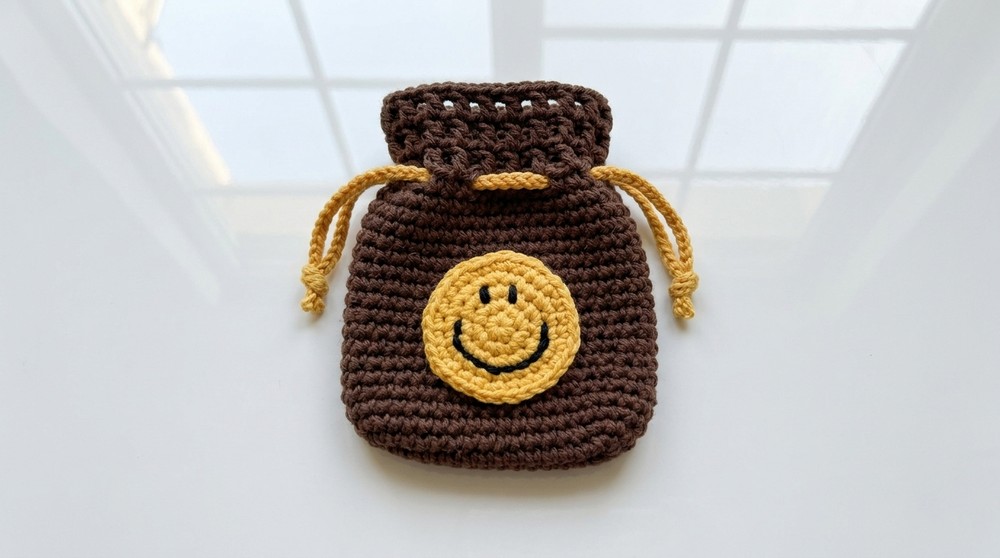
Brighten your day with crochet smile pouch pattern which is for keeping small items safe while adding cheerful touch to your routine.
Think of a small pouch that makes you happy every time you see it. Bright colors and a big smile are on the front and it feels soft in your hands. This little bag is perfect for holding your coins pencils or small treasures you want to keep safe. When you follow the crochet smile pouch pattern you make something that makes people smile with you. You can bring this pouch to school on a trip or even keep it by your bed.
Happy Crochet Smile Pouch Pattern to Gift Loved Ones
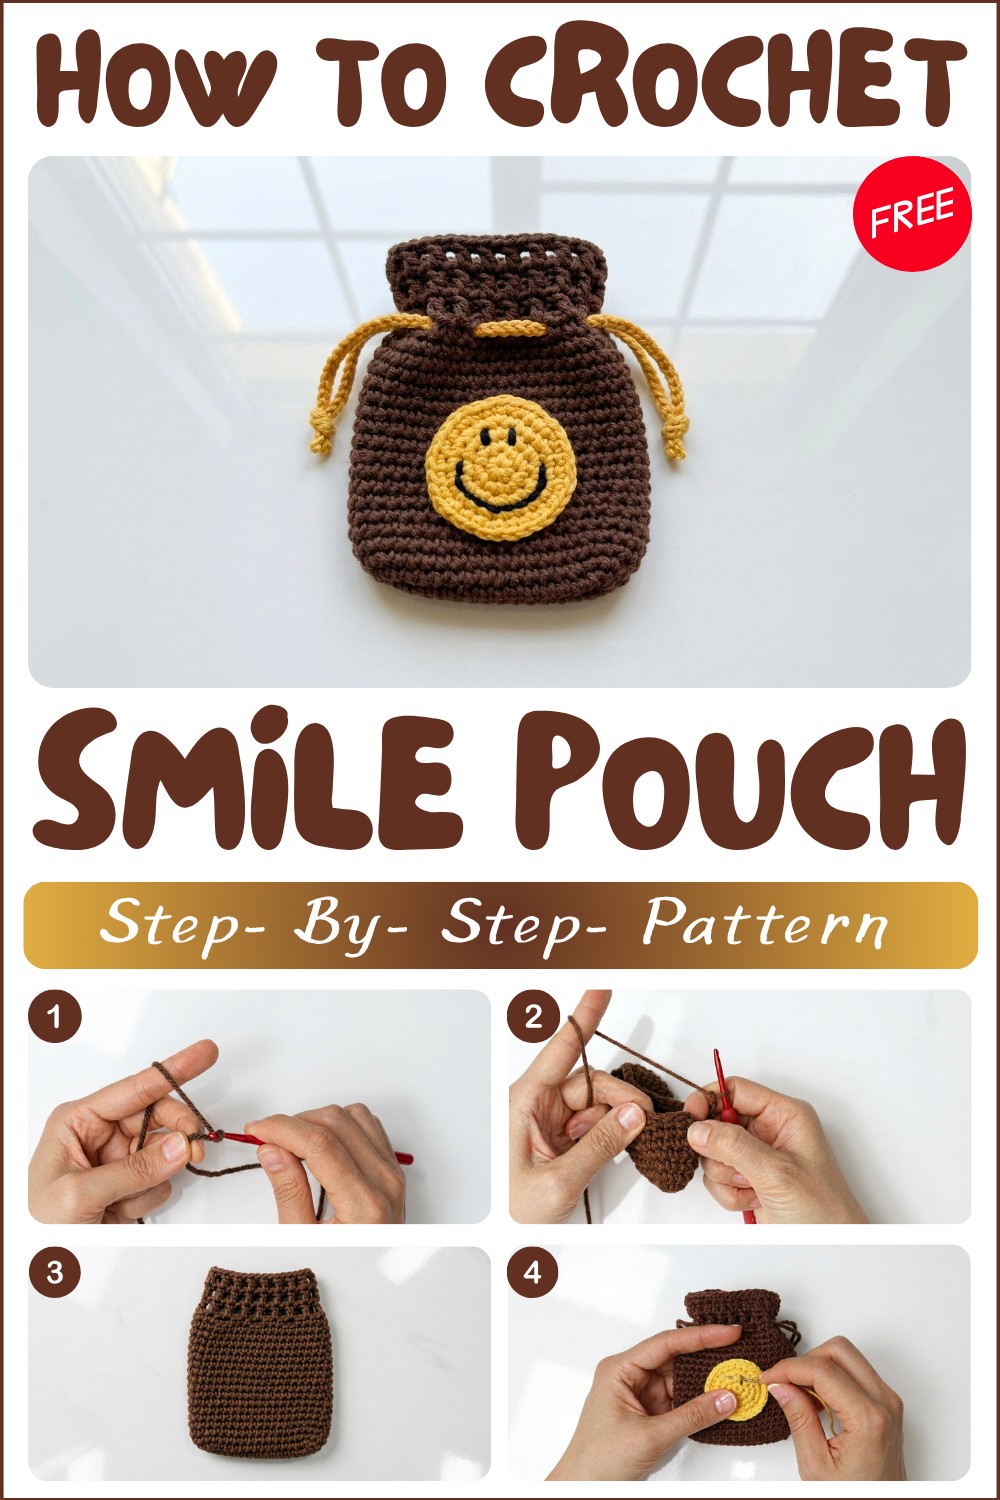
It opens and closes easily so you can find your things fast and never lose them. The pouch is light so kids and grown-ups like to carry it everywhere. Giving one as a gift is special because you show someone you care. Making this pouch is easy fun and it adds happiness to every day. The bright look and happy face mean your things are always in a cheerful place.
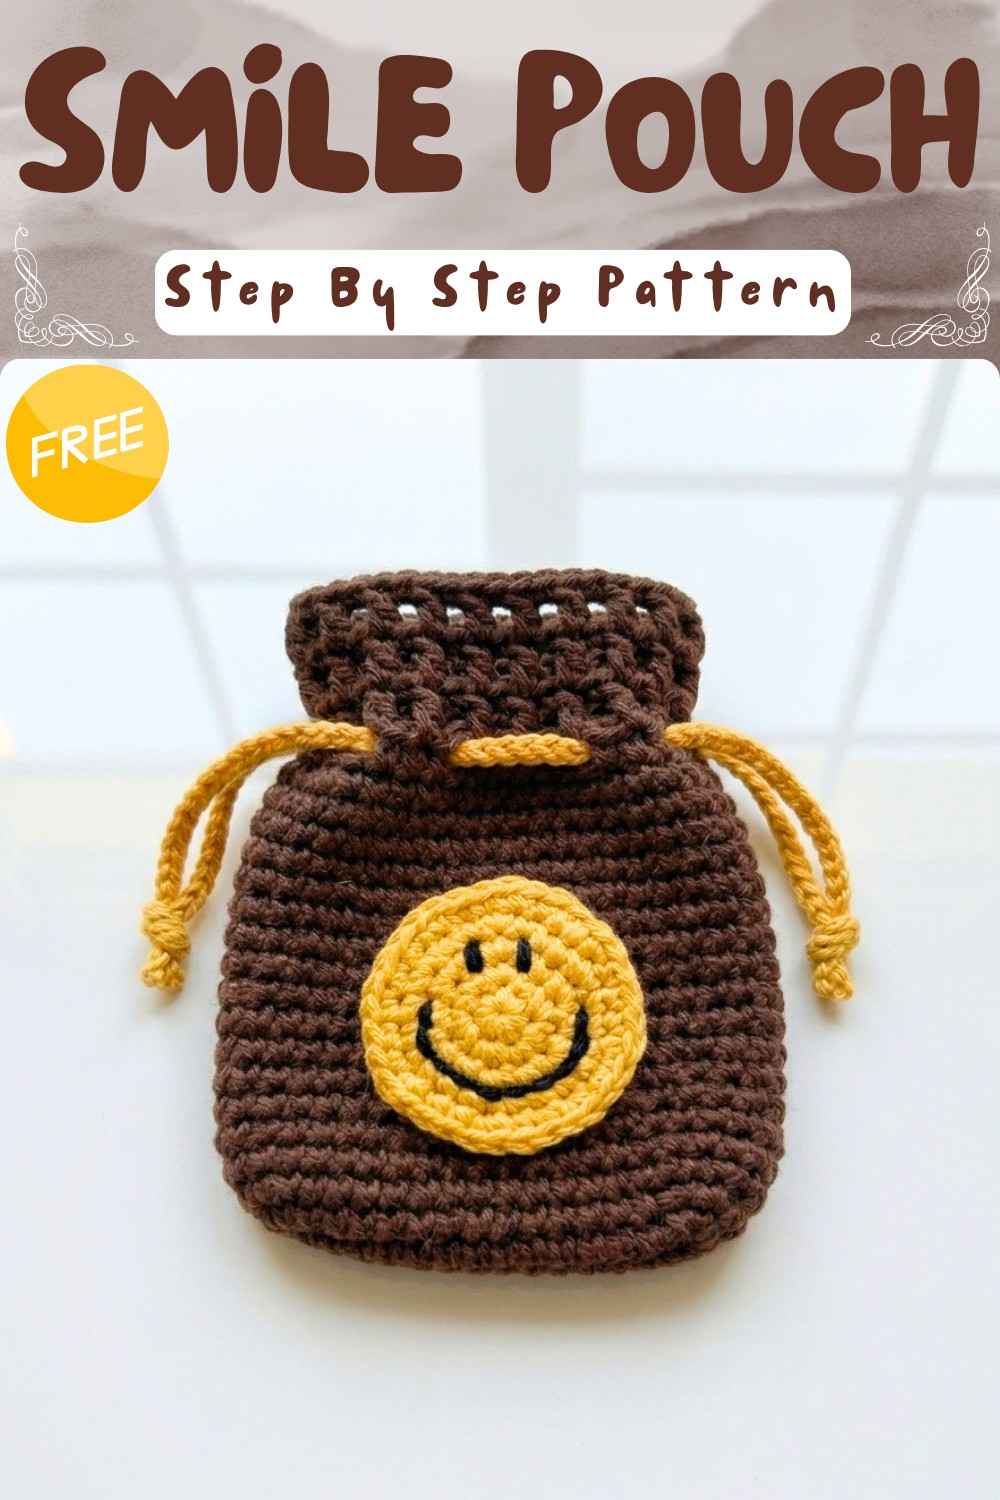
Mini Net Drawstring Pouch
Pattern Notes
- The pouch is worked from the bottom up in one piece.
- Single crochet is used for the sturdy base and sides; upper section features a net (mesh) pattern.
- The drawstring closure is added through specially created holes near the top.
- Pouch is finished with optional smiley face patch and embroidery.
- Make sure to count stitches accurately to maintain symmetry.
- You can adjust yarn and hook size for different pouch sizes as desired.
This pattern guides you to crochet a charming mini net pouch for storing earphones, AirPods, or accessories. Begin with a sturdy single crochet base, work up the sides, then transition to a decorative mesh for breathability. The easy drawstring closure keeps contents secure. Enhance your pouch with a cheerful patch and simple embroidery for a personalized touch! A versatile, giftable project full of small but satisfying techniques.
Skill Level
Adventurous Beginner / Intermediate
Familiarity with magic ring, single crochet, increasing, working in the round, chain spaces, and basic assembly.
Measurements / Sizing
- Finished Size:
Approx. 6–7 cm wide × 7–8 cm tall (excluding drawstring)
(Size may vary by yarn/hook; make the chain and base slightly larger for iPad or smaller as desired.) - Base: 14 chains × 2 rounds as foundation.
- Sides: 18 or more rounds single crochet, then 4 rounds of mesh pattern.
Materials
- Fingering/sport-weight cotton yarn (main color; e.g., Walnut)
- Patch accent color (e.g., yellow)
- Embroidery thread or scrap yarn (e.g., black, for eyes/smile)
- Crochet hook 2.5–3 mm (or suitable for your yarn)
- Tapestry needle
- Scissors
- Stitch marker (recommended)
- Optional: Thicker yarn for demonstration/sample; slightly larger hook for easier visibility
Gauge (and Stitch Pattern)
- Gauge is not critical for this pouch.
- Base: Rows of sc, fabric should not be too loose (dense enough to support small accessories).
- Mesh Pattern:
- Alternating double crochet and chain spaces.
Stitch Abbreviations
| Abbreviation | Meaning |
|---|---|
| ch | chain |
| sc | single crochet |
| dc | double crochet |
| sl st | slip stitch |
| rep | repeat |
| st(s) | stitch(es) |
Special Stitches
- Increase (inc): Two single crochets in the same stitch.
- Mesh (Net) Pattern: [dc, ch 1] repeat, working dc in chain spaces as described.
- Bead Stitch (for Patch): Five incomplete double crochets worked into the same space and finished together.
- Magic Ring: Forms a closed round base for the patch.
The Crochet Pattern
1. Base & Foundation
- Ch 14.
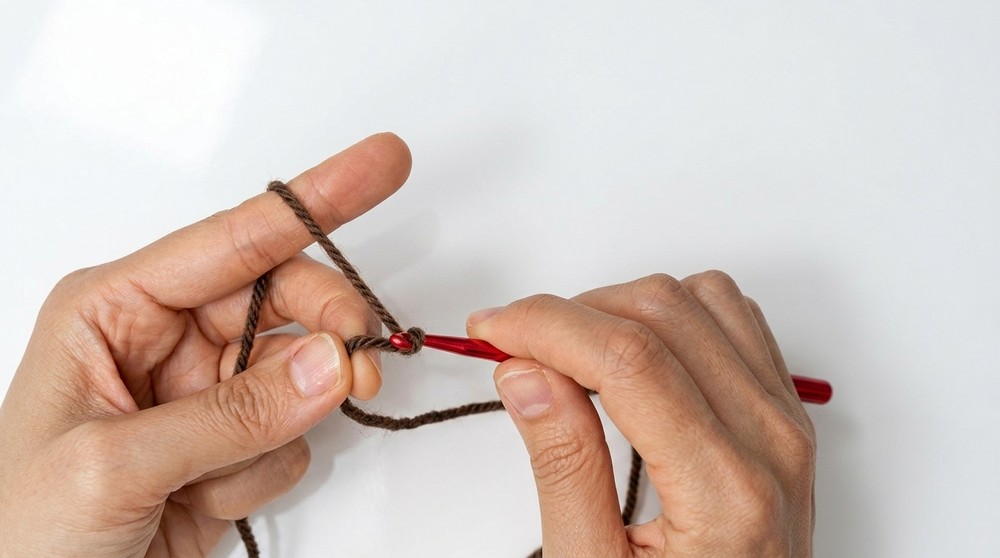
- Row 1 (Base):
- Starting in 2nd ch from hook, sc 1 in each (13 sc).
- In last ch, work 3 sc (to turn the corner).
- Rotate work, sc 12 along the bottom chain loops.
- In final stitch, work 2 sc (total 4 sc in last ch).
- You now have an oval.
- Join with sl st to first sc.
- Row 2 (Base increases):
- Ch 1, sc in same st.
- [Inc in next st] x2 (both corners).
- Sc in next 12 sts.
- [Inc in next st] x4 (other end; all in the same stitch).
- Sc in next 12 sts.
- [Inc in last st] x2 (on the turn).
- Join with sl st (should have 32 sts; double-check).
- Row 3:
- Optional for deeper base:
- Ch 1, sc in same st.
- [Inc in next st] x2 (each corner).
- Sc in each to next turn.
- [Inc in next st] x4 (other end).
- Sc in each to end.
- Join.
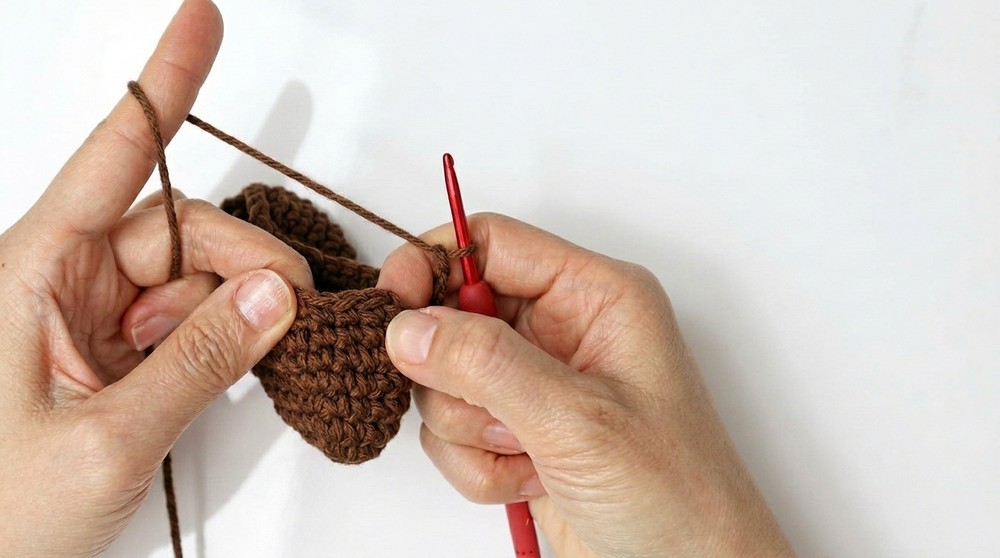
- (You may now have ~40 sts; adjust for your pouch size.)
- Optional for deeper base:
2. Sides (Single Crochet Body)
- Place a marker at the first st for the start of the round.
- Rounds 4–21 (or until pouch is tall enough):
- Ch 1, sc in each st around.
- Join with sl st at the end of each round.
- Work 18 rounds for standard AirPods size.
- Tip: If not increasing, your work will naturally form walls and cup upward.
3. Mesh/Net Section + Drawstring Eyelets
- Eyelet Round (drawstring row):
- Ch 1, sc in next 3 sts, ch 2, skip 2 sts, repeat from * to * around (should get 8 eyelets; adjust to fit total sts).
- Join with sl st.
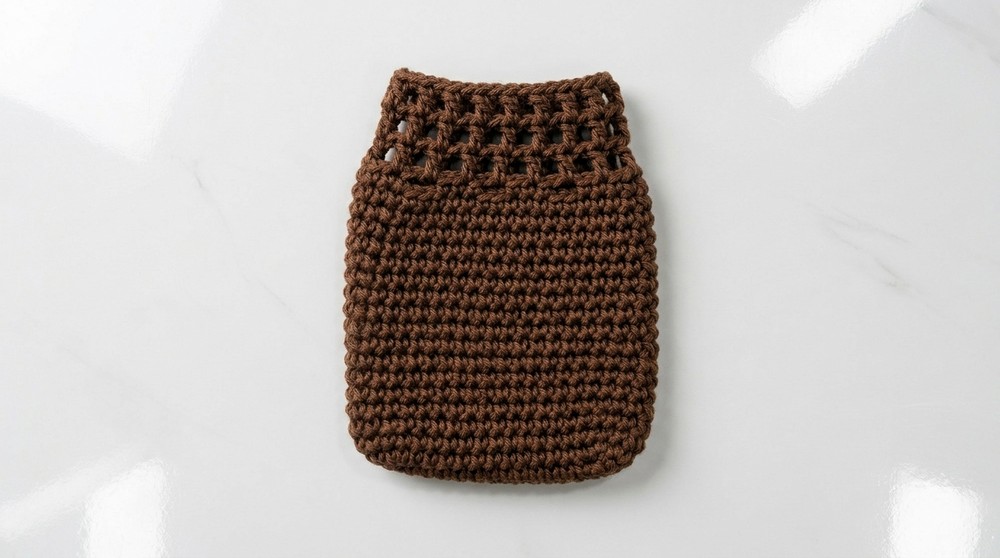
- Mesh/Net Pattern (Rows 2–4 of mesh):
- Ch 4 (counts as dc + ch 1); place marker if needed.
- Dc in next st, ch 1, repeat around; dc into the center st of each 3-sc group, ch-1 in each space.
- Join at top of ch-3 with sl st.
- Rep this round for 2–3 more rounds (total 3–4 rounds of mesh).
4. Finishing Top Edge
- After last mesh round, fasten off.
- With yarn needle, weave in ends neatly on inside.
5. Drawstring Cord
- Make 2 cords:
- With main or contrast color, ch 25–30 (or to your preferred length).
- Fasten off, thread tail through last loop.
- Use tapestry needle to weave one cord in and out of the eyelets, starting from one side, all the way around, exiting on the other side.
- Repeat with the second cord, starting from the opposite side, so both ends can pull against one another for easy closure. Tie knots at tips if desired.
6. Patch (Smiley or Decorative Circle, Optional)
- Make a magic ring.
- Rnd 1: Work 6 sc into ring, pull tight to close.
- Rnd 2: [Inc] in each st around (12 sc).
- Rnd 3: [Sc in next st, inc in next st] around (18 sc).
- Rnd 4: [Sc in next 2 sts, inc in next st] around (24 sc).
- Rnd 5: Work even or add another increase round as needed. Fasten off.
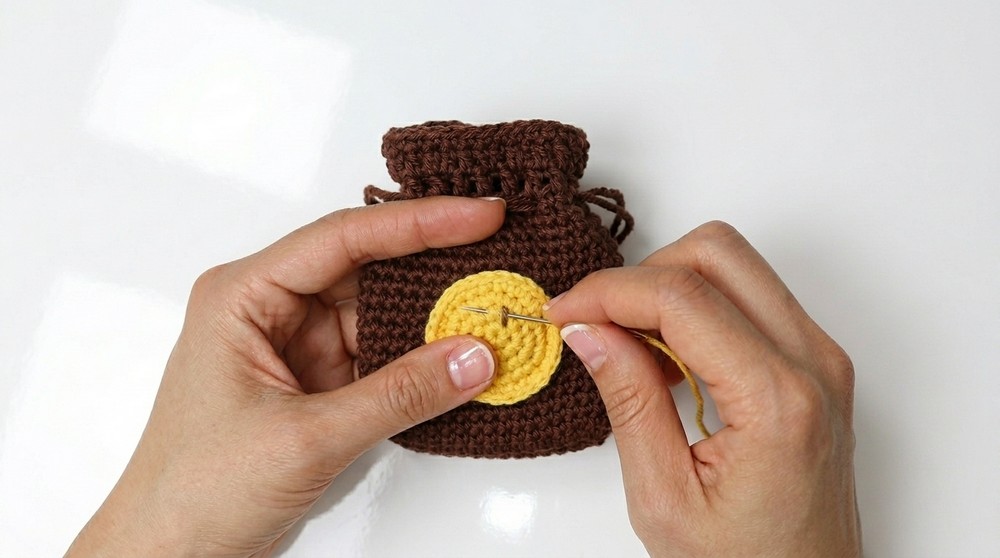
- With contrast yarn, stitch patch onto center of pouch using whipstitch through both layers for a secure, invisible finish.
7. Bell or Bobble Ties (Optional)
- At each drawstring end, use yarn to make a ‘bell’:
- Ch 3, work 5 incomplete dc in the same st, yarn over, pull through all loops, ch 1 to close the bobble.
- Repeat for both ends. Weave in the tail securely.
8. Face Embroidery (Optional Smiley)
- With black (or chosen color) thread, use embroidery needle to add facial features on patch:
- For eyes, make two small straight lines or French knots spaced evenly.
- For mouth, use split or backstitch to curve a smile beneath the eyes.
- Secure and weave in ends on inside, shaping as you go so not to pucker the fabric.
Assembly & Finished Size
- Work is seamless; base and body are in one piece.
- Sew patch securely at center front before inserting accessories.
- Insert drawstring cords at eyelet row and attach bells or knots on ends.
- Add optional embroidery before closing cords.
- Gently block for neatness if desired.