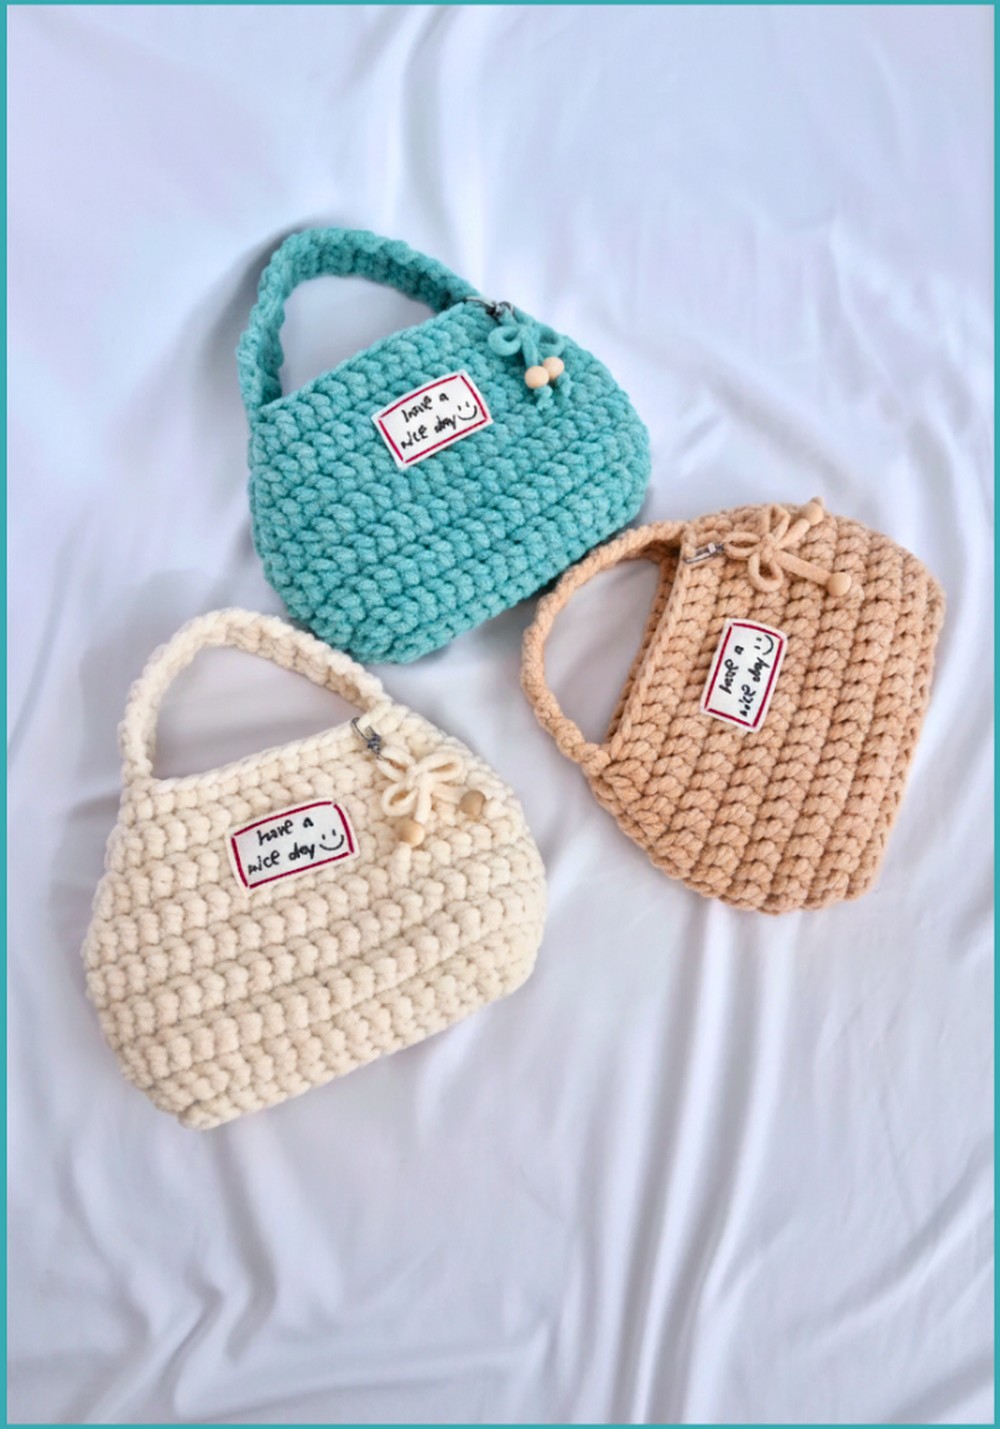
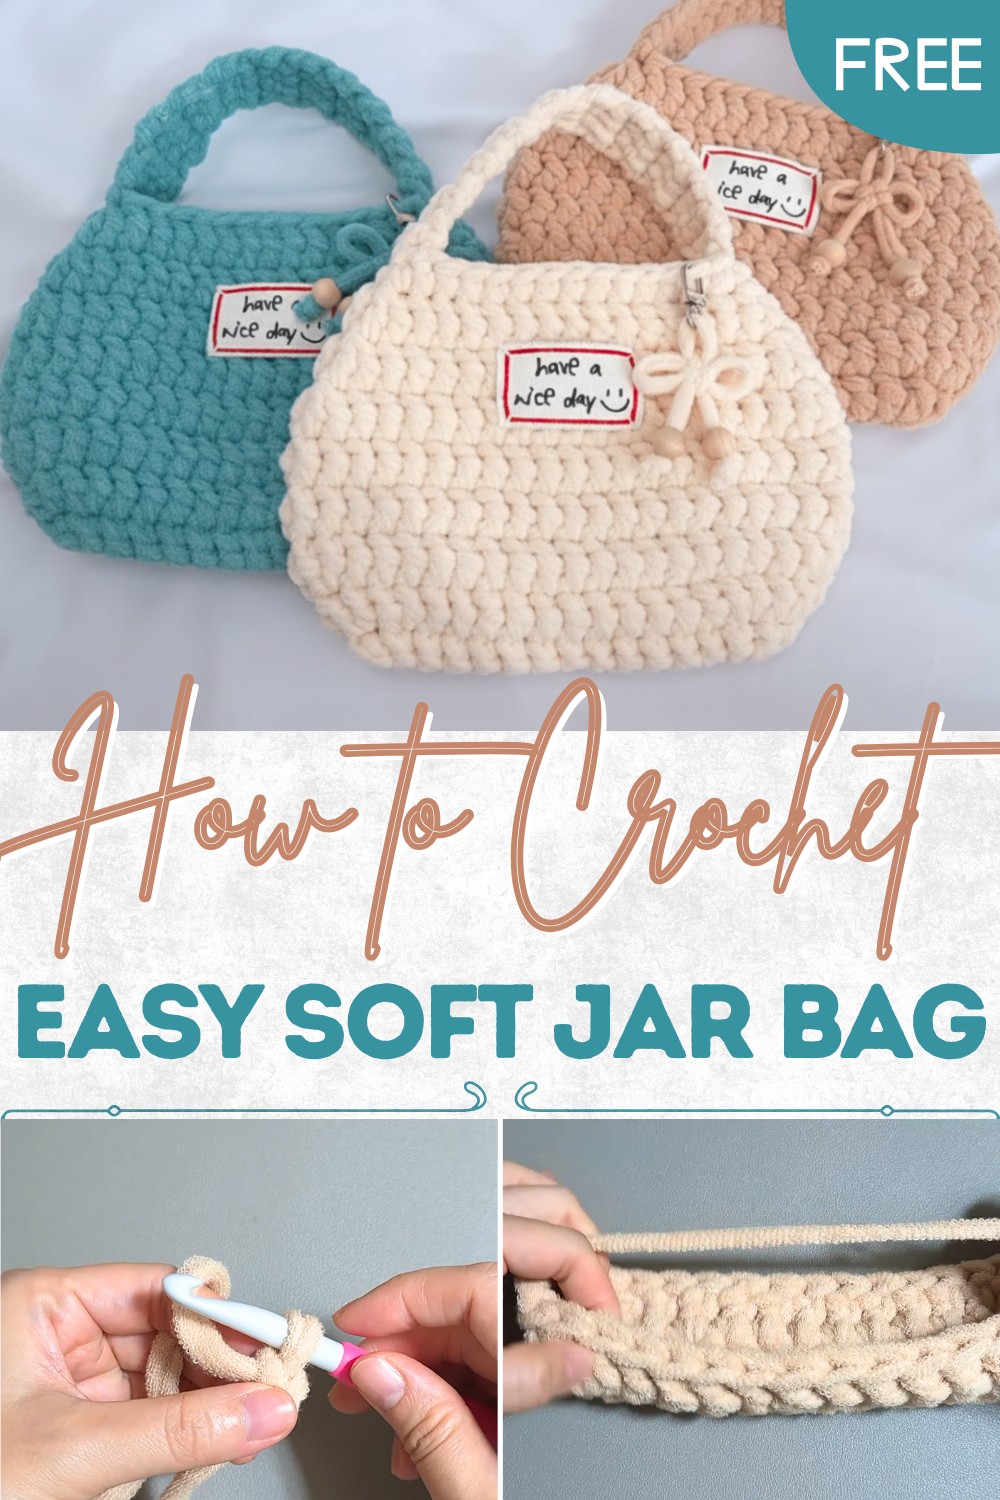
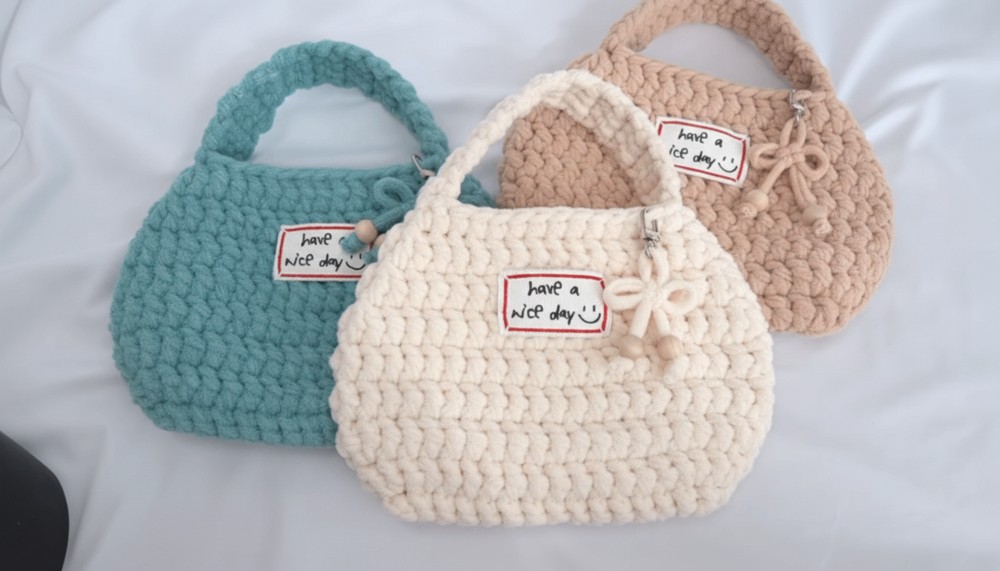
Unique Crochet Jar Bag Pattern to Wow Your Friends
Carry your essentials in style with an easy crochet jar bag pattern that offers a fun way to hold treats coins or surprises for any occasion.
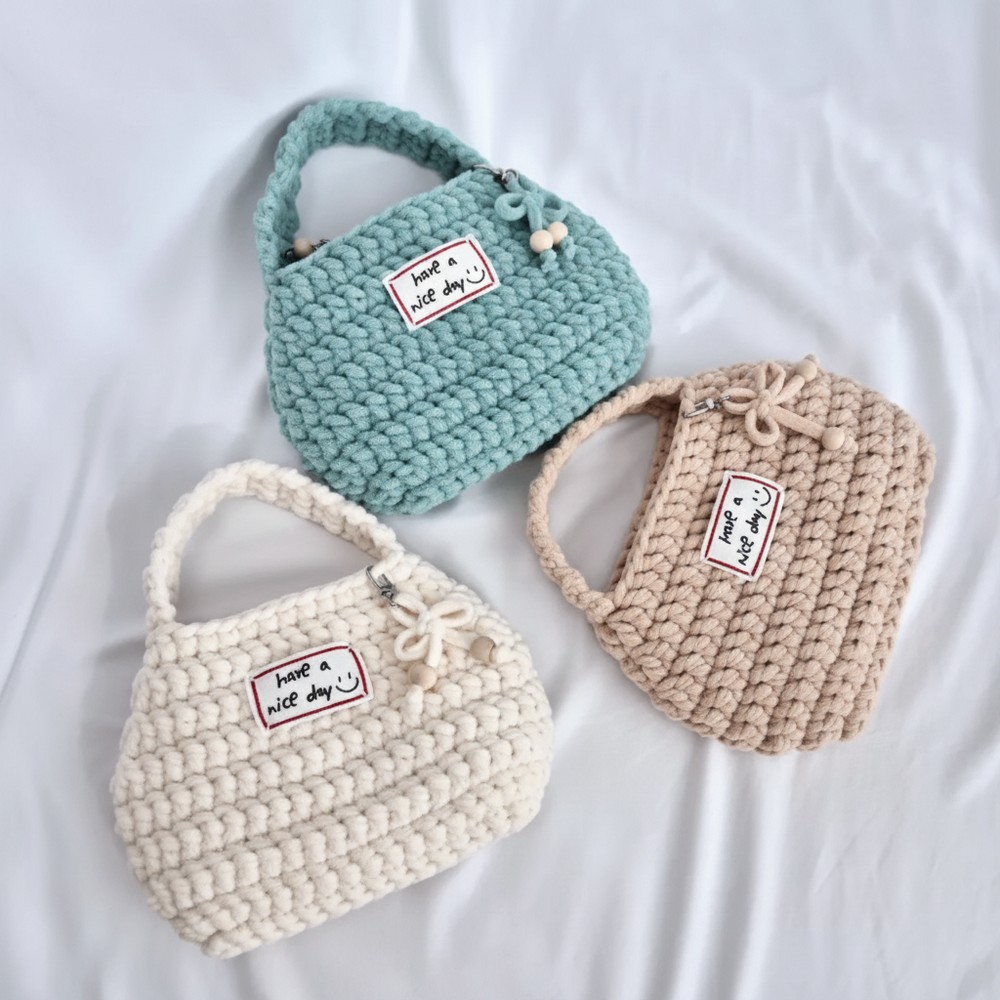
Soft round sides and a gentle curve make this bag look just like a tiny jar you’d see on a cozy kitchen shelf. The crochet jar bag pattern is perfect for carrying small things like coins, snacks, or a special toy, adding a cute touch to any outfit. Many people enjoy using this bag for quick trips, a child’s playdate, or even as a unique gift pouch. Its sweet shape and bright colors help it stand out and match with anything you wear.
Fun Crochet Jar Bag Pattern for Magical Moments
Anyone can feel happy carrying something that is both useful and pretty. The simple steps make it easy for anyone to make one, and its strong shape keeps your treasures safe. Use it as a small purse, a holder for important little things, or a lovely surprise for someone special. This charming bag brings a pop of happiness to everyday life and every adventure.
Materials
- Yarn: 1 ball Sebi “Bodul Yang” or similar bulky, lightly elastic yarn (Ivory, Latte, Green are suggested shades)
- Hook: 8.0 mm crochet hook (not US size 8, but 8.0 mm; size up/down if you crochet tightly/loosely)
- Tapestry Needle: For seaming, weaving ends, and attaching label/wappen
- Stitch Markers: Helpful for marking the beginning and key positions
- Scissors
- Optional: Patch (wappen), magnetic button, split ring and beads for keychain
Key Abbreviations (US Terms)
| Abbreviation | Meaning |
|---|---|
| ch | chain |
| sc | single crochet |
| dc | double crochet |
| st(s) | stitch(es) |
| rep | repeat |
| dec | decrease (see Special Notes below) |
| inc | increase (2 sts in 1 st) |
| sl st | slip stitch |
Special Notes
- dc is used throughout for quick progress and soft texture.
- Decreases are worked as: Yarn over, insert hook into st, yarn over and pull up loop, yarn over, pull through two loops (leave last loop on hook), repeat into next st, yarn over, pull through all loops—this counts as one dc2tog.
- The bag is worked bottom up in rounds: Start with a small oval, then increase for body, work even, then decrease for narrowing.
- Short rows are used for the sturdy handle/strap.
- This project is suitable for confident beginners.
Pattern
1. Base
- Foundation:
Ch 13.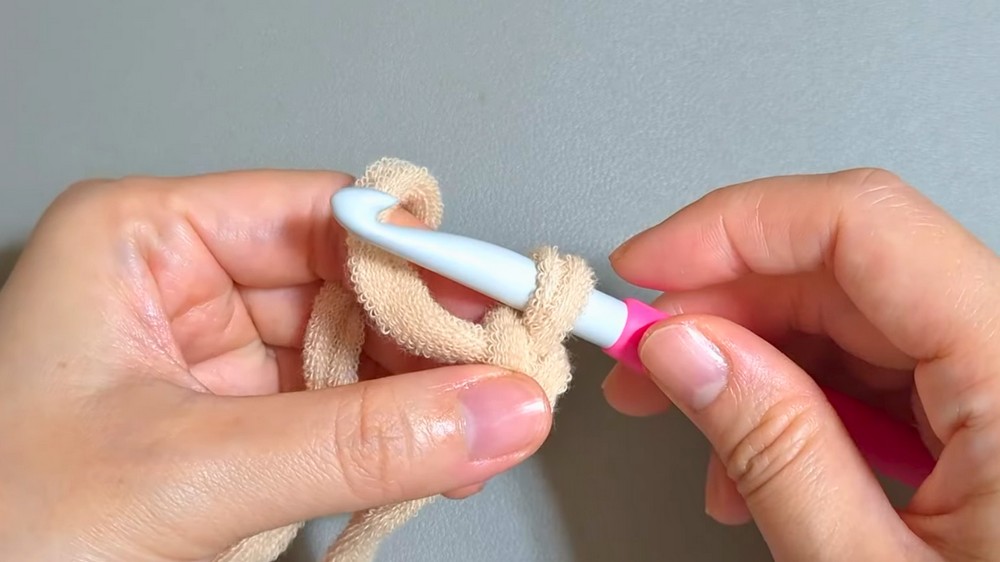
- Round 1:
- Work 1 dc in 4th ch from hook (counts as first dc).
- Dc in next 8 ch.
- In last ch, 5 dc (turning around to begin working along the opposite side of chain).
- Dc in next 8 ch.
- In last ch (same as first dc): 4 dc.
- (Total: 32 dc)
2. Increase Rounds — Rounds 2–3
- Round 2:
- Mark the single middle “nose” (stitch) on each end—this will not be increased.
- In stitches on either side of the marked center st, work 2 dc in each to increase the round at four corner points.
- Work dc evenly in straight sections.
- (Total after this round: 40 dc)
- Round 3:
- As in prior round, on each end, increase (2 dc in same st) in the stitch just before and just after the marked center st.
- Work dc evenly between increases.
- (Total after this round: 44 dc)
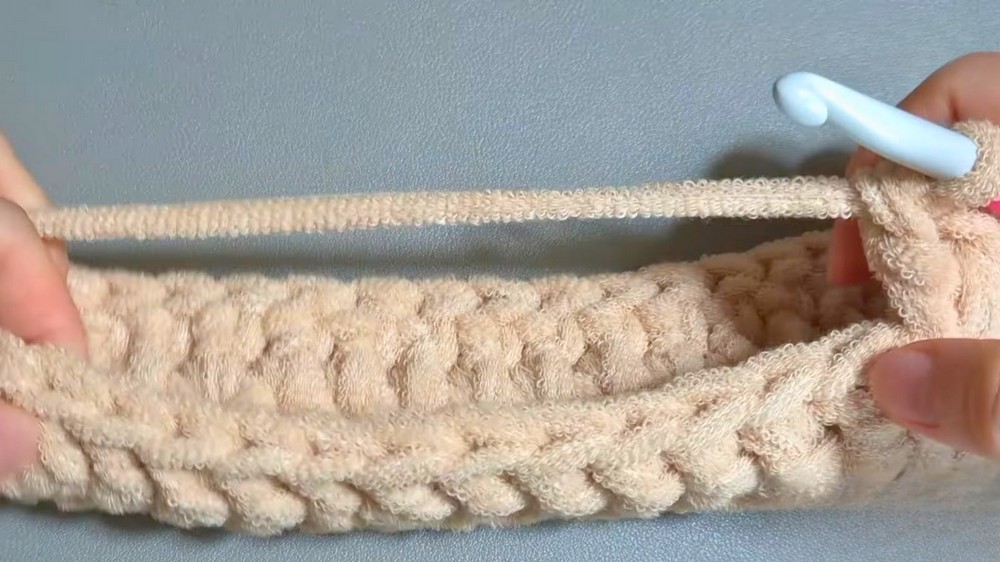
3. Body
- Rounds 4 & 5:
- Dc in each st around (44 dc per round).
- Do not increase. This creates the rounded sides.
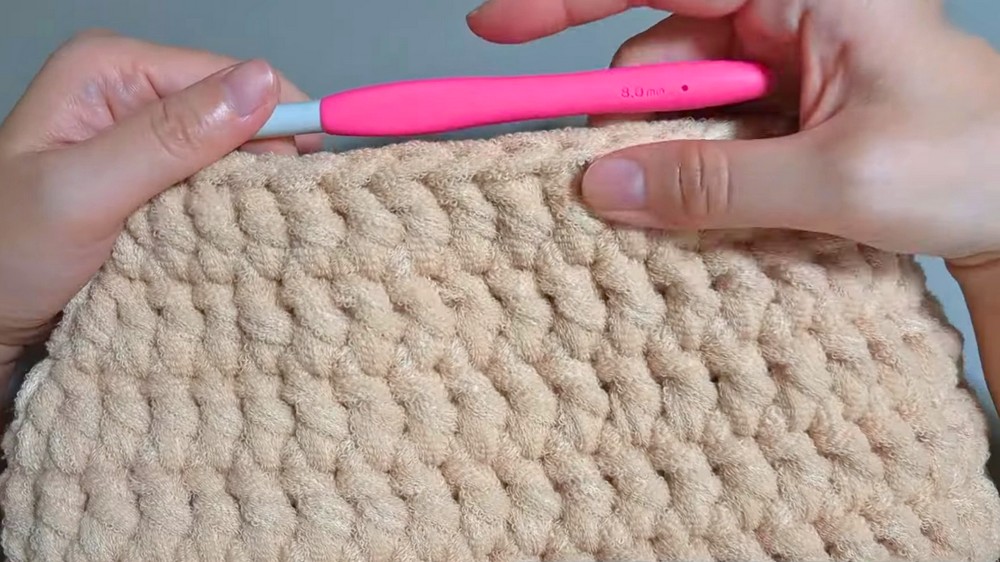
4. Decrease Rounds (shaping jar neck)
- Round 6:
- Ch 3, mark this ch as first st.
- Decrease at the start and end of each straight section: [dc2tog (dec), dc in each st across to 2 sts before marker, dec] at each end.
- Work dc between the decreases.
- Mark the center st at each end.
- Round 7:
- Repeat as for Round 6. Decrease at the start and end of each straight section, and at ends, around the center marker.
- (This shaping narrows the opening.)
- Round 8:
- Repeat as in previous rounds—dc2tog at side/ends, dc evenly elsewhere.
- Adjust as needed for your tension/yarn and desired opening width.
5. Optional: Finishing Round
- If you have leftover yarn, work 1 round of sc evenly around the opening for a sturdy, neat edge.
- Fasten off, cut yarn, and weave in all ends on inside.
6. Strap/Handle
- With remaining yarn:
- Ch 4, turn.
- Work sc in each ch (3 sc).
- Rows 2+: Ch 1, turn, sc in each st (3 sc).
- Repeat until strap reaches your desired length (ca. 20 rows, or adjust for crossbody/shoulder use).
- Assembly:
- Use tapestry needle to sew strap ends neatly to inside/top sides of bag.
- Use tapestry needle to sew strap ends neatly to inside/top sides of bag.
7. (Optional) Embellishments
- Wappen/Patch: Sew patch or label onto desired bag position using matching or contrasting sewing thread and small neat stitches.
- Magnetic Button: Sew or glue in place if a secure closure is desired.
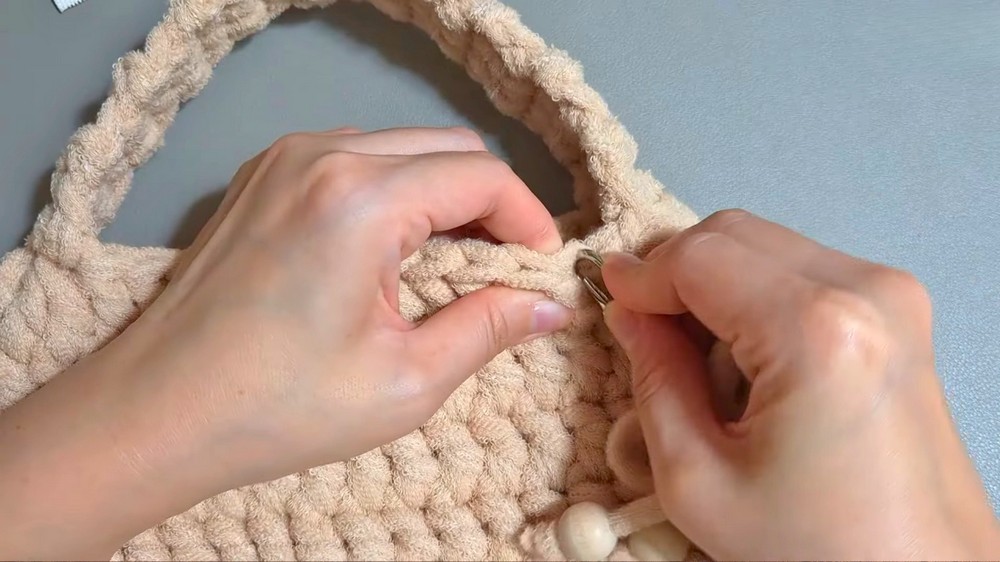
- Keychain Knot:
- Add a split ring and bead to a thread length (ca. 50 cm), tying a decorative knot (such as a Chinese good luck knot or “raw knot”).
- Sew bead/knot to center or corner of bag.
Conclusion
This jar-shaped mini bag is beginner friendly, ultra-cute, and quick to complete (1 hour or so with a bulky, towel-style yarn). Its deep, round body and narrow opening keep items secure. Customize with favorite colors, add a patch or keychain, and enjoy this fun project as a gift or for personal use.
Pattern Correction
- The base uses 13 chains, not stitches; count carefully to maintain symmetry on increases.
- Mark center stitches on each end to ensure proper increase/decrease placement.
- If you run low on yarn, skip the optional sc finishing row or shorten the handle.
Tips
- Sew all ends securely for durability, especially on strap/handle.
- For best results, keep tension consistent, especially on decrease rounds.
- Attach patches or buttons before final round for ease, if preferred.
- Search and practice the “raw knot” separately for unique keychain decor, or substitute any small charm.
- Bag is easy to size up or down; increase foundation chain for a wider bag.