Trendy Crochet Garden Shorts Pattern With a Fun Floral Twist
Sweeten sunny days for your little one with Crochet Garden Shorts Pattern offering comfort and cheerful style for every outdoor adventure.
Looking for something colorful and fun to wear outside on a sunny day that feels good on the skin and brings a smile to your face? With a crochet garden shorts pattern, it’s easy to add playful style to your little one, whether relaxing in the yard, visiting the park, or sitting with friends. This shorts pattern can be made in any color you like and offers soft comfort that is gentle enough for all-day wear.
Unique Crochet Garden Shorts Pattern For Effortless Kids’ Style

The finished piece looks beautiful and stands out during family picnics, casual walks, or even lazy afternoons at home. Perfect for creating happy memories and enjoying warm summer days, this crochet garden shorts pattern is a simple way to keep your child both cozy and cute. It’s a joyful addition to every outdoor moment.
Materials List
- Yarn:
- Fine-weight cotton or acrylic yarn (used double for thickness)
- Suggestions: Use two strands of a fine yarn or substitute with Anne or Charme (Círculo) yarn.
- Contrasting color for pockets/frills (sample uses white and blue).
- Fine-weight cotton or acrylic yarn (used double for thickness)
- Hook:
- 1.75 mm (US steel/steel size 4 or 5), or size to achieve gauge/proper fit.
- Notions:
- 3 buttons (waistband closure)
- Elastic band (waist width, optional)
- Yarn needle, sewing thread (to match yarn color, for sewing elastic)
- Scissors
- Stitch markers
- Optional: Appliqués (flowers, butterfly, leaves) and glue or sewing thread
Key Abbreviations (US Terms)
| Abbreviation | Meaning |
|---|---|
| ch | chain |
| sl st | slip stitch |
| sc | single crochet |
| dc | double crochet |
| hdc | half double crochet |
| st(s) | stitch(es) |
| rep | repeat |
| () | instructions to repeat |
Special Notes
- The sample shorts fit a 1-year-old; adjust starting chain and number of rows for larger sizes or custom fit (wider hips).
- Two strands of fine yarn are held together throughout.
- Elastic is worked into waistband for comfort; frilled leg edge gives a decorative touch.
- Add custom appliqués for extra embellishment.
Step-by-Step Pattern
1. Waistband and Body: Mesh Section
Waistband (Button Area)
- Foundation Chain:
- With 2 strands of yarn, ch 15 (or longer, to fit child’s hip/waist; verify measurement).
- Mark end.

- Row 1 (Mesh Setup):
- Ch 3 (counts as dc), dc in marked ch.
- Ch 1, skip 1 ch, dc in next ch.
- Rep: (ch 1, skip 1, dc in next ch) across to end.
- Rows 2–(Length Needed):
- Ch 3 (counts as dc), ch 1, dc in next dc, ch 1, dc in next dc across, working into dc from previous row.
- Continue this mesh pattern until waistband measures desired length (sample: approx. 50 cm).
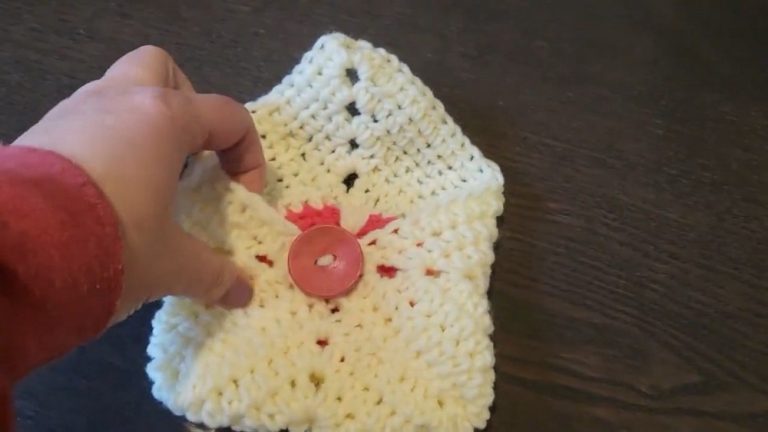
2. Buttonhole Edge Preparation
Buttonhole Layer
- Edge Row:
- Ch 1, sc across row (work sc into all dc and ch-1 spaces).
- Turn, ch 1, sc in first st, ch 3, skip 3, sc in next (make buttonhole), sc in each st across, repeat buttonhole as needed.
- Turn, ch 1, sc across, working one sc in each ch and previous sc.
- Repeat for a total of 3 rows (for sturdy buttonhole band).
- **Sew buttons evenly spaced along opposite edge for closure.

3. Elastic Band (Optional)
- **Attach elastic band along waistband:
- Using needle and matching thread, sew elastic to inside if desired.
- Secure at ends, then cover with dc and frill edging (below).
4. Frill Edging for Waistband
- Attach yarn at waistband edge (where elastic is sewn):
- Ch 3, work 2 dc in same space, move to next space and repeat.*
- Continue, working 2 dc in each space (for frill), slightly stretching elastic for gathered effect, all the way around waistband.
- Secure and weave in ends.
5. Body of Shorts
- Short Leg (White Section):
- Attach yarn at lower edge of waistband mesh section.
- Ch 3, dc in each st across.
- Work rows in dc, increasing at sides for desired width and shaping.
- For shaping (increases):
- Work 5 dc, then 2 dc in same st (increase), rep across row.
- For next 3 rows, increase at sides only (using markers to indicate increase positions).

- After 4 rows of increases, work 8 more rows of plain dc with no increase (lengthening shorts).
- Split for Legs:
- Measure/mark center; join with sl st and work each leg separately (instructions below).
6. Legs and Frill Edging
Leg Openings:
- For each leg:
- Attach contrasting color (blue) yarn at leg opening, work 1 round sc, joining with sl st.
- Ch 3, skip 2, sc in next, ch 3, skip 2, sc in next—continue for “ring”/mesh effect.
- Work “fans” of 2 dc, ch 2, 2 dc in each ring/space.
- For more frill, work another row of fans.
7. Pocket (Make 2)
- Pocket Base:
- Ch 15 for pocket foundation.
- Row 1: Sc in second ch from hook and across (14 sc).
- Ch 2, turn, work hdc in each st.
- Rep for 8 rows total.
- Pocket Edging:
- Ch 1, sc evenly around pocket, working extra sc at corners to round edges.
- For rounded corners, fold edges and work sc together (as in video).
- Finish with a round of crab stitch (reverse sc) along pocket edge.
- **Sew pockets to shorts front, one on each side near waistband.
8. Optional Appliqués & Flowers
- Crochet or sew small flowers, butterflies, leaves, etc.
- Attach to shorts and pockets with glue or sewing thread.
9. Finishing
- Weave in all ends.
- Sew buttons on waistband at marked locations.
- Sew elastic securely if used.
- Block (light steaming or damp press) for shape if needed.

Conclusion
These adorable baby shorts are quick, comfortable, and can be styled with playful appliqués, pockets, and frilly trims. Buttoned waistband and elastic make dressing easy. Adjust for any child’s size by modifying foundation chain and rows.
Pattern Corrections & Tips
- Sizing: Always check size against child’s measurements. Adjust chain length and rows as necessary.
- Elastic: For maximum comfort and fit, add elastic at waist.
- Increases: For roomier fit, add more increases at sides.
- Decoration: Appliqués can be customized; consult referenced video tutorials for flowers/butterfly details.
- Leg Frill: For less frill, skip every other ring; for more, add extra rows.
- Buttons: Sew securely; avoid choking hazards for babies.
- Finishing: Weave in all ends and check all seams are secure for durability.