Sweet Crochet Otter Pattern for Stylish Displays
Delight in playful whimsy with Crochet Otter Pattern, featuring adorable details, cozy textures, and a charming handmade touch for all.
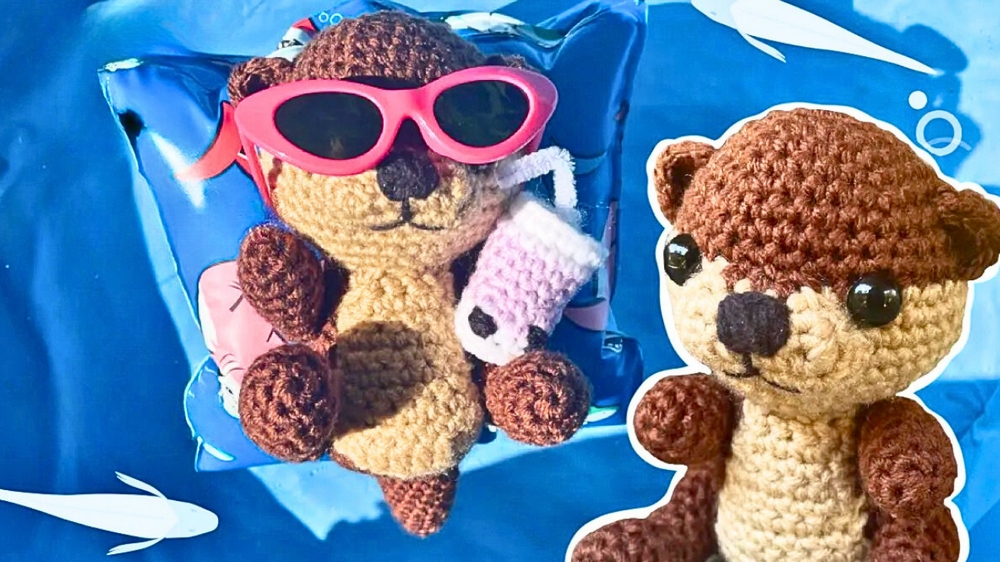
Along rivers and streams, otters have long charmed observers with their playful energy, gentle movements, and endearing expressions. Capturing this lively spirit in crochet form brings the same sense of joy and companionship into the home, offering a soft, tactile keepsake that delights both children and adults. The Crochet Otter Pattern transforms simple yarn into a figure that combines whimsy with charm, making it perfect as a decorative accent, a cuddly toy, or a heartfelt handmade gift.
Quirky Crochet Otter Pattern for Fun Accents

The process begins with forming a rounded body, carefully shaped to convey the otter’s smooth, streamlined form. Midway, small limbs and a delicate tail are attached, giving the figure balance and the ability to be posed in playful stances. Facial features, including expressive eyes and a tiny nose, are embroidered or stitched on to bring personality and warmth. Additional details, such as subtle texture for the fur or optional accessories, add character and enhance visual appeal.
Lightweight, durable, and full of personality, the Crochet Otter Pattern can be customized in natural shades or playful colors, making it versatile for décor or gifting. Beyond its visual charm, it embodies care, patience, and creativity, turning yarn into a small companion that radiates joy, handcrafted beauty, and a touch of nature’s delight in every stitch.
Materials Needed
- Crochet Hook: 3.5 mm (or adjust based on your yarn weight).
- Yarn:
- Dark brown (for the body, head, tail, and ears).
- Tan (for the face, stomach, and accents).
- Black (for the nose and mouth).
- Usual Supplies: Scissors, tapestry needle, stuffing, and a stuffing stick if needed.
- Eyes: Plastic safety eyes and their backs for facial detailing.
- Optional: Tweezers or tape to clean up stray stuffing strands post-assembly.
Special Features
- Color Swapping: Smooth transitions between brown and tan sections provide a polished, seamless look.
- Compact, Versatile Size: Fits well as a decorative piece or a cute collectible.
- Customizable Assembly: Choice between sitting or laying positions for the tail.
- Realistic Details: Shaped nose, contoured stomach, and detailed ears contribute to lifelike charm.
Level of Difficulty
- Intermediate level, with some beginner-friendly sections.
- Color changes, invisible decreases, and shaping techniques may pose mild difficulty for newer crocheters, but are clearly demonstrated by the tutor.
Tutor’s Suggestions
- Color Changes: Practice smooth swaps by tightening yarn tails and knotting securely to prevent gaps.
- Magic Circle: If this beginner technique proves challenging, use the chain method as an alternative.
- Invisible Decreases: Use the front loops of two stitches for a neat finish that blends seamlessly into the overall structure.
- Eyes Placement: Adjust the positions before securing the backs to ensure symmetry.
- Stuffing Tips: Avoid overstuffing to maintain shape. Focus on corners of cheeks, body curves, and tail.
Step-by-Step Instructions
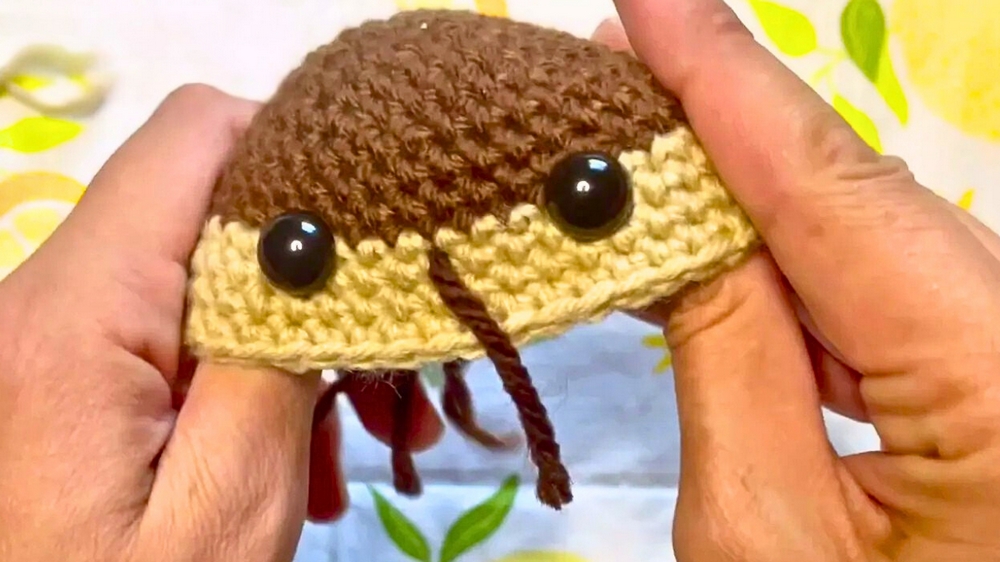
1. Head
- Begin with a magic circle of 6 single crochets.
- Gradually increase stitch count:
- 6 -> 12 stitches with 2 sc per stitch.
- 12 -> 18 with (1 sc + 1 increase).
- Continue increasing up to 36 stitches with regular increments.
- Work three rounds of single crochet (without increasing) and swap colors with tan yarn for the face area as demonstrated.
- Insert safety eyes at symmetrical positions and knot yarn tails securely at all swap points.
- After completing increases and decreases, stuff the head carefully and transition into shaping the body.
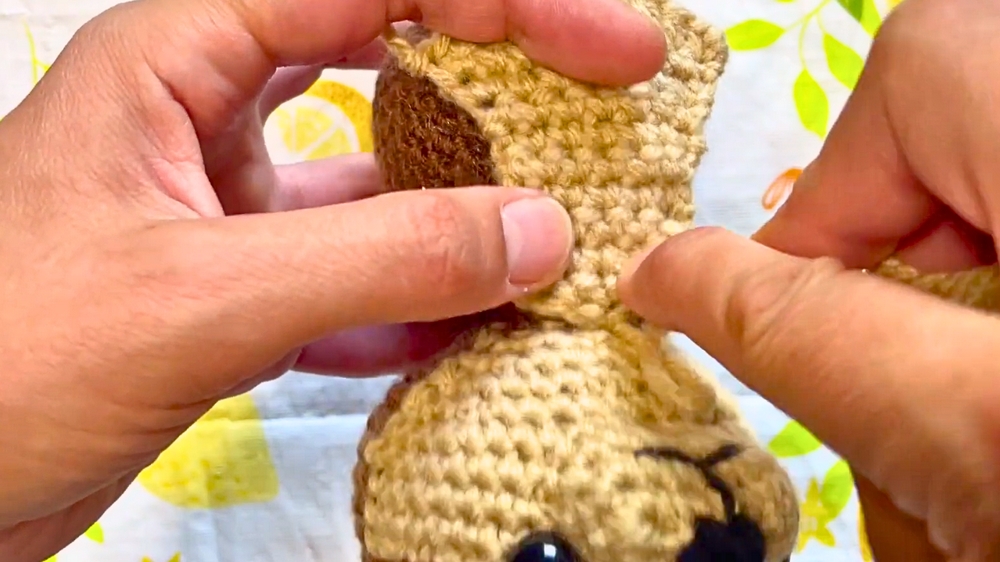
2. Body
- Start with a magic circle of 6 sc and follow a similar increasing method (6 -> 36 stitches).
- Incorporate invisible decreases and single crochet rounds to shape and taper the body.
- Add stuffing as you sew the head and body together, ensuring a firm, well-distributed structure.
- Attach the stomach with tan yarn using whip stitching. Adjust position carefully to align it with the body’s center.
3. Arms and Legs
- Begin each limb with magic circles of varying sizes: arms with 5 stitches, and legs with 6 stitches.
- Add increases and work single crochet rounds to shape and taper each piece.
- Lightly stuff limbs and sew them onto the body in symmetrical positions. Flatten the bottoms of the arms to create a natural shape when attaching.
4. Tail
- Start with a magic circle of 4 stitches, gradually increase to 15 stitches, and work even rounds for shaping.
- Choose your preferred tail position: laying down, standing upright, or flattened for dual-purpose sitting and laying poses.
- Sew firmly to the curved portion of the body.
5. Facial Features and Ears
- Snout: Use tan yarn to shape the snout, incorporating brown stitches at the top for contrast. Thread black yarn to stitch a triangular nose and add indents for dimension.
- Mouth: Weave black yarn carefully to stitch a smile and knot securely inside the head.
- Ears: Make two small semicircles with magic circles and single crochet rows. Attach above the tan face line in slightly arched positions.
Uses
- Decor: Perfect for desks, shelves, or as a playful accent to any room.
- Gift: A personalized, handmade token for loved ones.
- Collectible: Adds charm to amigurumi collections or themed displays.
Conclusion
The crochet otter project strikes a balance between creativity and technical skill, offering a joyful crafting experience that results in an endearing plush creation. Its thoughtful design, with seamless color shifts, realistic features, and versatile pose options, adds depth and uniqueness to the finished piece. Whether crocheted for personal enjoyment or gifted as a heartfelt token, this little otter is sure to bring smiles and admiration.
Tip
When sewing components together, use pins to secure positions before stitching. This ensures symmetry and helps maintain alignment, especially for delicate parts like ears or limbs.