Sweet Crochet Cartoon Pikachu with Whimsical Glow
Playful charm comes alive with this Crochet Cartoon Pikachu Pattern that turns a beloved character into an adorable handmade companion.
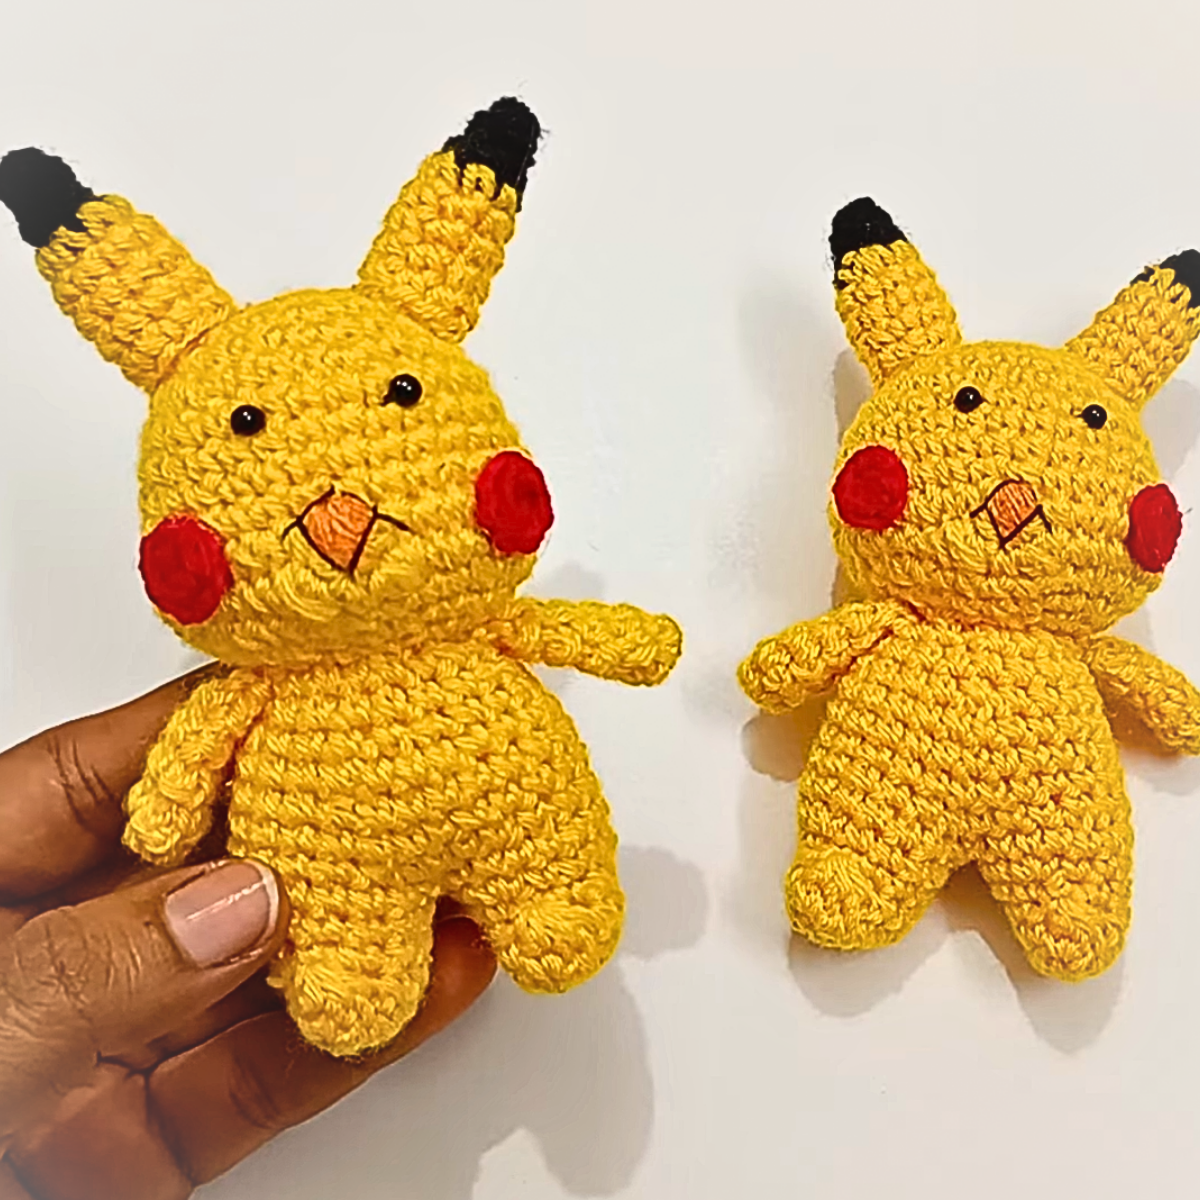
Bright eyes and cheerful smiles often follow the presence of beloved characters from childhood, reminding us of simpler days filled with imagination and play. The Crochet Cartoon Pikachu Pattern captures this charm, transforming yarn into a lively, huggable version of the iconic Pokémon. Its playful form and carefully placed features bring Pikachu to life, making it a delightful addition to bedrooms, playrooms, or display shelves.
Fun Crochet Cartoon Pikachu for Happy Spaces
The pattern offers more than visual appeal. Its compact size and soft texture make it a perfect companion for children, while collectors and enthusiasts appreciate its meticulous skills and recognizable details. Makers can enjoy the satisfaction of bringing a beloved character into three-dimensional form, practicing stitches that build both skill and creativity.
Functionally, this crochet Pikachu can serve as a toy, a decorative accent, or a thoughtful gift, demonstrating the versatility of crochet beyond conventional uses. Its bright colors and charming expression evoke warmth and joy, while the durable stitches ensure it withstands handling and maintains shape over time. The Crochet Cartoon Pikachu Pattern seamlessly blends playfulness with practicality, offering a project that is engaging, skill-enhancing, and rewarding, leaving both the maker and recipient with a piece that sparks nostalgia and happiness in everyday life.
Materials Needed
- Yarn:
- Yellow (main body)
- Black (tips of the ears)
- Red (cheeks; can also use form material as an alternative)
- Crochet Hook:
- A 3 mm hook (suitable for 4-ply yarn).
- Black Beads (2):
- Used for Pikachu’s eyes.
- Cotton:
- Used as stuffing to make the toy soft and give it shape. Cotton sheets from handloom retailers work well.
- Glue:
- For sticking smaller details (such as red cheeks if alternative material is used).
- Scissors:
- To trim excess yarn.
- Sewing Needle:
- For stitching different parts together.
- Marker or Extra Yarn:
- Used to mark the start of rows to maintain symmetry.
Step-by-Step Details for Making a Pikachu Crochet Toy
Introduction
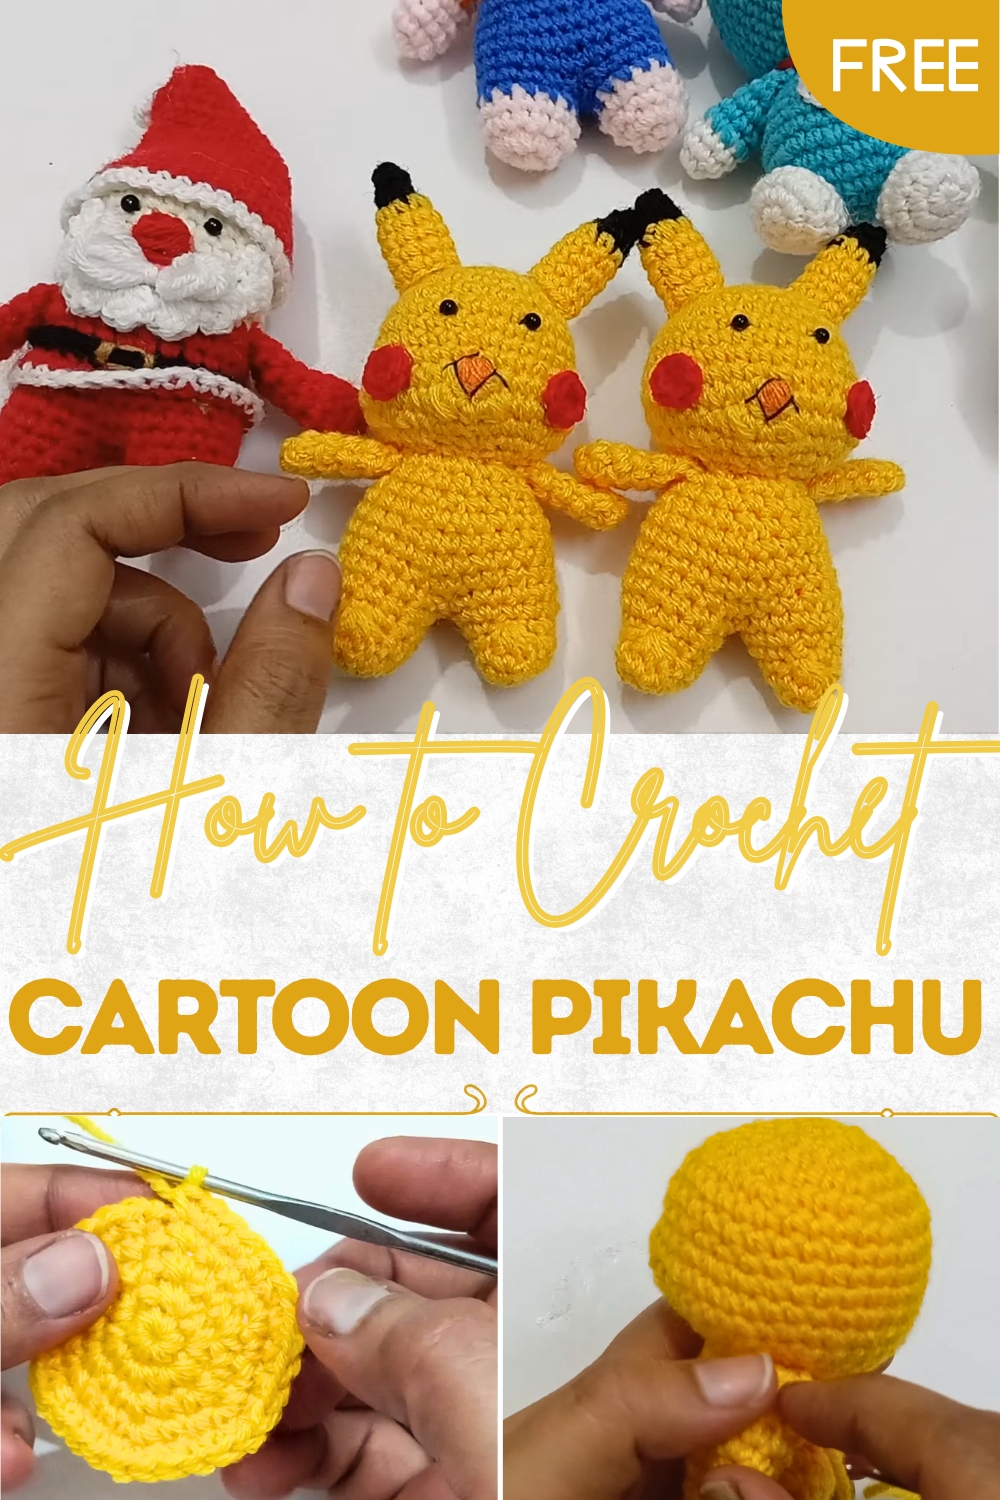
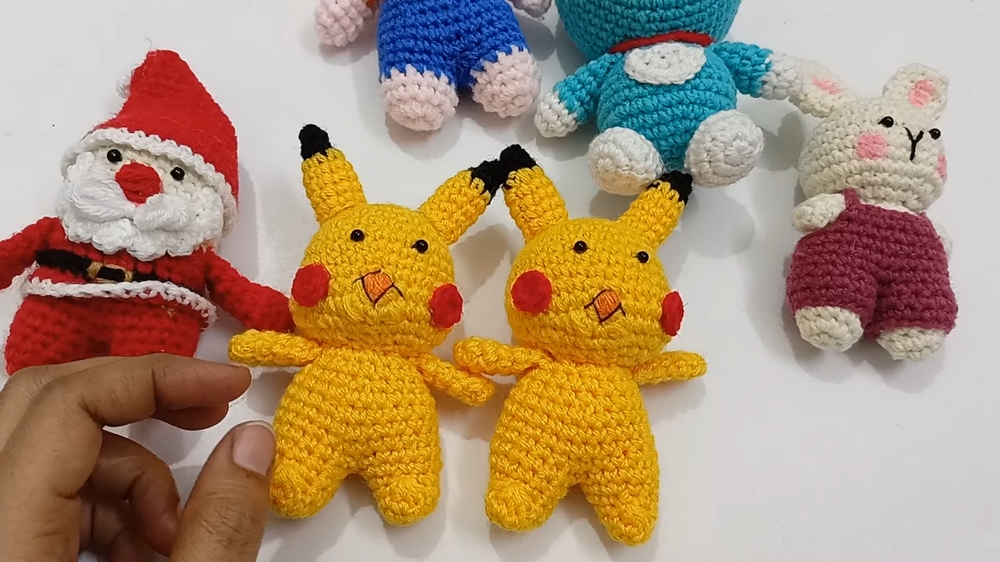
In this tutorial, the creator from the “Radhe Krishna Crochet” YouTube channel demonstrates how to crochet a Pikachu soft toy, referred to as “Pikikachu”, using simple techniques, materials, and a detailed approach. The final product is an adorable Pikachu figure that’s less than 5 inches in height. This toy is part of a larger crochet collection that includes other cartoon characters like Doraemon, Santa Claus, Bunny, and Hello Kitty. The project is beginner-friendly, creative, and makes use of basic crochet skills, with an end goal of decorating baby cradles or other home spaces.
Special Features
- Compact Toy Size: The finished Pikachu is less than 5 inches tall, making it perfect for decorative purposes or as a small gift.
- Creative Decor Option: This toy can replace chandelier-style pendants traditionally hung over baby cradles and be placed as ornamentation on pallu covers or other crafts.
- Simple Materials: Uses three main colored yarns (yellow, red, black), cotton stuffing, and black beads for the eyes.
- Versatility: The tutorial explains how to adapt materials, such as replacing red wool with other materials like form sheets for the cheeks.
- Crafting Details: The tutorial is highly detailed and includes techniques for creating the head, body, arms, legs, ears, and other facial details.
Level of Difficulty
Beginner-Friendly:
- Accessible for Beginners: While this project does not require advanced crochet techniques, it does require familiarity with basic stitches like the magic ring, single crochet, slip stitches, and incremental/decremental stitching. Beginners may need to watch certain parts of the tutorial carefully for clarity.
- Attention to Detail Required: The sizing of the components and assembling different parts require precision to ensure the toy turns out symmetrical and well-made.
Steps to Crochet Pikachu
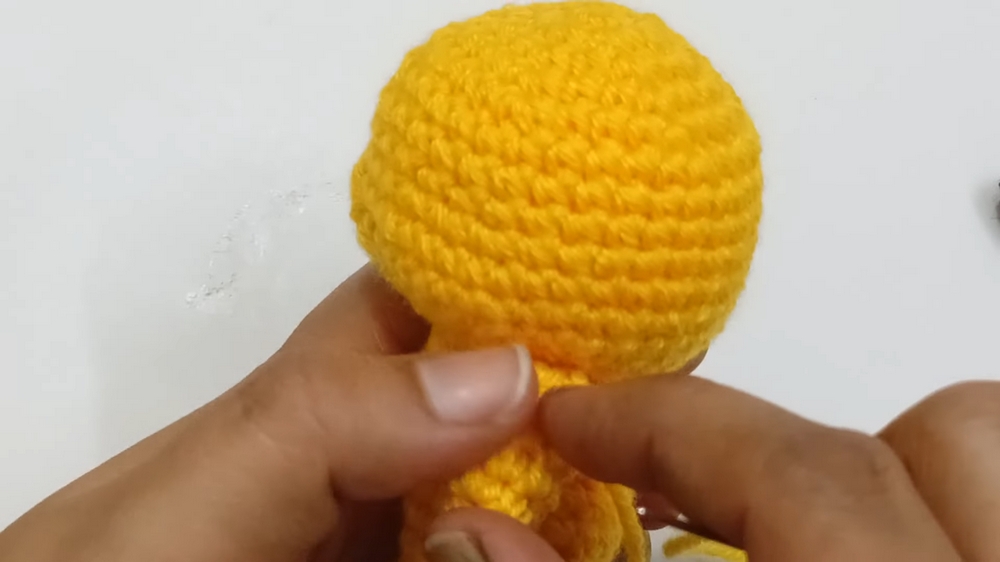
1. Making Pikachu’s Head
- Begin with the Magic Ring:
- Create a magic ring, chain 1, and work 6 single crochet (SC) stitches into the ring. Pull the ring tight and join the round with a slip stitch.
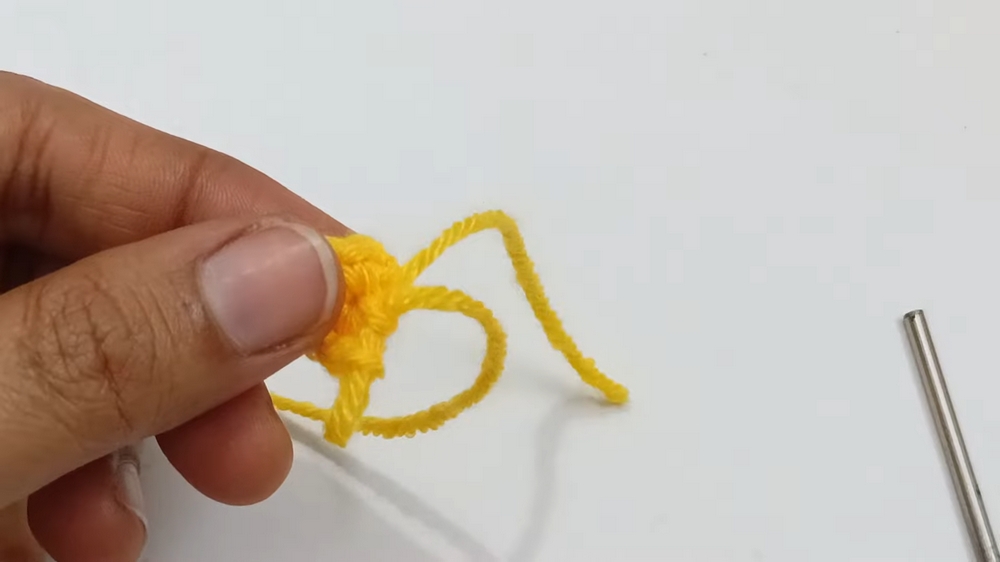
- Create a magic ring, chain 1, and work 6 single crochet (SC) stitches into the ring. Pull the ring tight and join the round with a slip stitch.
- Increase the Rounds for the Head:
- Row 2: Make 2 SC in each stitch (12 SC total).
- Row 3: Alternate 1 SC and 2 SC in the same stitch (18 SC total).
- Row 4: Work the pattern of 1 SC in each of the first 2 stitches and then 2 SC in the 3rd stitch (24 SC total).
- Continue increasing rows similarly until you reach 30 stitches. Then, work 3 rows with 30 SC in each round to maintain the head’s shape.
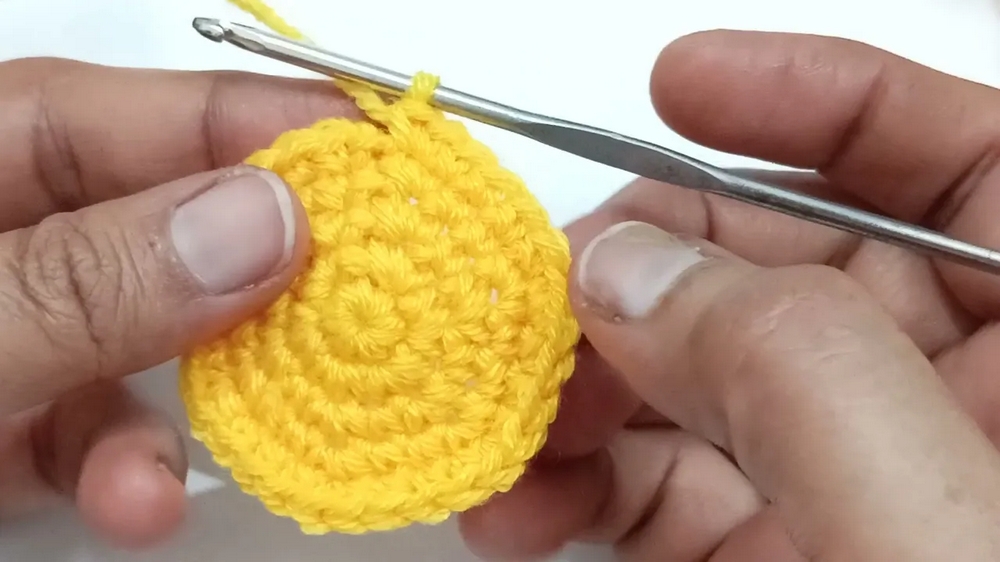
- Shaping the Head:
- Begin the process of decreasing by working incremental reductions:
- Rows 9-12 decrease 6 stitches across each round.
- After row 12, you should have 16 SC stitches.
- Begin the process of decreasing by working incremental reductions:
- Stuff with Cotton:
- Once the head shape is finalized, tightly fill it with cotton before sealing it.
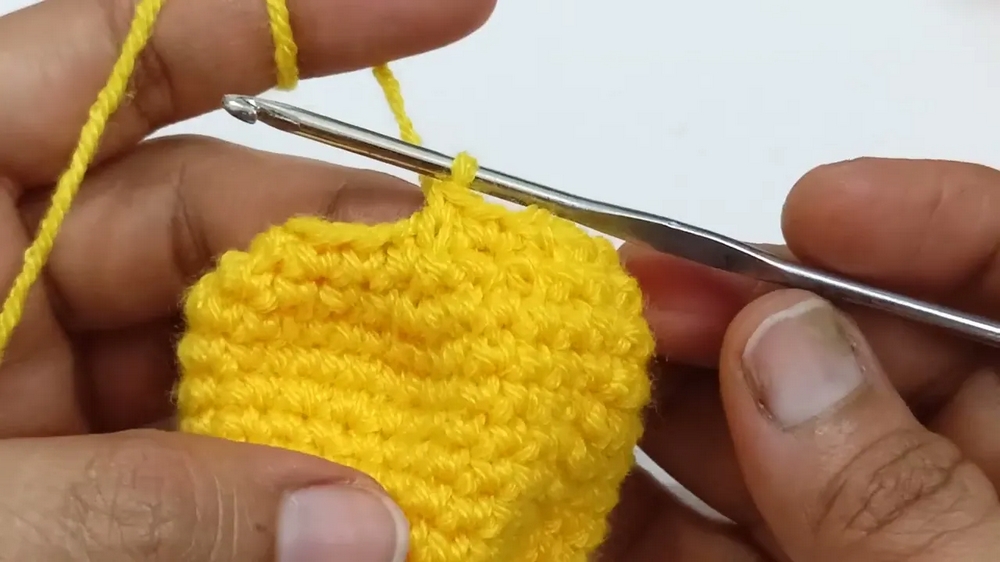
- Once the head shape is finalized, tightly fill it with cotton before sealing it.
2. Creating Pikachu’s Body
- Start at the Base:
- Chain 5, turn, and work single crochets. Gradually build the structure into two legs, which will later merge to form the body.
- Joining the Legs:
- Crochet both legs separately; then, stitch the legs together to form the base of the body.
- Crocheting the Torso:
- Alternate between incremental and steady rounds to give the body a cylindrical shape. Stuff with cotton before closing.
3. Crafting the Arms and Ears
- Arms:
- Start with a magic ring, and work 4 SC in the first round. Gradually increase to 7 stitches and crochet a straight pattern for a few more rows. Stuff lightly with cotton before closing.
- Ears:
- Use black yarn for the ear tips:
- Start with a magic ring with 4 SC in the first round, increase to 6, and then switch to yellow yarn after 3 rounds.
- Yellow portion: Work a few more straight rows with 8 SC in each round.
- Use black yarn for the ear tips:
4. Facial Details
- Eyes:
- Attach two black beads for the eyes. Use a sewing needle to position them symmetrically.
- Red Cheeks:
- Create two small circles (magic ring with 6 SC) using red yarn. Alternatively, cut form material into small circles and attach them with glue.
- Mouth and Nose:
- Use black thread to embroider the mouth and a small triangular nose shape.
5. Final Assembly
- Attach Each Piece:
- Carefully sew the head, body, arms, and ears together using a needle and the corresponding yarn. Ensure stitches are tight and invisible.
- Finishing Touches:
- Draw or mark additional features with a sketch pen if necessary.
- Do a final quality check for loose threads and symmetry.
Tutor’s Suggestions
- Marker Use: Place a marker at the beginning of each round to avoid mistakes in stitch count.
- Adjust Materials as Needed: If red wool isn’t available, use alternative materials like form sheets for the cheeks.
- Take Your Time: Focus on small sections at a time to ensure precise stitching and a symmetrical outcome.
Uses
- Decorative Charm: Ideal for hanging over baby cradles, on a pallu, or even as room decor.
- Gift Option: Perfect for gifting to children or lovers of handmade crafts.
- Skill Development Project: A great practice for mastering incremental stitches, joining parts, and crocheting small items.
Tip
When assembling smaller features like the cheeks or ears, handle glue carefully, or consider stitching for a more secure and durable finish.
Conclusion
This Pikachu crochet pattern is a fun and engaging way to create a unique handmade toy with a delightful fan-favorite design. With detailed instructions and the ability to customize the size and materials, this project is perfect for beginners looking to enhance their skills or intermediates seeking to create adorable amigurumi figures.