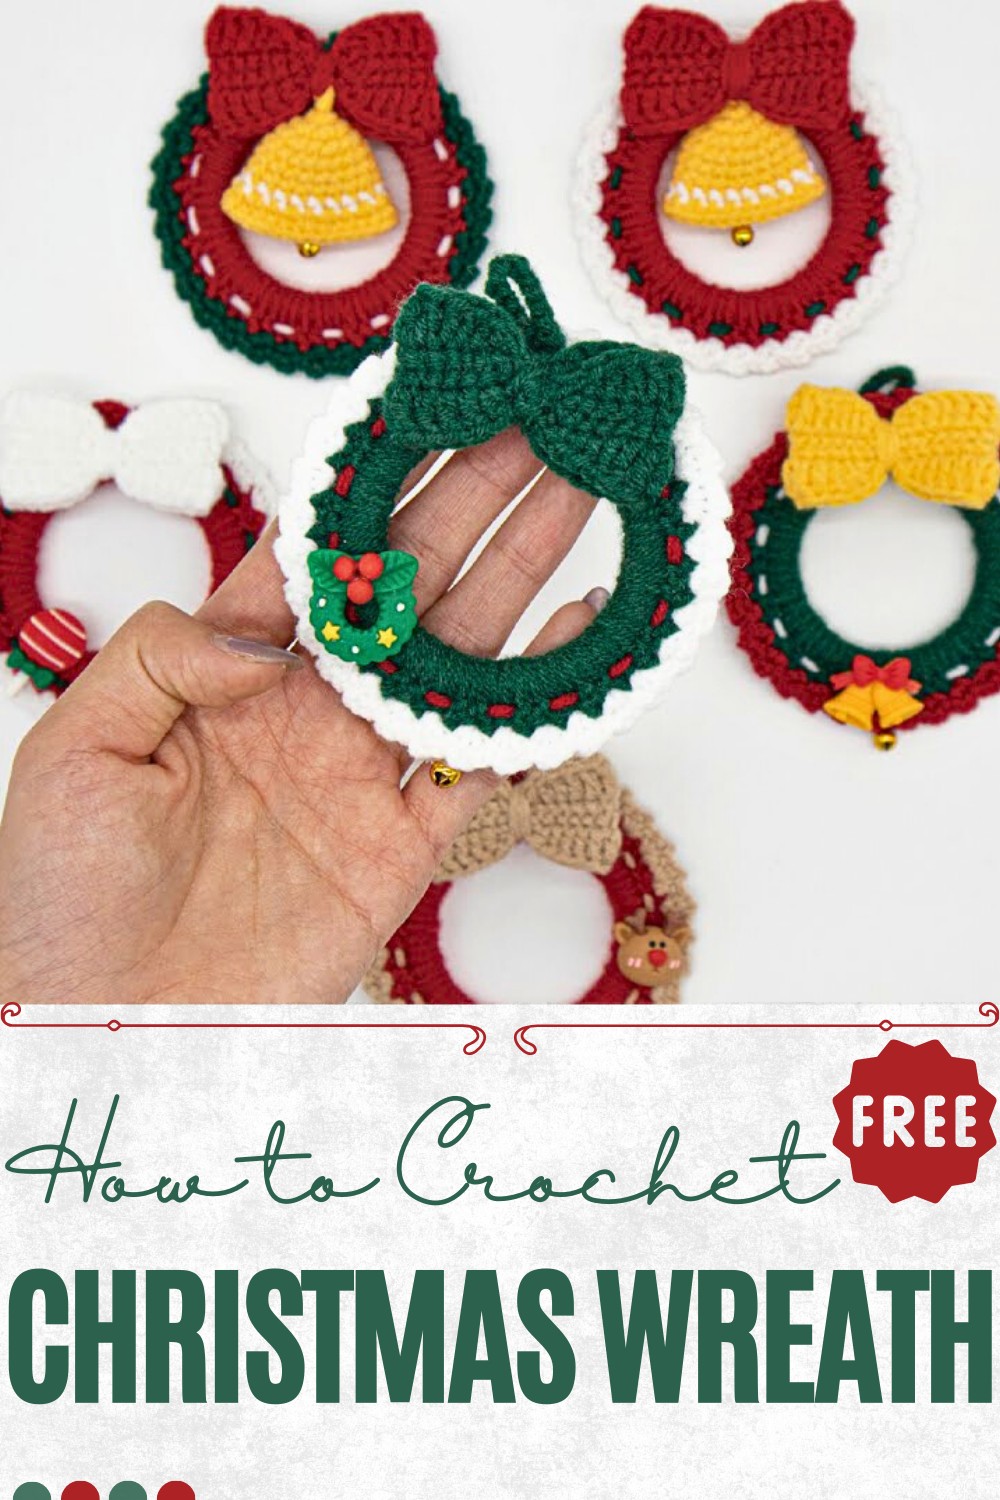
Stylish Crochet Christmas Wreath for Creative Home Decor
Adorn your home with this Crochet Christmas Wreath Pattern for a festive, charming accessory that adds warmth to holiday décor.
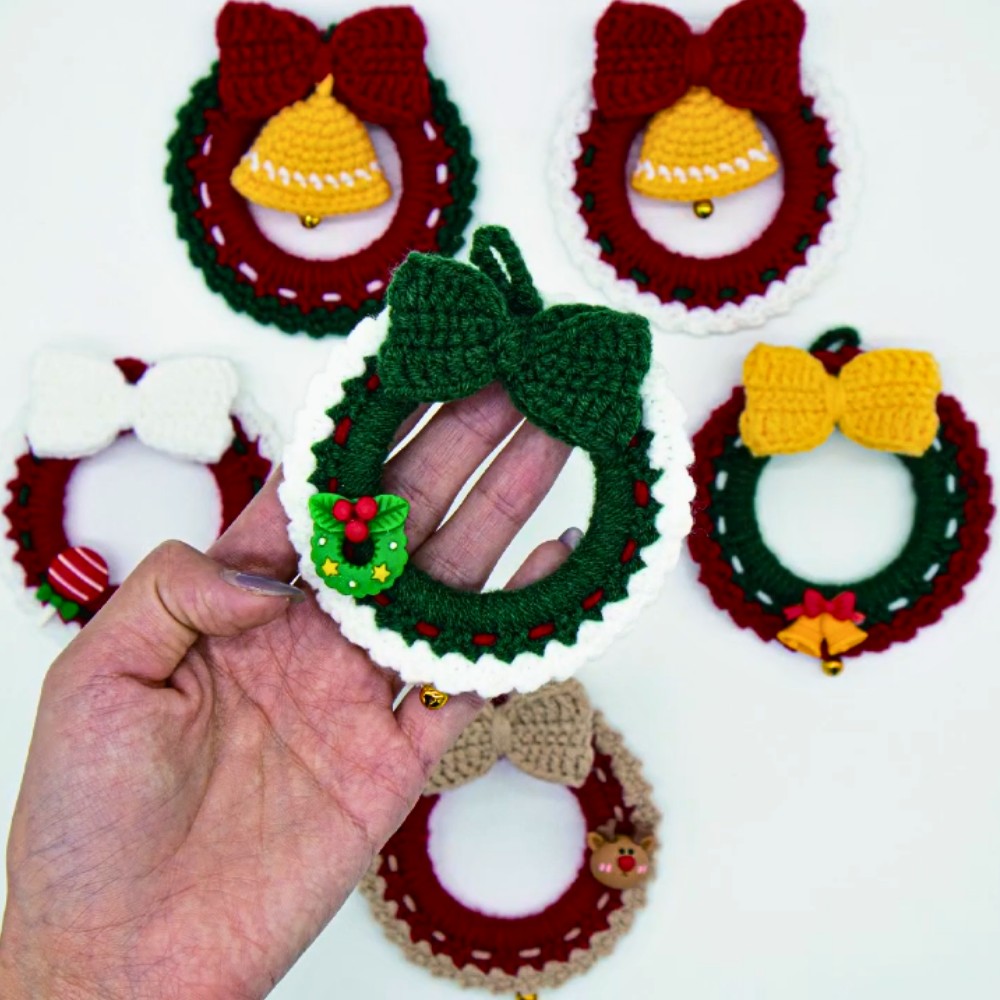
Every holiday season, homes glow with warmth and festive spirit, and a crochet Christmas wreath brings charm and personality to any entryway or wall. This pattern captures the essence of holiday cheer, transforming simple yarn into a circular display of color and texture that evokes the joy of the season. Each stitch contributes to a cohesive piece that is both decorative and durable, offering a soft yet structured wreath that holds its shape beautifully.
Lovely Crochet Christmas Wreath for Decorative Spaces
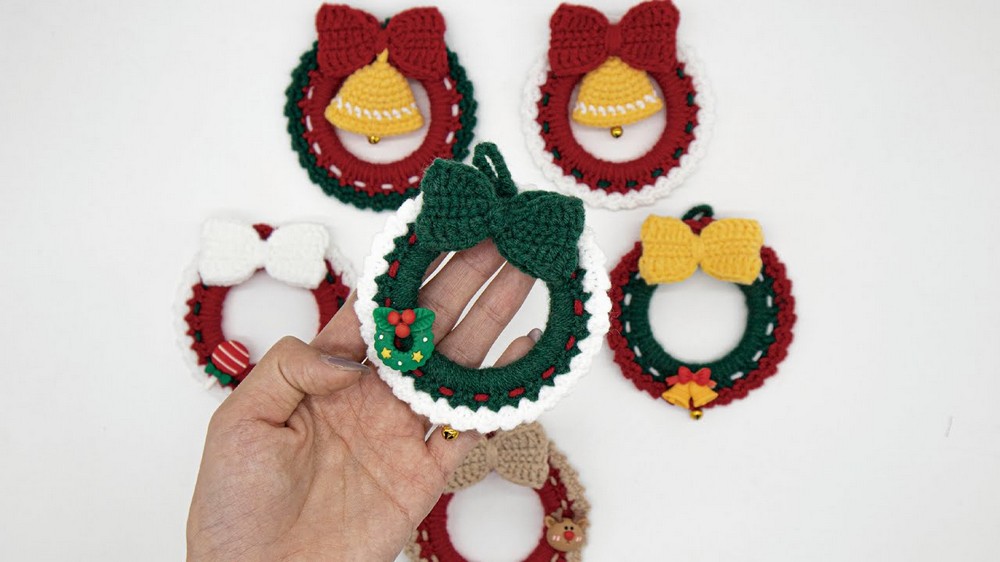
Beyond its visual appeal, the crochet wreath serves versatile purposes: it can be hung on doors, used as a centerpiece on tables, or incorporated into mantel décor, providing a cheerful accent that harmonizes with other holiday elements. The pattern allows for creative adaptations, from traditional reds and greens to modern palettes, and even seasonal embellishments such as small ornaments or ribbons, enhancing the aesthetic without compromising functionality.
Its handcrafted quality adds warmth and a personal touch, making it a thoughtful gift for friends and family. With easy maintenance and long-lasting durability, this wreath offers a lasting decorative accent, turning ordinary spaces into festive havens and bringing a touch of handmade elegance that uplifts both home and spirit during the holiday season.
Materials Needed
The provided crochet kit includes:
- Yarn: Multiple colors (e.g., green, red, white) based on your preference.
- Crochet Hook: The ideal size for the yarn provided.
- Needle: Useful for sewing and weaving in loose ends.
- Rings: Six plastic or wooden rings that serve as the structure for the wreaths.
- Bells: Two mini gold bells for added decorative charm.
- Accessories: Four additional optional Christmas-themed accessories for customization.
- Hot Glue Gun: For securing decorations if needed.
- Markers: To track stitches.
- Basic Manual and QR Code: A manual and linked tutorial videos for beginner-friendly guidance.
Step-By-Step Instructions
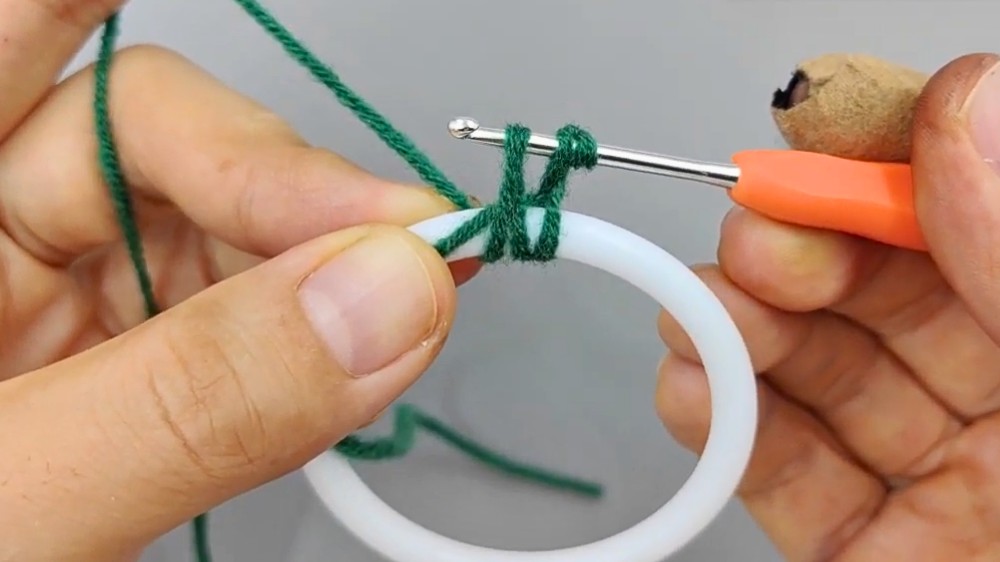
1. Crochet the Base Ring
- Create a Magic Circle
- Hold the yarn and place it in a circle. Pinch the circle with your thumb and middle finger.
- Insert your crochet hook into the circle, hook the yarn, and draw through to form a loop.
- Adjust as needed to form a slip knot.
- Start the Ring Base
- Chain 2 stitches (this counts as the foundation).
- Chain 2 stitches (this counts as the foundation).
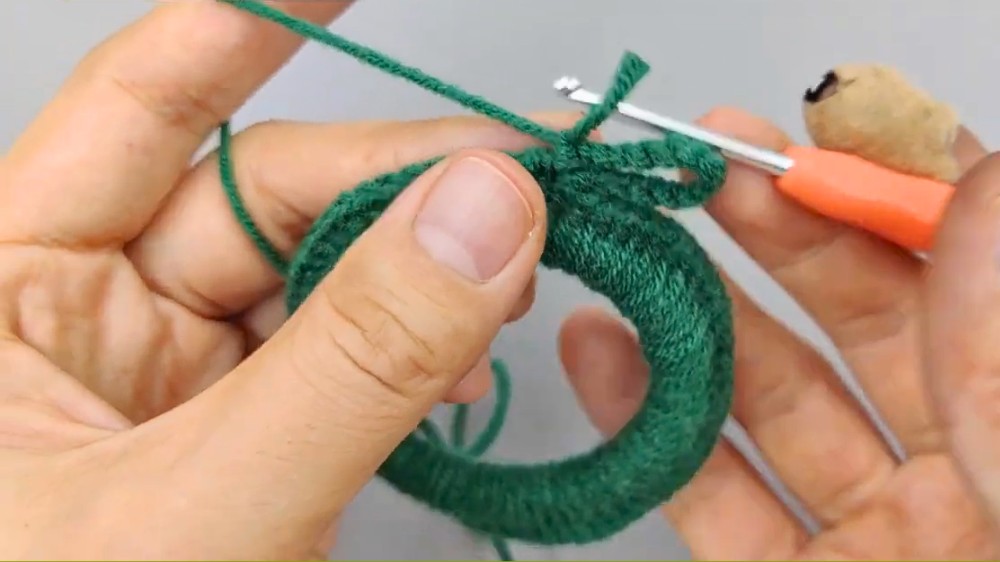
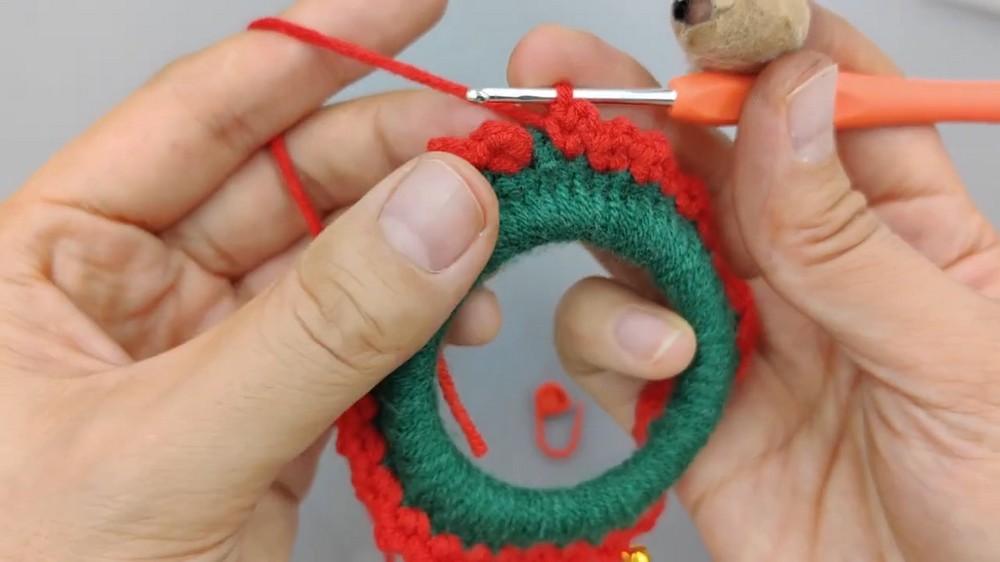
- Work Double Crochets Around the Circle
- Yarn over, insert your hook through the circle, and hook the yarn. Pull through to form three loops on your hook.
- Yarn over again, pull through two loops, and then yarn over once more to pull through the last two loops.
- Repeat until the circle is fully covered with approximately 64 double crochets. The number may vary slightly depending on your tension.
- Use a marker to track the beginning stitch.
- Join the Round with a Slip Stitch
- Insert your hook into the marker’s stitch, yarn over, and pull through all loops on the hook.
- Add the Hanging Loop
- Chain approximately 15 stitches (more or less based on your preference for length).
- Slip stitch back into the same spot at the marker to securely attach the hanger.
2. Work the Outer Layer of the Wreath
- Start with a Slip Knot in a New Color
- Tie a new yarn color (e.g., white) onto the first double crochet stitch from the inner circle.
- Make one chain stitch to start the outer round.
- Knot Formation for the Outer Round
- Work the following sequence: one single crochet, two chain stitches, and one single crochet into the same stitch.
- Skip one stitch and then repeat the sequence.
- Continue this pattern around the ring.
- Join the Outer Round
- After the final knot, make a slip stitch into the first knot of the round to close it.
- After the final knot, make a slip stitch into the first knot of the round to close it.
3. Attach the Bell (Optional)
- Count Stitches and Mark the Bottom of the Wreath
- If you want to add a mini gold bell, locate the stitch in the middle of the bottom of the wreath and use a marker to identify it.
- Thread the Bell
- Use a short thread to attach the bell to the designated spot. Insert the thread through the bell and then secure it with a single crochet stitch.
- Continue Knotting Around the Bell
- Skip one stitch and resume the knot-creation pattern to complete the outer round.
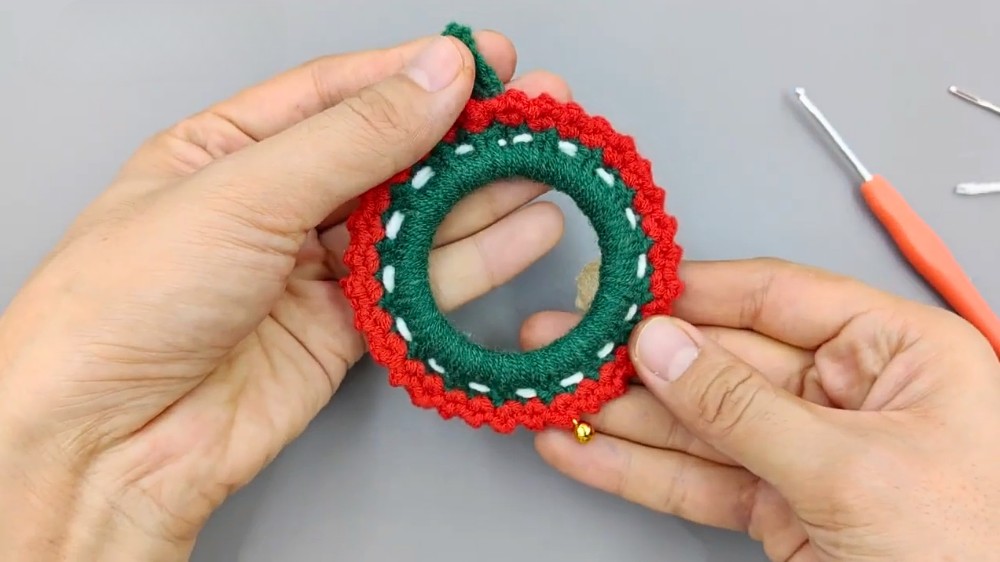
4. Add Decorative Yarn
- Thread the Yarn
- Cut a length of yarn (approximately half a meter) in a contrasting color for decoration (e.g., white for a snowy effect).
- Insert the thread through the base of the hanging loop.
- Weave Through the Stitches
- Skip two stitches and insert the needle with the thread, pulling it through loosely. Continue this pattern around the wreath.
- Be careful not to overtighten the yarn to maintain the wreath’s shape.
- Secure and Finish
- Once you’ve woven the length, secure the yarn ends with a knot or by weaving them in. Trim any excess yarn.
- Once you’ve woven the length, secure the yarn ends with a knot or by weaving them in. Trim any excess yarn.
Special Features
- Beginner Friendly: The pattern is designed for beginners, offering detailed instructions and basic stitches like double crochet, single crochet, and slip stitching.
- Customizable Design: With multiple yarn colors and additional accessories like bells and bows, you can create unique variations of the wreaths.
- Quick to Complete: Each wreath takes minimal time to create, making this a great project for those looking to make multiple pieces in one session.
- Multi-Purpose Use: These wreaths can be used as ornaments, gift toppers, or even mini table decorations.
Tutor’s Suggestions
- Refer to Beginner Guides: If this is your first crochet project, use the crochet manual and QR code for supplemental tutorials.
- Maintain Even Tension: Consistent tension ensures that the double crochets smoothly cover the base ring without gaps.
- Skip and Knot Carefully: While creating the outer round (knot pattern), check that you’ve skipped only one stitch each time for uniformity.
- Experiment with Colors: Mix and match yarn colors for bows, wreath bases, and outer trims to create a variety of looks.
Level of Difficulty
- Beginner Level:
- The project uses foundational stitches like double crochet, single crochet, and slip stitch.
- A little practice with tension and stitch counting will help improve uniformity.
Uses
- Christmas Tree Ornaments: Hang these wreaths on the tree for a handmade touch.
- Gifts and Wrapping Accessories: Attach them to wrapped presents as a decorative addition.
- Seasonal Decorations: Use them to create garlands, table centerpieces, or wall displays.
- DIY Festive Activity: A fun holiday project for families, beginners, or craft events.
Tip
When working the double crochets to cover the inner ring, keep your hook close to the ring’s edge. This helps achieve a neat, even look and avoids gaps in the stitches.
Conclusion
This Christmas wreath ornament pattern offers a creative, beginner-friendly way to prep for the holidays. By learning foundational crochet skills and experimenting with color combinations, you can create personalized wreaths perfect for decorating, gifting, or simply enjoying the process of crocheting. With minimal materials and a straightforward process, this project is enjoyable and rewarding for crocheters of all skill levels.