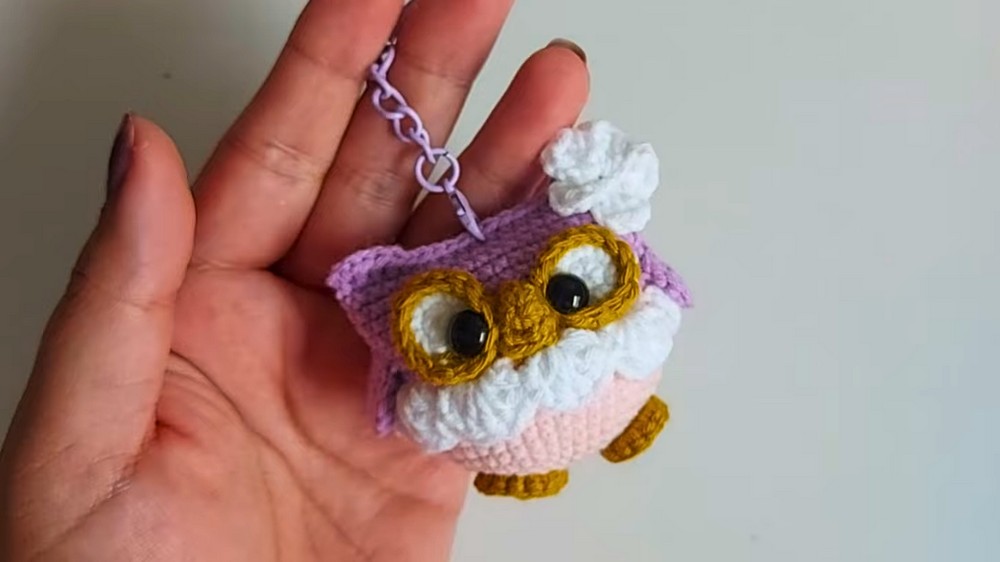
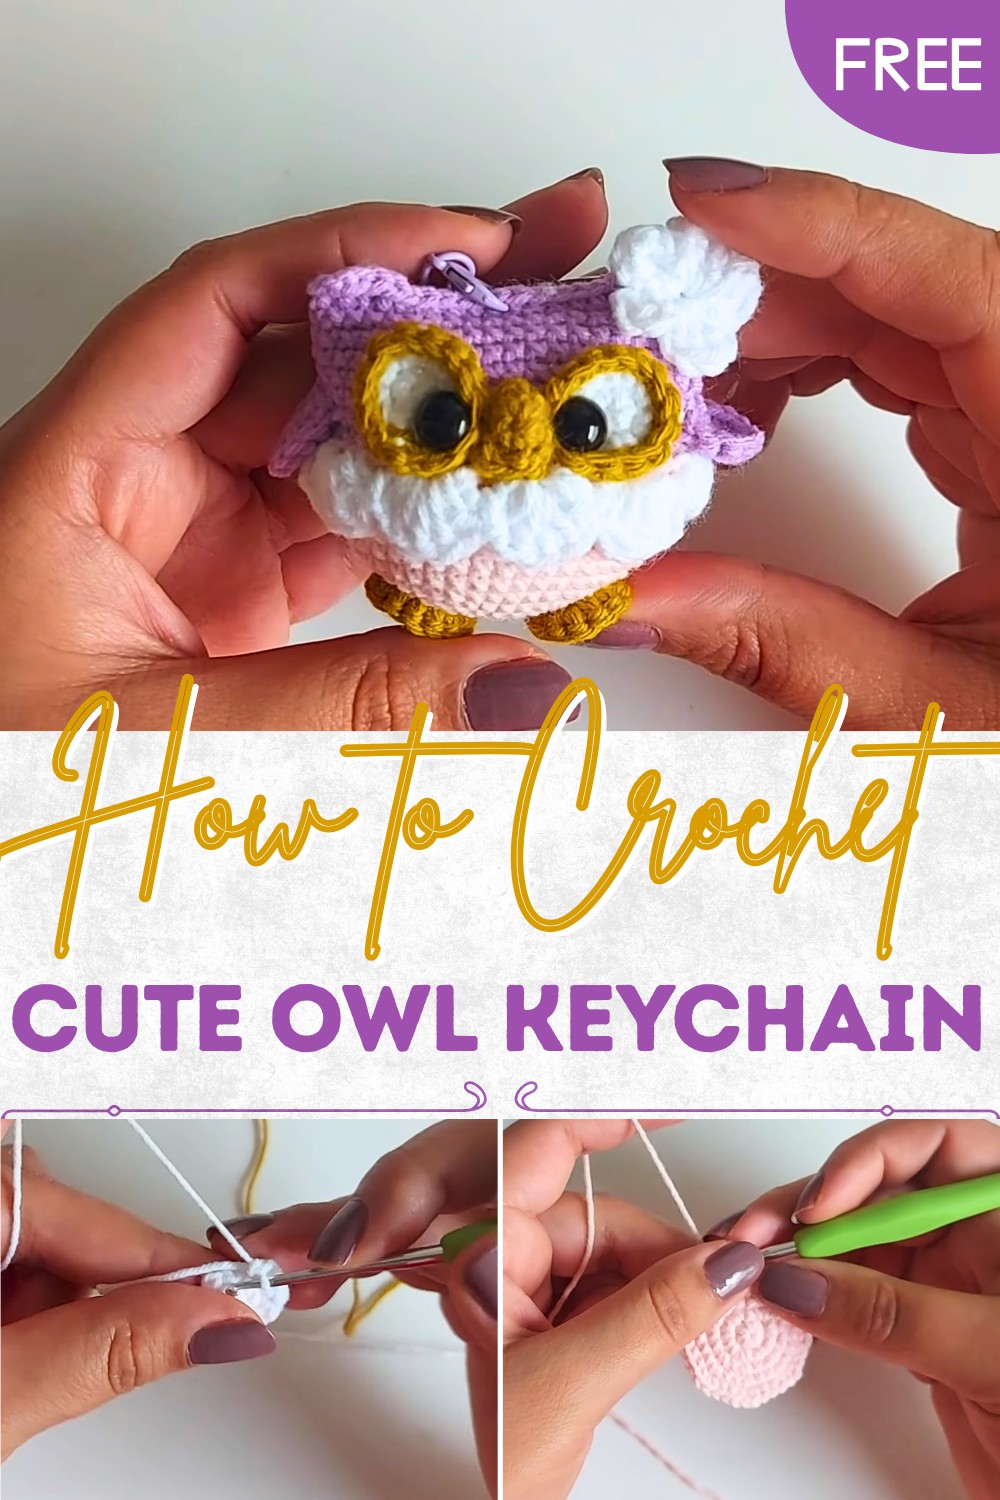
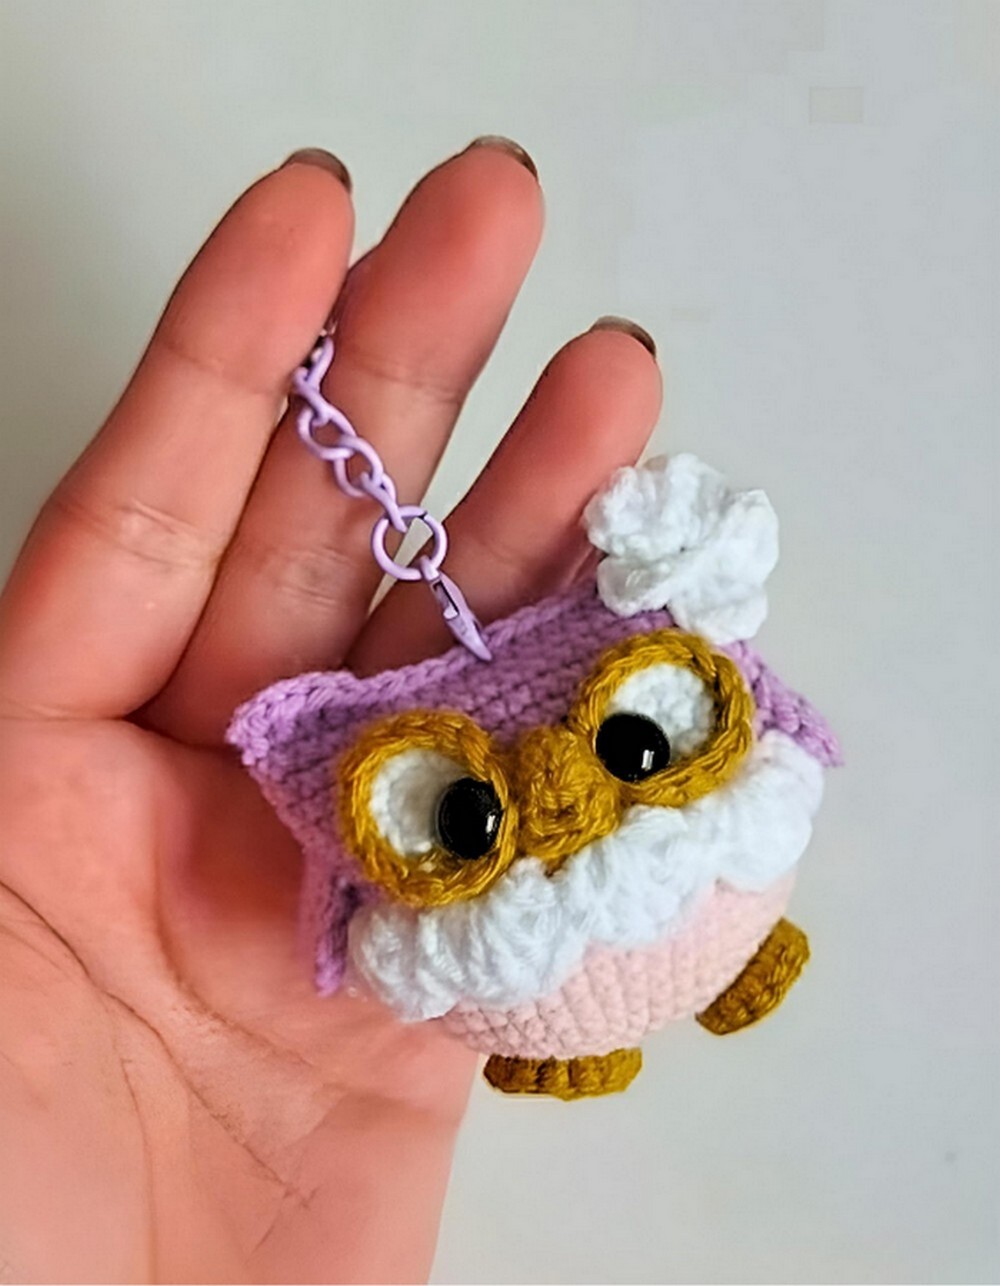
Step-by-Step Crochet Owl Keychain Pattern for Whimsical Appeal
How to Crochet an Owl Keychain Pattern for Everyday Charm
With its simple stitches and customizable colors, this mini project makes the creative process fun and approachable—making it perfect for beginners who want to try something new or experienced crocheters looking for quick gratification. You’ll learn techniques like structuring magic rings, adding detailed embellishments, and assembling small crochet parts to form this charming design.
More than just an accessory, this keychain represents warmth, care, and a bit of whimsy. It’s small, portable, and versatile, ideal for those who appreciate the unique flair of handmade creations. Whether you keep it for yourself or gift it to someone special, this pattern is sure to win hearts while offering practicality.
Materials Needed
To create the crochet owl keychain, gather the following materials:
- Yarn: Multiple colors (gold/mustard, pink, white, etc.), preferably soft and lightweight.
- Crochet Hook: 2 mm
- Magic Ring Marker: For crocheting magic rings.
- Safety Eyes
- Stuffing: To fill the owl for a plush look.
- Scissors: For cutting yarn strands.
- Pins: To help position parts before sewing.
- Needle: For sewing the parts.
Step-by-Step Instructions
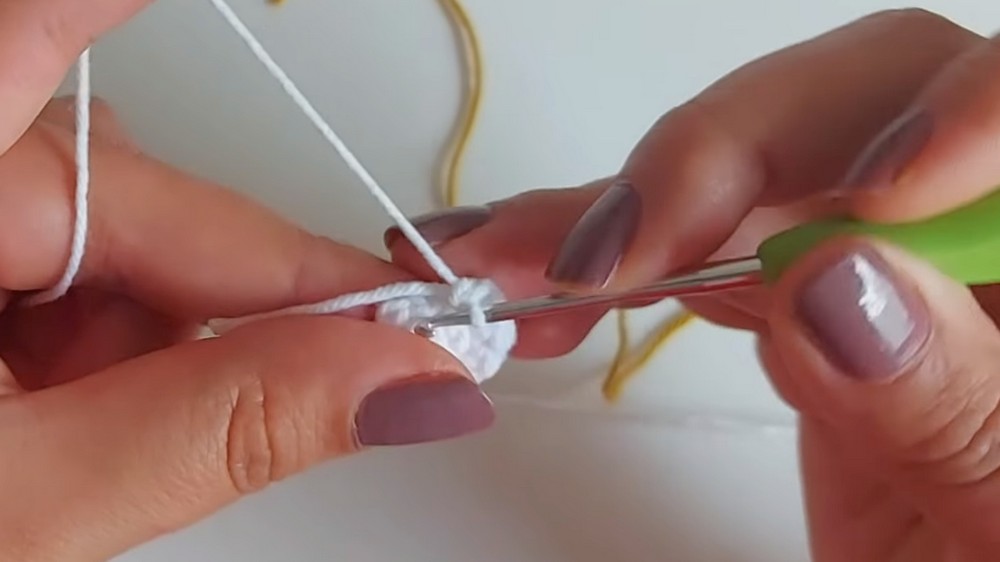
1. Create the Owl’s Eyes
- Start by making magic rings. Inside each ring, crochet 6 single crochet stitches.
- Close the ring and begin the second round, crocheting 6 increases to end with 12 single crochet stitches.
- For the third round, switch to gold/mustard yarn and crochet in the front loop only (FLO). Knit stitch over stitch to maintain 12 single crochet stitches.
- After completing the eyes, pull a long thread for sewing and cut off the excess strands.
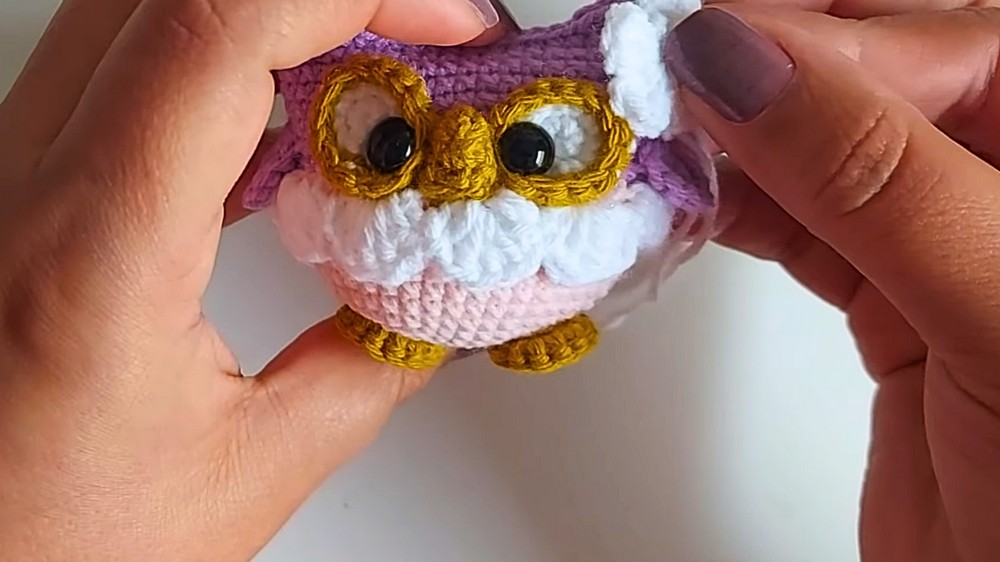
2. Attach the Eyes and Safety Eyes
- Place each safety eye between the second and third rounds.
- Position each eye close together, leaving around five stitches distance (adjust as preferred).
- Sew the eyes securely to the owl’s body.
3. Crochet the Little Legs
- Using gold or mustard-colored yarn, create a magic ring with 6 single crochet stitches.
- Complete a second round with 6 increases, finishing with 12 single crochet stitches.
- Leave a long tail for sewing and make a second leg the same.
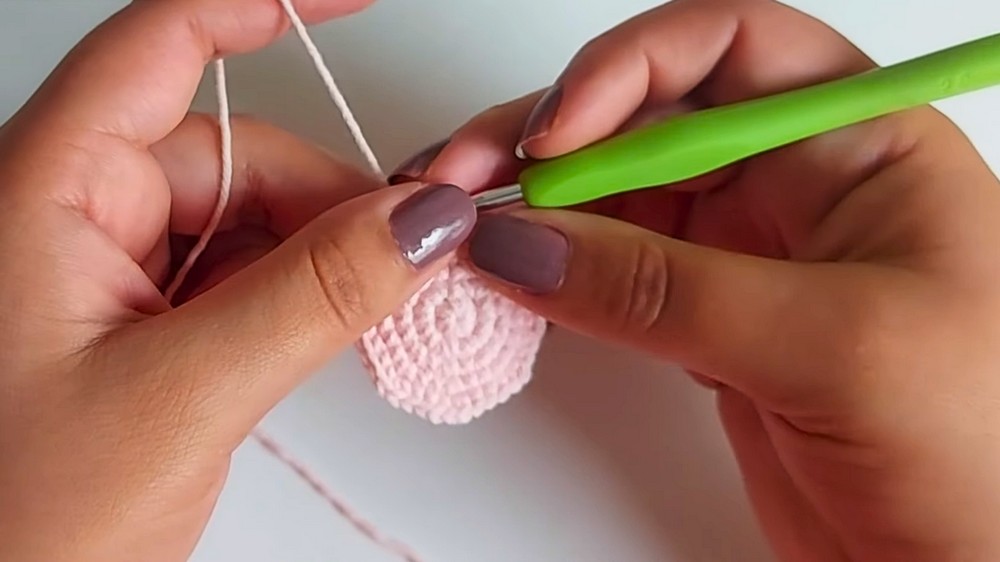
4. Start the Body
- Combine yarn colors like pink, gold, and white for the body. Begin with the soft pink shade:
- Create a magic ring and crochet 8 single crochet stitches inside it.
- In the second round, crochet 8 increases to end with 16 single crochet stitches.
- For the third round, follow a pattern: crochet 1 single crochet, 1 increase, repeated 8 times to get 24 stitches.
- In the fourth round, crochet 2 single crochets, 1 increase, repeated 8 times to complete 32 stitches.
- For the fifth round, crochet 3 single crochet stitches, 1 increase, repeated 8 times to make 40 stitches.
- From rounds 6–13, continue stitching stitch over stitch (40 single crochet stitches per round).
5. Add Details to the Body
- Change to white yarn for round 14. Work in front strands (FLO) for these rounds.
- Crochet 40 single crochet stitches FLO.
- For rounds 15–20, return to working stitch over stitch using the full stitch with 40 single crochet stitches per round.
6. Add the Decorative Details to the Body
- Using white yarn during round 14, raise three chains and leave one point unworked.
- In the next point, make a slip stitch. Repeat this sequence (chain 3, slip stitch) until you finish the lap, creating 20 spaces.
- Start working through these spaces with decorative stitches such as double crochets and slip stitches, alternating patterns to create texture.
7. Make and Attach the Beak
- Make a magic ring with 6 single crochet stitches.
- In the second round, crochet 1 single crochet, 1 increase, repeated three times for 9 single crochet stitches.
- Leave a thread for sewing and position the beak between the two eyes. Securely sew in place.
8. Crochet the Wings
- Using the same method as the legs, create magic rings with 6 single crochet stitches and complete 6 increases in the second round to end with 12 stitches per wing.
- Leave long threads for sewing, and position and attach the wings using pins for accuracy.
9. Add Any Final Decorations
- Make a small crochet flower to decorate the owl’s head (optional). Use a magic ring, crochet chains, double crochets, and slip stitches to shape the flower before attaching it neatly to the owl.
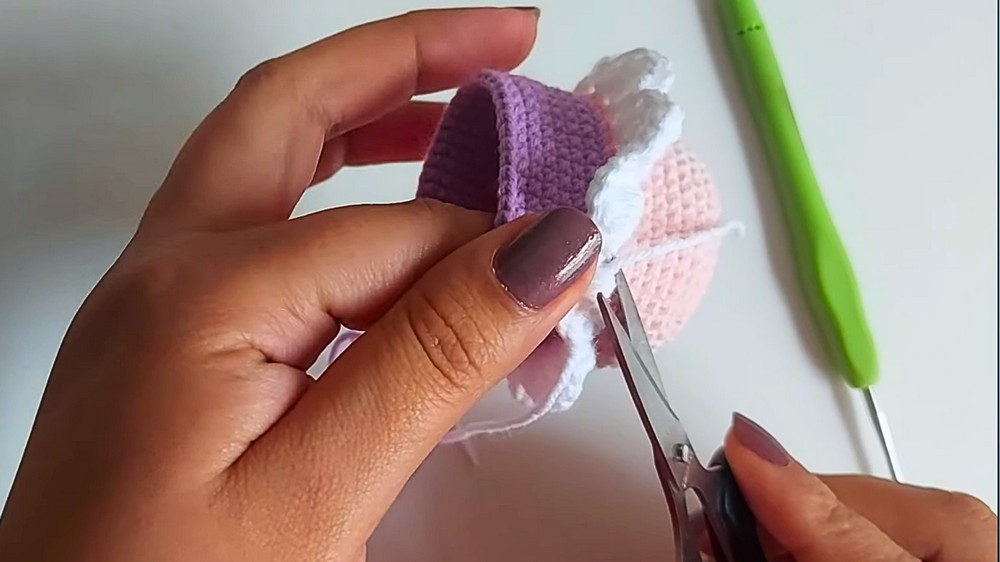
10. Assemble and Finish
- Fill the owl with stuffing to add structure.
- Stitch all parts together securely, ensuring the pieces align.
- Add a keyring at the top to turn your little creation into a keychain.
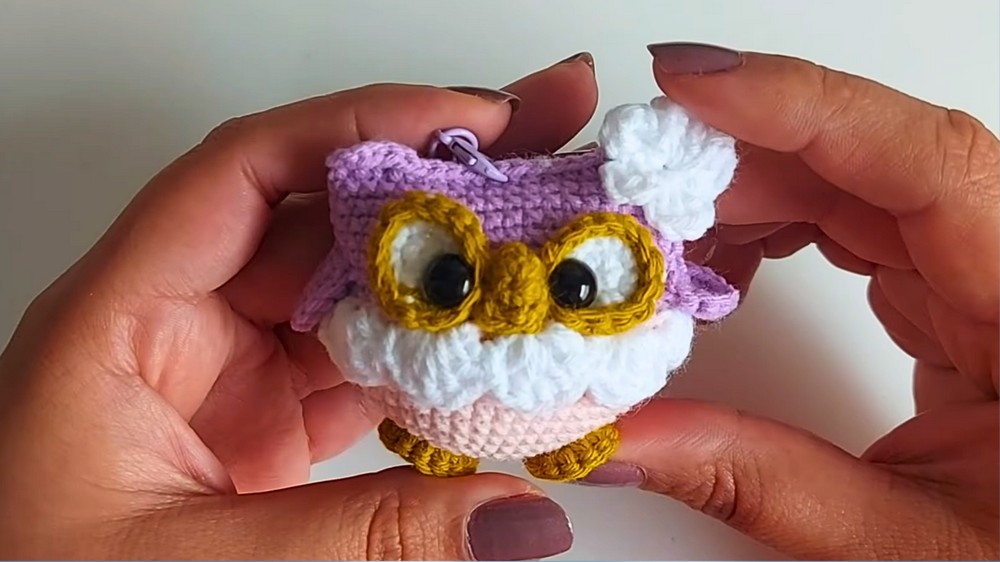
Special Features
- Adorable Design: Perfect for gifting or personal use.
- Customizable Colors: Choose colors that resonate with your style or preference.
- Textured Decorative Stitching: The use of FLO and alternating decorative patterns adds unique texture to the owl’s body.
Level of Difficulty
This project is ideal for intermediate beginners, as it introduces techniques like magic rings, increases, FLO, decorative stitches, and sewing crochet pieces. If you’re a beginner, take it slow and practice each element.
Tutor’s Suggestions
- The tutor recommends adjusting the positions of the eyes and wings to your preference.
- Position pieces first with pins to ensure a balanced appearance before sewing.
- Don’t hesitate to bring parts closer together or use different color combinations to make your owl unique.
Uses
- Keychain accessory for bags and keys.
- Cute handmade gifts for friends and family.
- Decoration for kids’ backpacks, pencil cases, or even as an ornament.
Tip
- To sew cleanly: Leave longer yarn tails for sewing so you don’t accidentally run out of thread during assembly.
Conclusion
This Crochet Owl Keychain pattern is both fun and rewarding, helping to enhance your crochet skills while crocheting a useful, adorable item. With bright colors, delightful textures, and unique features, this owl will surely catch everyone’s eye.