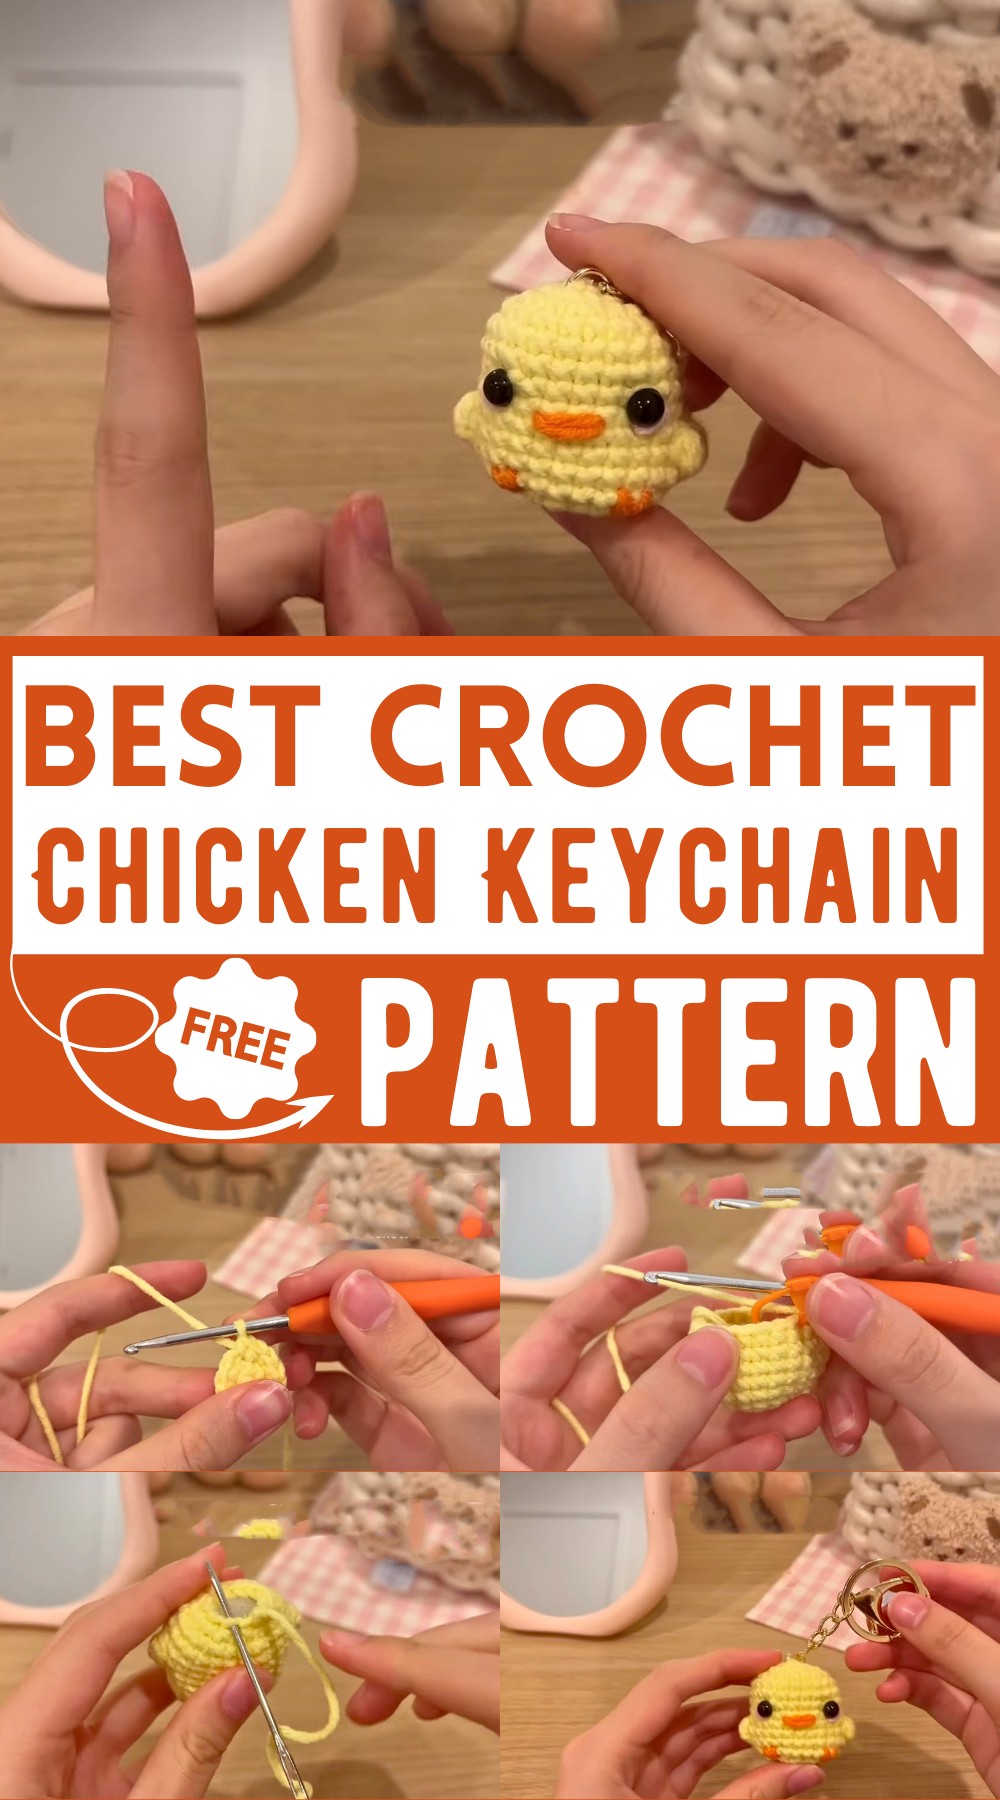
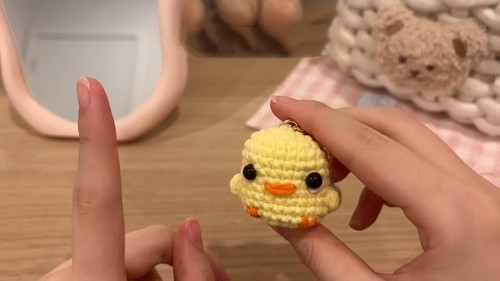
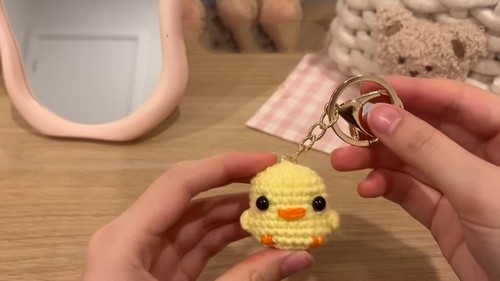
Soft And Squishy Crochet Chicken Keychain Pattern
Get ready to create a cute, beginner-friendly crochet chicken keychain with this guide. Using simple stitches, you’ll make a small, yellow chicken with tiny wings and a beak. The final piece looks adorable and can be used as a keychain or a decorative charm. Featuring clear instructions, stuffing for shape, and safety eyes for an expressive look, this project is just great!
Why love this pattern?
This crochet pattern for a chicken keychain is perfect for several reasons:
- Beginner-Friendly: The tutorial is designed to be super beginner-friendly, with each step explained slowly and clearly, making it ideal for those who are just starting out or are absolute beginners in crochet.
- Quick and Easy: Because the amigurumi chicken is small, it’s a quick and easy project that can be completed in a short amount of time, making it perfect for those who want a fun and fast project.
- Addictive and Fun: Crocheting can be very addictive and enjoyable. This pattern is not only fun to make, but once you get the hang of it, you can create multiple chickens that look really cute.
- Perfect Gift Idea: The finished product, a cute little chicken keychain, makes for a perfect gift or a charm to sell. It’s a great way to showcase your crochet skills and share your creations with others.
How To Crochet Chicken Keychain
Materials Needed
- 3 mm Hook
- Yellow Yarn (for the body)
- Orange Yarn (for the mouth and legs)
- Stuffing
- Darning Needle
- Scissors
- Safety Eyes (or black yarn/felt)
- Keychain with Pliers (optional)
Abbreviations
- MR: Magic Ring
- sc: Single Crochet
- inc: Increase (2 sc in one stitch)
- dec: Decrease (sc 2 stitches together)
- st(s): Stitch(es)
Pattern Instructions
Start: Body
- Round 1: MR, 6 sc into the ring. [6 stitches]
- Round 2: inc in each st around. [12 stitches]
- Round 3: sc in next st, inc around. [18 stitches]
- Round 4: sc in next 2 sts, inc around. [24 stitches]
- Round 5-9: sc in each st around. [24 stitches per round]
Creating the Hands (Round 10)
- Round 10:
- sc in next 5 sts
- [Bobble Stitch for hand]*: Start in the next st, yarn over, insert hook into st, yarn over, pull up loop, yarn over, pull through two loops. Repeat until you have three partial dc, yarn over and pull through all loops.
- sc in next 11 sts
- Bobble Stitch for the second hand.
- sc in next 6 sts.
Building Height (Round 11-12)
- Round 11-12: sc in each st around. [24 stitches per round]
Decreasing to Close (Round 13-14)
- Round 13: sc in next 2 sts, dec around. [18 stitches]
- Round 14: dec, sc in next st around. [12 stitches]
Completing the Body
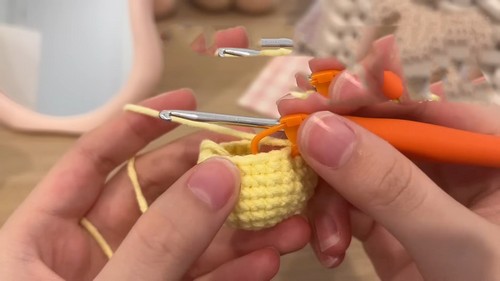
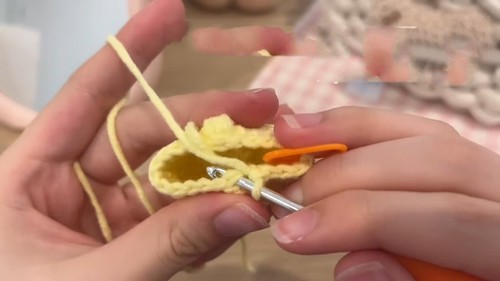
- Close the Opening:
- Add stuffing to the body.
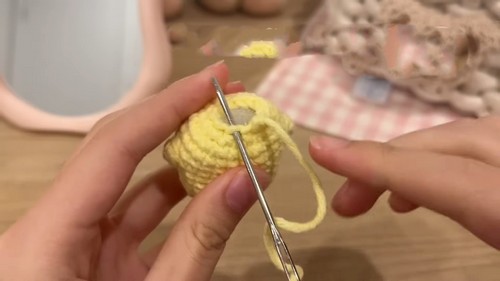
- Cut yarn leaving a long tail.
- Weave tail through the front loops of the remaining stitches and pull tight to close. Secure the yarn and weave in the ends.
Adding Features
- Safety Eyes: Insert between rounds 7 and 8, five stitches apart.
- Mouth:
- Using orange yarn, create a small mouth shape between rounds 8 and 9.
- Legs:
- With orange yarn, create small legs between rounds 11 and 12, right beneath the eyes.
Optional Keychain Attachment
- Use pliers to attach the keychain to the top of the chicken.
This should give you a detailed guide to follow along with. The video might provide additional visual aid, so it can be useful to follow along this guide. Happy crocheting!