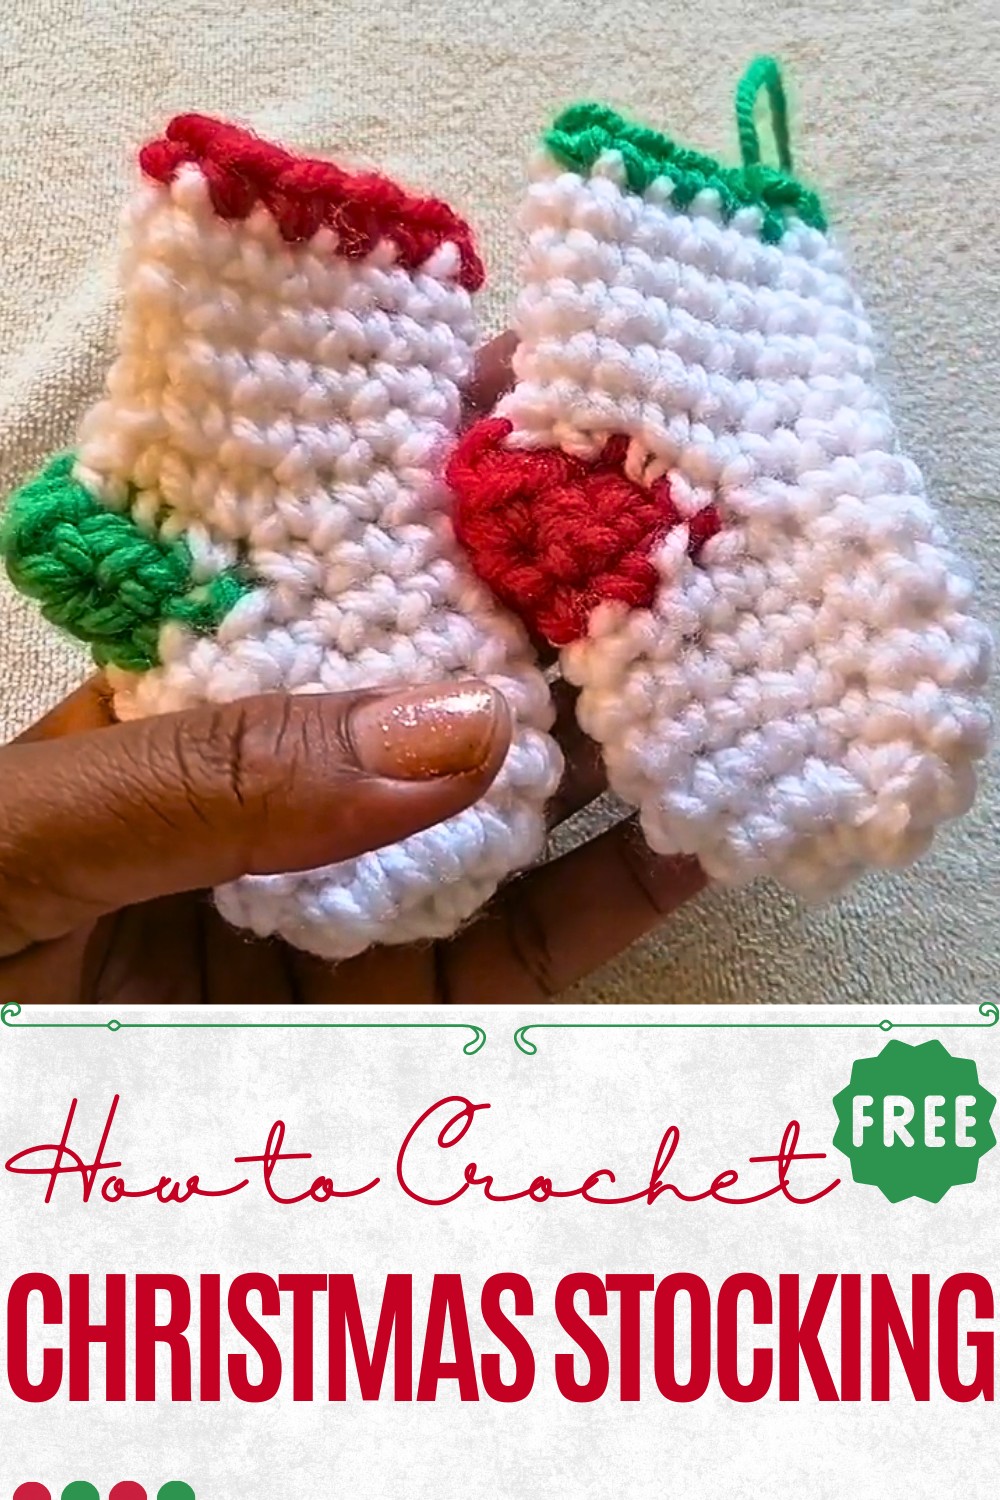
Radiant Crochet Mini Christmas Stocking Pattern to Brighten Décor
Sparkling seasonal style comes alive with this Free Crochet Mini Christmas Stocking Pattern offering delightful décor and thoughtful gift possibilities
Frosted windows and the soft glow of holiday lights set a cheerful scene where small details make every celebration feel more personal. In this spirit, the Free Crochet Mini Christmas Stocking Pattern offers a charming way to share seasonal warmth and thoughtful gestures. Perfect for holding candies, tiny gifts, or heartfelt notes, each stocking adds a festive touch to mantels, trees, and dining tables alike. Their compact size makes them ideal for party favors or unique gift toppers, adding character to any gathering without overwhelming the décor.
Elegant Crochet Mini Christmas Stocking Pattern with Classic Style
The lightweight texture keeps them easy to hang, while the sturdy stitching ensures they maintain their shape year after year. They can be arranged as garlands across fireplaces, tied to wreaths, or used as memorable keepsakes for friends and family. This versatile piece allows for playful color choices, letting each stocking reflect personal style or match a specific holiday theme.
With the Free Crochet Mini Christmas Stocking Pattern, every corner of the home can share a touch of festive cheer. These small accents bring both practicality and sentiment, making them an effortless way to highlight the joy of giving while enhancing the cozy atmosphere of winter celebrations.
Materials Needed
- Yarn
- Two colors: White (Color A) and Red (Color B) or any colors of your choice.
- Crochet Hook
- 4mm crochet hook.
- Scissors
- For trimming and cutting yarn ends.
- Marker or Yarn Scrap
- To mark rows or stitch boundaries.
- Optional: A hanging loop if you want to display the stocking.
Special Features
- Festive Color Scheme: Designed to reflect the Christmas spirit using white and red yarn.
- Compact Size: Small and practical for decorative purposes.
- Customizable: You can change the stocking size, adjust the length, or add other colors.
- Beginner-Friendly: Uses simple stitches like single crochet, slip stitches, and color changes.
Step-by-Step Instructions
Step 1: Starting with the Base (Color A)
- Make a Slip Knot
- Begin with a slip knot using the white yarn.
- Chain Two
- Create two chains as the foundation for your pattern.
- Single Crochets in Second Chain
- Work six single crochets into the second chain to form a small round (this creates a magic ring effect).
- Use a marker to indicate the start of the round.
Step 2: Expanding the Base
- Work Row Two
- In each stitch, make two single crochets (increase).
- You should have a total of 12 single crochets by the end of this round.
- Work Rows Three to Six
- Make one single crochet in each stitch without increasing.
- Continue working “in the round,” using the marker to keep track of the starting point.
Step 3: Adding Color B (Red)
- Switch to Color B
- After completing row six, turn your work to push the inside out.
- Count six stitches backward and insert your hook into the sixth stitch.
- Start the Heel Section
- With red yarn, make five single crochets along the stitches.
- Chain one and turn.
- Work Heel Rows
- Continue making five single crochets per row using red yarn for a total of three rows.
- Cut and knot the red yarn when you finish.
Step 4: Resuming with Color A (White)
- Return to White Yarn
- Pick up the white yarn where you left off, and make six single crochets across the open stitches.
- Connecting the Sides
- Make three single crochets along the edge of the red heel section.
- Fold your work in half and make three single crochets on the other side of the red heel as well.
- Crochet Around the Base
- Resume crocheting over the original six single crochets, making single crochets around the stocking to form the main shape.
Step 5: Building the Stocking Body
- Work Rows Nine to Twelve
- Make single crochets in each stitch around the stocking (one stitch per chain space).
- Continue crocheting “in the round” until row twelve.
- Adjust Length
- At this stage, you can customize the length by adding more rows.
Step 6: Adding a Decorative Top (Optional)
- Extra Color Top
- You can add a row of single crochets in red yarn at the top for decoration.
- Finish with a Slip Stitch
- End on a slip stitch, securing the work.
Step 7: Final Touches
- Create a Hanging Loop (Optional)
- To display the stocking, make a loop using a piece of yarn and knot it at the corner.
- Trim Yarn
- Cut any excess yarn and weave in loose ends.
Level of Difficulty
- Beginner-Friendly: Basic stitches (single crochet and slip stitch) make this project easy to follow, even for new crocheters.
- Minimal Techniques: Only requires basic color changes and round crocheting.
Tutor’s Suggestions
- Use a Marker: Place a marker to track where your row starts and ends, especially when crocheting in the round.
- Practice Color Changes: If you’re unfamiliar with switching yarn colors, try practicing before starting the project.
- Maintain Even Tension: Consistent tension ensures that the stocking is neat and evenly shaped.
Uses of the Mini Christmas Stocking
- Christmas Decorations: Hang them on a wall, mantel, or tree for festive flair.
- Gift Packaging: Use it to hold small gifts or candies.
- DIY Projects: Great for craft fairs or as part of a handmade holiday setup.
Conclusion
This mini Christmas stocking crochet tutorial is a fun and festive handmade project to incorporate into your holiday traditions. It’s quick, beginner-friendly, and lends itself to a myriad of creative uses. Whether you’re hanging it, gifting tiny treats, or simply embracing the crafting spirit, this stocking is an excellent way to express your love for crocheting during the Christmas season.
Final Tip
Experiment with Yarns and Colors: While red and white are traditional Christmas colors, you can customize the stocking by using other combinations like green, blue, or gold to match your holiday theme!