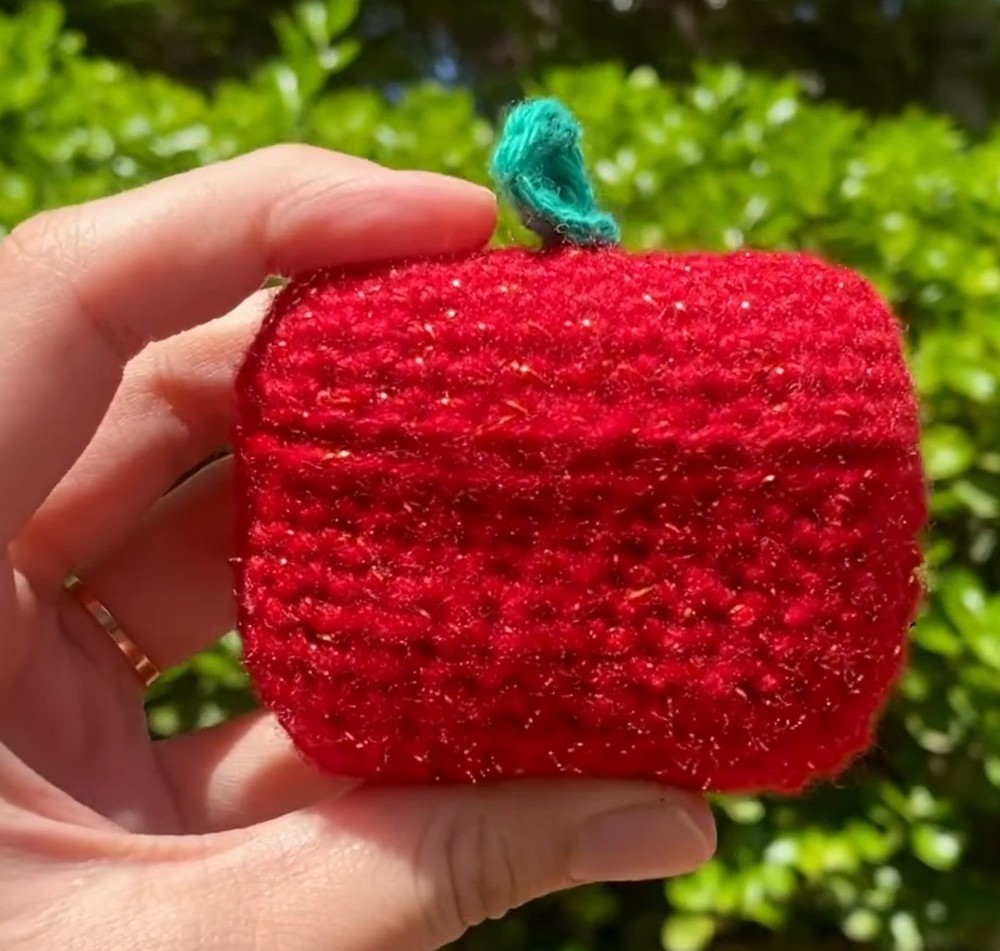
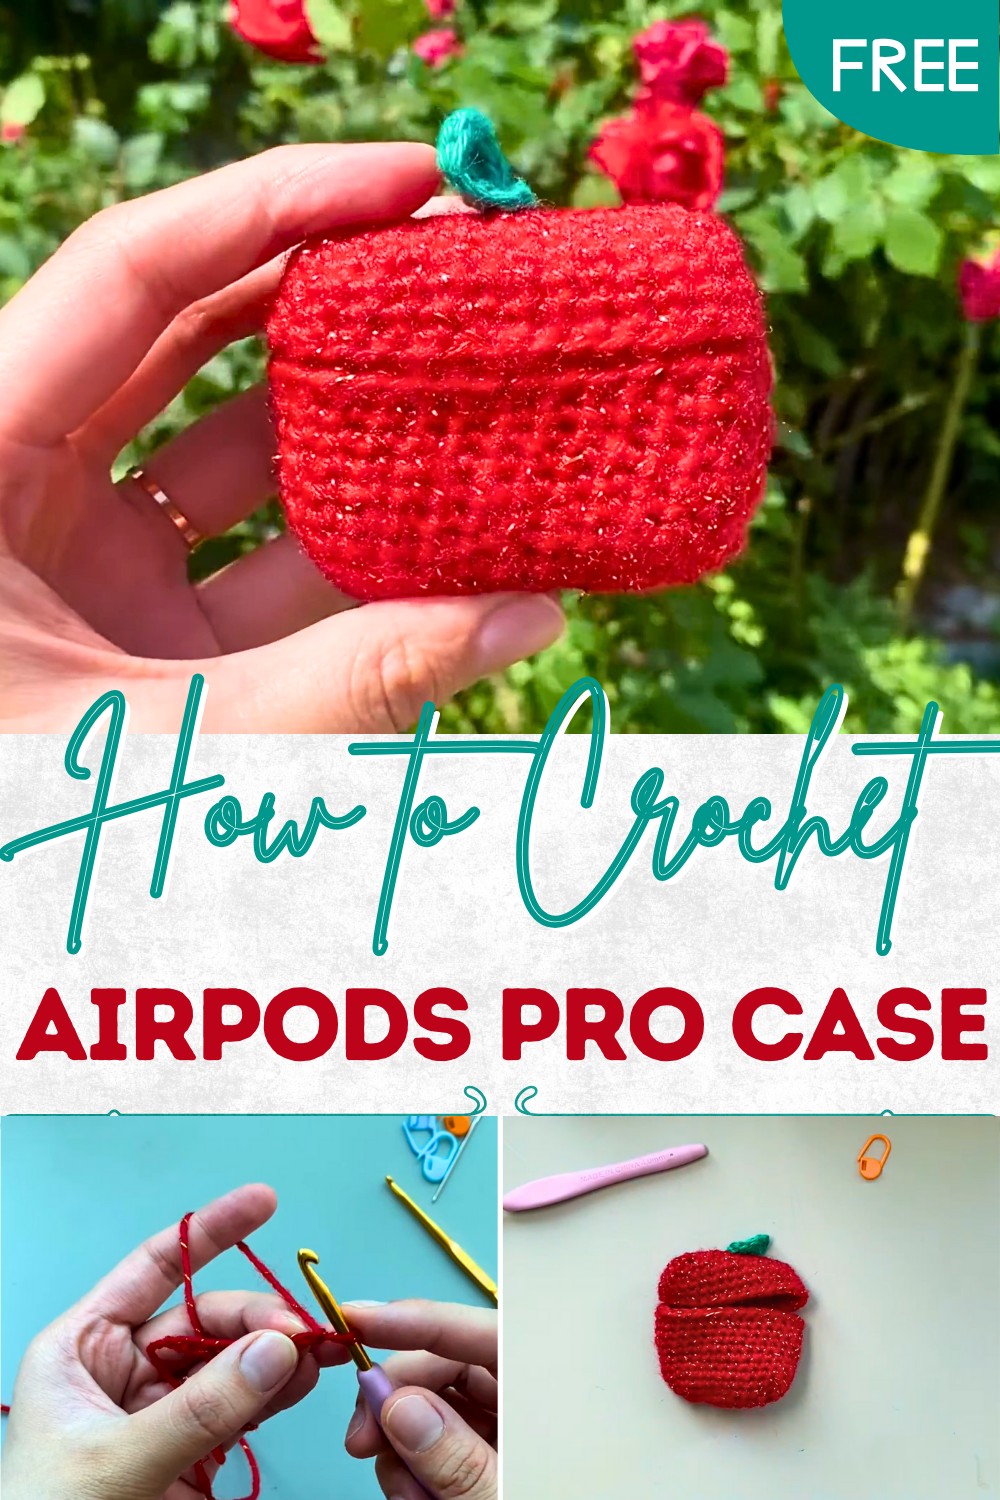
Radiant Crochet Airpods Pro Case with Modern Glow
Enjoy stylish protection with this Crochet Airpods Pro Case Pattern, featuring cozy textures, chic details, and a charming handmade touch for all.
In today’s fast-paced world, protecting delicate electronics has become as essential as carrying them, and accessories that combine functionality with style are highly valued. The Crochet AirPods Pro Case Pattern transforms simple yarn into a practical and charming protective cover, ensuring that your AirPods Pro remain safe from scratches, dust, and minor impacts while adding a personal touch. Its soft yet durable texture cushions the device while giving it a handcrafted elegance that sets it apart from standard cases.
Stylish Crochet Airpods Pro Case for Tech Accessories
The construction begins with forming a snug, rounded body that perfectly fits the AirPods Pro charging case. Midway, a secure flap or closure is added to keep the device safely enclosed, while optional details like decorative stitches, color accents, or tiny charms enhance its visual appeal. Lightweight and flexible, the case allows easy access to the charging port while maintaining full protection, making it both practical and stylish.
Versatile in color and customization, the Crochet AirPods Pro Case Pattern can reflect personal style or coordinate with other accessories. Beyond protection, it serves as a thoughtful handmade gift, a conversation starter, and a way to carry a touch of creativity every day. Each stitch embodies care, functionality, and aesthetic charm, turning a simple accessory into a delightful statement piece.
Materials Needed
- Crochet Hooks:
- 4.0 mm for the main body.
- 3.5 mm for the leaf.
- Yarn:
- Red knitting yarn (apple body).
- Green knitting yarn (leaf).
- AirPods Case: To ensure proper size and structure.
- Markers: To keep track of stitches.
- Super Glue: For attaching the crochet case to the hard AirPods case.
- Tapestry/Matte Needle: For hiding yarn ends and sewing pieces.
- Stuffing Stick (optional): For placing the AirPods securely while you work.
Special Features
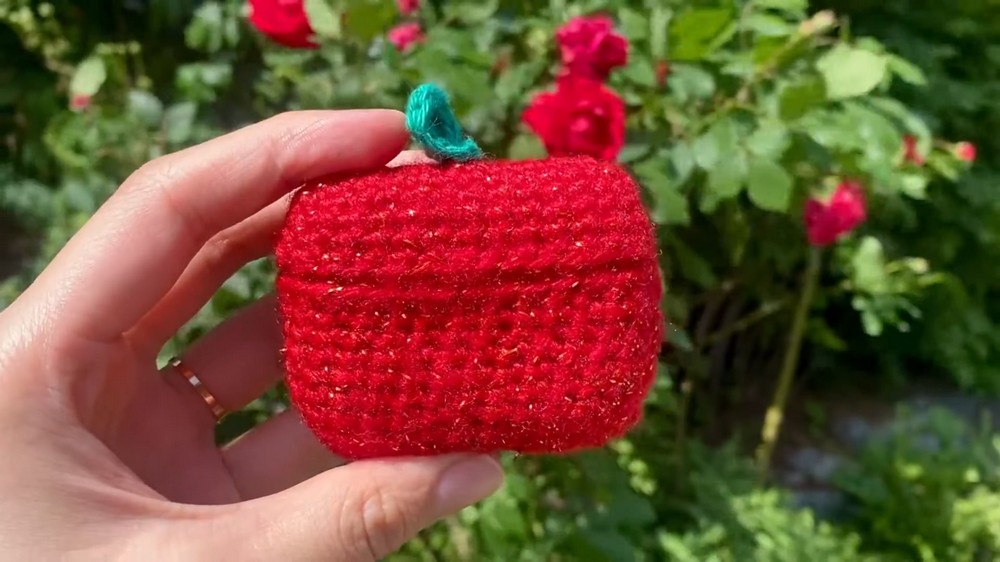
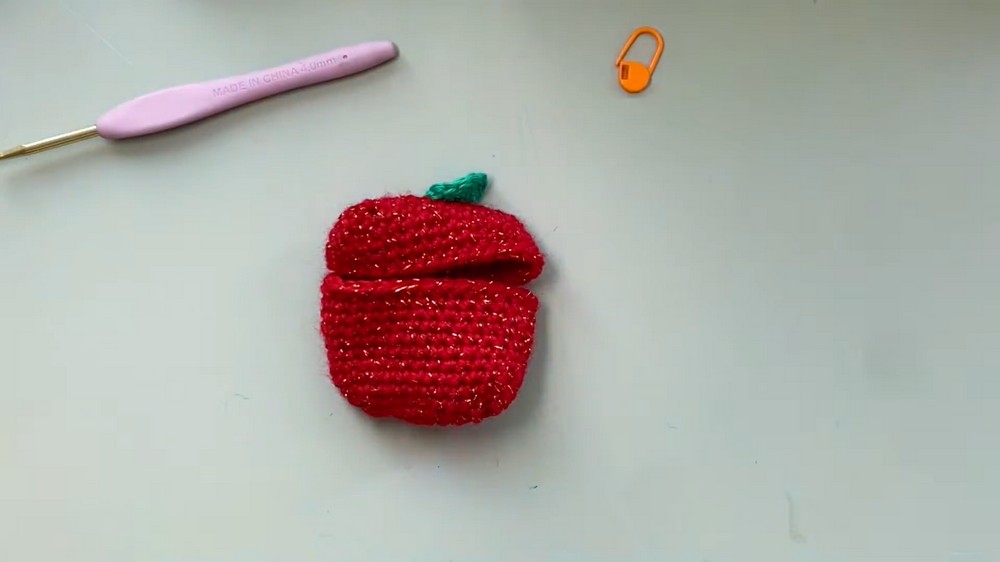
- Cut-out for Charging Port: The bottom portion includes a neat cut-out for the charging port.
- Decorative Leaf: A finely-detailed green leaf that adds a cute and creative finishing touch.
- Tight, Secure Fit: The case is designed to snugly fit the standard AirPods Pro hard case.
- Durable Build: Combining tight stitches and super glue ensures that your case is sturdy and long-lasting.
- Adorable Design: The apple theme adds a playful element to your accessories, making it both unique and functional.
Level of Difficulty
- Beginner to Intermediate: The project is friendly to those comfortable with basic crochet stitches (single crochet, double crochet, etc.) and techniques, such as creating chains or increasing stitches. However, the addition of shaping and details like the charging port area may be slightly challenging for complete beginners.
Tutor’s Suggestions
- Chain Length: For those working on the case without using an actual AirPods case, the pattern recommends reducing the initial chain stitches to 10 instead of 11.
- Markers: Use a marker to track important stitches, especially where increases and decreases occur.
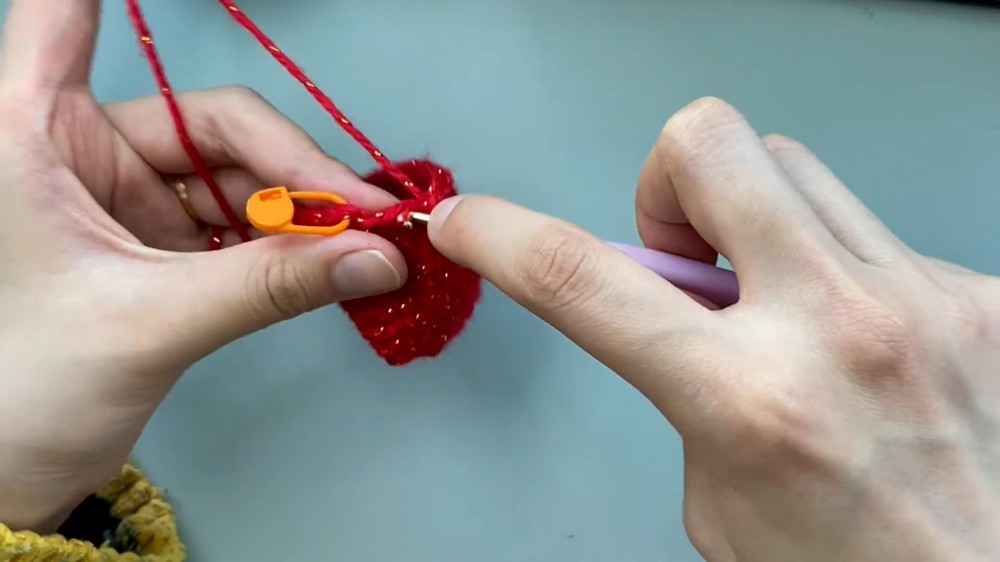
- Neat Yarn Ends: Hold leftover yarn as you crochet for hiding it seamlessly into the structure.
- Avoid Overloading Glue: Use super glue sparingly to ensure a clean, polished look and prevent messiness.
- Check Fit Before Gluing: Always test the fit of the crochet piece with your hard AirPods case before applying glue.
Step-by-Step Instructions
1. Top Part of the Case (Red Apple Body)
- Starting Chain:
- Use red yarn and a 4.0 mm crochet hook to make 11 chain stitches.
- If you’re crocheting without an AirPods case as a reference, use only 10 chains instead.
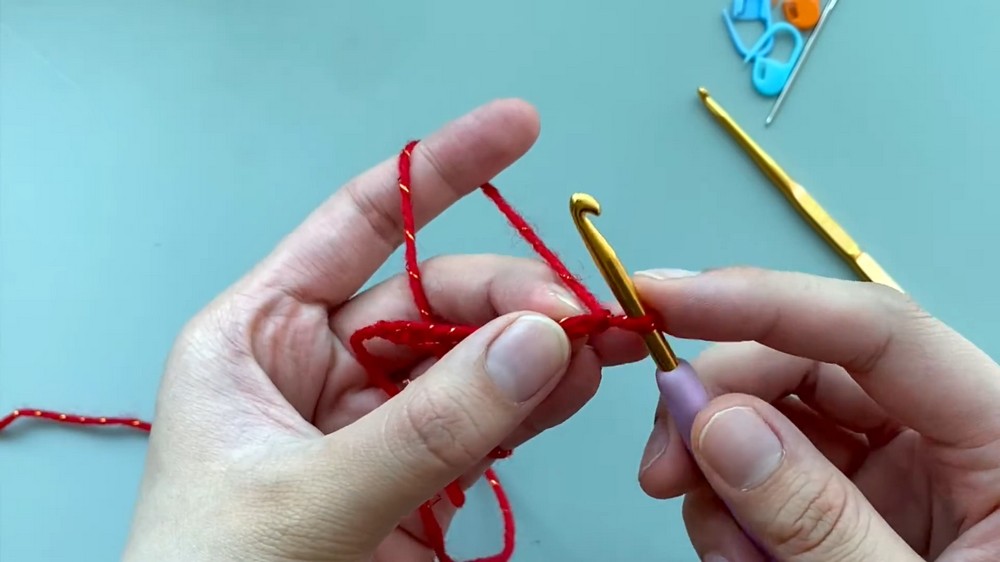
- First Row:
- Skip the first stitch to create a turning chain.
- Work 9 single crochets along the chain, adding a marker after the first stitch.
- Turning the Work:
- Add an extra single crochet at the end.
- Place two additional single crochet stitches in the same spot as the last stitch and crochet around the chain in the opposite direction.
- Rounding Off:
- Add 9 single crochets moving back toward the starting point.
- At the end of the row, add one additional single crochet, then remove the first marker and slip stitch to join the row.
- Second Row:
- Begin by working two single crochet stitches into the first stitch, placing a marker again at the first stitch.
- Continue to single crochet across, up to the marker.
- For the end stitches, add two single crochets in every stitch across three stitches to form the rounded base.
- Third to Sixth Rows:
- Work even rounds of single crochet without increasing or decreasing.
- Slip stitch and chain one at the end of each round.
- Finishing the Top Part:
- Once the sixth row is complete, bind off the yarn, and hide the ends with a tapestry needle.
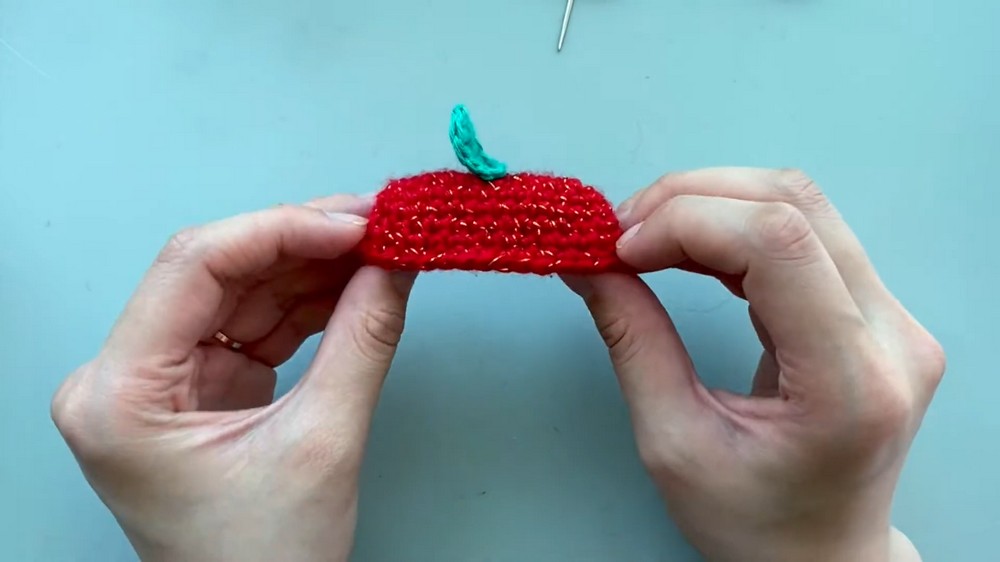
2. Leaf (Green Accent)
- Starting Chain:
- Use green yarn and a 3.5 mm crochet hook to make 6 chains.
- Skip the last stitch for the turning chain.
- First Side:
- Work a single crochet into the first stitch (add a marker here).
- Crochet double crochets into the next two stitches, followed by a half-double crochet into the fourth stitch.
- Place 3 single crochets into the last stitch for rounding the tip of the leaf.
- Second Side:
- Work back along the opposite side of the chain:
- Half-double crochet in the next stitch.
- Double crochet into the following two stitches.
- Single crochet into the final stitch.
- Work back along the opposite side of the chain:
- Final Touch:
- Remove the marker and slip stitch to the first stitch to complete the shape.
- Bind off, leaving a tail long enough to sew the leaf onto the case.
- Attach Leaf:
- Sew the leaf securely to the top of the red apple part using the tapestry needle.
- Sew the leaf securely to the top of the red apple part using the tapestry needle.
3. Bottom Part of the Case (Including Charging Port)
- Base Foundation:
- Make 11 chain stitches with red yarn.
- Skip the first stitch and single crochet into the next 9 stitches.
- Charging Port Cut-Out:
- After the third single crochet, chain 4, then skip 4 stitches and continue single crocheting.
- Build Up Rows:
- Continue the same process as the top part, with increases where necessary for rounding the edges.
- From Rows 3–11, work even rounds of single crochet.
- Finish:
- After completing the 11th row, bind off and sew in the yarn ends with the tapestry needle.
- After completing the 11th row, bind off and sew in the yarn ends with the tapestry needle.
4. Assembly
- Glue the Pieces:
- Test-fit your crochet pieces on the hard AirPods case to ensure proper alignment.
- Use super glue sparingly on the hard case and firmly press the top and bottom crochet sections in place.
- Check Alignment:
- Ensure the charging port lines up properly with the opening at the bottom.
- Ensure the charging port lines up properly with the opening at the bottom.
Uses
- Protective Cover: Adds a layer of protection to your AirPods case while keeping them stylish.
- Gift: A thoughtful, handmade gift for friends or family.
- Decoration: A unique and fun accessory to carry around.
Conclusion
Creating this apple-themed AirPods case is a blend of creativity and functionality. With its playful design and snug fit, it adds a cute and personal touch to your everyday tech accessory. Whether for personal use or as a handmade gift, this case is a charming project that both beginner and intermediate crocheters can enjoy.
Tip
When applying super glue, work in small areas at a time to maintain control and avoid over-gluing. Always check alignment as you go to ensure a perfect fit.