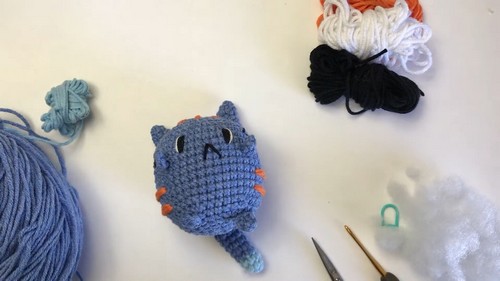
Perfect Crochet Amigurumi Cat Pattern For Kids
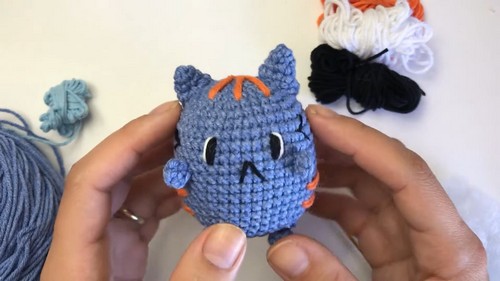
The Crochet Amigurumi Cat Pattern is a delightful project that produces an adorable, chubby cat with a cute tail. Perfect for beginners, this easy-to-follow tutorial helps you create a 10-inch cuddly toy using cotton yarn and a thick crochet hook. The cat has a round, ball-like body, tiny feet, and triangular ears, making it irresistibly cute. Its simple shapes and straightforward steps make it an enjoyable, stress-free craft. Once complete, this soft, charming kitty can be a fun toy, a charming shelf decoration, or a companion for larger amigurumi creations.
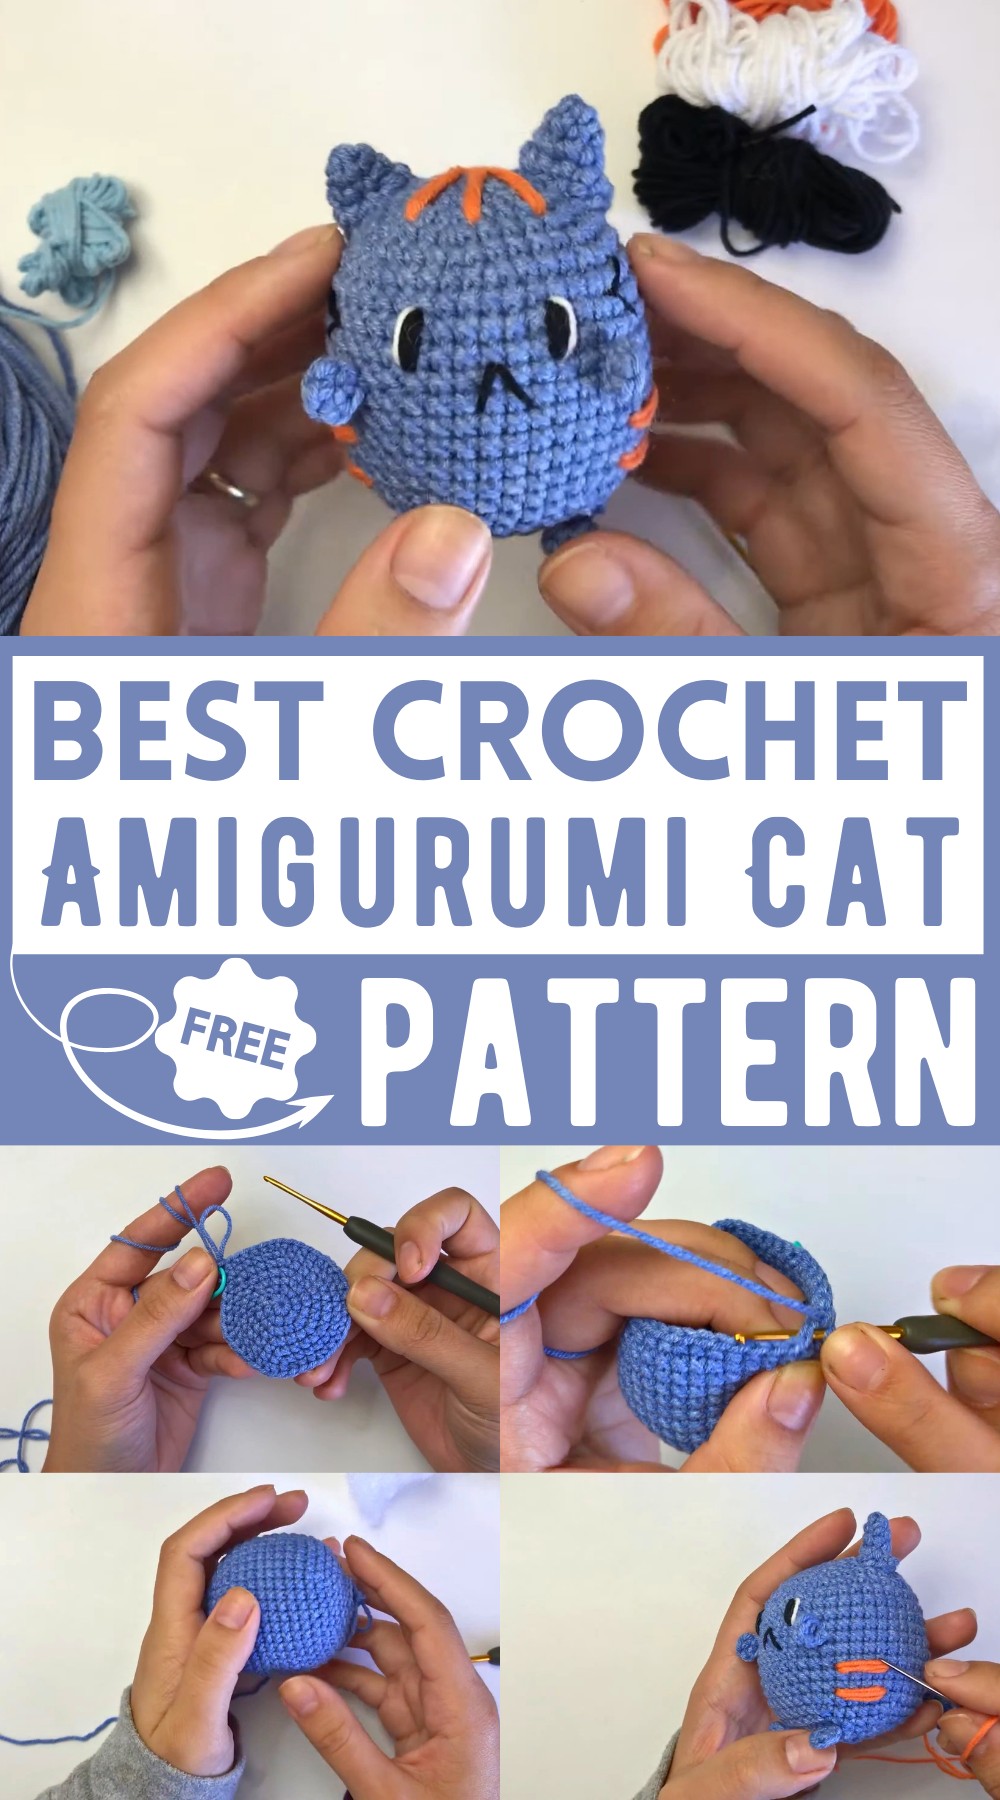
Why Love This Pattern?
- Adorable Design: The pattern creates a cute and chubby kitty that is just 10 inches long, making it an adorable handmade toy or decoration.
- Customizable Features: There are options for using locked eyes or embroidered eyes, allowing you to customize the kitty’s appearance to your liking.
- Versatile Usage: The finished kitty can be used as a toy, a companion to larger toys, or even as a decorative piece in your home.
- Complete Guide: The tutorial covers all aspects of the project, from knitting the main body to creating and attaching the ears, feet, and tail, as well as adding decorative touches.
How To Crochet Amigurumi Cat
Materials Needed:
- Amigurumi cotton yarn (light blue and a different color for the tail)
- Thick crochet hook
- Fiber fill (for stuffing)
- Yarn needle
- Stitch marker
- Safety eyes or yarn for embroidery (if you prefer locked eyes, count rows for placement)
Abbreviations:
- sc: single crochet
- inc: increase (2 sc in the same stitch)
- dec: decrease (single crochet 2 stitches together)
- st: stitch
- sl st: slip stitch
Pattern:
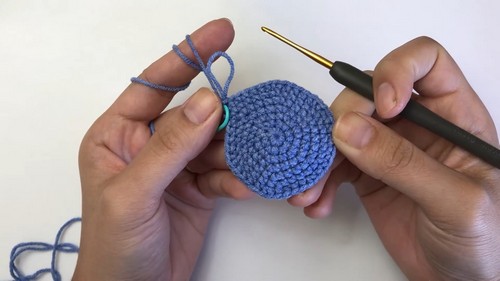
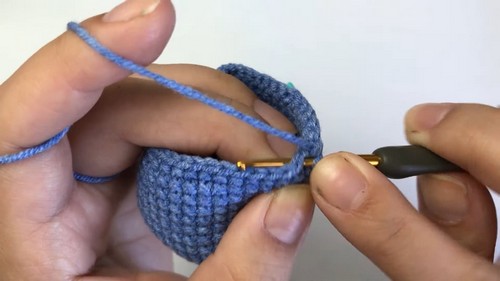
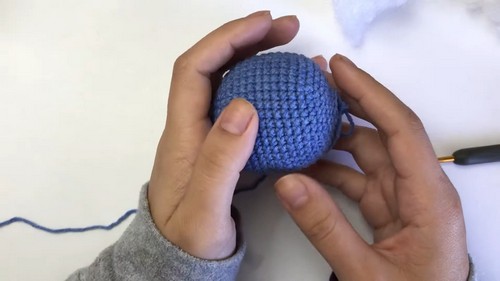
Body:
- Magic Ring:
- Make a magic ring with 6 sc.
- Round 1:
- 2 sc in each stitch around. (12)
- Round 2:
- 1 sc in next stitch, inc – repeat around. (18)
- Round 3:
- 2 sc in next 2 stitches, inc – repeat around. (24)
- Round 4:
- 3 sc in next 3 stitches, inc – repeat around. (30)
- Round 5:
- 4 sc in next 4 stitches, inc – repeat around. (36)
- Round 6:
- 5 sc in next 5 stitches, inc – repeat around. (42)
- Rounds 7-16:
- Sc in each stitch around. (42)
- Round 17:
- 5 sc, dec – repeat around. (36)
- Round 18:
- 4 sc, dec – repeat around. (30)
- Round 19:
- 3 sc, dec – repeat around. (24)
- Round 20:
- 2 sc, dec – repeat around. (18)
- Round 21:
- 1 sc, dec – repeat around. (12)
- Round 22:
- Dec around. (6)
- Finish:
- Fasten off and weave in ends.
Ears (Make 2):
- Magic Ring:
- Make a magic ring with 4 sc.
- Round 1:
- 1 sc, inc three times. (6)
- Round 2:
- 2 sc, inc – repeat around. (9)
- Round 3:
- 3 sc, inc – repeat around. (12)
- Finish:
- Fasten off, leaving a long tail for sewing.
Legs (Make 2):
- Magic Ring:
- Make a magic ring with 5 sc.
- Finish:
- Fasten off, leaving a long tail for sewing.
Arms (Make 2):
Same as legs.
Magic Ring:
- Make a magic ring with 5 sc.
Finish:
- Fasten off, leaving a long tail for sewing.
Tail:
- Magic Ring:
- Make a magic ring with 6 sc.
- Round 1:
- 1 sc, inc – repeat around. (9)
- Rounds 2-24:
- Sc in each stitch around.
- Finish:
- Fasten off, leaving a long tail for sewing.
Assembly:
- Stuff the Body:
- Add fiber fill to the body and close the last round tightly.
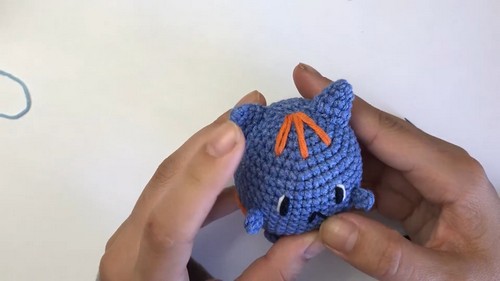
- Attach Ears:
- Sew the ears onto the top of the body.
- Attach Legs and Arms:
- Sew the legs to the bottom and arms to the sides just below the head.
- Attach Tail:
- Sew the tail to the back of the body.
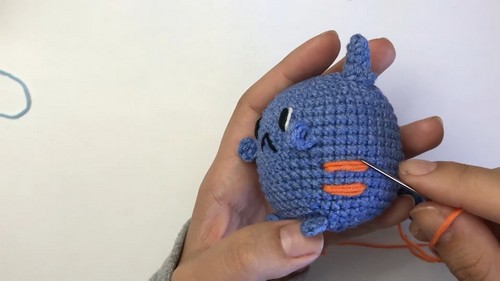
- Eyes and Face Embroidery:
- Position the eyes between rows 6 and 7. Embroider the nose, whiskers and any other desired features.
Happy crocheting!