Pallet Greenhouse Project For Small Backyard Vegetable Gardens
Transform trash into treasure with the Pallet Greenhouse Project! Crafted from simple supplies, this greenhouse is not just eco-friendly but budget-friendly too. Easy to build, it involves framing windows, covering them with plastic based on your climate needs, and preparing the soil for planting. Whether it’s too chilly or scorching outside, your plants stay snug inside this DIY plants haven. So, get into making your garden thrive while keeping costs low and creativity high with the Pallet Greenhouse where every plant gets its chance to shine.
Materials:
- Wood (primarily pallets, available for free on Craigslist or similar platforms)
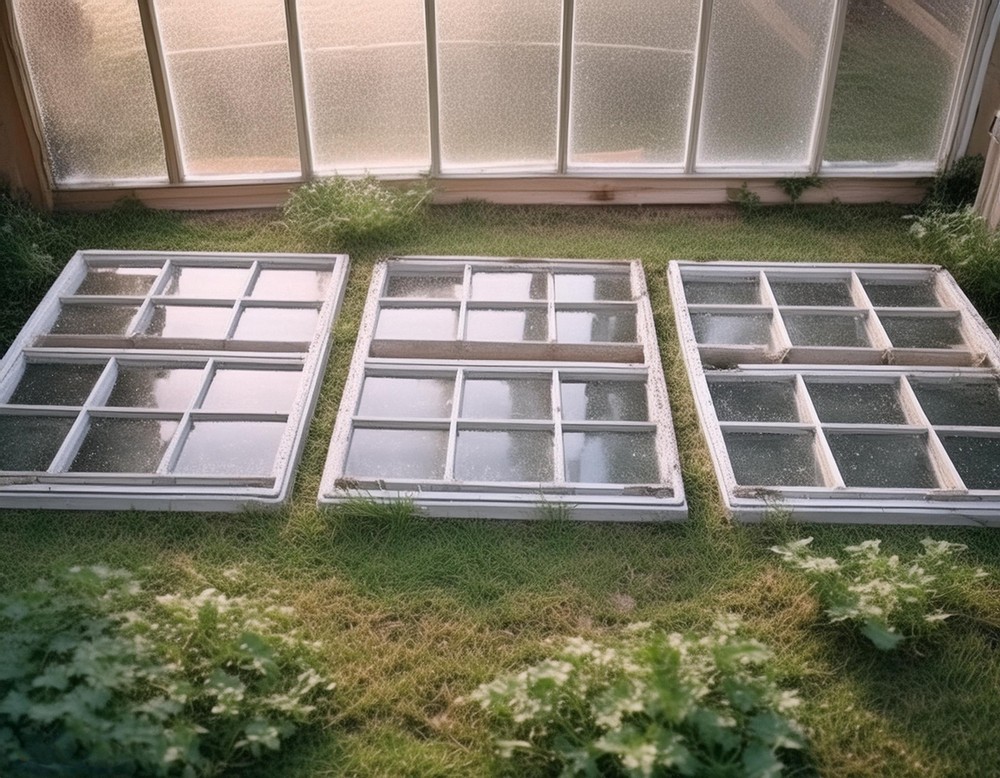
- Windows (also procurable for free on Craigslist)
- Clear paint drip plastic (2-4mm, depending on regional climate)
- Screws (a generous quantity)
- Shovel (for excavation tasks)
- Black tarp (serving as a rain guard)
- Rocks (for drainage)
- Organic soil
- Organic compost
Tools:
- Measuring Tape
- Saw (for cutting wood to size)
- Drill (for assembling the frame with screws)
Project Steps
Step 1: Measure and Frame Construction
- Area Measurement: Start by measuring the area where you intend to set up the greenhouse. Ensure the dimensions align with the size of the windows you’ve procured, as these will form the primary enclosing structure.
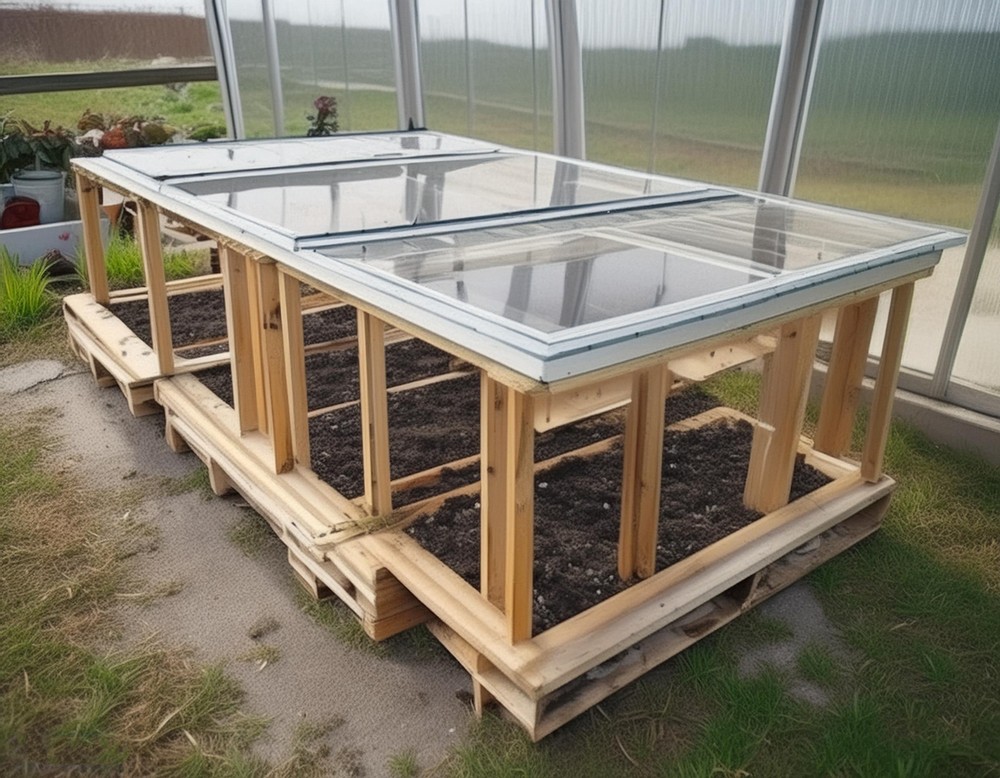
- Frame Creation: Using the wood sourced, construct a robust frame that matches your measured dimensions. This frame will serve as the skeleton of your greenhouse.
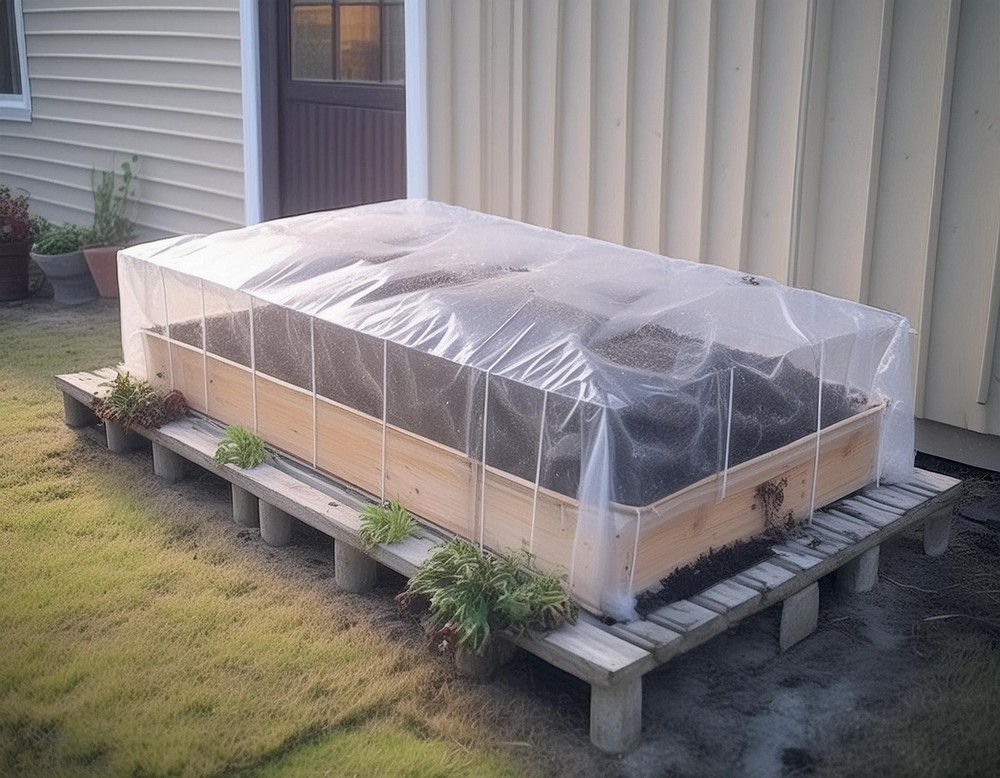
- Siding with Plastic: Cover the sides of your frame with the clear paint drip plastic. Depending on your location’s climate, decide between a single or double layer to offer adequate insulation. This step is crucial for temperature control within the greenhouse.
Step 2: Preparing the Soil
- Soil Enrichment: Fill the base of your constructed frame with organic soil. For optimized plant growth, blend this soil with organic compost, enriching the nutrient content available to your future plantings.
- Planting: Now’s the time to introduce your plants. Whether you’re starting with seeds, seedlings, or more mature plants, ensure they’re evenly spaced and adequately buried within your enriched soil.
Step 3: Harvesting and Maintenance
- Temperature Management: Given the confined space and plastic covering, the greenhouse can experience significant warmth. Monitor and adjust by opening the structure during sunny days to mitigate excess heat.
- Weatherproofing: In anticipation of rain or storms, ensure the greenhouse is securely covered. Additionally, utilize the black tarp and trench filled with rocks around the perimeter for effective rainwater management.
Final Thoughts
This pallet greenhouse project embodies not just a step towards self-sufficiency in growing your plants, but also a step forward in the use and reuse of materials that are often overlooked. By infusing technology with nature, creating a space that supports life year-round, irrespective of external weather conditions, becomes a rewarding venture. Whether you’re a seasoned gardener or someone looking to embark on your first gardening project, this greenhouse offers both a challenge and an opportunity to create something truly beneficial from materials that would otherwise be considered waste. Join us in crafting a greener future, one pallet at a time.