Magical Crochet Santa Coaster with Joyful Holiday Spark
Brighten festive moments with this Crochet Santa Coaster Pattern for a playful, charming accessory that adds joy to holiday tables.
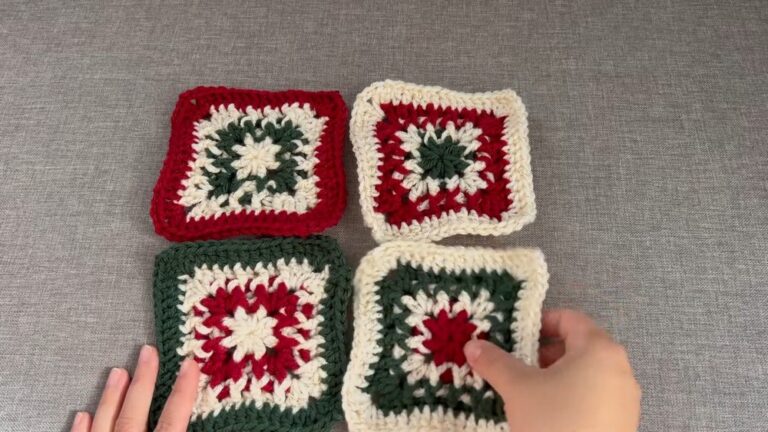
During the festive season, small details can make a home feel warm and inviting, and the crochet Santa coaster pattern brings both charm and functionality to any tabletop. Each coaster captures the cheerful spirit of Santa Claus, with vibrant red and white yarn creating a playful yet refined look. These coasters not only protect surfaces from drinks but also add a festive touch to coffee tables, dining settings, or holiday displays. Their soft texture provides a tactile delight, while sturdy stitching ensures durability through countless gatherings and seasonal celebrations.
Cheerful Crochet Santa Coaster for Colorful Christmas Style

Beyond practical use, these coasters serve as thoughtful gifts, party favors, or collectibles for those who appreciate handmade touches. Their compact size encourages creative variations in color, trim, and decorative accents, allowing crafters to personalize each piece while practicing precise crochet techniques. The cheerful motif sparks conversation and adds a whimsical touch without overwhelming existing décor.
Overall, the crochet Santa coaster pattern combines functionality with holiday charm, bringing joy and aesthetic appeal to everyday moments. Whether nestled under mugs, displayed as part of a centerpiece, or gifted to friends and family, these coasters embody festive cheer and practical beauty, creating memorable accents that elevate seasonal gatherings with handmade elegance.
Materials Needed
To make this Santa Claus coaster, you will need:
- Yarn: Red, white, and skin-toned yarns for Santa’s hat, beard, and face (medium weight).
- Crochet Hook: 3.5 mm or size appropriate for your yarn.
- Scissors: For cutting yarn.
- Tapestry Needle: For weaving in ends and sewing pieces together.
- Stuffing (Optional): For a puffier pom-pom at the top of the hat.

Step-by-Step Instructions
1. Create Santa’s Face
- Start with a magic ring: Create an X-shape around your fingers to form the ring.
- Chain 2: This does not count as your first stitch.

- 15 Double Crochets (DC): Into the magic ring, work 15 DC stitches.
- As you stitch, pull the tail of the magic ring to tighten the circle and eliminate any gaps.
- Close the Round: Slip stitch into the first double crochet (not the chain 2).
2. Begin Expanding the Circle
- Round 2:
- Chain 2 (not counted as a stitch).
- Work 2 DC into each stitch around for a total of 30 DC.
- Slip stitch into the first double crochet to close the round.
- Round 3:
- Chain 2.
- Work (1 DC in the next stitch, 2 DC in the following stitch). Repeat this sequence around to create a total of 45 DC.
- Slip stitch into the first double crochet.
- Round 4:
- Chain 2.
- Work (1 DC in each of the next 2 stitches, 2 DC in the next stitch). Repeat the sequence around for a total of 60 DC.

- Close with a slip stitch.
3. Add the Beard
- Begin with Shell Stitches:
- Chain 1 and make a single crochet in the same stitch.
- Skip 1 stitch and work 5 DC in the next stitch (creating a shell).
- Skip the next stitch, then work 1 single crochet in the following stitch.
- Repeat the shell-stitch pattern (single crochet, skip 1 stitch, 5 DC in the next stitch) around the edge.
- You will have 12 shell stitches forming the beard by the time this step is completed.

4. Create the Hat Base
- Switch to red yarn.
- In the next 9 stitches, work single crochets to form the base of Santa’s hat.
- For symmetry, decrease over the last two stitches using single crochet two together (sc2tog).
- Chain 1, turn your work, and make one decrease in every row (crocheting the last two stitches together) until only three stitches remain.
- In the final row, crochet all three stitches together, creating the peak of the hat.

5. Make the Pom-Pom
- Create a magic ring with white yarn.
- Chain 1 and work 6 single crochets (SC) into the ring.
- Tighten the ring and slip stitch into the first single crochet.
- Cut the yarn, leaving a tail, and sew the tiny pom-pom to the tip of the hat.
6. Weave In Ends and Finishing Touches
- Sew or hide all the loose yarn ends with a tapestry needle.
- The coaster is now complete and ready for use or display!
Special Features
- Fast to Make: The coaster takes only 15 minutes to complete, making it ideal for quick projects or last-minute gifts.
- Versatile Christmas Piece: This Santa coaster can be used as a functional item (a coaster), decoration, or even a Christmas tree ornament.
- Adorable Design: Features Santa’s iconic beard, hat, and pom-pom, adding charm and personality to the piece.
- Beginner-Friendly: Simple stitches like DC and SC are used with minimal shaping involved, making it accessible to beginners.
Tutor’s Suggestions
- Keep Tension Consistent: Maintaining even tension ensures the coaster lays flat without curling or misshaping.
- Tighten the Magic Ring Well: Properly tightening the magic ring is key to removing gaps in the center of Santa’s face.
- Use Bright Colors: Red, white, and skin-toned yarn create the festive and classic Santa look. Using vibrant shades of yarn will enhance the overall design.
- Follow the Decrease Pattern Carefully: Pay close attention while decreasing stitches for the hat to maintain its triangular shape.
Level of Difficulty
- Beginner to Intermediate:
- The project is beginner-friendly, using basic stitches like double crochet, single crochet, and slip stitch.
- Some intermediate techniques such as the magic ring and crocheting decreases might need a bit of practice.
Uses
- Coasters for Holiday Entertaining: Perfect to use during Christmas parties or family dinners.
- Holiday Decorations: Can be hung as ornaments or added to garlands and wreaths.
- DIY Gifts: A thoughtful handmade gift option for friends, family, or coworkers during the holidays.
- Stocking Stuffers: Great for small touches in holiday stockings.
Tip
When adding the beard shell stitches, ensure consistent spacing between the shells to make the pattern uniform and neat. This enhances the finished product’s visual appeal.
Conclusion
This Santa Claus coaster pattern is a fun and festive project that combines simple crochet techniques to create a charming piece for the holidays. Whether used as a coaster, ornament, or decoration, this quick project is sure to bring a handmade touch to your Christmas celebrations. Even beginners can enjoy making this adorable Santa coaster thanks to the clear instructions and straightforward pattern.


